SakeBomb Garage GB: Water Injection / AI Rear "Euro" Tank Pre-Order - Group Buy
#78
Go get one! Try PMing @tomsn16 - I bet he has one hanging around.
I can't speak for that. But before the tanks arrive, I'm sure.
Perhaps @SakeBomb Garage will chime in.
Did you order recently? Or were you just updating the list?
Apologies.
#80
#81
#85
Yeah. SBG did a great job with it.
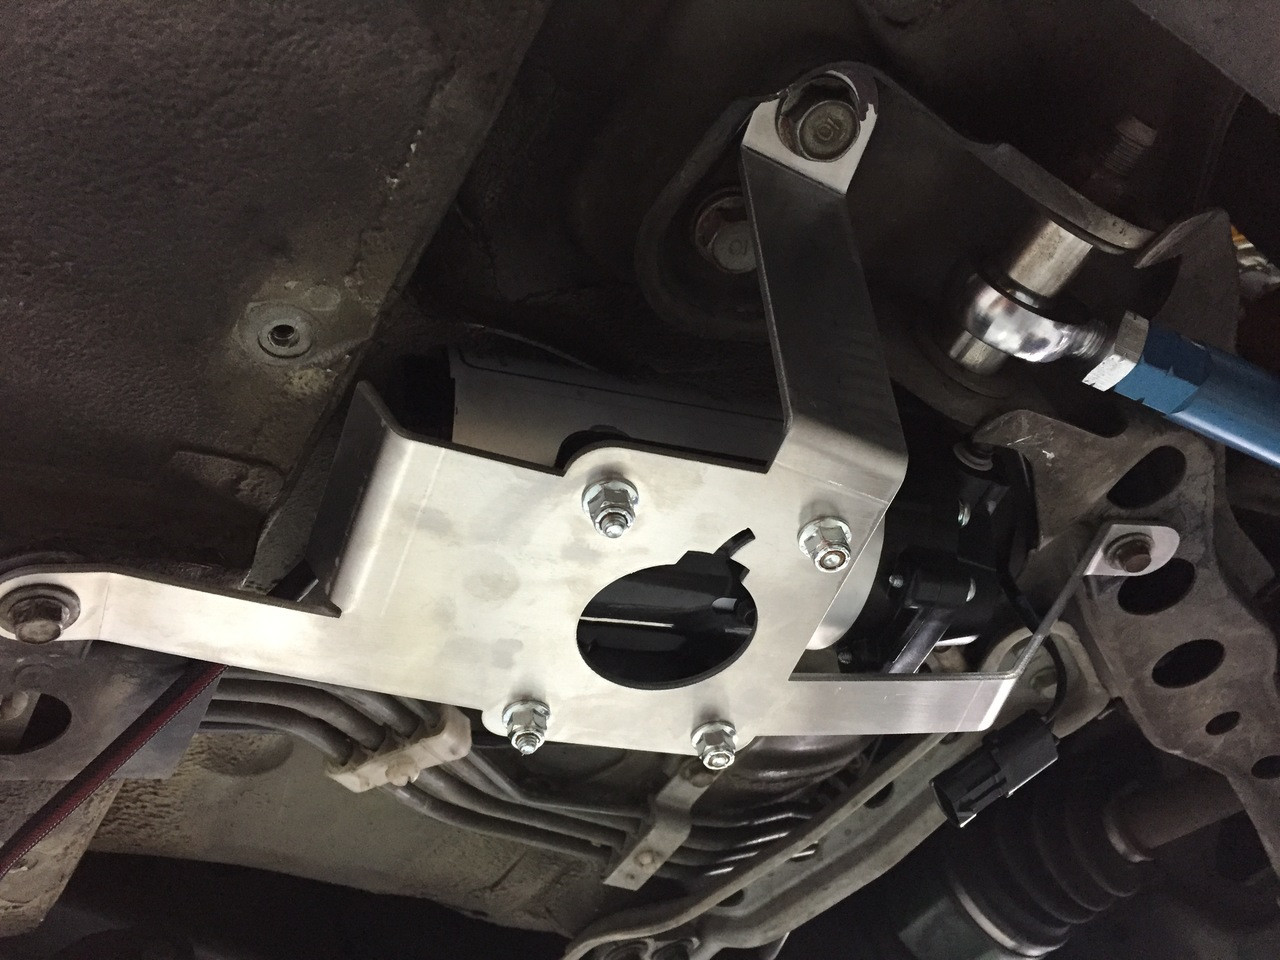
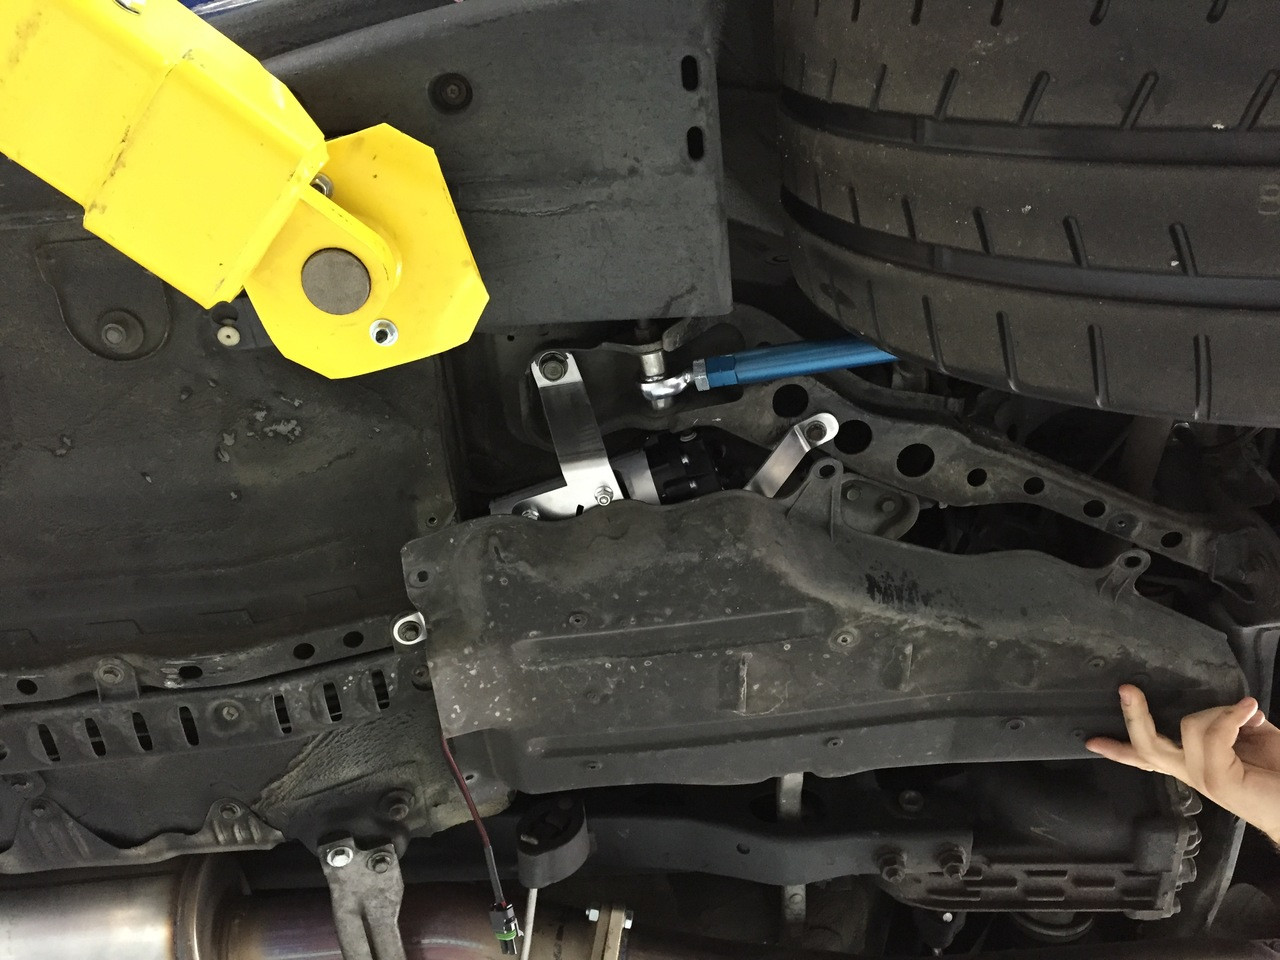
The real genius around the placement is; the lines from the pump will then follow the same path the fuel lines use and also be covered by the OEM shielding the entire way up. Really top notch.
The real genius around the placement is; the lines from the pump will then follow the same path the fuel lines use and also be covered by the OEM shielding the entire way up. Really top notch.
#86
That's what I like to hear!, stealth/sleeper mods are the way to go for a street car IMO, can't wait for all this to come together!
The following users liked this post:
MattGold (10-17-18)
#88
1. $lacker - 1 tank paid in full
2. r2omega. 1 tank. Paid in full
3. SmokeyTheTalon - 1 tank paid in full
4. Street-heat7 - 1 tank. Paid in full
5. Montego - 1 Tank. Paid in full
6. Cloud9 - 1 Tank. Paid in full
7. Idiazs - 1 Tank Paid in full
8. Izanami - 1 Tank Paid in full
9 stever -1 Tank Paid in full (#142 on list)
10 hadokenny 1 tank paid in full
11. candrzej2 - 1 tank. Paid in full
12. REAmFC3S - 1 tank paid full
13. Brekyrself - 2 tanks paid in full
14. CREEPENJEEPEN 1 tank Paid Deposit
15. Fendamonky - 1 tank, Paid in Full
16. ZoomZoom - 1 tank, Paid In Full
17. Trout2 (J Coxe) - 1 tank, Paid in Full
18. Sukisuki - 1 tank, Paid in Full
19. gio610 - 1 tank, paid deposit
20. Kissama - 1 tank, Paid in Full
21. jsemerica - 1 tank, Paid in Full
22. ArmenMAxx- 1 tank, Paid in Full
23. artowar -- 1 tank, paid in full
24. ChrisNZ - 1 tank, paid in full.
25. Rarotary - 1 tank, paid in fI'll
26. 97fd3s - 1 tank, paid in full
27.clarke86 - 1 tank, paid in full
28. rotarystyle - 1 tank, paid in full
29. Tys93r1fd - 1 tank deposit paid (will pay for v2 kit and all accesories when tanks are ready to ship)
30. Silvertrd - 1 tank paid on full
31. Quickfini - 1 tank paid in full
32. Saham - 1 tank, Paid in Full
33. ColdFeet - 1 tank, Paid in Full
34. bigpanda - 1 tank, Paid in Full
35. Ondabirdhouse - 1 tank, paid in full
36. iantboyd - 1 tank, paid in full
37. XPT - 1 tank, paid in full
38 Sc0rp7- 1 tank paid in full
39. Raffmeister - 1 tank paid in full (#140 on the list)
40. Knotsonice - Paid in full, 1 tank
41. alchemyst6 - 1 tank paid in full
42. Fourtyounce - 1 tank paid in full
43. Hi Im Simon - 1 tank paid in full
44. Macer - 1 tank deposit paid
45. MightyCondor - 1 tank paid in full
46. Tripple 7's - 1 tank paid in full
47. RCCAZ 1 - 1 tank paid in full
48. RX7LINK - 1 tank paid in full
49. Jonnybravo408- 1 tank paid in full
50. jza80 - 1 tank paid in full
...Added my own forum ID since it was not on this list. Also highly interested in the install kit!!
#94
Hey guys!
I've been holding off posting anything until there was something more substantial to share. Well, I got something substantial.
Where should I start? Ok, a few pics.
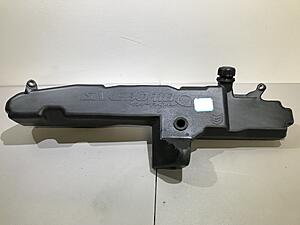
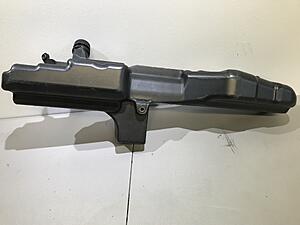
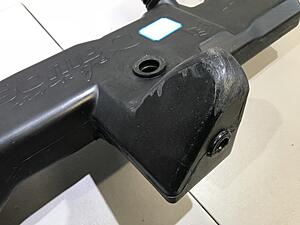
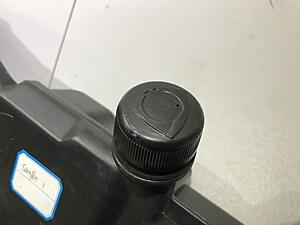
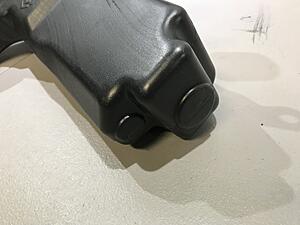
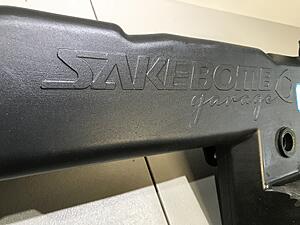
What you see is the first sample pulled from the production mold. We needed to make a few changes and will make a couple more before we get another and hopefully final sample in a couple weeks.
Ok. So quick rundown of what you are looking at.
1) We managed to tic the box on all the upgrades to the OEM Euro Washer Tank we set out to do. One piece design, increased capacity (about 2 gallons), sump to control slosh (more on that), bosses for installing sensors/nozzles, OEM fitment and molded cap and rubber mounts.
2) On the topic of the sump - we had to change the design slightly from the last 3D print. There was an issue with plastic filling the 90 degree corners fully, so it went to a more 'sloped' design. No biggie and should not effect performance at all. Also, please note the finish scuffs are just a artifact from modifying the mold, NOT an indication of what the production piece will look like.
3) This thing is a BEAST. I had originally gone through the thought exercise of figuring out how to protect this from getting damaged in transit. I now have ZERO worries about that.
4) The fill neck interior is a little ugly. Nothing that effects the threads, or sealing, or filling - just inconsistent (and ugly). I'm going to try to work with the factory on cleaning that up a bit. Maybe machine it after the fact.
5) The black material is just for the sample. The final (and next sample actually) will be white / opaque like OEM.
6) The supplied SBG cap OR the OEM cap fit no problem. Tank WILL include a SBG Cap. I have a few OEM caps if people are interested. PM me.
7) The tank in the pictures is ALREADY drilled so I could test fit the level sensor. You tank will NOT be drilled and won't include a grommet (pictured) unless you buy a kit from SakeBomb Garage.
Further Improvements from this sample to the next.
1) Relocated Sensor Boss. I didn't account for the pigtail part of the sensor when I placed the sensor boss on the front where I did. SO, I need to move it down a bit. No biggie.
2) Additional Sensor Boss. I am adding a sensor boss directly in the sump. I didn't know if there'd be room for it, bu there is, so I added it.
3) Drill Guides. When drilling the sensor/nozzle bosses, it was a little tough to center the drill bit, so I added centering 'divots' in order to help with that.
4) Finish. We will be adding a sandblasted finish to the entire tank and cap, EXCEPT to the lettering. It should look really nice.
I'm sure there's something I'm missing, but I will be sure to update this as I remember.
OH! Also, SBG will have updated on the brackets here soon. Sit tight on that.
...and finally, here's a video I took since it probably does a better job then any pictures or words:
I've been holding off posting anything until there was something more substantial to share. Well, I got something substantial.
Where should I start? Ok, a few pics.


What you see is the first sample pulled from the production mold. We needed to make a few changes and will make a couple more before we get another and hopefully final sample in a couple weeks.
Ok. So quick rundown of what you are looking at.
1) We managed to tic the box on all the upgrades to the OEM Euro Washer Tank we set out to do. One piece design, increased capacity (about 2 gallons), sump to control slosh (more on that), bosses for installing sensors/nozzles, OEM fitment and molded cap and rubber mounts.
2) On the topic of the sump - we had to change the design slightly from the last 3D print. There was an issue with plastic filling the 90 degree corners fully, so it went to a more 'sloped' design. No biggie and should not effect performance at all. Also, please note the finish scuffs are just a artifact from modifying the mold, NOT an indication of what the production piece will look like.
3) This thing is a BEAST. I had originally gone through the thought exercise of figuring out how to protect this from getting damaged in transit. I now have ZERO worries about that.
4) The fill neck interior is a little ugly. Nothing that effects the threads, or sealing, or filling - just inconsistent (and ugly). I'm going to try to work with the factory on cleaning that up a bit. Maybe machine it after the fact.
5) The black material is just for the sample. The final (and next sample actually) will be white / opaque like OEM.
6) The supplied SBG cap OR the OEM cap fit no problem. Tank WILL include a SBG Cap. I have a few OEM caps if people are interested. PM me.
7) The tank in the pictures is ALREADY drilled so I could test fit the level sensor. You tank will NOT be drilled and won't include a grommet (pictured) unless you buy a kit from SakeBomb Garage.
Further Improvements from this sample to the next.
1) Relocated Sensor Boss. I didn't account for the pigtail part of the sensor when I placed the sensor boss on the front where I did. SO, I need to move it down a bit. No biggie.
2) Additional Sensor Boss. I am adding a sensor boss directly in the sump. I didn't know if there'd be room for it, bu there is, so I added it.
3) Drill Guides. When drilling the sensor/nozzle bosses, it was a little tough to center the drill bit, so I added centering 'divots' in order to help with that.
4) Finish. We will be adding a sandblasted finish to the entire tank and cap, EXCEPT to the lettering. It should look really nice.
I'm sure there's something I'm missing, but I will be sure to update this as I remember.

OH! Also, SBG will have updated on the brackets here soon. Sit tight on that.
...and finally, here's a video I took since it probably does a better job then any pictures or words:
The following 2 users liked this post by MattGold:
cloud9 (11-12-18),
Jonnybravo408 (11-12-18)
#95
Thread Starter
Joined: Jan 2011
Posts: 2,196
Likes: 235
From: California
__________________
SAKEBOMB GARAGE LLC
www.SAKEBOMBGARAGE.com
Specialty aftermarket parts & service // Fremont, California
Contact: info@sakebombgarage.com
SAKEBOMB GARAGE LLC
www.SAKEBOMBGARAGE.com
Specialty aftermarket parts & service // Fremont, California
Contact: info@sakebombgarage.com
The following users liked this post:
Alchemyst6 (11-12-18)
#98
Thread Starter
Joined: Jan 2011
Posts: 2,196
Likes: 235
From: California
__________________
SAKEBOMB GARAGE LLC
www.SAKEBOMBGARAGE.com
Specialty aftermarket parts & service // Fremont, California
Contact: info@sakebombgarage.com
SAKEBOMB GARAGE LLC
www.SAKEBOMBGARAGE.com
Specialty aftermarket parts & service // Fremont, California
Contact: info@sakebombgarage.com
#99
to clarify if I already purachased the tank by it self, if I buy the kit and controller, the tank comes predrilled for the right spots to use the kit?
and hten do you have any pictures of the stock plastic piece trimmed to fit over the metal bracket? or does it not fit at all?
and hten do you have any pictures of the stock plastic piece trimmed to fit over the metal bracket? or does it not fit at all?


