Hybrid Renesis/Wankel NA
 07-27-21, 03:08 PM
#1
I'm going to run an interesting combo here and I will post results. I am starting to work on the race car's next motor.
Lightened/balanced/clearanced/scalloped rx8 rotating assembly cut for rx7 apex seals. (chips motorsports)
yeah I gayed all out and got Titanium front bolt and rear nut too...
custom intake/exhaust using some metal and polymer 3D printed parts
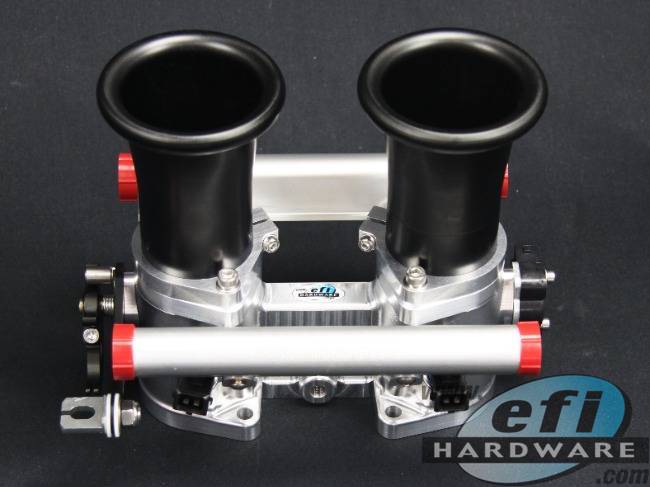
EFI technologies billet pro throttle body assembly:
S5 NA housings w/ pineapple racing port, inconel exhaust sleeve.
S4 T2 irons; primaries will be mazdatrix renesis streetport and the secondaries will be pineapple racing's race port
controlled by an elite 1500 ECU using rx8 injectors
a few things to tidy up left and I'm still torn on doing a half bridgeport or not, I should just do it anyways - the last 2 motors have been streetports.
Lightened/balanced/clearanced/scalloped rx8 rotating assembly cut for rx7 apex seals. (chips motorsports)
yeah I gayed all out and got Titanium front bolt and rear nut too...
custom intake/exhaust using some metal and polymer 3D printed parts
EFI technologies billet pro throttle body assembly:
S5 NA housings w/ pineapple racing port, inconel exhaust sleeve.
S4 T2 irons; primaries will be mazdatrix renesis streetport and the secondaries will be pineapple racing's race port
controlled by an elite 1500 ECU using rx8 injectors
a few things to tidy up left and I'm still torn on doing a half bridgeport or not, I should just do it anyways - the last 2 motors have been streetports.
Last edited by fidelity101; 07-27-21 at 03:10 PM.
 11-23-21, 10:50 AM
#4
**** it, its still going to be side port this time - I like having 7 years out of a race motor with constant 7000 rpm launches and burnouts on command. I've been competitive with this small style port in my racing so I'm not gonna rock the boat and work on more seat time HOWEVER! also if I wear these housings out fast I will then bring out the big guns.
here are some teasers:
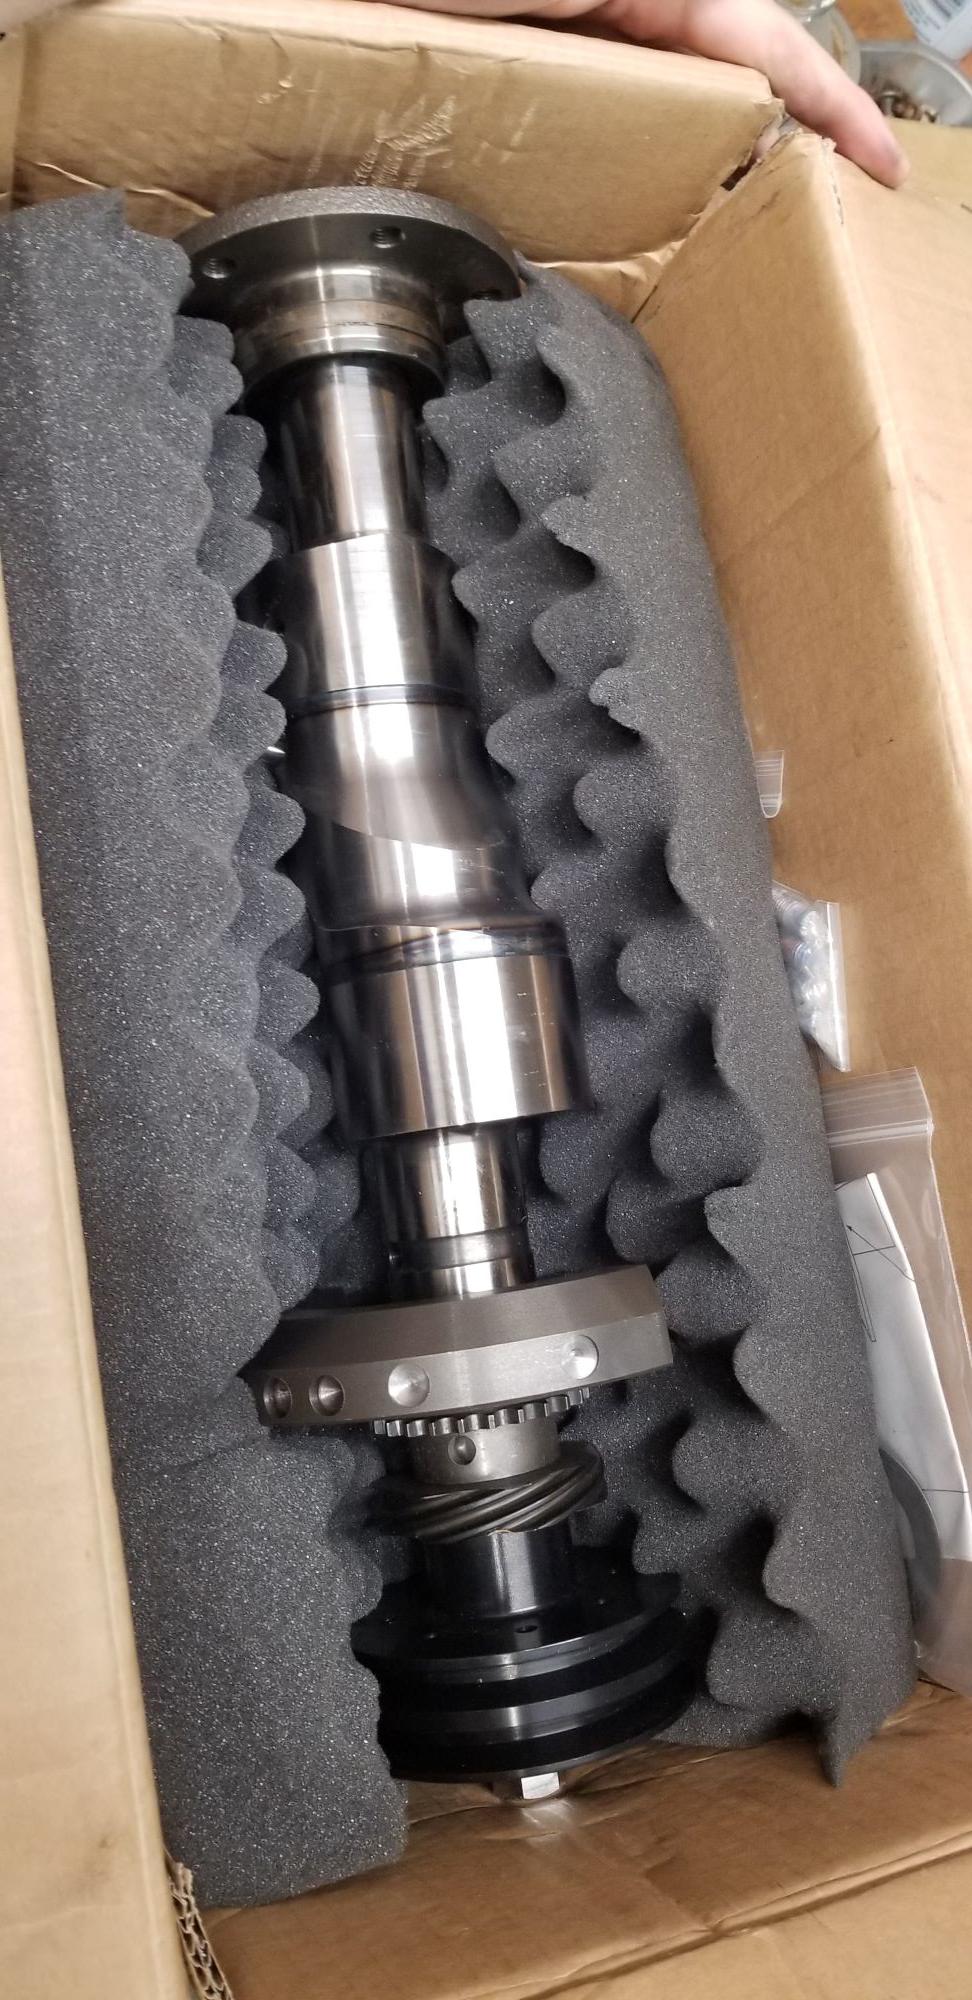
rx8 rotating assembly (franken wankel #2 uses the e-shaft currently as a drop in swap but this goes a bit further) utilizing titanium hardware (the ti hardware is stupid I know, but I was going this far so I said F it...) and the whole assembly is rebalanced within 1 gram. There isn't much lightening you can do here outside of the racing beat pulley shown and the rx8 shaft (1/2lb lighter than the rx7 e-shaft)
so I had to find other areas to reduce mass:
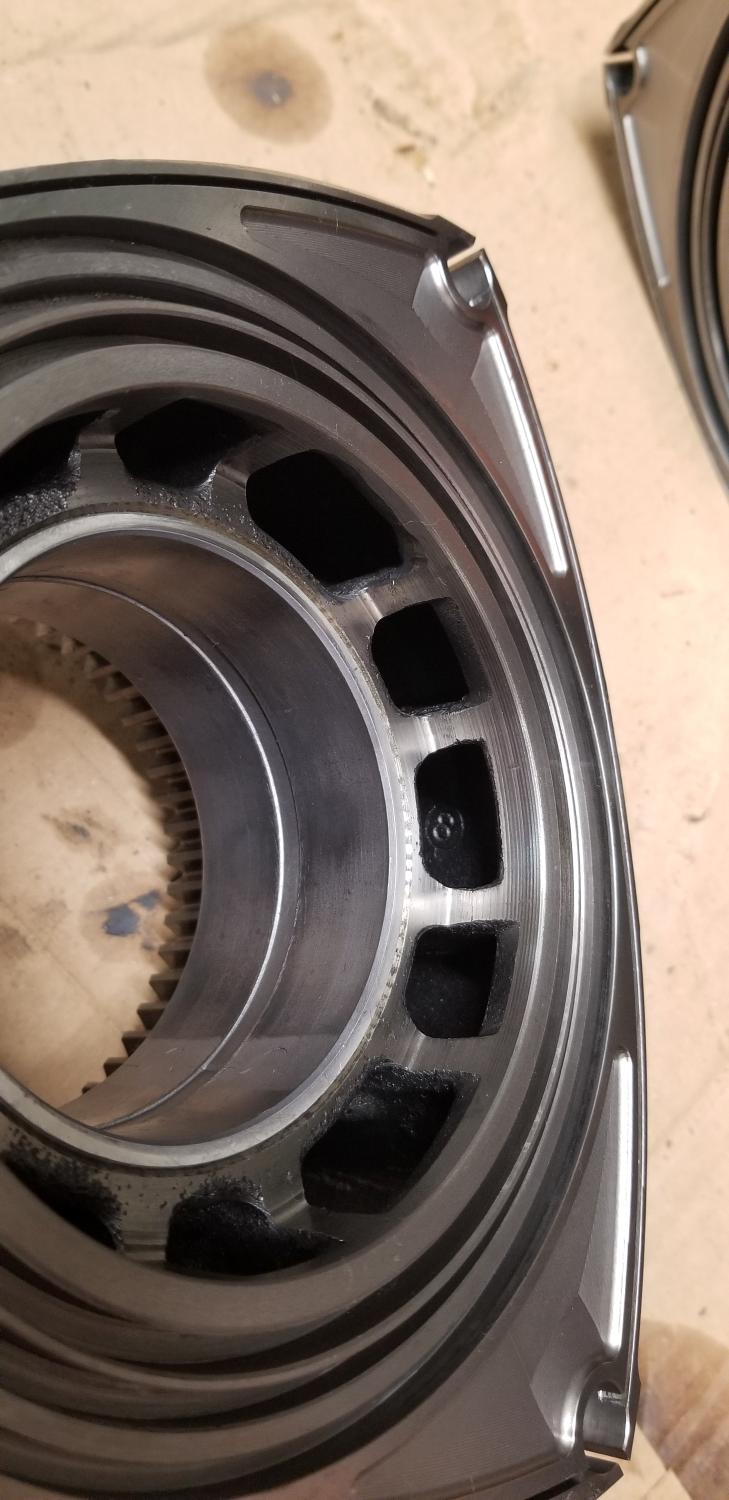
rx8 rotors have been modified... extensively
to the untrained eye this just looks like some cool light weighting and some poor machning marks but what we have here is:
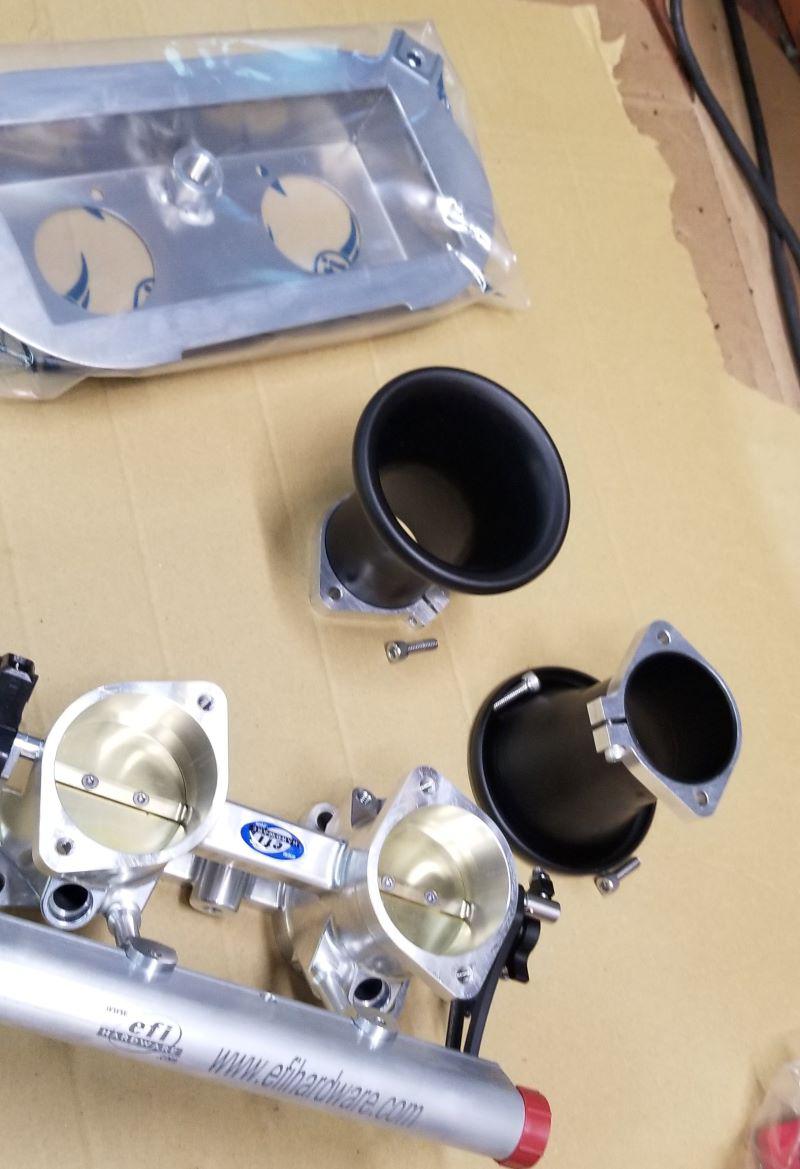
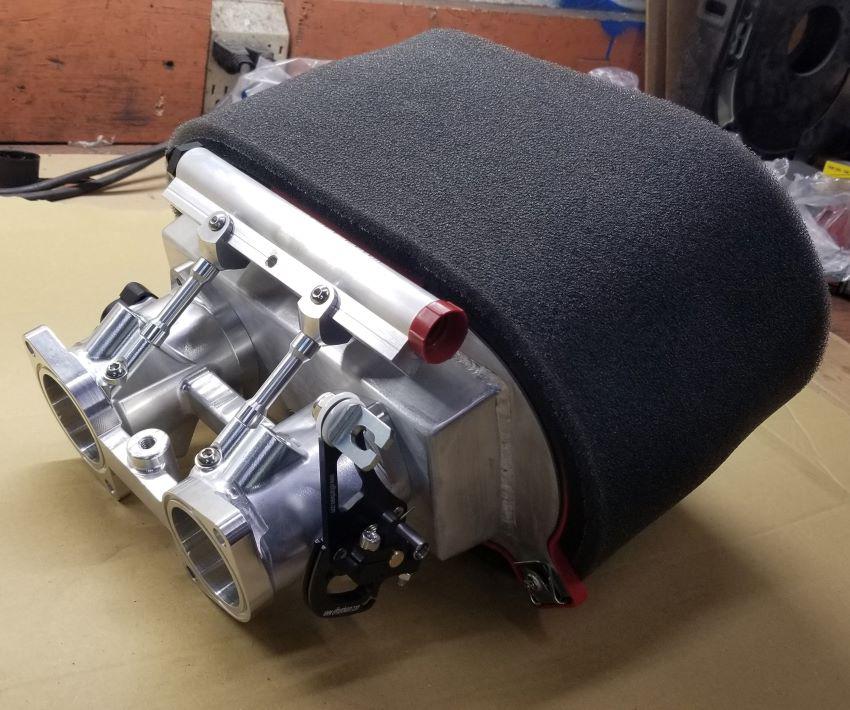
well we can't just do all this fun work and not let it breathe better can we? hell no! The stock intake is far too heavy and cumbersome so its time to drop some weight and increase the filtering and let some of these ponies breathe, here is a teaser for the intake. Trying to 3d print a collector out of aluminum for this as well:

just need to fill in the blanks with some tubing once I figure out the desired runner length
here are some teasers:
rx8 rotating assembly (franken wankel #2 uses the e-shaft currently as a drop in swap but this goes a bit further) utilizing titanium hardware (the ti hardware is stupid I know, but I was going this far so I said F it...) and the whole assembly is rebalanced within 1 gram. There isn't much lightening you can do here outside of the racing beat pulley shown and the rx8 shaft (1/2lb lighter than the rx7 e-shaft)
so I had to find other areas to reduce mass:
rx8 rotors have been modified... extensively
to the untrained eye this just looks like some cool light weighting and some poor machning marks but what we have here is:
- Rx8 Rotors
- rx8 rotors are ~110g lighter than the rx7 rotor
- compression bump from 9.7:1 to 10.1:1
- can open intake ports earlier given side seals are more outboard than rx7 rotors, allows for more porting
- Rx8 Rotors Lightened
- further lightened by about another 100g each
- Rotor scalloping added (more port timing)
- rx8s already have a minor scallop but its not on every face because it would mess with the side port style of a renesis, however in a wankel I don't have that problem and then these rotors become unhanded which is nice for assembly.
- its not huge in comparison to what you may find on the internet, rx8 side seals are more outboard on the rotor
- Apex seal grooves wire EDM cut for Rx7 apex seals
- Each rotor is balanced within 1 gram of each other (roughly 9lb rotor)
- Rotors have been clearanced (look towards the tip of the apex's)
- at high rpm rotors tend to wobble and crash into the side plate causing wear
- this step omits that possibility by removing a tiny bit of material
- you can see the horizontal lines as you approach the apex seal
well we can't just do all this fun work and not let it breathe better can we? hell no! The stock intake is far too heavy and cumbersome so its time to drop some weight and increase the filtering and let some of these ponies breathe, here is a teaser for the intake. Trying to 3d print a collector out of aluminum for this as well:
just need to fill in the blanks with some tubing once I figure out the desired runner length
The following 2 users liked this post by fidelity101:
Aboriginal1162 (11-25-22),
gracer7-rx7 (11-07-22)
11-23-21, 07:07 PM
#5
Old [Sch|F]ool
I got 7 years out of that bridge port, the biggest issue was my rotor housings were all warped and starting to crack pretty badly around the spark plug holes. 
it's back together with NEW/refreshed parts instead of slapping it together with porting old parts from core engines. And I know how to make the cooling system work now!
it's back together with NEW/refreshed parts instead of slapping it together with porting old parts from core engines. And I know how to make the cooling system work now!
The following users liked this post:
fidelity101 (11-28-21)
Trending Topics
11-28-21, 11:39 AM
#9
okay so nothing real renesis about this but the rotating assembly the title is misleading...
rotary **** photo dump: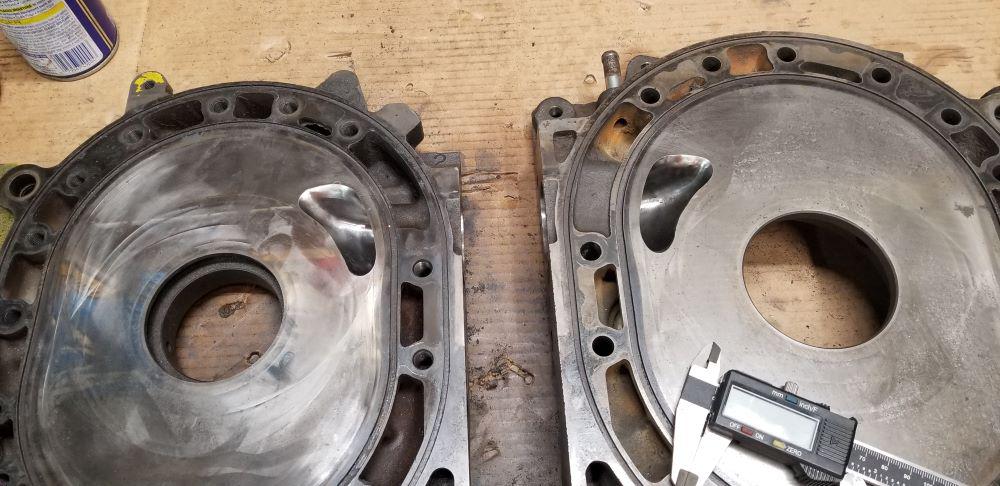
front and rear housings have been ported and have been sent out to be resurfaced, working on the center iron now. the key idea is to not have to open up my current engine at all. But that motor will likely get opened up and slapped together to make the rx8 mobile again one day but keeping the rally car going is pretty time consuming so we shall see on that project...
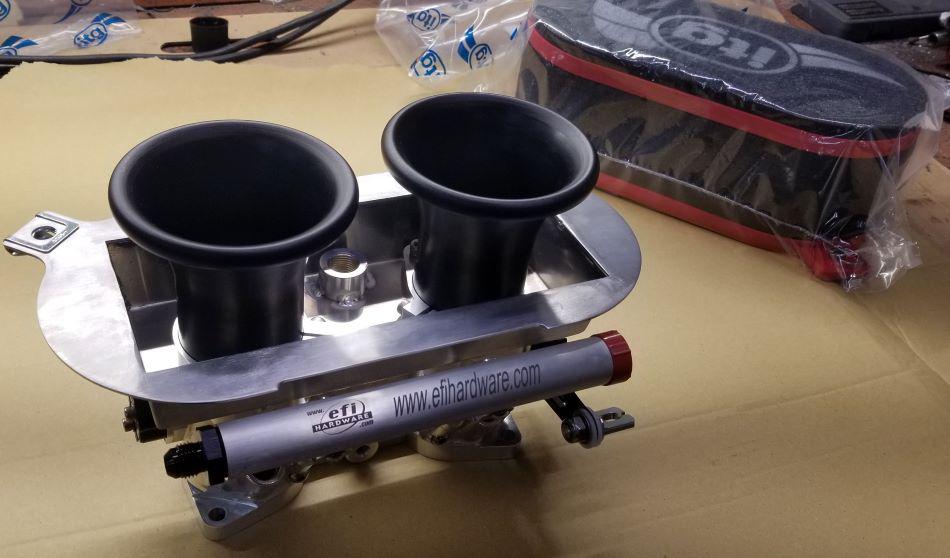
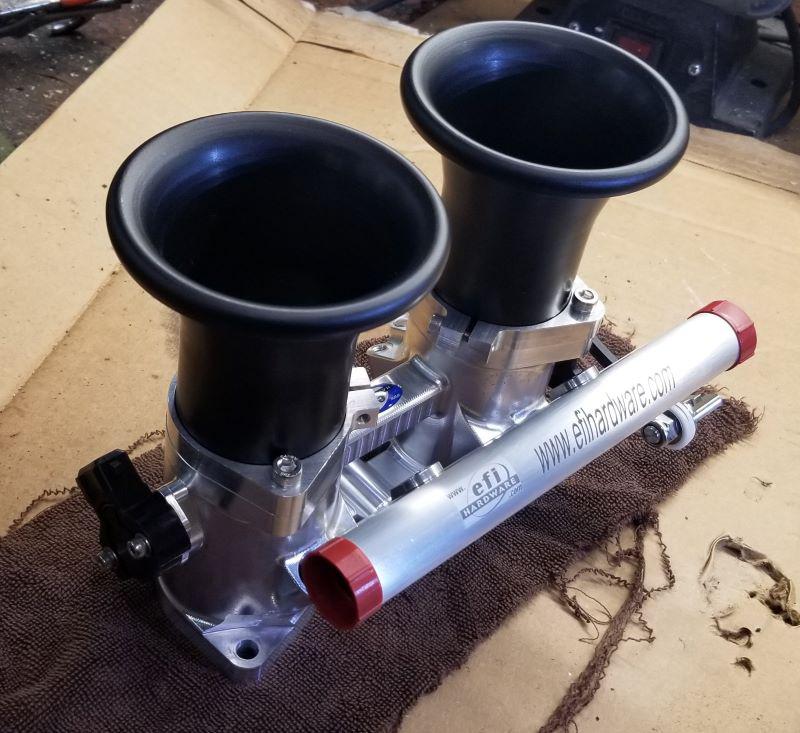
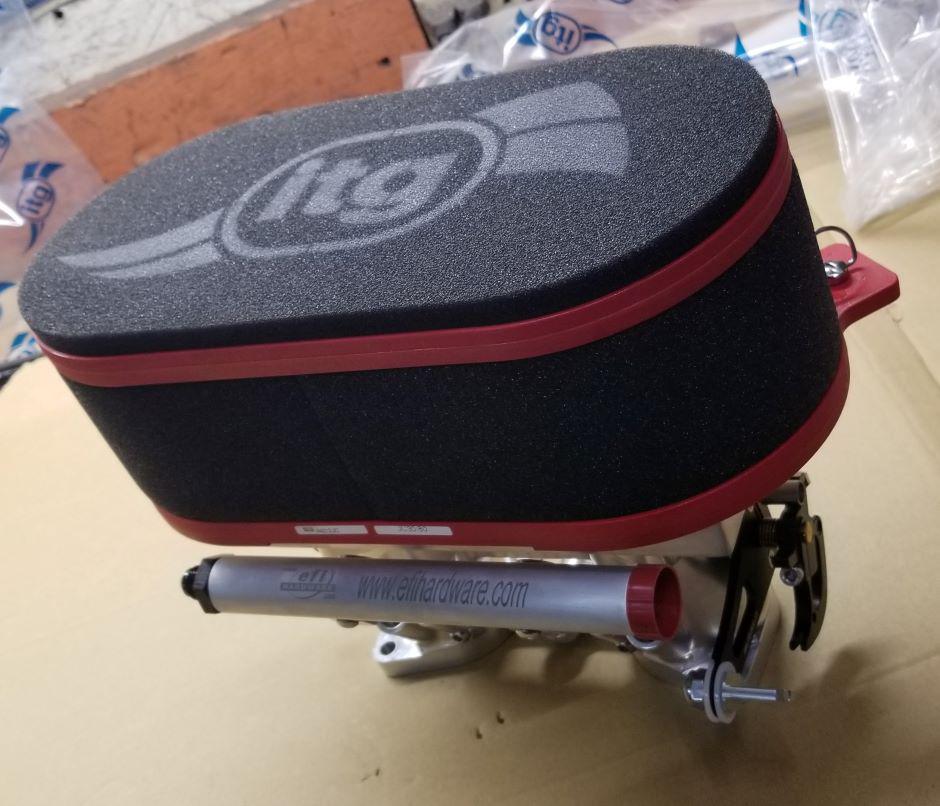
here it is with the extra overfilter for enhanced dust protection
rotary **** photo dump:
front and rear housings have been ported and have been sent out to be resurfaced, working on the center iron now. the key idea is to not have to open up my current engine at all. But that motor will likely get opened up and slapped together to make the rx8 mobile again one day but keeping the rally car going is pretty time consuming so we shall see on that project...
here it is with the extra overfilter for enhanced dust protection
11-28-21, 02:57 PM
#10
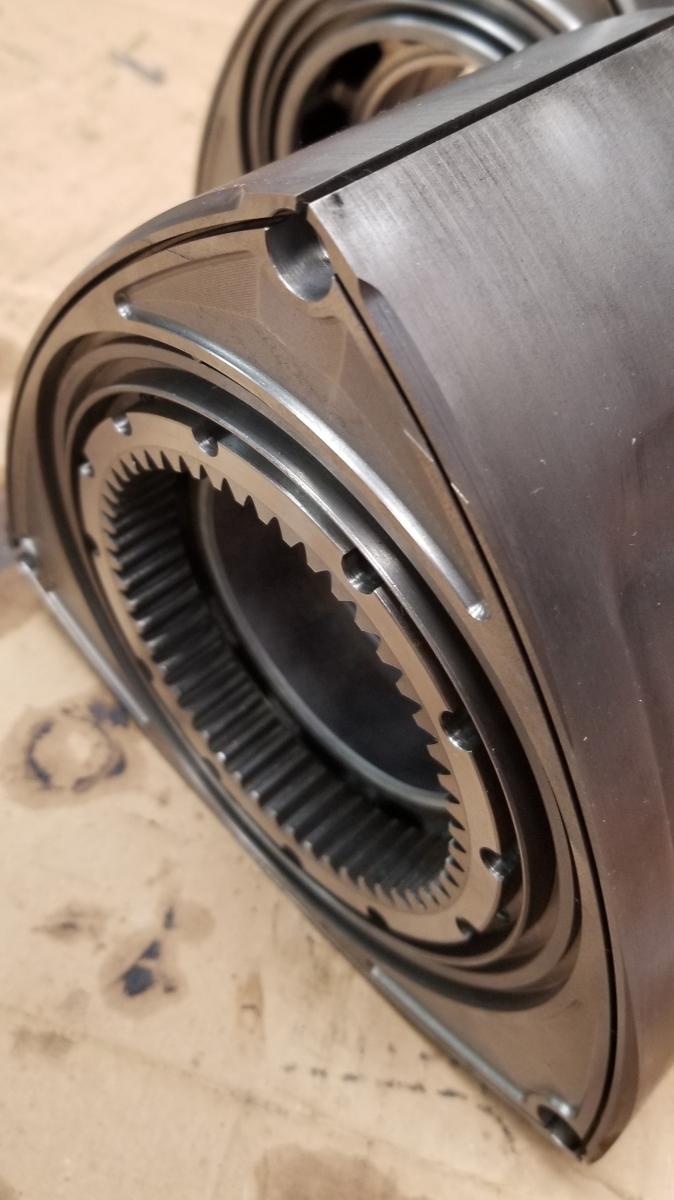
kind of sloppy doing it by man-fingers on my phone, but eliminating the areas scribbled in white in the pic below, to only have the edge at the side seal with everything to the cutoff seal groove removed. Because if the cutoff seal isn’t used there’s not any reason to maintain an edge around the groove it would have been in. If you’re counting grams, might as well get as many as you can. Or at least in the future if this pans out.

Just so others might understand, Mazda added a cutoff seal between the oil scraper ring and the side seal on the Renesis rotors. With the Renesis side exhaust port it closes off a path area inside the side seal between the side exhaust port and intake port to keep exhaust gases from bleeding into the intake ports. With 13B plates and peri exhaust port housing this condition doesn’t exist.
Last edited by TeamRX8; 11-28-21 at 03:08 PM.
11-29-21, 07:53 PM
#11
No I understood - but I see your point. I didn't perform the machine work, I had a few people advise not to machine rx8 rotors due to porosity in the casting, I went with what is known. Chips motorsports had performed the machining on this. I went with his judgement on that but like you say there are even more grams to loose potentially.
12-22-21, 02:28 PM
#12
oh yes things are happening, quick holiday break then its fun time!
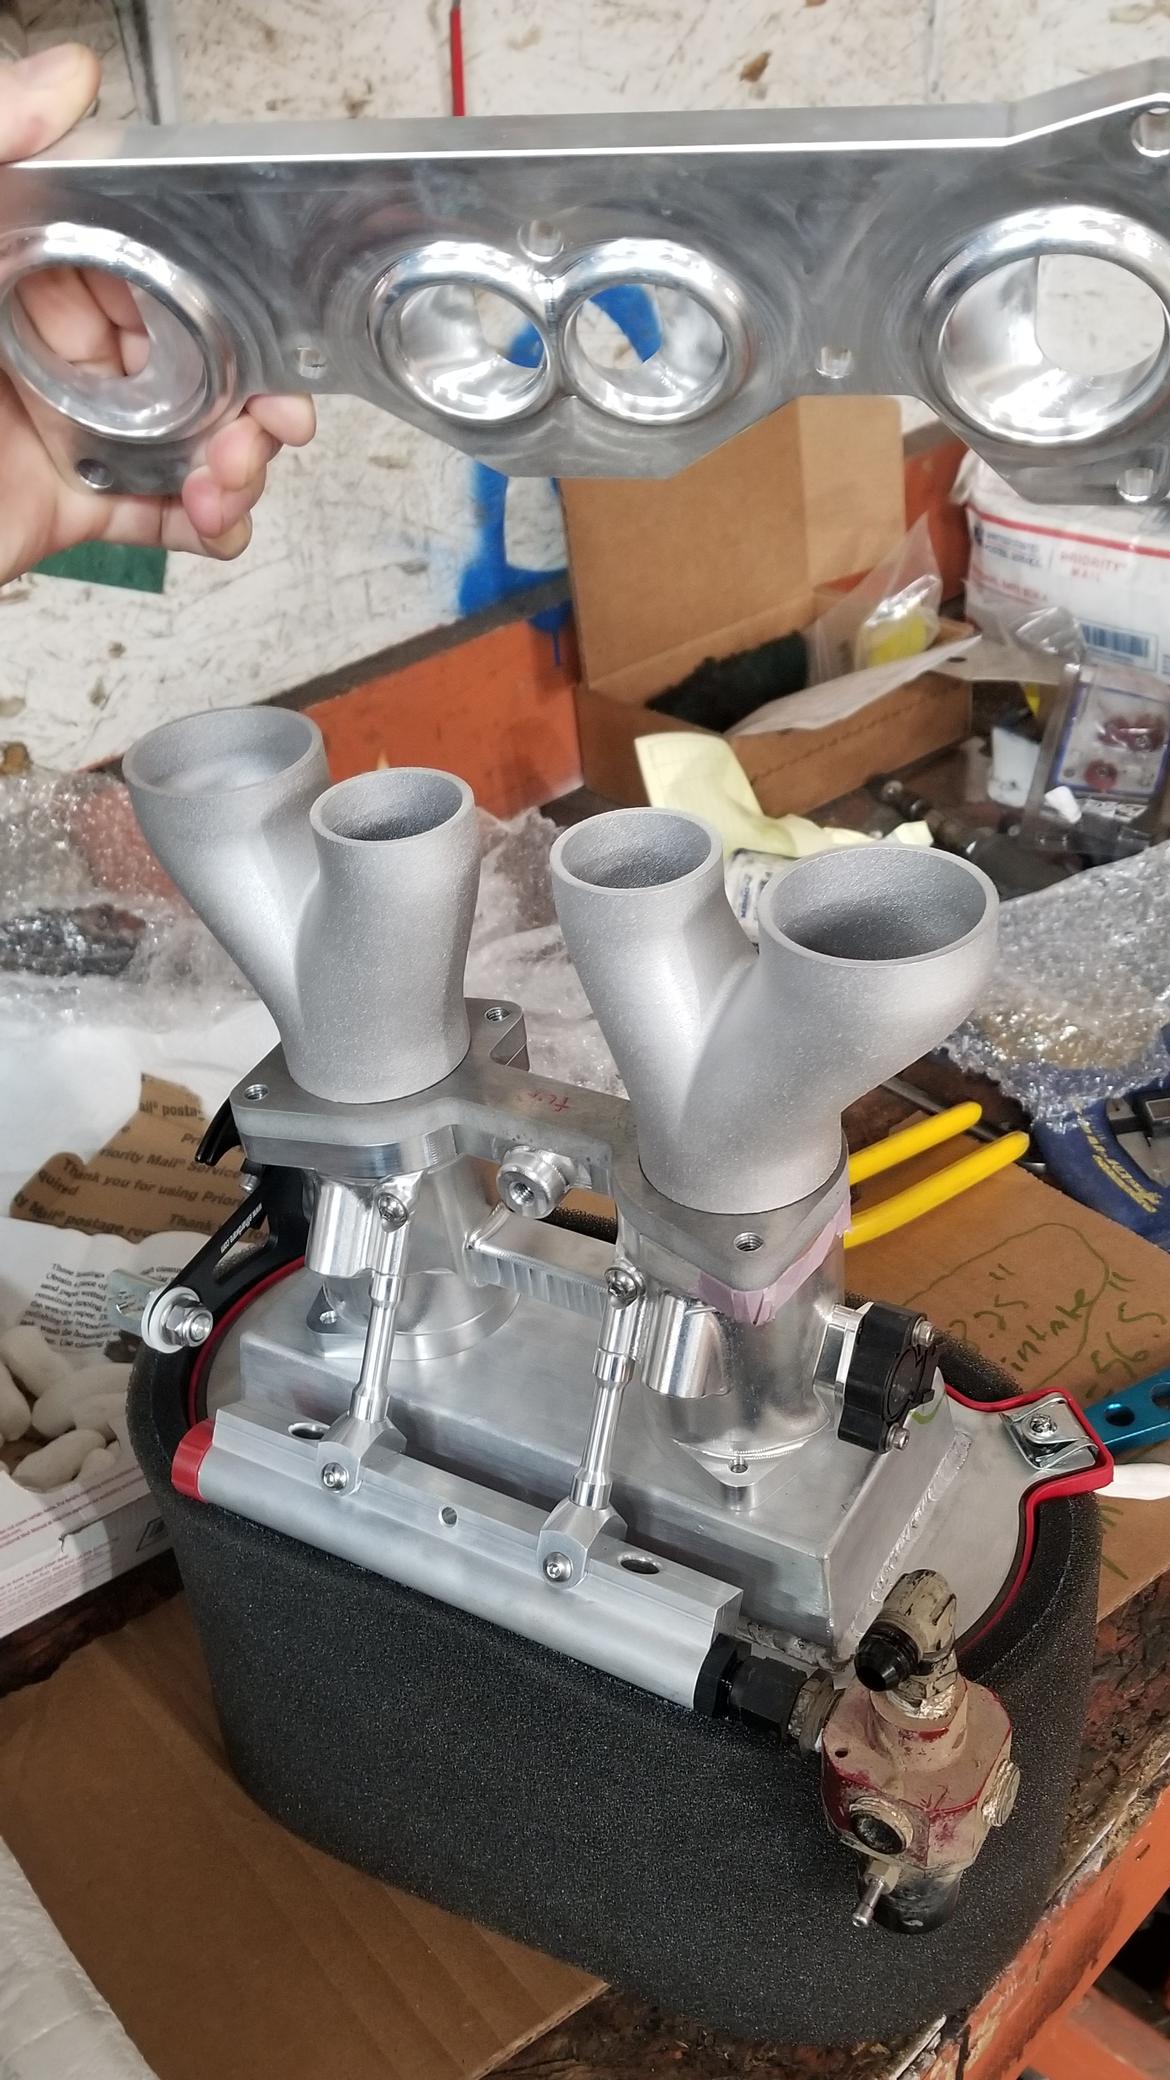
printed collectors! (AlSi10Mg)

rotor housings are all set!
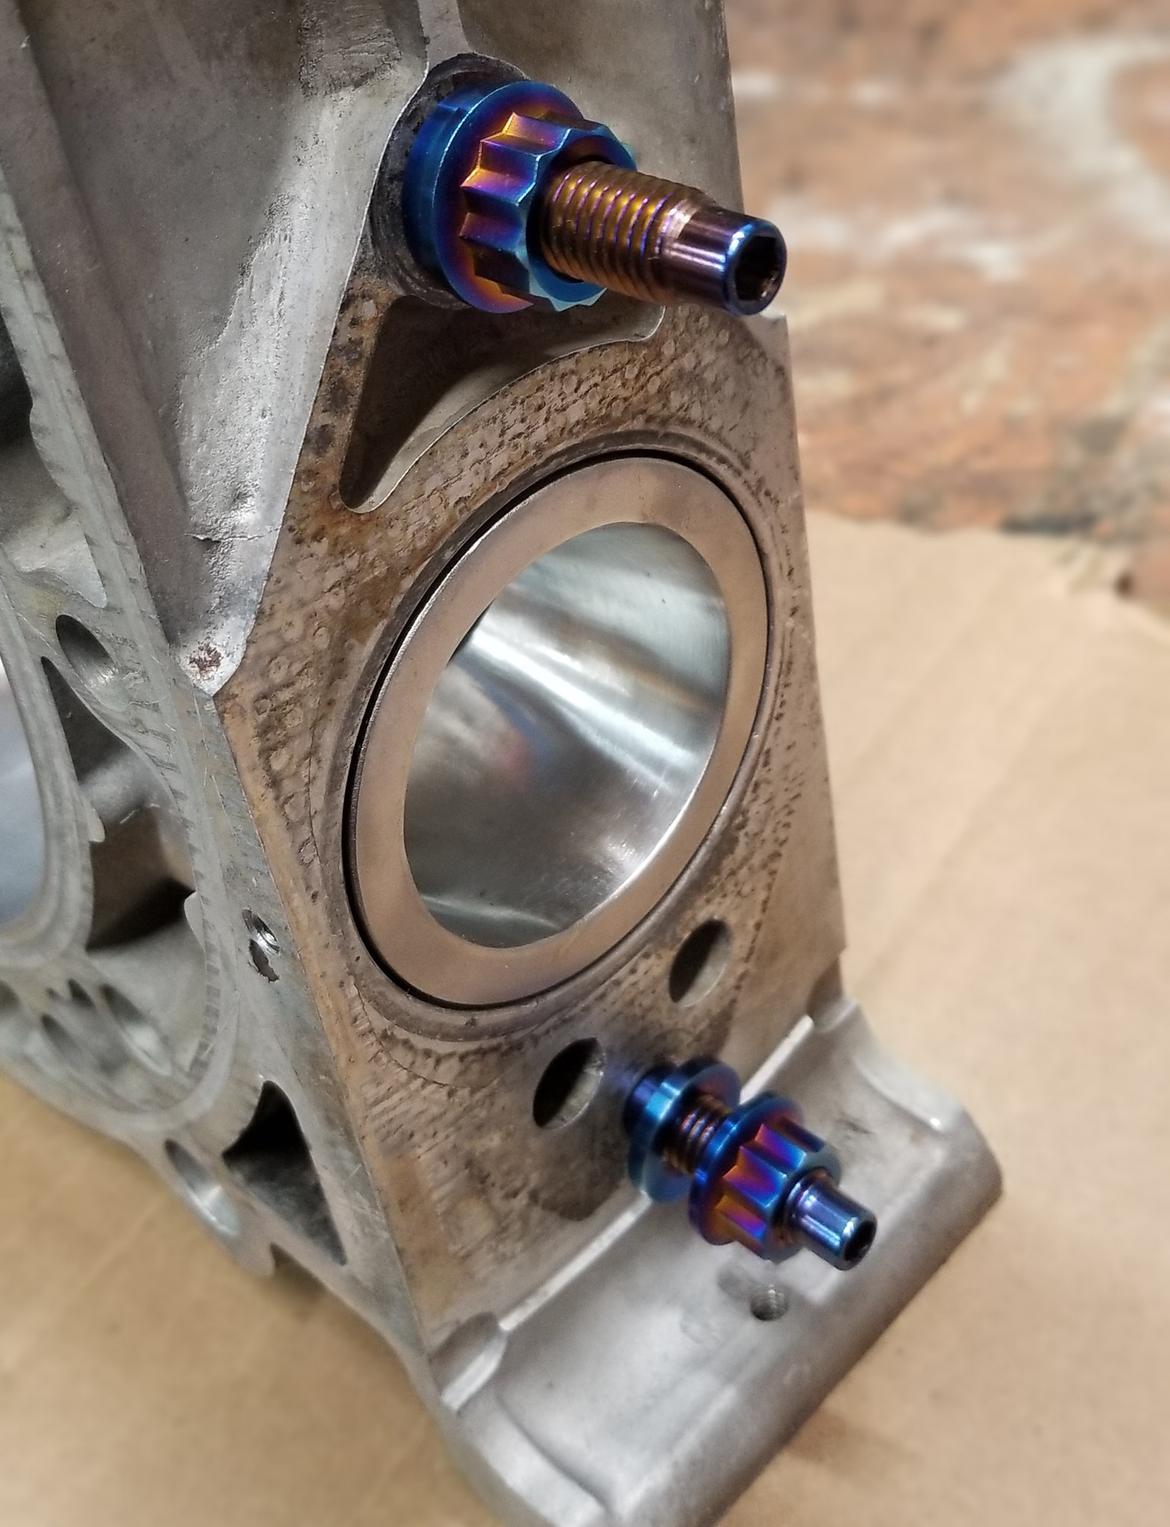
Printed inconel exhaust inserts, titanium hardware cleaned and OMP ports plugged, the opposite side now has a mount for a knock sensor too just need to re-wire the connector then.
I may even begin side seal clearancing and rotor assembly.
meanwhile I wait for the side housings to come back from the refinisher I can get this intake wrapped up and possibly do the engine rebuild in the same week. Apex seals and gasket kit just arrived so we are in the home stretch! car should be raceable for ice racing season, hopefully.
printed collectors! (AlSi10Mg)
rotor housings are all set!
Printed inconel exhaust inserts, titanium hardware cleaned and OMP ports plugged, the opposite side now has a mount for a knock sensor too just need to re-wire the connector then.
I may even begin side seal clearancing and rotor assembly.
meanwhile I wait for the side housings to come back from the refinisher I can get this intake wrapped up and possibly do the engine rebuild in the same week. Apex seals and gasket kit just arrived so we are in the home stretch! car should be raceable for ice racing season, hopefully.


 12-28-21, 09:17 AM
#19
Red Pill Dealer
iTrader: (10)

Do you anneal and reheat treat the parts when they're done or just not worry about the stresses built up from the cooling layers? I'd imagine that a normalizing process would lead to a need to straighten or machine critical surfaces like mounting flanges?
12-28-21, 10:57 AM
#20
Moderator
iTrader: (3)
Join Date: Mar 2001
Location: https://www2.mazda.com/en/100th/
Posts: 30,982
Received 2,688 Likes
on
1,903 Posts
interesting point, when you print plastic, the temps really matter, and if its not right you can have layers that peel right off. plastic might be its own thing though, its got some quirks
12-28-21, 11:16 AM
#21
it’s not as straightforward as just printing out an entire assembly. They usually have to be made in sections and the assembled/welded.
some of the more notable early examples
have a turbo manifold design concept I’d like to finishout and have made, but even just doing a cast prototype is likely still the lower cost option.
.
.
some of the more notable early examples
have a turbo manifold design concept I’d like to finishout and have made, but even just doing a cast prototype is likely still the lower cost option.
.
.
Last edited by TeamRX8; 12-28-21 at 11:20 AM.
12-28-21, 12:47 PM
#22
Red Pill Dealer
iTrader: (10)
My question dealt with the shrinking of the metal. No matter how fine the laser, molten metal shrinks when it cools, quite a bit. Try laying beads with a welder, one on top the other and watch what happens. These forces from cooling can be negated with various heat treatments, I was just curious if it's even bothered with on a thin walled piece, especially with aluminum being so ductile. Welding tubes together normally doesn't require anything special, I'm just looking at the build-up of what is essentially weld and dealing with built up stresses.
The following users liked this post:
TonyD89 (12-28-21)
12-29-21, 12:14 PM
#24
here are the flanges I have on the car today out of inconel:

no heat treatment done or needed.
With DMLS (laser) it does not shrink, the binderjet metal 3d printing process shrinks, you actually print those about 20% larger as they shrink to size (like a traditional MIM or metal powder compaction process). this is literally made out of weld, its just micro welding so the machine and parameters are key to not getting a sad blob out of the printer. Some machines have capability to monitor the part mid print and can alter its settings to try and get the part as close to the CAD model as possible. pretty wild stuff. poorly designed part/bad settings you are going to get build failure and warped part and potentially machine damage. (IE: when a part separates from the build plate and contacts the recoater blade because its 'grown' in the Z height and the machine doesn't realize it)
cheapest was is design it and print it in plastic that can be used in a casting process where the pattern is lost to the molten metal poured. its surprisingly reasonable, even for low volume but then you need to be mindful of the casting process/limitations so you can't do wild shapes like these flanges, that have a floor of triangles and overhangs that are undercut on the mounting flanges shown above.
12-29-21, 12:50 PM
#25
Moderator
iTrader: (3)
Join Date: Mar 2001
Location: https://www2.mazda.com/en/100th/
Posts: 30,982
Received 2,688 Likes
on
1,903 Posts
does the metal generally stress test like metal? the plastic has a grain, essentially; so to get a thing that is strong enough you just have to try some different iterations