
JB welding injector bungs or some sort of Loctite product?
 03-23-10, 03:05 AM
#1

JB welding injector bungs or some sort of Loctite product?
Hey guys,
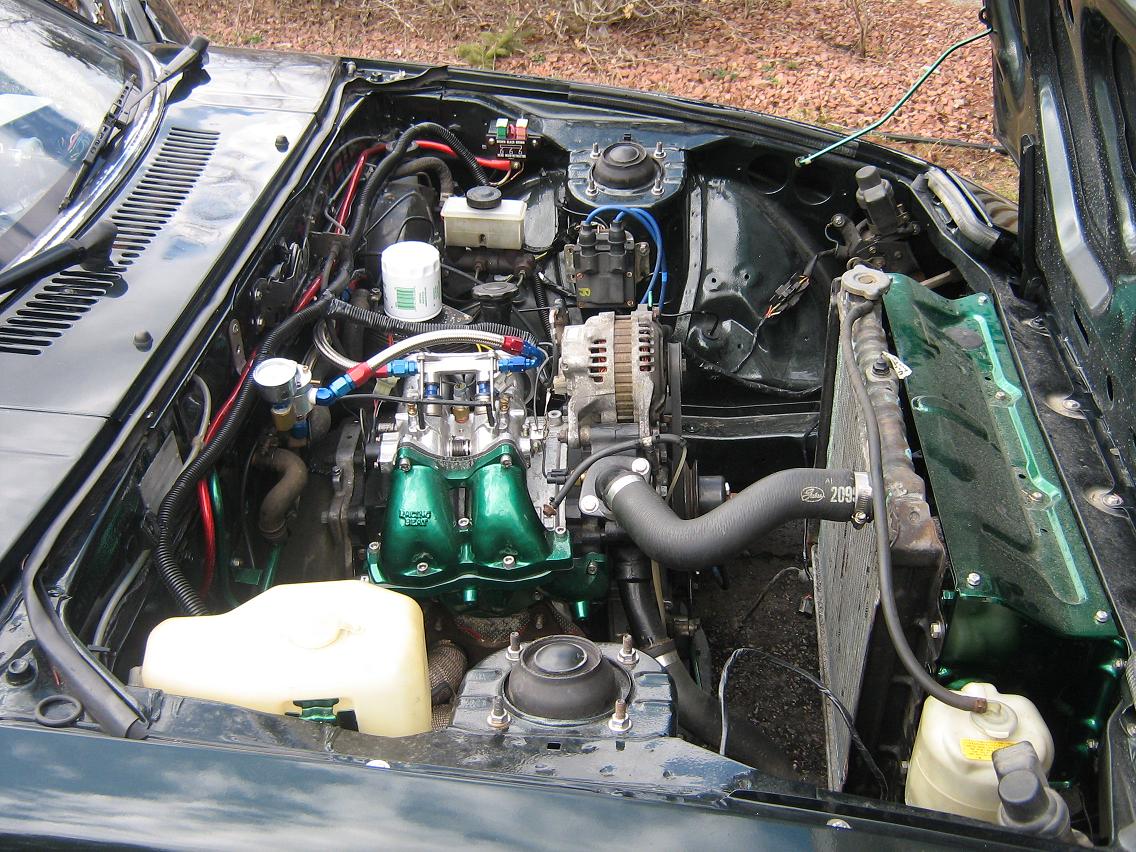
Here's my little dilema, I have a powder coated intake manifold, and would like to add a couple more fuel injectors. Now i could waste that nice finish on the manifold, and weld in the bungs, but thats such a waste of a good powder coated manifold.
So i had to expand my options a bit, and thought if i machine a custom bung, and drill the holes on the upper part of the manifold on a mill and get a very tight fitment on there, slap a bit of JB weld or Loctite Weld.
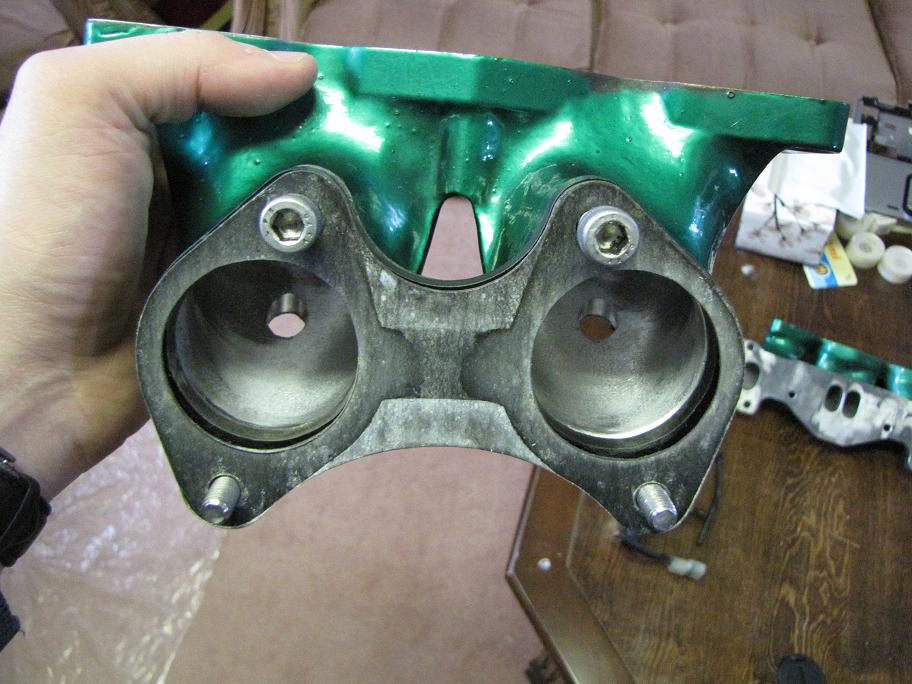
Here's a shot of the Intake in question:
Here's my little dilema, I have a powder coated intake manifold, and would like to add a couple more fuel injectors. Now i could waste that nice finish on the manifold, and weld in the bungs, but thats such a waste of a good powder coated manifold.
So i had to expand my options a bit, and thought if i machine a custom bung, and drill the holes on the upper part of the manifold on a mill and get a very tight fitment on there, slap a bit of JB weld or Loctite Weld.
Here's a shot of the Intake in question:
 03-23-10, 05:30 AM
#2
How about drilling a hole and then cutting in some threads with a NPT tap? With this you could just screw in the injector bung without any need for JB Weld or Loctite.
http://www.toolsusa.com/asp/item_det...ode=GoogleBase
Here are metric to NPT adapters:
http://www.sealconusa.com/encnpthub.htm
I think they sell them at Home Depot and Ace Hardware
http://www.toolsusa.com/asp/item_det...ode=GoogleBase
Here are metric to NPT adapters:
http://www.sealconusa.com/encnpthub.htm
I think they sell them at Home Depot and Ace Hardware
03-23-10, 12:06 PM
#3
I have thought about this too, but I'm not sure it will work out too good. The insert that I'm making will need to be beveled on the side the is going inside the manifold and I'm not too sure how much thickness I have to play around with.
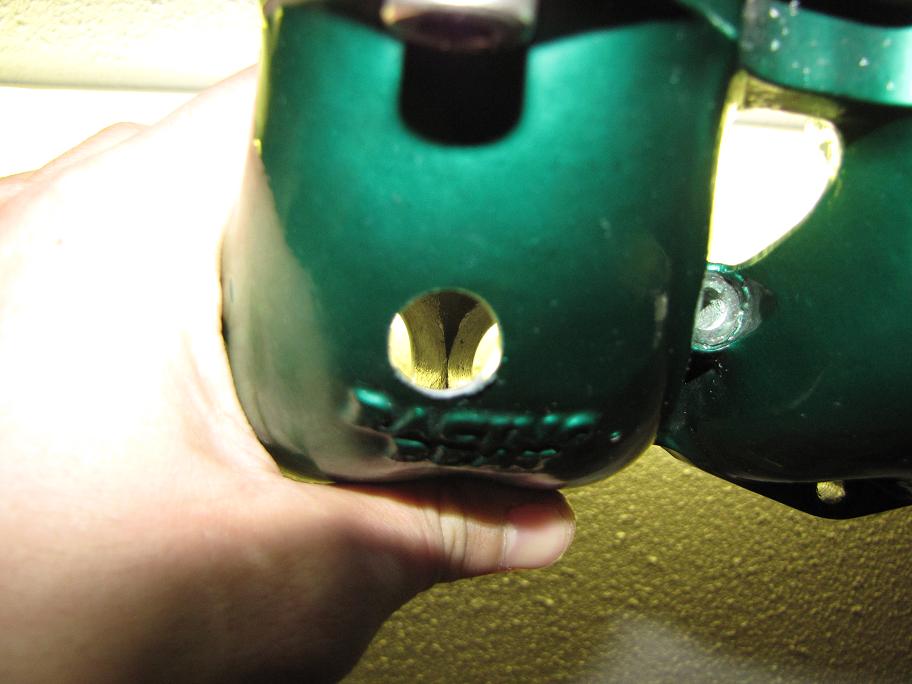
I would like to have them positioned right above where it says "Racing Beat" on the manifold shooting downstream. Also I was thinking of making one billet piece that goes to both sides and then just drilling and tapping the ends to have the fuel rail bolt on to it as oppose to drilling and tapping the manifold to keep the flow inside as good as possible.
I would like to have them positioned right above where it says "Racing Beat" on the manifold shooting downstream. Also I was thinking of making one billet piece that goes to both sides and then just drilling and tapping the ends to have the fuel rail bolt on to it as oppose to drilling and tapping the manifold to keep the flow inside as good as possible.
How about drilling a hole and then cutting in some threads with a NPT tap? With this you could just screw in the injector bung without any need for JB Weld or Loctite.
http://www.toolsusa.com/asp/item_det...ode=GoogleBase
Here are metric to NPT adapters:
http://www.sealconusa.com/encnpthub.htm
I think they sell them at Home Depot and Ace Hardware
http://www.toolsusa.com/asp/item_det...ode=GoogleBase
Here are metric to NPT adapters:
http://www.sealconusa.com/encnpthub.htm
I think they sell them at Home Depot and Ace Hardware
03-23-10, 03:27 PM
#6
It's not about cost, I can do the welding and powder coating myself . But that, powder color is no longer available, and taking out powder coating is a pain in the butt.
I did forget to mention that it will be boosted too later on in its life but no more than 12 psi or so.
I did forget to mention that it will be boosted too later on in its life but no more than 12 psi or so.
03-23-10, 03:29 PM
#7
It's not about cost, I can do the welding and powder coating myself . But that, powder color is no longer available, and taking out powder coating is a pain in the butt.
I did forget to mention that it will be boosted too later on in its life but no more than 12 psi or so.
I did forget to mention that it will be boosted too later on in its life but no more than 12 psi or so.
Trending Topics
03-24-10, 05:27 PM
#9
Banned. I got OWNED!!!

Join Date: Aug 2009
Location: Chicago,IL
Posts: 297
Likes: 0
Received 0 Likes
on
0 Posts
03-24-10, 09:27 PM
#10
JB weld is fine. It's used to seal PP intake sleeves. I know it can handle joining some non-structural aluminum because I've used it and seen it used by others on custom intake manifolds. There is another bonding agent called devcon that has similar applications to JB weld.
Here's the specs on JB weld:
http://jbweld.net/products/jbweld.php
500F continuous.
The key to a good, strong, long-lasting bond is in the prep work. Make sure the surfaces are free of contaminants like and paint and oil by using acetone and course sandpaper to prep the surfaces.
It's also good practice to keep one of those small kitchen type fire extinguishers behind the passenger seat. You never know what might go wrong on a 20+ year old car.
03-25-10, 04:28 PM
#11
Well i think i figured out what I'm going to do, I think that I'm going to grab an aluminum dowel turn it down and drill it to fit the injectors and put a lip on it. Then i'm going to make an insert that sits over that lip with another hole in it that will hold an m8 bolt or something so that insert is going to look like an "8" figure with one hole larger than the other. I'll still seal the injector insert with jb weld though.
I'll get a few pictures going soon, but I should start manufacturing the parts tomorrow if I get a chance. I have to finish welding a set of headers first.
Then all I need to do is figure out what to do with the fuel rail now.
I'll get a few pictures going soon, but I should start manufacturing the parts tomorrow if I get a chance. I have to finish welding a set of headers first.
Then all I need to do is figure out what to do with the fuel rail now.
 03-25-10, 08:04 PM
#13
JB weld is fine. It's used to seal PP intake sleeves. I know it can handle joining some non-structural aluminum because I've used it and seen it used by others on custom intake manifolds. There is another bonding agent called devcon that has similar applications to JB weld.
Here's the specs on JB weld:
http://jbweld.net/products/jbweld.php
500F continuous.
The key to a good, strong, long-lasting bond is in the prep work. Make sure the surfaces are free of contaminants like and paint and oil by using acetone and course sandpaper to prep the surfaces.
It's also good practice to keep one of those small kitchen type fire extinguishers behind the passenger seat. You never know what might go wrong on a 20+ year old car.
Here's the specs on JB weld:
http://jbweld.net/products/jbweld.php
500F continuous.
The key to a good, strong, long-lasting bond is in the prep work. Make sure the surfaces are free of contaminants like and paint and oil by using acetone and course sandpaper to prep the surfaces.
It's also good practice to keep one of those small kitchen type fire extinguishers behind the passenger seat. You never know what might go wrong on a 20+ year old car.
03-28-10, 02:54 AM
#17
Senior Member
iTrader: (1)

Join Date: Dec 2008
Location: Vancouver, BC
Posts: 250
Likes: 0
Received 0 Likes
on
0 Posts
Freeze fit them.
Drill/ream the holes in the manifold to size. Machine the bungs 0.003" over. Place the bungs in the freezer and heat the manifold to 300*c (which should be safe for the powder depending on brand). Tap the bungs into place. Once thawed they shouldn't move. There are a couple production engines that do it this way for the cam gears. 0.003" might be too much but it's typically what I use. There are formulas out there to calculate shrinkage for free fitting though.
You can also use green loctite. It's used to hole cylinder liners in and is virtually impossible to break once set.
03-28-10, 03:02 PM
#18
Freeze fit them.
Drill/ream the holes in the manifold to size. Machine the bungs 0.003" over. Place the bungs in the freezer and heat the manifold to 300*c (which should be safe for the powder depending on brand). Tap the bungs into place. Once thawed they shouldn't move. There are a couple production engines that do it this way for the cam gears. 0.003" might be too much but it's typically what I use. There are formulas out there to calculate shrinkage for free fitting though.
You can also use green loctite. It's used to hole cylinder liners in and is virtually impossible to break once set.
Drill/ream the holes in the manifold to size. Machine the bungs 0.003" over. Place the bungs in the freezer and heat the manifold to 300*c (which should be safe for the powder depending on brand). Tap the bungs into place. Once thawed they shouldn't move. There are a couple production engines that do it this way for the cam gears. 0.003" might be too much but it's typically what I use. There are formulas out there to calculate shrinkage for free fitting though.
You can also use green loctite. It's used to hole cylinder liners in and is virtually impossible to break once set.
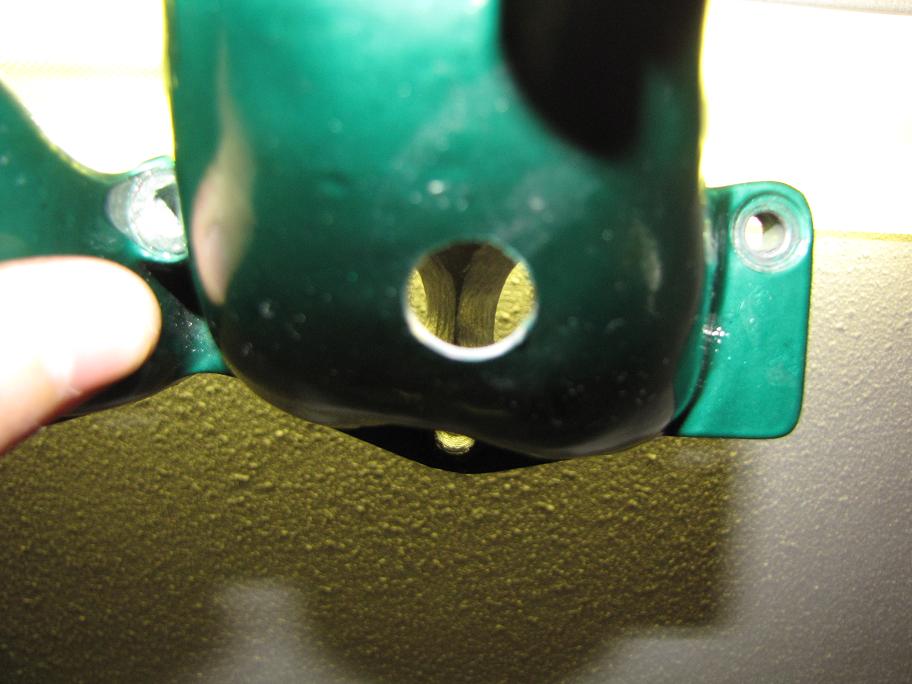
I already made some inserts for it also, but I think that I'm going to have to made them about 1/4" longer for it to sit properly or just take a 1" mill bit and take out a bit off the top so the insert sits better which might also help locate it in the hole better.
 03-28-10, 03:27 PM
#19
Senior Member
iTrader: (1)
Join Date: Dec 2008
Location: Vancouver, BC
Posts: 250
Likes: 0
Received 0 Likes
on
0 Posts
You could make the insert longer and taper the end. A 3* taper should be more then enough. The drawback to this method is having to grind out the insert from inside the manifold.
03-31-10, 12:13 PM
#24
I'll get some pictures later on tonight. I didn't sleep last night working on the intake. And to make matters worse, I have to modify every fitting that i bought for my fuel pump as nobody carried what I needed.
So i still need to finish up the plate that holds both of those injectors bungs in, and also I'll be making my fuel rail today. I'm buying a chunk of 1x1/5x5" 6061 aluminum and machining it to fit. The ends will be tapped with 1/4" NPT and then get the -6an plumbing routed.
So i still need to finish up the plate that holds both of those injectors bungs in, and also I'll be making my fuel rail today. I'm buying a chunk of 1x1/5x5" 6061 aluminum and machining it to fit. The ends will be tapped with 1/4" NPT and then get the -6an plumbing routed.
04-01-10, 02:20 AM
#25
well day 2 of no sleep lol ... just starting my fuel rail, its sitting on the lathe now finished machining the ends so they're square now. Drilling the holes is alway fun though to make sure it ends up as close as possible to center on the other side. Its 5" long, I've done 12" before and worked so it shouldn't be as bad.
One a second note, after running a heat gun for quite a while on the loctited parts, I grinded the excess stickout with a die grinders and all smoothed out from the inside. If it survived the harsh grinding I'm sure it'll survive on the engine. I just hope there is no vaccum leaks out of there.
I'll get pictures once I have a bit more done, things are still looking a bit rough and crude.