
All about paint/body.. Kustom paint? Mega Flake? Shaved? post here!!

 07-30-10, 03:12 PM
#52
Full Member

Join Date: Mar 2009
Location: St. Louis
Posts: 54
Likes: 0
Received 0 Likes
on
0 Posts
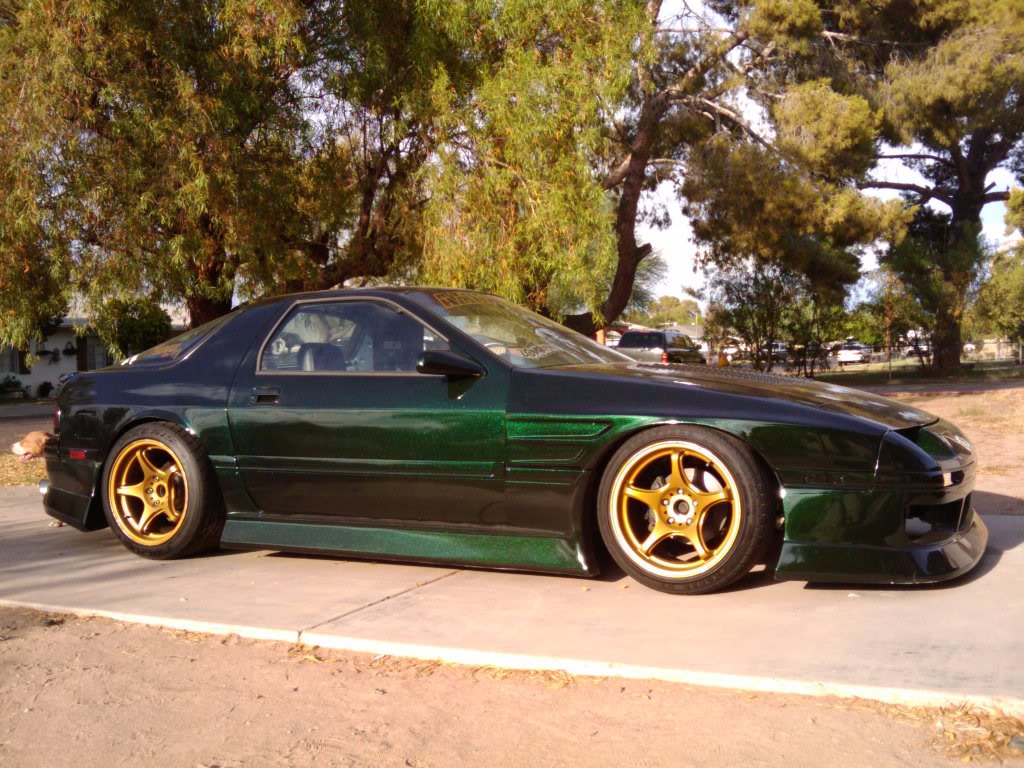
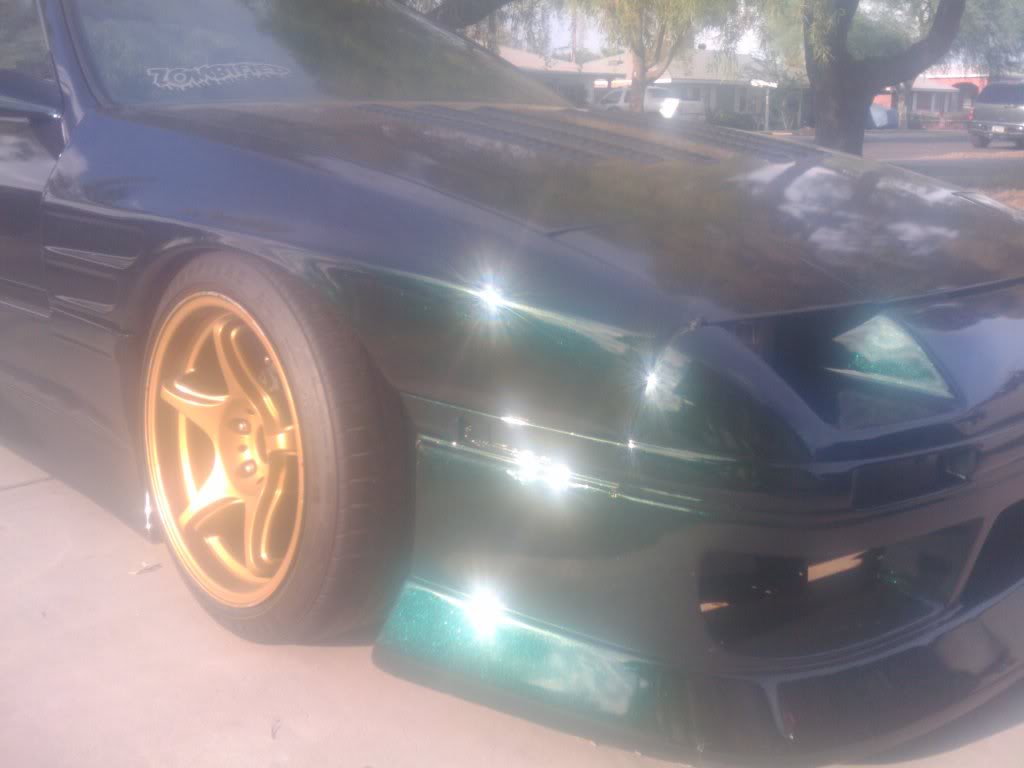
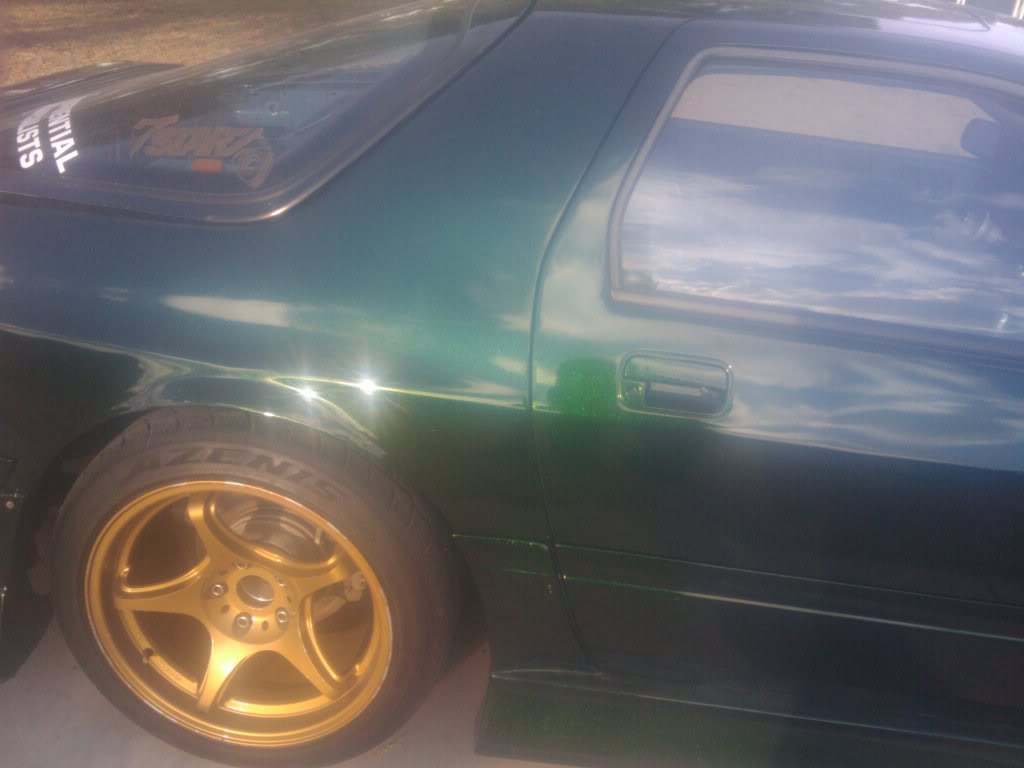
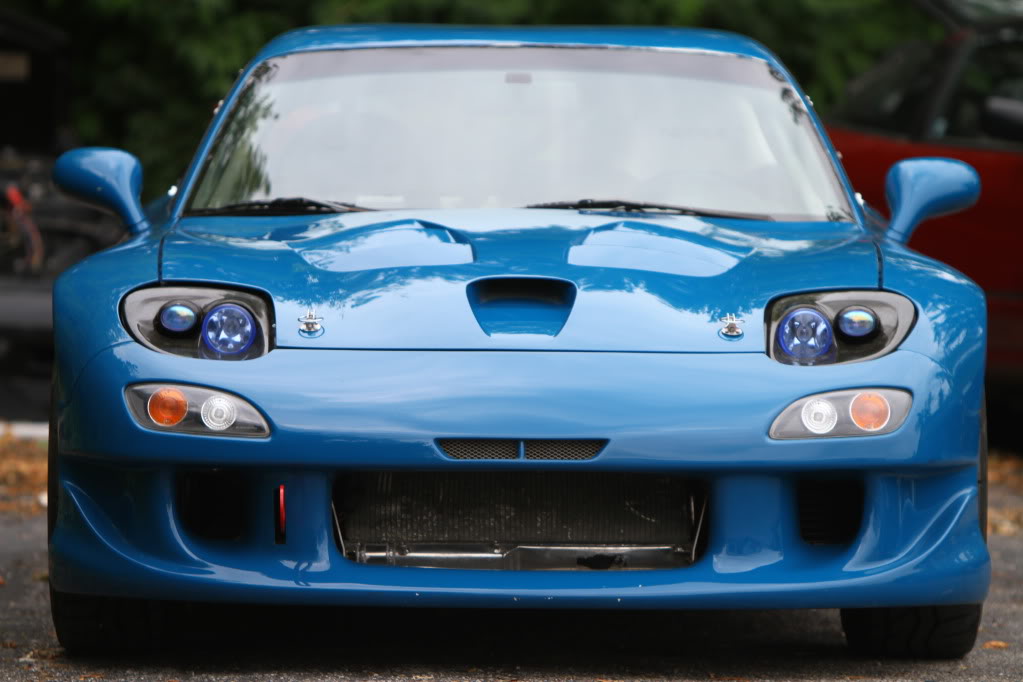
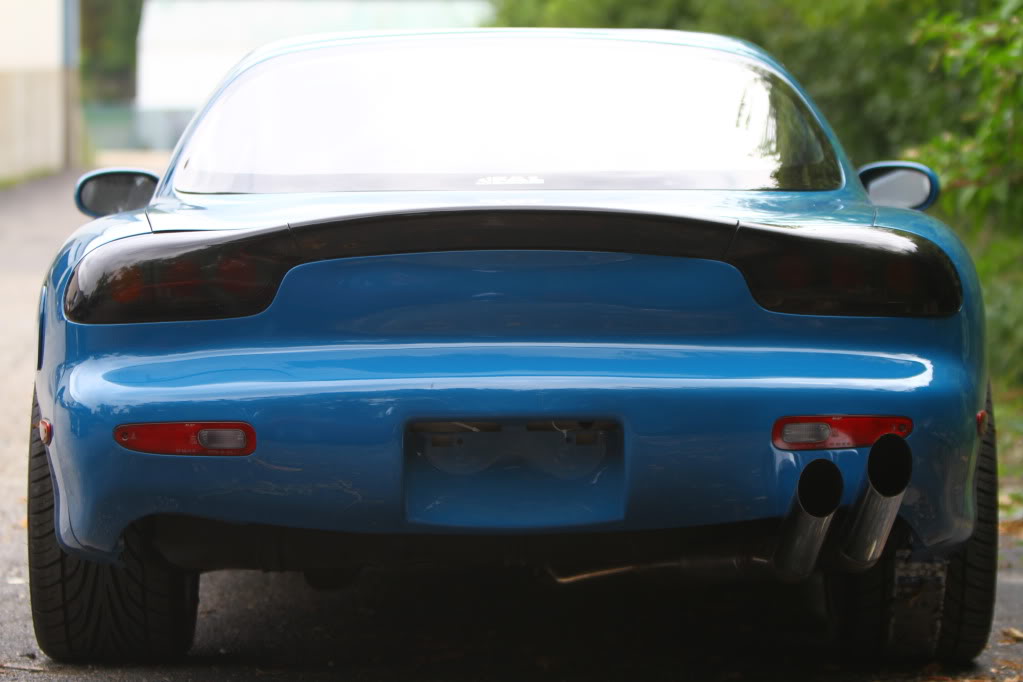
Took more today with other body pieces on. Looks good, but definitely needs lowering. The steering angle is making the front of my wheels rub/hit on something, not quite sure what though. Besides needing to be aligned, driving it felt pretty good. It has type flex on it which I wish were a bit stiffer but oh well.
IMG_8224.jpg?t=1280520504
IMG_8176.jpg?t=1280520576
IMG_8198.jpg?t=1280520636
IMG_8207.jpg?t=1280520683
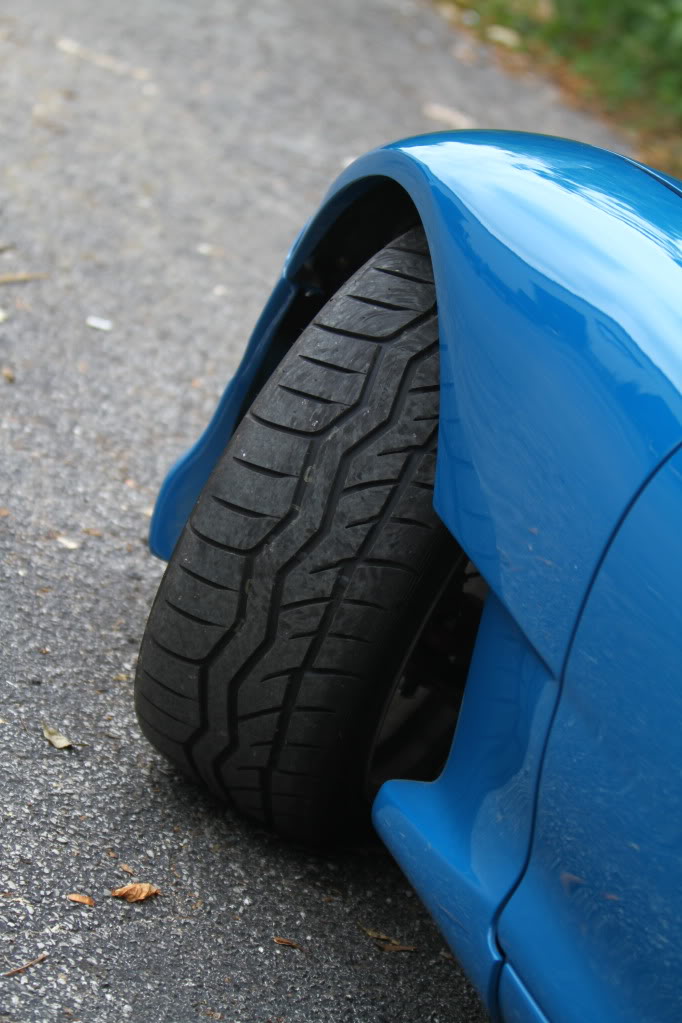
Im using a 15mm spacer up front right now, going to move it to the rear and try a 25mm up front I think
IMG_8224.jpg?t=1280520504
IMG_8176.jpg?t=1280520576
IMG_8198.jpg?t=1280520636
IMG_8207.jpg?t=1280520683
Im using a 15mm spacer up front right now, going to move it to the rear and try a 25mm up front I think
07-30-10, 03:21 PM
#53
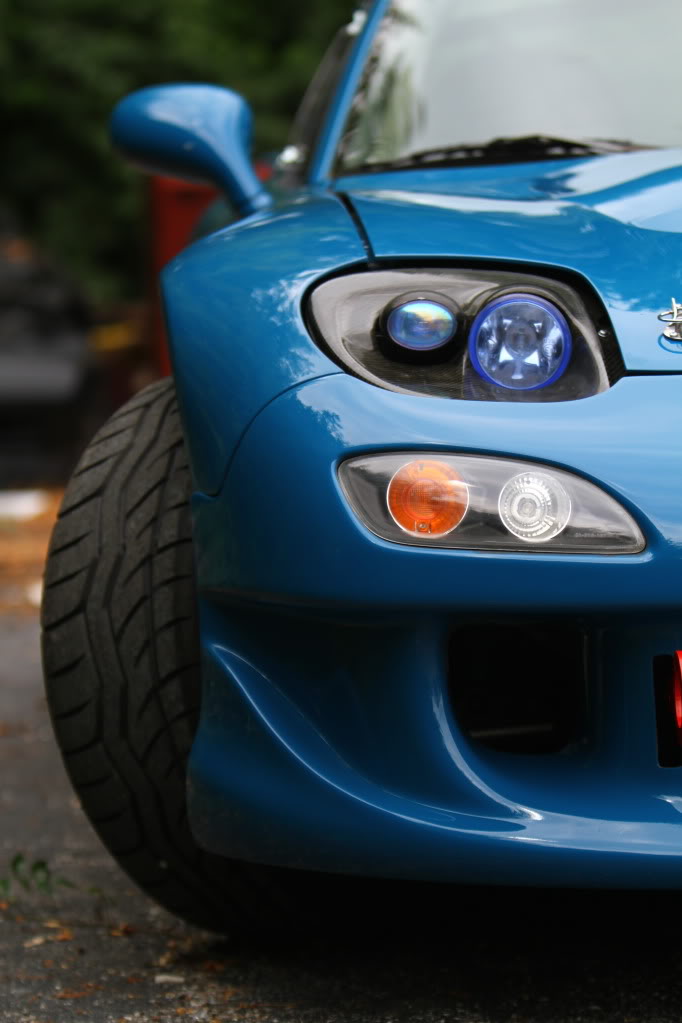
LOOKS great,.. not my style headlights but, looks good with the RE kit..
btw your ******* exhuast is bitchin.. you got any more pics?? (is that st mays exhaust?)
dude, from experience get ride of the tein.. go stance or something with stiffer springs.. i traded my flex for Stance GR+
btw your ******* exhuast is bitchin.. you got any more pics?? (is that st mays exhaust?)
dude, from experience get ride of the tein.. go stance or something with stiffer springs.. i traded my flex for Stance GR+
Last edited by Battle Cat; 07-30-10 at 03:24 PM.
07-30-10, 03:41 PM
#54
Full Member
Join Date: Mar 2009
Location: St. Louis
Posts: 54
Likes: 0
Received 0 Likes
on
0 Posts
LOOKS great,.. not my style headlights but, looks good with the RE kit..
btw your ******* exhuast is bitchin.. you got any more pics?? (is that st mays exhaust?)
dude, from experience get ride of the tein.. go stance or something with stiffer springs.. i traded my flex for Stance GR+
btw your ******* exhuast is bitchin.. you got any more pics?? (is that st mays exhaust?)
dude, from experience get ride of the tein.. go stance or something with stiffer springs.. i traded my flex for Stance GR+
Also, I saw you talking about the pbm knuckles for the FD, those knuckles on their site are mine, so that should give some idea of the steering angle
 Its not rubbing bad, hopefully some +25mm spacers will work better
 08-03-10, 11:08 PM
#57


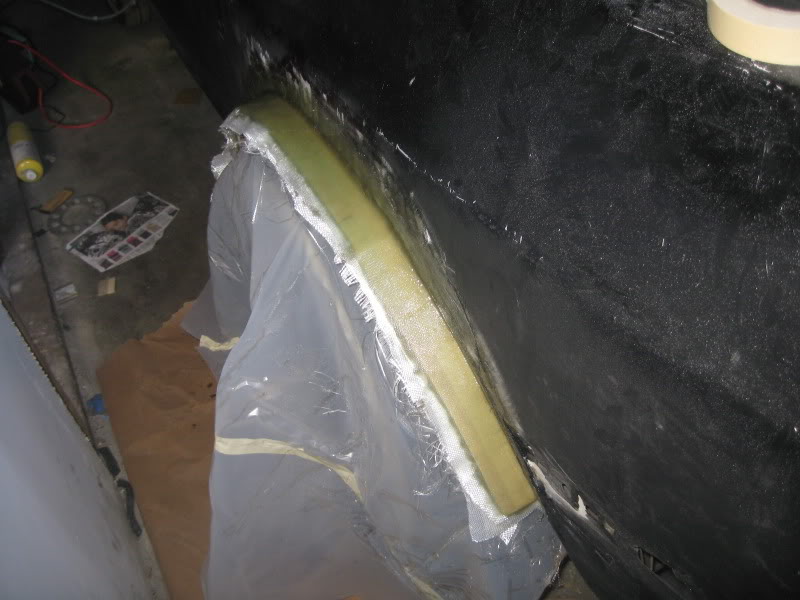
Only pics i took. I did this WITHOUT gloves and my fingers were COVERED in fiberglass hair and resin. Doesn't bother me. I'm used to the itch but i didn't want to resin my buttons up on my phone....
Like i said, i'm a weekend warrior so i'll be finishing up the fabric + one moar layer of mat over the fabric and pulling this up off the car so i can start glassing up the rest. I'm probably doing this the hard way but whatever. It's comming along well.
My hood was super flexy and after about 24hours, just as ridgid as it was BEFORE i cut all the support out of the bottom of it.
 . Cool ****. All i did was put wax as a release agent on top of the tape. The side parts are cardboard and the front is actually part of the hood itself. Should look **** when all is said and done for a SMALL fraction of the price of a knock off or legit uras vent.
Tip: Foil line your cups. The resin will eat the **** out of them.
I'll contribute more when i buy a gun and paint. I was going to do the roll on but my brother's girlfriend's dad has a shop and he's going to talk him into letting me borrow it and his compressor so i can lay down some hot ****. This guy i work with is going to do some sick full metal airbrushing on it for cheaps too. Think skulls, smoke, death, pin-up gir, blood, battleaxe, totally wicked ****. Not the whole car but part of it. Maybe JUST the hood. I dunno yet.
*bangs head like a maniac*
08-04-10, 12:22 AM
#58
s4 GENERAL
Only pics i took. I did this WITHOUT gloves and my fingers were COVERED in fiberglass hair and resin. Doesn't bother me. I'm used to the itch but i didn't want to resin my buttons up on my phone....
Like i said, i'm a weekend warrior so i'll be finishing up the fabric + one moar layer of mat over the fabric and pulling this up off the car so i can start glassing up the rest. I'm probably doing this the hard way but whatever. It's comming along well.
My hood was super flexy and after about 24hours, just as ridgid as it was BEFORE i cut all the support out of the bottom of it.
. Cool ****. All i did was put wax as a release agent on top of the tape. The side parts are cardboard and the front is actually part of the hood itself. Should look **** when all is said and done for a SMALL fraction of the price of a knock off or legit uras vent.Tip: Foil line your cups. The resin will eat the **** out of them.
I'll contribute more when i buy a gun and paint. I was going to do the roll on but my brother's girlfriend's dad has a shop and he's going to talk him into letting me borrow it and his compressor so i can lay down some hot ****. This guy i work with is going to do some sick full metal airbrushing on it for cheaps too. Think skulls, smoke, death, pin-up gir, blood, battleaxe, totally wicked ****. Not the whole car but part of it. Maybe JUST the hood. I dunno yet.
*bangs head like a maniac*
not that bad so far....... but blood, skulls joking right?
08-05-10, 03:38 AM
#59
see: drift charm thread.
Yes. I'm serious. Like right now, i dont have a vision in my head but i'm not good at that stuff like when i was younger/in highschool. Soooo, i'll let my buddy take creative control airbrushing my hood. The rest is being left alone. Either single color or black on top with purple flake (paint or vinyl) on the bottom..... It's up in the air but purple, black and green are probably my all time favorite colors, period. I wanna use em all.
Kinda like this?
08-06-10, 03:36 PM
#60
dammit thats pretty good. Is your hood aluminum or steel? Im curious how flimsy a aluminum hood is when gutted. i did that **** to my old s13 and it was decent, good weight savings. You should update your progress on the fg forums, they will love this ****.
08-07-10, 01:47 PM
#61
I should. However i wont be doing much else until next weekend. I gotta run around this week and handle all the legal **** for my car (tag/title/insurance) and i'll buy some more mat/fabric/resin. I had to pull the thing off because my dumbass didn't put enough hardner in one section and it came out super flimsy. It's still wet to the touch underneath where the tape was and i glassed that up LAST weekend.
Pfft. Oh well. Live and learn. The hot glue/cardboard sides were great. I'm tempted to use some of the sheet metal i have and just weld the **** instead. I'd rather **** with metal than fg. I can weld the clothes off a nun. wait, what?! It's a steel hood btw. I really dont care about it. It's just something functional that i want to come out looking halfway decent on the cheap. However i'm paying twice because i fucked up my hardener/resin ratio in one spot and it came out all ****.
Starting BACK over and i'll be buying about 4 packs of each glass. I'm going to see if the body shop can cut me a deal on a gallon of resin vs going and getting the **** from advanced. I live in a tiny *** town but when it comes to welding/fab/bodywork/paint....hehe. Yeah, i can get whatever. I like working with the stuff but when **** comes out fucked up, it makes me hate life.
08-07-10, 08:38 PM
#62
Sideways is the only way
iTrader: (2)
Join Date: Nov 2007
Location: Vermont
Posts: 958
Likes: 0
Received 0 Likes
on
0 Posts
nice nopistons, +1 for doing **** on the cheap. coming along pretty well but fabbing up a metal vent doesn't seem too hard either. I would just make the whole hood FG if I was dong an fg vent but thats just me and for weight savings. airbrushing FTW too, **** should stand out. I'm loading my car with a huge vinyl down the sides eventually when I get my car done. I'm putting a crazy looking anime chick swinging an axe down the side of a black car. I'm learning how to draw anime/manga right now because I am so OCD about how it'll turn out that I want to try and at least get a rough idea down for another artist to finish if not do it entirely myself.
I still need EVERYTHING for my car though. needs rockers done still, sand and recoat the underside, paint, just to get it back to stock and from red to black. I'm getting my coilovers first, welding the diff, wheels, gp sports body kit for time being until my widebody. NO $$$! I'm sick of my heap sitting around looking like junk.
I still need EVERYTHING for my car though. needs rockers done still, sand and recoat the underside, paint, just to get it back to stock and from red to black. I'm getting my coilovers first, welding the diff, wheels, gp sports body kit for time being until my widebody. NO $$$! I'm sick of my heap sitting around looking like junk.
 08-08-10, 01:56 PM
#64
Sideways is the only way
iTrader: (2)
Join Date: Nov 2007
Location: Vermont
Posts: 958
Likes: 0
Received 0 Likes
on
0 Posts
money is only thing stopping me. I'm going to paint it myself so this thread comes in handy. I was going to rattle can it but I think I can borrow a spray gun from a friend so I can do **** the right way and have it look good in the end.
I have a paint related question: my interior will most likely be stripped most of the time and I am going from red to black. now, I want to paint the interior black too so it all looks right but I noticed that the interior color is flat. should I just spray my color coat from the exterior inside and leave it, should I throw clear on top, or should I just use a black primer? also, how well should I sand my interior before spraying? same as the exterior or can I get away with less since its not as important for looks? I just want it black, don't care if the interior is flashy or anything.
I have a paint related question: my interior will most likely be stripped most of the time and I am going from red to black. now, I want to paint the interior black too so it all looks right but I noticed that the interior color is flat. should I just spray my color coat from the exterior inside and leave it, should I throw clear on top, or should I just use a black primer? also, how well should I sand my interior before spraying? same as the exterior or can I get away with less since its not as important for looks? I just want it black, don't care if the interior is flashy or anything.
 08-09-10, 06:30 PM
#66
Sideways is the only way
iTrader: (2)
Join Date: Nov 2007
Location: Vermont
Posts: 958
Likes: 0
Received 0 Likes
on
0 Posts
thats what I was wondering too. I wanted to keep all my sound deadening as it is already loud enough. Is it possible to prep the sound deadening too and paint over it? I guess I could rip the deadening out and run the carpet but does the carpet alone really deaden that much sound? I'm concerned if I am carting around my 2 year old daughter sometimes.
btw, thanks for the prep info. I figured I should use the same pint as exterior. that means clear too right?
btw, thanks for the prep info. I figured I should use the same pint as exterior. that means clear too right?
08-09-10, 10:19 PM
#67
Tip:
Anyone who has those cheap as **** chromed spline style lugs and gets tired of them surface rusting do this.
1. Remove lugs. Swear at spending $30+ on them and their shitty craftsmanship.
2. Did you paint your brakes with caliper paint recently? Cool. I hope you have some left over. If you have a rex, you should. There's enough to do the front and rear calipers plus another pair of calipers if you so wish....
If not, well now is a good time to buy it. It's TOUGH paint. Doesn't fade in the sun quick either.
3. Grab any grits from 320 to 800 and begin to scuff/swirl all the surface rust off the lugs and off the exposed face. Continue until the entire lug is scuffed evenly, no deep gouges or anything of that sort. Paint WILL flake off smooth chrome. I found 800 grit paper still does enough roughing to make it stick and stick well.
(chrome dust will **** you up if you inhale it. Try to wear a mask or atleast use wet paper to keep the dust from going in the air.)
4. Clean lugs and preheat your oven to 400 degrees.
5. Place open side up and spray away. Make sure you get a nice even coat. If it's hot enough outside, you can do ONE coat. I did two just to be sure. I let the first coat tack up and laid another on top. Real nice and thick. DO NOT touch the lugs with your fingers.
6. hold your lugs in the oven for 5 to 10 minutes. This will BAKE the paint on. Granted it's HIGH temp paint to begin with, baking it on gives it a better bond to the chrome.
7. Gloat because now your lugs match your brakes and you did the **** on a poor mans budget without the poor mans look.
Disclaimer: If i had $100+ for kics/muteki, that's what i would have bought. I got tired of looking at NEW lugs rusting and looking all fucked up every time i removed my wheels so i did something about it.
I'll take some pics later. It got dark when i set the car back down, i almost passed out and gnats/fire ants were feasting on my 140 pound ***....
08-09-10, 11:34 PM
#68
it just will look like **** compared to rest of the non deadened areas or areas you knocked it off of.
If you are going to do it, just knock it all off. If you take the carpet out and half the sound deadening having it on the transmission tunnel won't do a ******* thing
If you are going to do it, just knock it all off. If you take the carpet out and half the sound deadening having it on the transmission tunnel won't do a ******* thing

 08-22-10, 09:13 PM
#73
Formerly widebodyseven
iTrader: (17)

Join Date: Jul 2009
Location: Garage
Posts: 1,799
Likes: 0
Received 0 Likes
on
0 Posts
I'll be posting progress pics of my custom widebody FC here. Just started a couple days ago and looking to finish with in a month, in time for sevenstock. Will be painting it satin black.
Pics....

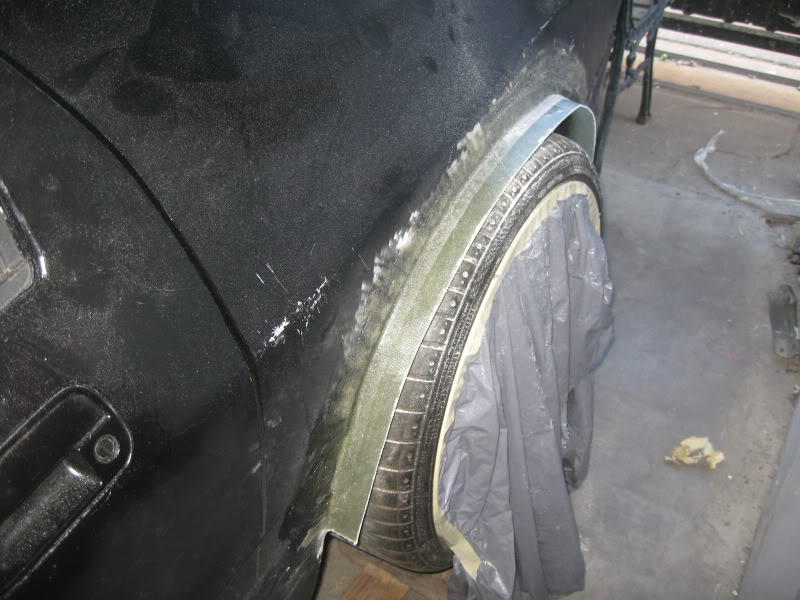
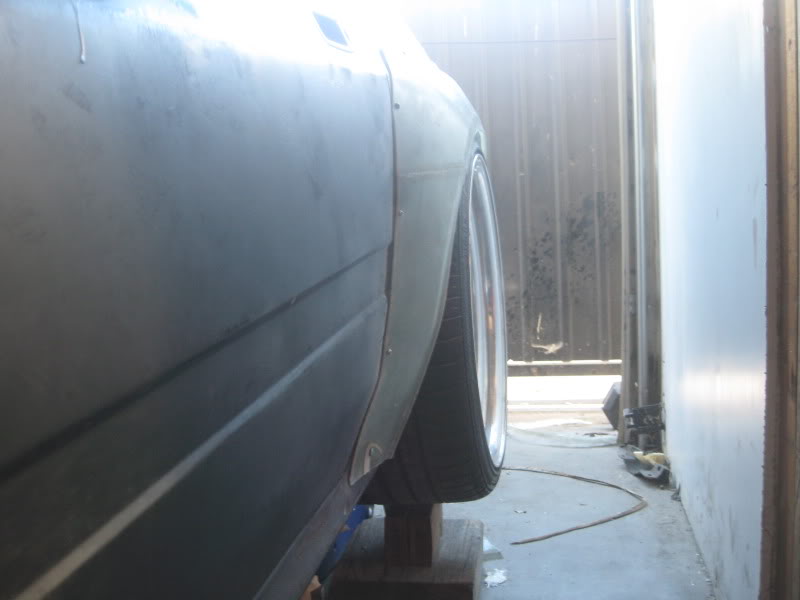
Its about 45-50 mm wider
Pics....
Its about 45-50 mm wider
Last edited by widebodyseven; 08-22-10 at 09:16 PM.
08-23-10, 03:33 AM
#74
Formerly widebodyseven
iTrader: (17)
Join Date: Jul 2009
Location: Garage
Posts: 1,799
Likes: 0
Received 0 Likes
on
0 Posts
Thanks! I need to pick up some 3M bonding adhesive, then i could start with evercoat body filler and finish it with evercoat metal glaze.
Its at least 45mm wider, from the outer metal to the end of the fiberglass strip you see in the first couple of pics is 1.75 inches and theres a little gap in between where the fiberglass panel is suppose to meet with the strip.
The wheels spec are....
19x12.5 +13 with 315/35/19
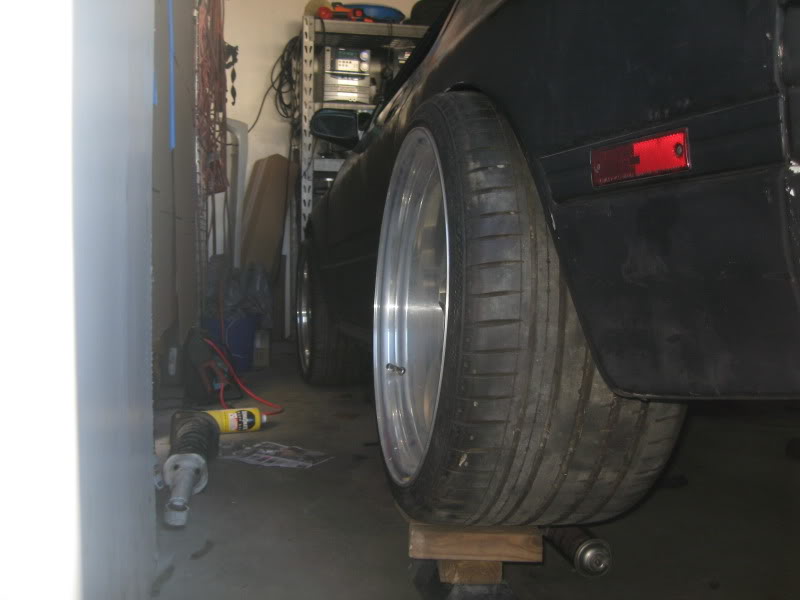
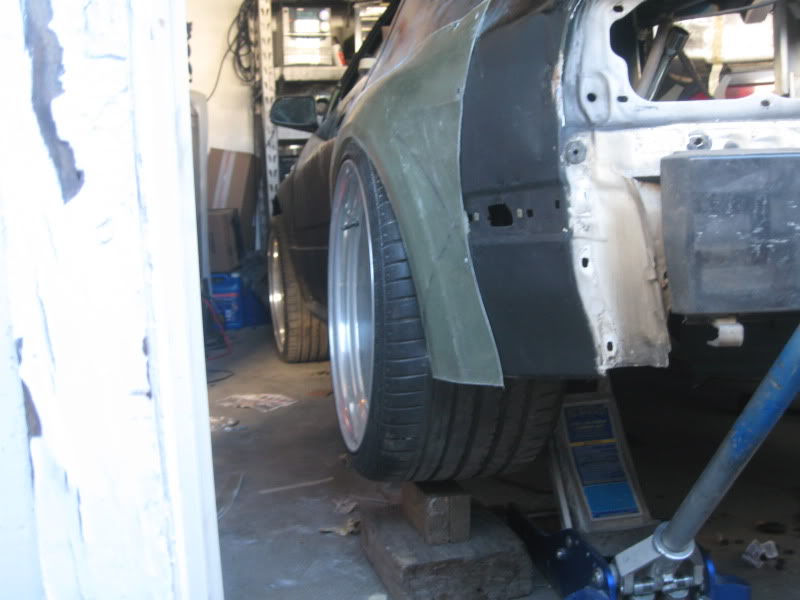
Its at least 45mm wider, from the outer metal to the end of the fiberglass strip you see in the first couple of pics is 1.75 inches and theres a little gap in between where the fiberglass panel is suppose to meet with the strip.
The wheels spec are....
19x12.5 +13 with 315/35/19
Last edited by widebodyseven; 08-23-10 at 03:41 AM.