
Tornado Silver Time - Now with 100% more REPU and 20b

 11-10-12, 10:10 PM
#152
Will do! Also - What is a common vmount intercooler size? I'd like to do this with minimal modifications. I dont have a welder, but I do have a friend who can make me brackets if I make them up on cardboard, as well as weld aluminum. I may be able to borrow a welder if its absolutely necessary.
11-10-12, 10:17 PM
#153
Just start in the nose and work your way back.
Something to be aware of ahead of time:
Gutting the condensor box below the dash is fine (because, why not?) but you'll have three holes in the box and the firewall (inlet, outlet and drain) to fill.
The plastic dash box is easy, you can half *** it as much as you like because it's not visible and under no real environmental assault.
The firewall holes on the other hand, you'll want to be more than just duct tape.
I have a supply of rubber body plugs gathered from the junkyard (they are everywhere on Japanese cars) and easily found perfect fits (the holes are not the same size, BTW). Pop 'em in and they look like Mazda put them there (which is exactly what they did on AC delete orders anyway).
The engine bracket that mounts the AC and PS is all one giant piece, removing the AC compressor doesn't bother the PS at all.
I have no idea if the bracket can be modified to allow the PS in the lower position, just offhand I'd guess it'd be easier to start from scratch rather than work with the stock piece.
11-10-12, 10:31 PM
#154
Originally Posted by clokker
Removing the AC is time consuming but fairly basic mechanically.
Just start in the nose and work your way back.
Something to be aware of ahead of time:
Gutting the condensor box below the dash is fine (because, why not?) but you'll have three holes in the box and the firewall (inlet, outlet and drain) to fill.
The plastic dash box is easy, you can half *** it as much as you like because it's not visible and under no real environmental assault.
The firewall holes on the other hand, you'll want to be more than just duct tape.
I have a supply of rubber body plugs gathered from the junkyard (they are everywhere on Japanese cars) and easily found perfect fits (the holes are not the same size, BTW). Pop 'em in and they look like Mazda put them there (which is exactly what they did on AC delete orders anyway).
The engine bracket that mounts the AC and PS is all one giant piece, removing the AC compressor doesn't bother the PS at all.
I have no idea if the bracket can be modified to allow the PS in the lower position, just offhand I'd guess it'd be easier to start from scratch rather than work with the stock piece.
11-10-12, 10:41 PM
#155
I found this https://www.rx7club.com/2nd-generati...cation-705539/ and I think I'm going to try it. If worse comes to worst I can just find a new bracket.
Taking the piece out from the dash is more hassle than its worth, I mostly just want to remove the stuff in the engine bay.
Taking the piece out from the dash is more hassle than its worth, I mostly just want to remove the stuff in the engine bay.
11-10-12, 10:44 PM
#156
Man, that is one ugly assembly.
That whole area of the shortblock is so very awkward.
Tsk, tsk, tsk.
That's just lazy but as an added incentive...gutting the AC under the dash removes a big obstruction between the blower fan and the heater core.
The result is improved circulation and better heat, which I would consider a really excellent payoff for an hour's labor.
That whole area of the shortblock is so very awkward.
Taking the piece out from the dash is more hassle than its worth, I mostly just want to remove the stuff in the engine bay.
That's just lazy but as an added incentive...gutting the AC under the dash removes a big obstruction between the blower fan and the heater core.
The result is improved circulation and better heat, which I would consider a really excellent payoff for an hour's labor.
 11-11-12, 08:35 AM
#160
Originally Posted by clokker
The condensor box is gutted, not removed entirely.
The empty box is the path between the blower fan and the heater core.
The empty box is the path between the blower fan and the heater core.
11-11-12, 09:56 AM
#162
I guess you could force round dryer duct or something to fit over the weirdly shaped flanges of the blower/heater boxes but the original box seems much easier to me.
11-11-12, 12:07 PM
#163
So I've never really researched bridgeports...but since i'm tearing it apart...does it make sense to do one? or should I leave it a streetport? I may go with a bigger turbo down the road, but for now I'm going to keep it hybrid.
Basically this car is going to be a weekend car - which will include track days, and maybe some autox if there is anything in the area. I'd still like the car to be somewhat driveable if I take it to work on a friday or something along those lines. I like the bridgeport idle, but I dont know how I feel about the volume of it.
Basically this car is going to be a weekend car - which will include track days, and maybe some autox if there is anything in the area. I'd still like the car to be somewhat driveable if I take it to work on a friday or something along those lines. I like the bridgeport idle, but I dont know how I feel about the volume of it.
11-11-12, 08:36 PM
#164
Got some more pulled today, but first I had made sure I had a good breakfast.
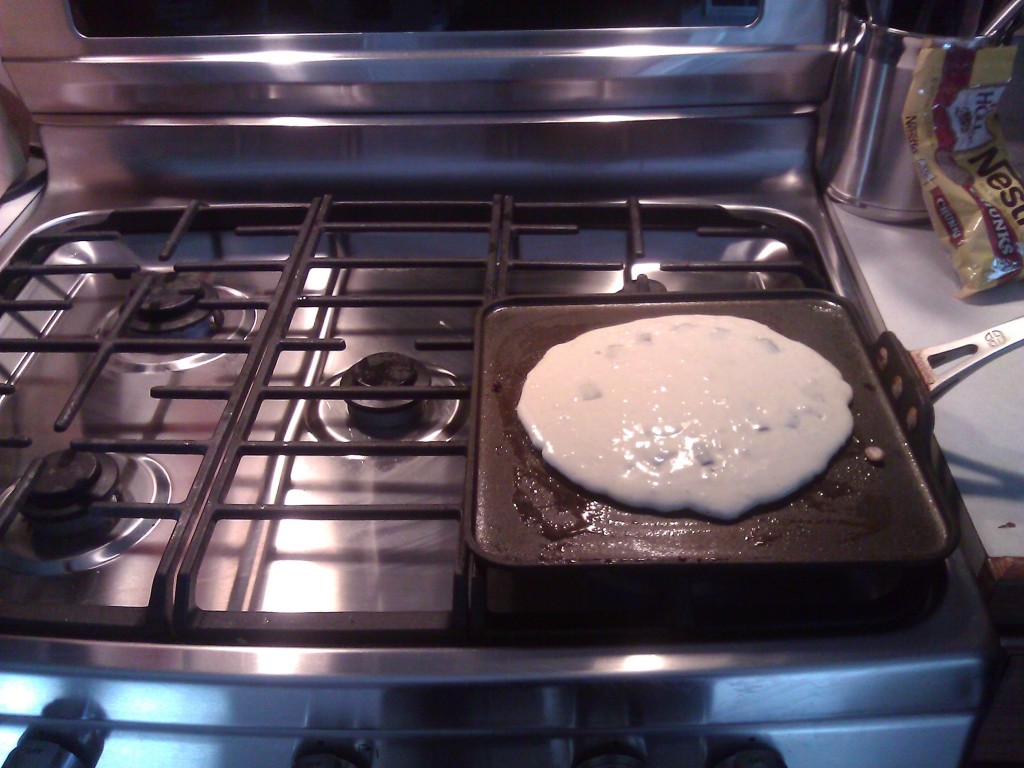
real vermont maple syrup...If you've never had it - try it. I cant go back to the fake stuff.

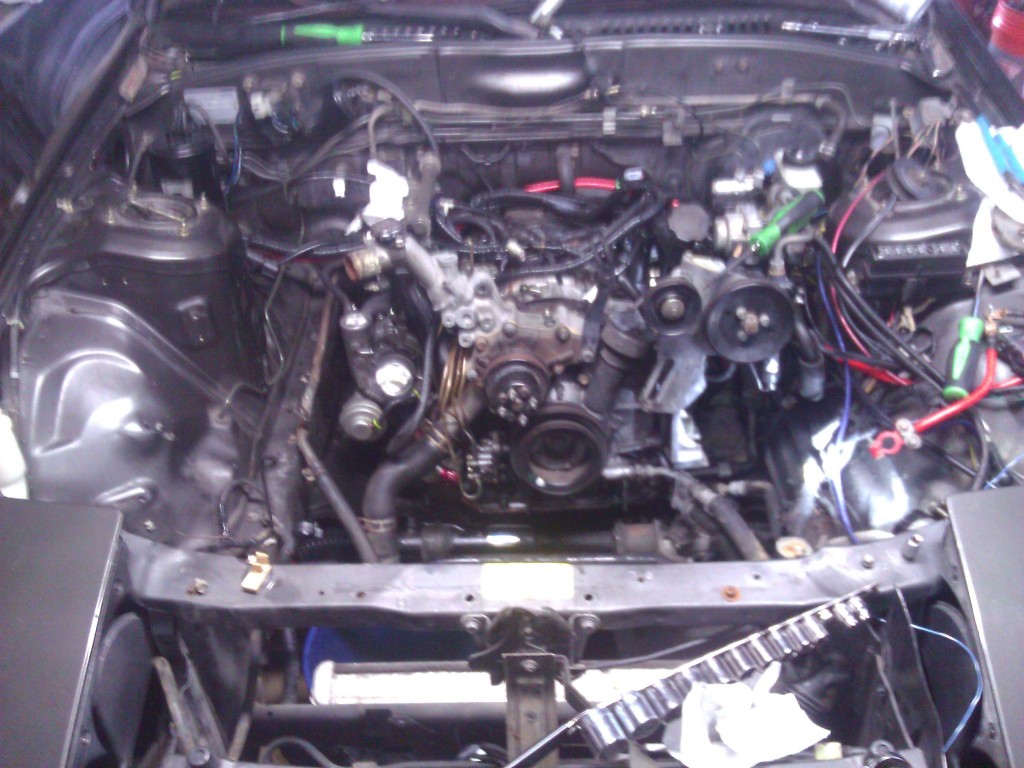
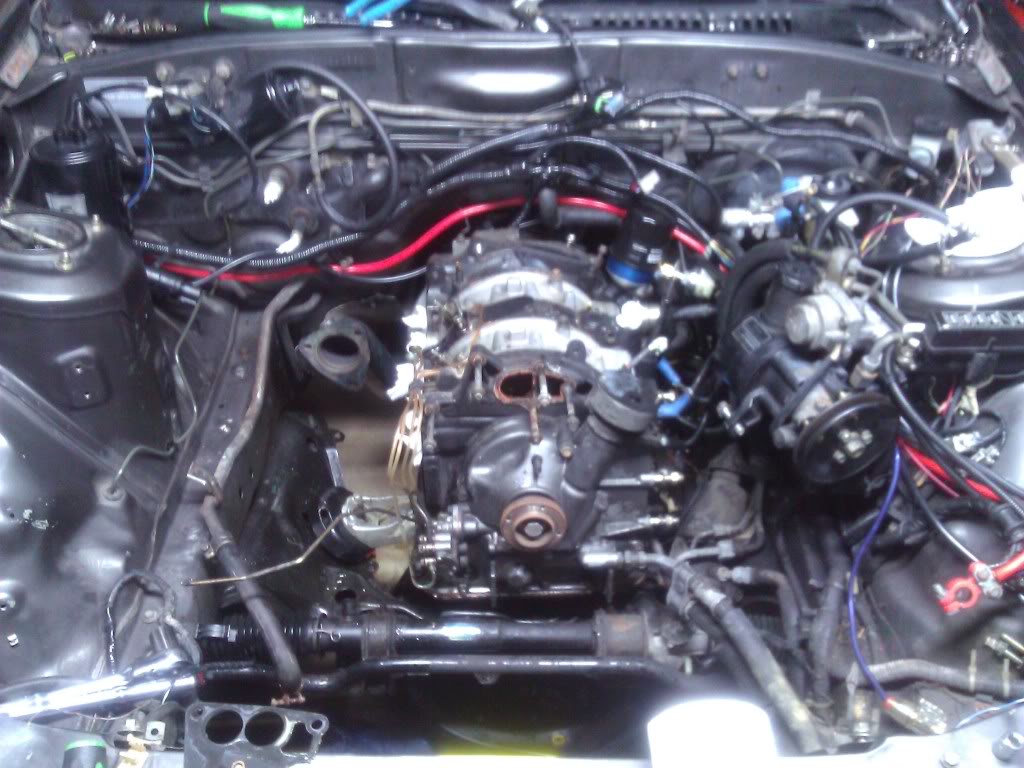
I tore the A/C apart. Removed safely in case I ever choose to re-add it.
shitty picture, but the battery tray and compressor and lines are removed. I am thinking of putting the battery in the passenger bin...undecided again. More work...
comments welcome
real vermont maple syrup...If you've never had it - try it. I cant go back to the fake stuff.
I tore the A/C apart. Removed safely in case I ever choose to re-add it.
shitty picture, but the battery tray and compressor and lines are removed. I am thinking of putting the battery in the passenger bin...undecided again. More work...
comments welcome
11-11-12, 08:48 PM
#165
Tasty looking flapjack, indeed.
Why are you considering battery relocation?
It is not a trivial project, a goodly part of the interior needs removing and supplies aren't cheap.
It does free up some valuable real estate in the bay and is potentially beneficial to chassis balance.
Why are you considering battery relocation?
It is not a trivial project, a goodly part of the interior needs removing and supplies aren't cheap.
It does free up some valuable real estate in the bay and is potentially beneficial to chassis balance.
11-12-12, 11:16 AM
#166
Mostly for the appearance in the engine bay, plus added room now that I am doing a Vmount. It would make ducting that side easier. I will have to read up on previous peoples attempts. I asked my dad how I would go about jumping if the battery were to die, he said I could add battery posts like his BMW in the engine bay, sounds like a cool idea and a nifty way to utilize the factory wire that is in the location. Relocating would also mean that I can rewire the power wires to the megasquirt so they go from the passenger footwell to the passenger battery tray, eliminating 10+ feet of unnecessary cable. After looking over your thread I really want to clean up my nasty wires in the engine bay and make it nice and pretty. I love the attention to detail.
Looks like I failed at including the image of the removed hard lines and compressor. Here it is
Looks like I failed at including the image of the removed hard lines and compressor. Here it is
11-12-12, 07:57 PM
#167
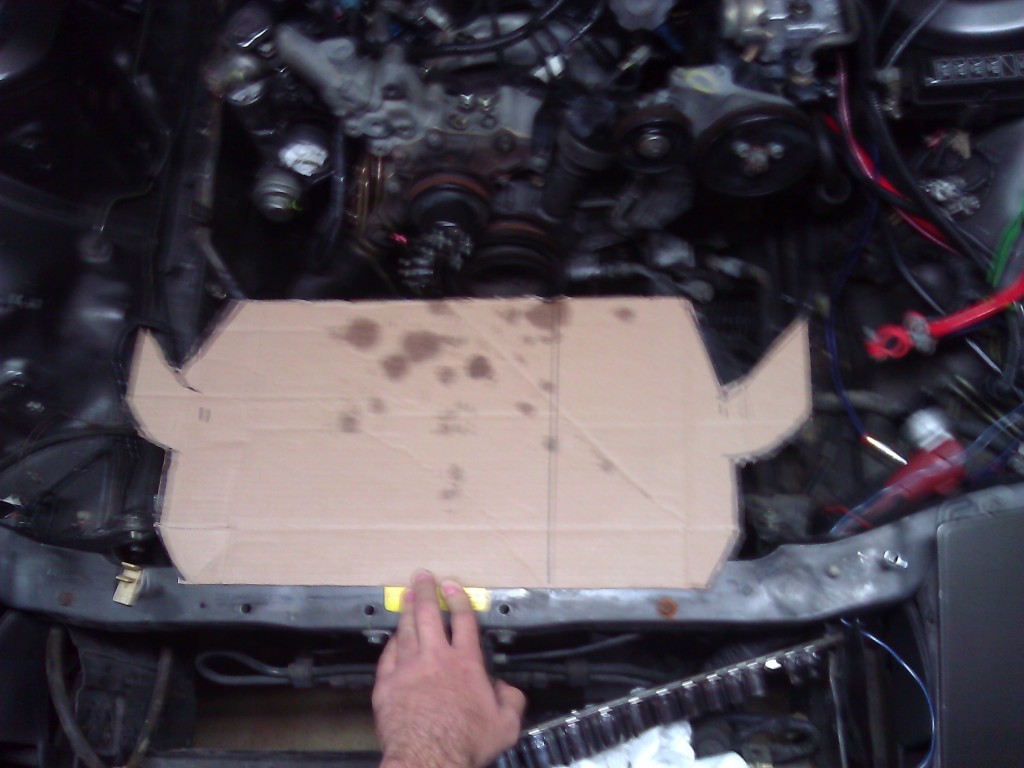
Again ,sorry about the shitty picture.....but here is an Evo 8 intercooler mock up. Found a local guy willing to sell it with a bunch of piping for $100. Will the intercooler be good nuff for say 15 psi? Water injection will be there as well.
The angled end tanks make this even easier!
The angled end tanks make this even easier!
11-17-12, 11:43 PM
#168
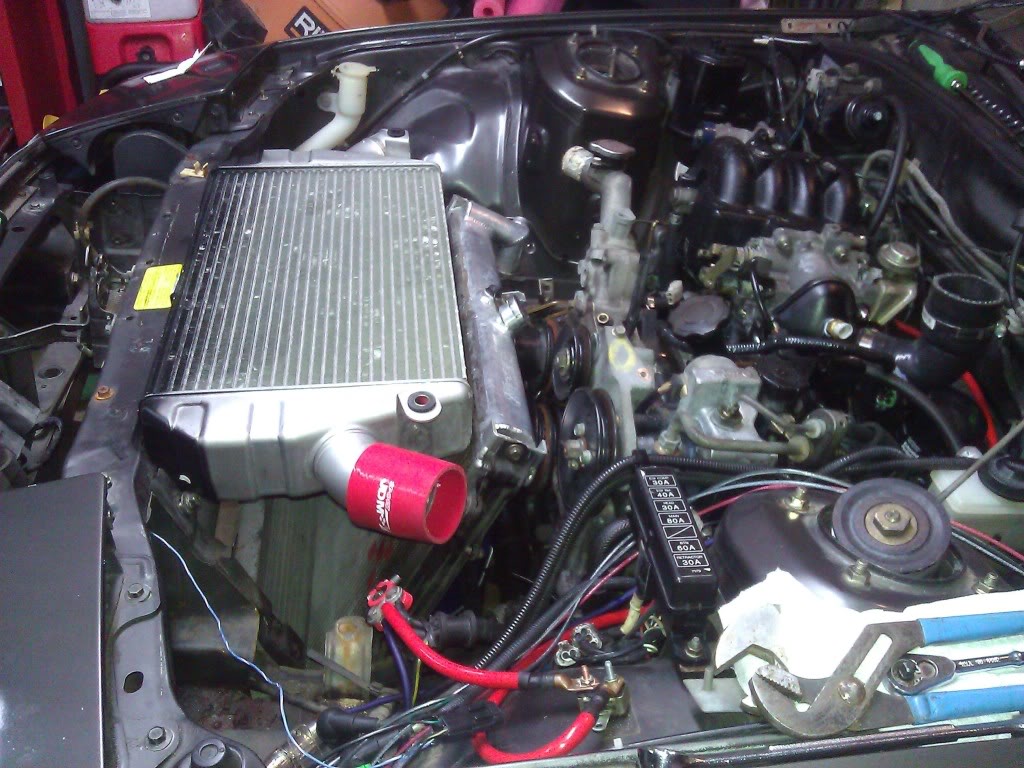
Evo intercooler plus piping. He gave me a bunch of t bolts along with some cheapy couplings.

rough location. I need to move the oil cooler forward so I can angle the radiator a bit more.
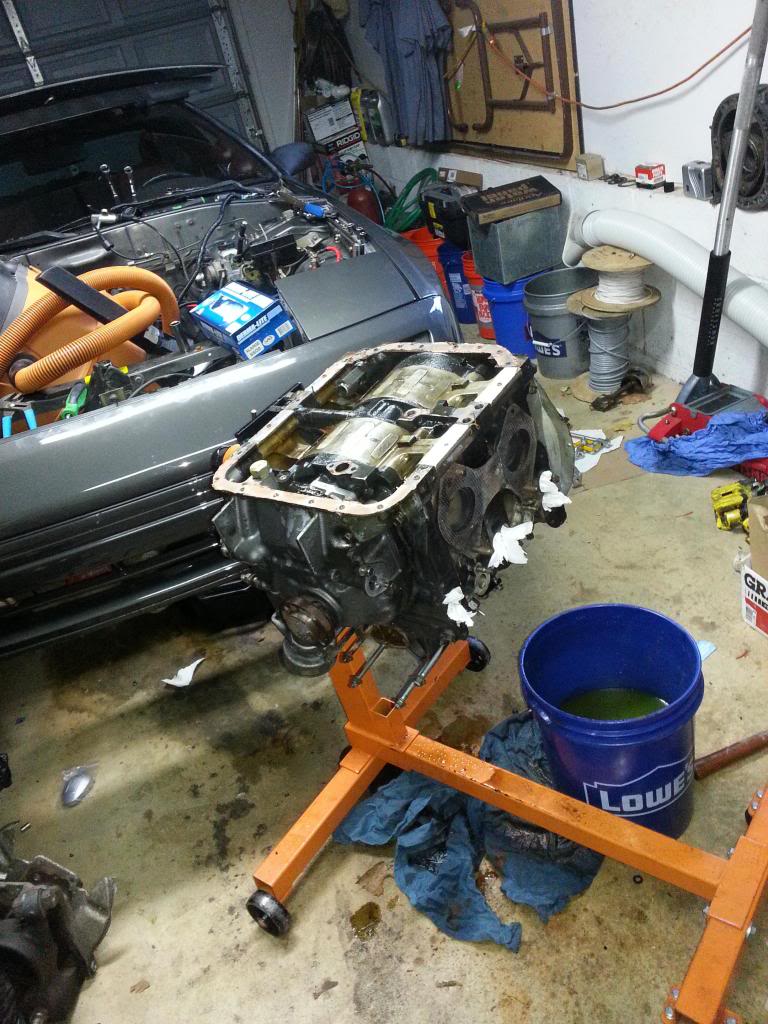
Almost down to the block...I'm a little afraid to rebuild this. I watched it get rebuilt last spring - my fear is missing a step or installing something incorrectly...
I'm gonna work on getting a better camera here shortly. I hate how crappy these pictures look.
rough location. I need to move the oil cooler forward so I can angle the radiator a bit more.
Almost down to the block...I'm a little afraid to rebuild this. I watched it get rebuilt last spring - my fear is missing a step or installing something incorrectly...
I'm gonna work on getting a better camera here shortly. I hate how crappy these pictures look.
11-22-12, 12:01 PM
#171
Happy Thanksgiving everyone! I am thankful for, gasoline...and rotary engines...and turbos....but most importantly my family for supporting me and allowing me to take up the garage for the last year to do all this work, all while trying to take care of a one year old baby!
Engine is out! Pulled the flywheel and oil pan. I would have taken the front bolt and cover off but my daughter is napping and I cant start the air compressor. I will have it disassembled tonight!
Engine is out! Pulled the flywheel and oil pan. I would have taken the front bolt and cover off but my daughter is napping and I cant start the air compressor. I will have it disassembled tonight!
11-22-12, 08:08 PM
#172
Everything came apart smoothly. I'll post this up top so it doesnt get lost....whats a good rebuild kit?
I shouldnt have to do too much cleaning!
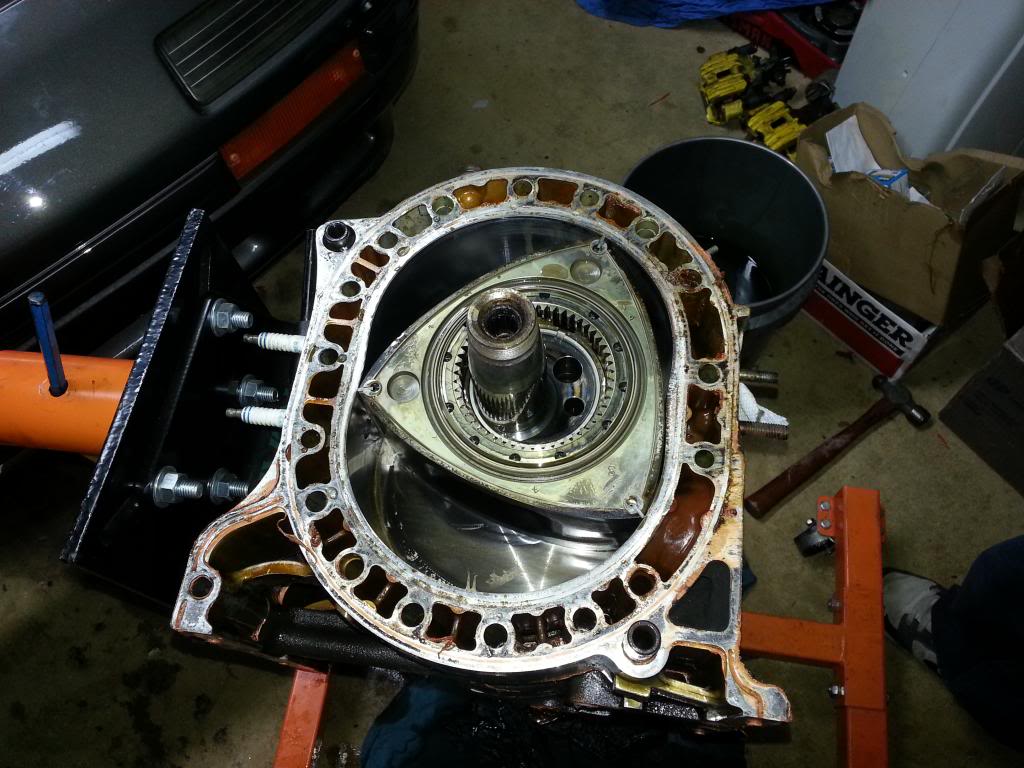
I found the problem!
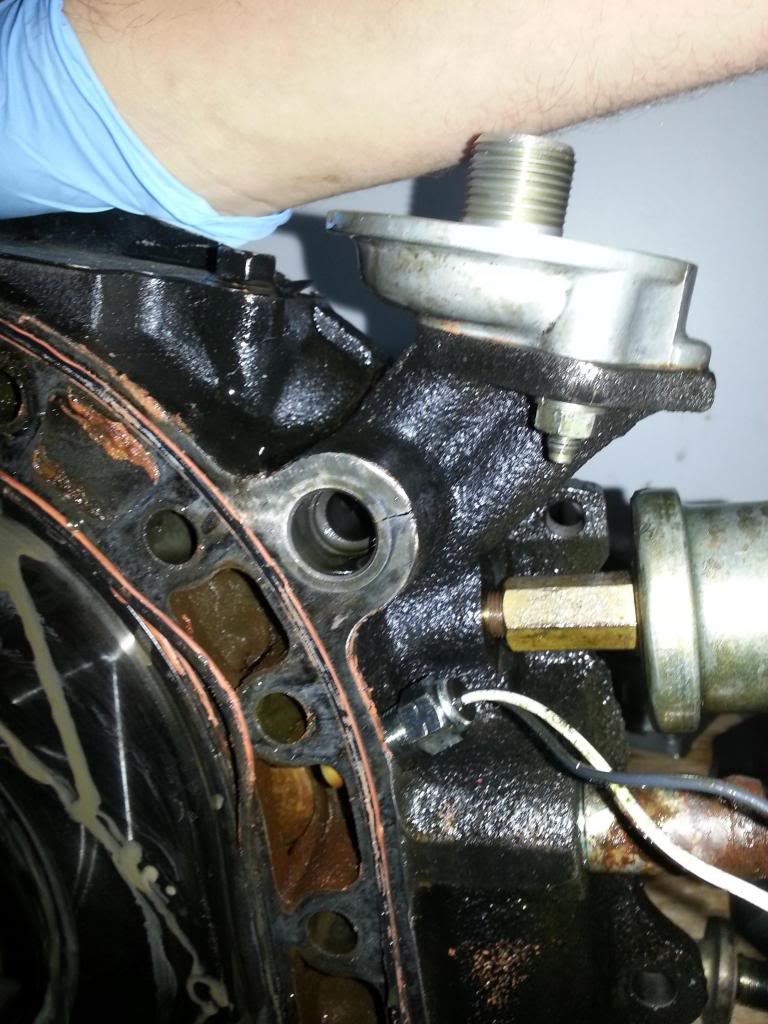
stop leak......
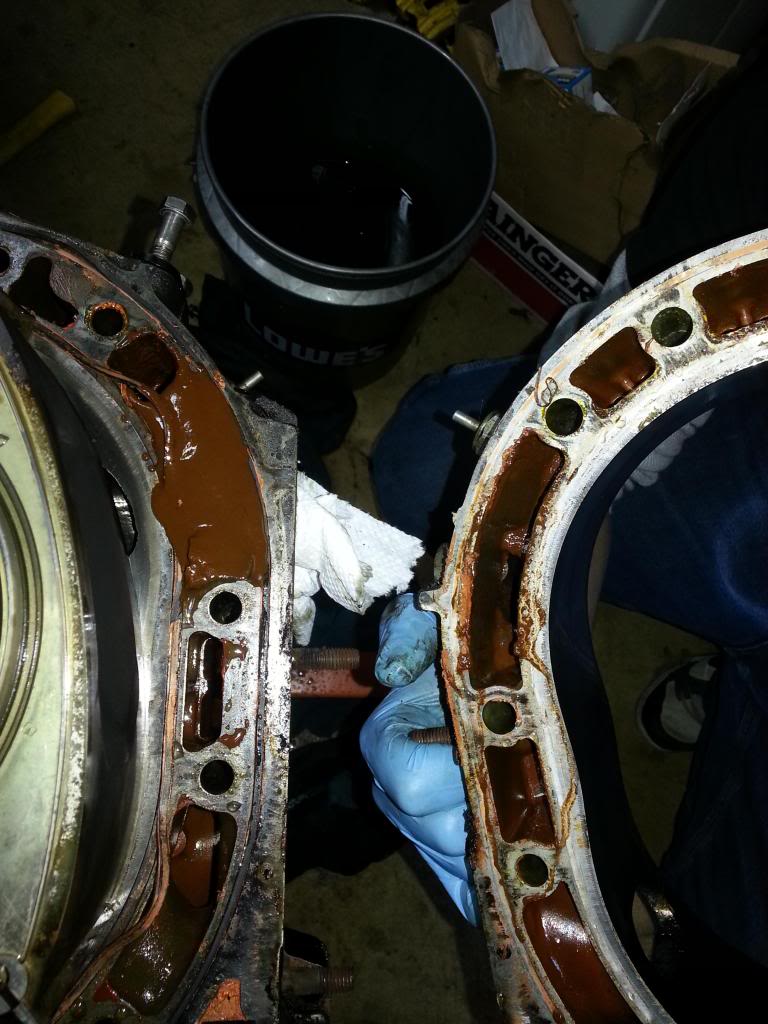
wow that stuff is nasty!
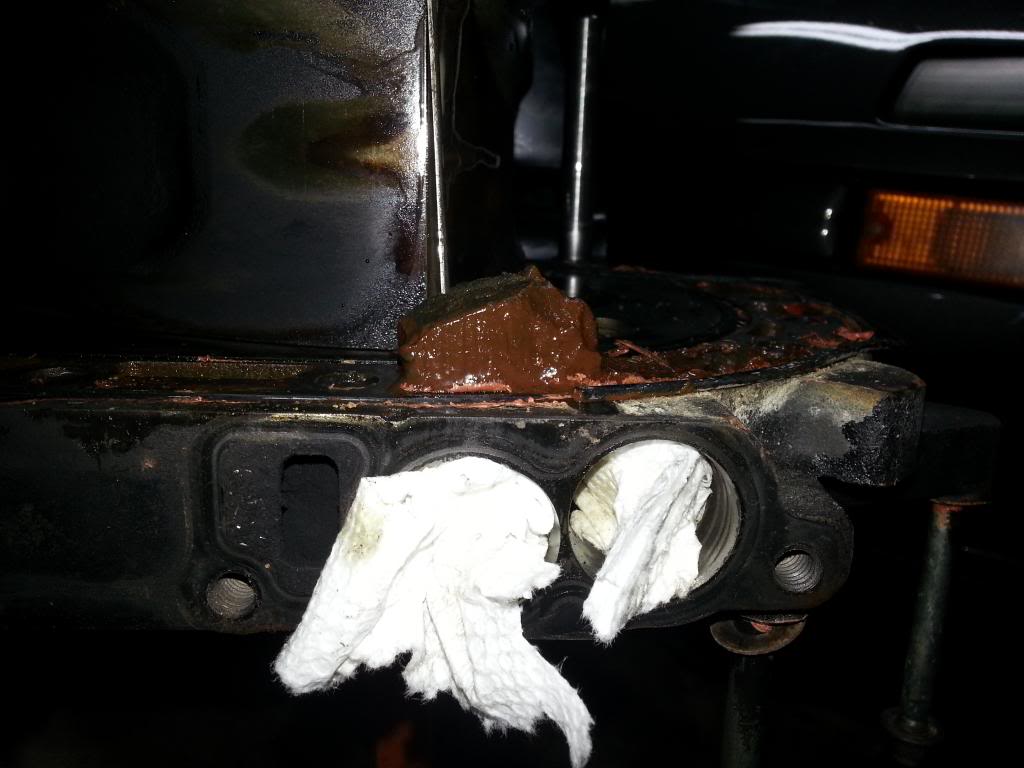
my coolant seals....they were reused...Ill take closer pictures of my housings, rotors, and ports once I get a little bit of time to clean them up.
I shouldnt have to do too much cleaning!
I found the problem!
stop leak......
wow that stuff is nasty!
my coolant seals....they were reused...Ill take closer pictures of my housings, rotors, and ports once I get a little bit of time to clean them up.
11-23-12, 05:01 PM
#175
yup. it was spewing oil. I guess it detonated when using the autotune feature with megasquirt. it's alright. this engine was a ******* hackjob and a half...I'm gonna build it right this time. Needs to be reliable at the racetrack in the spring!