DodgemSquad - Jaymo's FC (mine)
#1
DodgemSquad - Jaymo's FC (mine)
Yet ANOTHER car to add to the list of cars i've owned. But im sure this time im going to bond with it! It has lots of power and makes me smile everytime i drive it! (something I havent had with a car since my sil-80)
Heres the spec currently: (things in red are what i've discovered/changed/removed)
Engine:
13B-T Rotary Engine
HKS Mushroom Filter
HKS Dump Valve <- May be removing yet
Decat
Cat back exhaust with twin pipes <- Discovered to be a Kakimoto System
Uprated Diff <- Seems to be either a 1.5 or 2 way but havent identified whether its cusco or kaaz yet
Uprated Exedy clutch
Sure theres more done to the engine than has been listed....Need to check the ECU as theres no Fuel cut and no speed restricter and is definately running more than 200bhp+exhaust and breathing mods! (boost is still .75 bar)
Exterior
Front and rear Tow straps
Full BN Sports Bodykit
GarageBB.com BGW
Impreza clear front bumper Indicators custom mounted <- Going to look into something better suited
Fiat Bravo smoked side repeaters modified to create sidellights <- Going to look into something better suited
Domo Kun luck charm <- Removed and sentanced to death
Full custom graphics by stickmeup.co.uk <- Removed
Alloys
ABC Exclusive Alloys
18" x 10" Rear
18" x 9" Fronts <- Currently for sale and looking to change them for something aggressive
Suspension
Full Tein suspension with pillowball top mounts
Cusco front strut brace
Interior
Hydraulic Handbrake <- works ok, but think better rear pads are needed
HKS Boost Gauge <- Re-routed wire/hose and relocated gauge
HKS Turbo Timer
Bride drivers seat
Bride drivers side seat mount
Raceland 4 point harness
Carbon Centre Console <- Sold and replacing with standard fascia
Stereo relocated to glovebox <- Going back in the center console
Chrome Rear cage <- Needs moving further back as currently in the wrong position
Nardi personal Wheel <- Changing for something my taste (White vip wheel)
Still has the JDM rescue flare in footwell
Heres how it looked...as most probably remember:

All well and good for neil who used it to advertise his company etc...but the decals were not for me! So they had to come off.....
Here's how the car is currently sitting....But with more things to change yet... (eg, wheels...some more lows, and small tweaks here and there.....also 1 or 2 stickers left to remove!)


RIGHT, I 'THINK' the wiring is sorted.....me and Mark spent most of this morning tracing wiring and finding 'suspect' wiring.
What we found first off was a bit of a ******* joke to be honest and im not trying to point the finger here but all I will say is....If you CANT do wiring properly, DONT DO WIRING AT ALL!!!
Here's some pictures of what we found :wack:
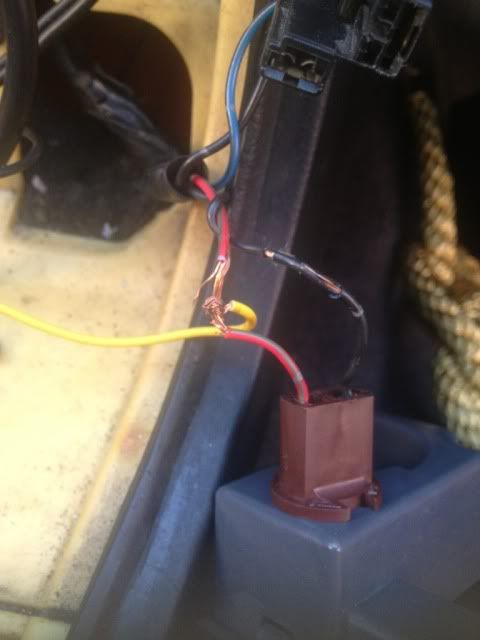
The gauge wiring for Illumination into the cigarette lighter (twised together and barely taped to insulate)
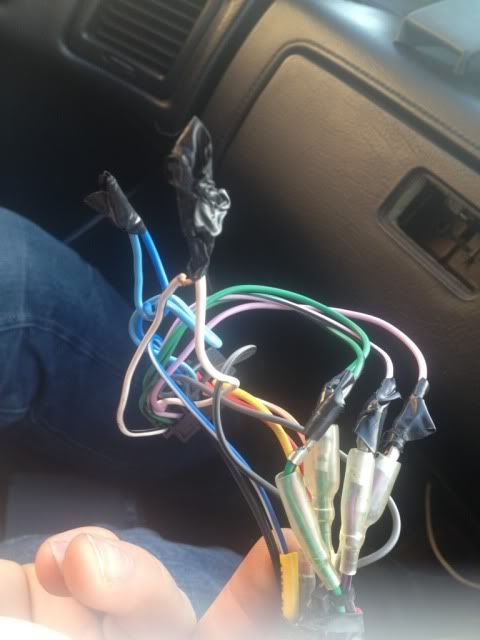
The stereo had been relocated into the glove box....heres the wiring on the stereo loom (again just twisted together!)
I needed a few new tools for work, one being a crimper so took a trip out to get some supplies as we knew we'd be needing some crimps ETC to sort this!
We sorted all of that and put the car back together....seemed ok until i went to test drive, the fuse popped again within 1 minute.
So investigated further, we found twisted wires together on the tail lights, so Mark re-did the connections there.
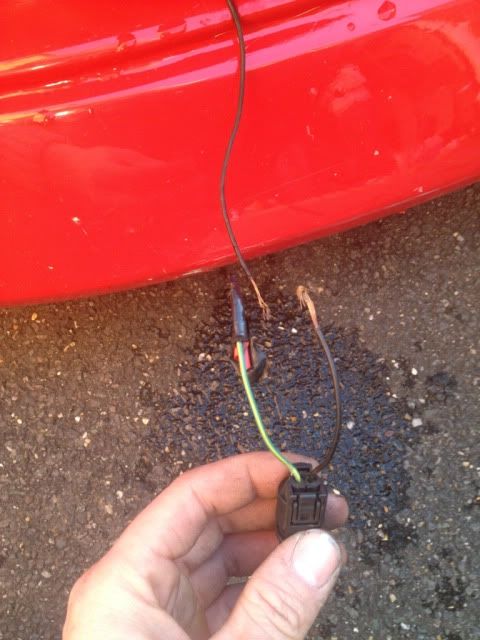
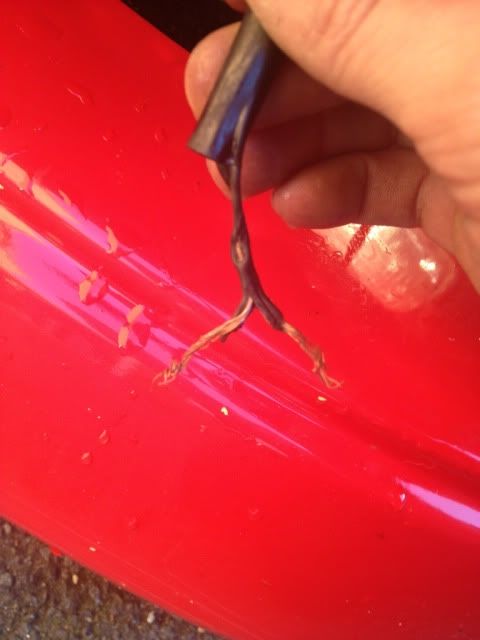
I also found what i think was the main cause of the short wiring...The sidelight wiring was beyond a joke...Again twisted together....and one side even had NO insulation at all! The wires were melted abit so seemed they we short lol.
Pretty pissed off with what we found, but hopefully its all sorted now!
THEN
Wheels turned up:
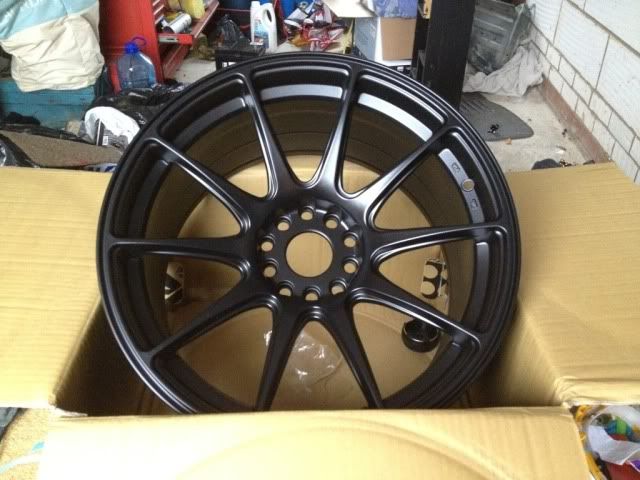
Got fitted:

Needs to go a bit lower, but the teins are maxed out so looking at options regarding that.
Also need to bleed the brakes as the hydro isn't great. Or may need better pads for the rear.
Getting some sidelight lenses for the front bumper.
Heres the spec currently: (things in red are what i've discovered/changed/removed)
Engine:
13B-T Rotary Engine
HKS Mushroom Filter
HKS Dump Valve <- May be removing yet
Decat
Cat back exhaust with twin pipes <- Discovered to be a Kakimoto System
Uprated Diff <- Seems to be either a 1.5 or 2 way but havent identified whether its cusco or kaaz yet
Uprated Exedy clutch
Sure theres more done to the engine than has been listed....Need to check the ECU as theres no Fuel cut and no speed restricter and is definately running more than 200bhp+exhaust and breathing mods! (boost is still .75 bar)
Exterior
Front and rear Tow straps
Full BN Sports Bodykit
GarageBB.com BGW
Impreza clear front bumper Indicators custom mounted <- Going to look into something better suited
Fiat Bravo smoked side repeaters modified to create sidellights <- Going to look into something better suited
Domo Kun luck charm <- Removed and sentanced to death
Full custom graphics by stickmeup.co.uk <- Removed
Alloys
ABC Exclusive Alloys
18" x 10" Rear
18" x 9" Fronts <- Currently for sale and looking to change them for something aggressive
Suspension
Full Tein suspension with pillowball top mounts
Cusco front strut brace
Interior
Hydraulic Handbrake <- works ok, but think better rear pads are needed
HKS Boost Gauge <- Re-routed wire/hose and relocated gauge
HKS Turbo Timer
Bride drivers seat
Bride drivers side seat mount
Raceland 4 point harness
Carbon Centre Console <- Sold and replacing with standard fascia
Stereo relocated to glovebox <- Going back in the center console
Chrome Rear cage <- Needs moving further back as currently in the wrong position
Nardi personal Wheel <- Changing for something my taste (White vip wheel)
Still has the JDM rescue flare in footwell
Heres how it looked...as most probably remember:

All well and good for neil who used it to advertise his company etc...but the decals were not for me! So they had to come off.....
Here's how the car is currently sitting....But with more things to change yet... (eg, wheels...some more lows, and small tweaks here and there.....also 1 or 2 stickers left to remove!)


RIGHT, I 'THINK' the wiring is sorted.....me and Mark spent most of this morning tracing wiring and finding 'suspect' wiring.
What we found first off was a bit of a ******* joke to be honest and im not trying to point the finger here but all I will say is....If you CANT do wiring properly, DONT DO WIRING AT ALL!!!
Here's some pictures of what we found :wack:
The gauge wiring for Illumination into the cigarette lighter (twised together and barely taped to insulate)

The stereo had been relocated into the glove box....heres the wiring on the stereo loom (again just twisted together!)

I needed a few new tools for work, one being a crimper so took a trip out to get some supplies as we knew we'd be needing some crimps ETC to sort this!
We sorted all of that and put the car back together....seemed ok until i went to test drive, the fuse popped again within 1 minute.
So investigated further, we found twisted wires together on the tail lights, so Mark re-did the connections there.
I also found what i think was the main cause of the short wiring...The sidelight wiring was beyond a joke...Again twisted together....and one side even had NO insulation at all! The wires were melted abit so seemed they we short lol.


Pretty pissed off with what we found, but hopefully its all sorted now!
THEN
Wheels turned up:

Got fitted:

Needs to go a bit lower, but the teins are maxed out so looking at options regarding that.
Also need to bleed the brakes as the hydro isn't great. Or may need better pads for the rear.
Getting some sidelight lenses for the front bumper.
#2
It's rare to find one person who is a master in mechanics, bodywork, electronics, and upholstery. Hopefully, the drivetrain is solid. Overall it ooks like a nice ride! I wouldn't take it any lower. That fender gap looks fine.
#4
On the fasttrack!
iTrader: (22)
Joined: Oct 2006
Posts: 2,494
Likes: 2
From: virginia beach, virginia
man, car looks great. i liked the old setup, stickers and all, sorta d1 car status.
the new look is great as well, and trust me, you have no idea how many wiring looms i have had to fix, or chop out and completely start over. but i agree with you, if you can do wiring, DONT!!
keep it up!
Lloyd
the new look is great as well, and trust me, you have no idea how many wiring looms i have had to fix, or chop out and completely start over. but i agree with you, if you can do wiring, DONT!!
keep it up!
Lloyd
#5
Thanks for the comments!
The engine bay is fairly standard looking right now, but I have an NPR Front mount to put in the new year, removing the A/C for weight loss as I think a pipe has gone.
Can anyone tell me the benefit of removing the air pump?
?
The engine bay is fairly standard looking right now, but I have an NPR Front mount to put in the new year, removing the A/C for weight loss as I think a pipe has gone.
Can anyone tell me the benefit of removing the air pump?
?
Last edited by jaymo_sx; 12-24-11 at 11:27 AM.
#6
Nah you need more low. And If I may suggest you should look into some powered by max coils. Great ride and you can slam the car to hell. Other then that you car is clean. Less stickers = better. Oh and Also what Are ur wheel specs
Last edited by Celestial-Fc; 12-24-11 at 12:15 PM.
Trending Topics
#9
Looked at options for lowering more:
Remove 1 collar gaining 3-5mm of low <- Pointless I think
Shorter springs <- not doing as I figure the shock must be near bottoming out which will make the car handle and drive like ****.
Get different coilovers <- May happen in the future.
So for now I have a to do list:
Remove A/C
Remove air pump
Replace alternator pulley for a double pulley and belt (incase 1 snaps)
Remove some other useless crap to lighten a bit.
Get more Lock via modified hubs and after market lower arms.
#10
I was planning on attending Norfolk Drift day yesterday.......so during the week planned I was going to do a coolant flush, thermostat change, oil and filter change to make sure the day went alright.
Friday came, and headed to my mates (mechanic and also an FC owner) and got to work.
Drained the oil out, swapped the filter, then drained the coolant out (which was brown as ****! definately due a change!!)
Once drained set on removing the thermostat, first 2 bolts came out fine, then got onto the back bolt and my mate was undoing it, came around halfway out then stiffened up a little. we stopped, had a look, gave some lube then proceeded with caution as It had to come out!
And yep, it snapped. Not a MASSIVE issue.
We then decided we'd need to drill the bolt out and then tap the hole. So used a small drill bit to get a pilot and gauge the remaining bolts depth, and then found a drill bit almost the same size (bit smaller) than the bolt.
Was going alright and managed to drill it out nicely.
My mate then thought as a temp fix for me to get home was to put a self tapper in around the same size, found one pretty much perfect, tried to edge it in a little and see if it would key in, and the housing cracked on the outer part of the hole.
Im not wanting peoples comments of 'you should have done this' or blah blah blah. Im pissed off. these things happen, I just need help finding the best option of sorting it without too much expense or dropping the block out for a new one!
heres a couple (bad) pics showing it!
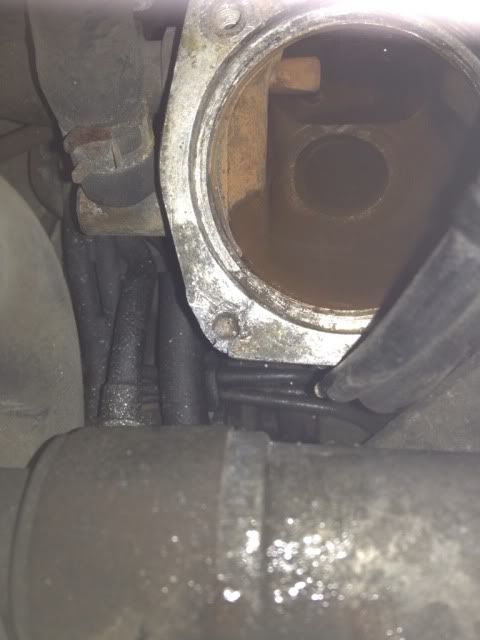
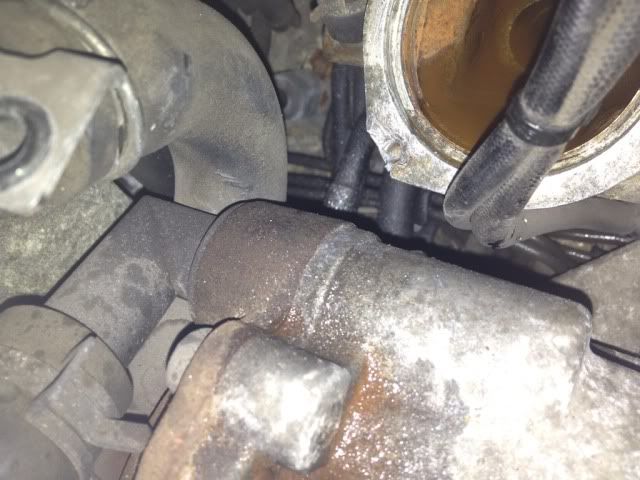
Options I can think of:
1.Ally weld to make up more material, drill it out all the way through and use a nut/bolt as a pinch.
2. new block
Friday came, and headed to my mates (mechanic and also an FC owner) and got to work.
Drained the oil out, swapped the filter, then drained the coolant out (which was brown as ****! definately due a change!!)
Once drained set on removing the thermostat, first 2 bolts came out fine, then got onto the back bolt and my mate was undoing it, came around halfway out then stiffened up a little. we stopped, had a look, gave some lube then proceeded with caution as It had to come out!
And yep, it snapped. Not a MASSIVE issue.
We then decided we'd need to drill the bolt out and then tap the hole. So used a small drill bit to get a pilot and gauge the remaining bolts depth, and then found a drill bit almost the same size (bit smaller) than the bolt.
Was going alright and managed to drill it out nicely.
My mate then thought as a temp fix for me to get home was to put a self tapper in around the same size, found one pretty much perfect, tried to edge it in a little and see if it would key in, and the housing cracked on the outer part of the hole.
Im not wanting peoples comments of 'you should have done this' or blah blah blah. Im pissed off. these things happen, I just need help finding the best option of sorting it without too much expense or dropping the block out for a new one!
heres a couple (bad) pics showing it!


Options I can think of:
1.Ally weld to make up more material, drill it out all the way through and use a nut/bolt as a pinch.
2. new block
#12
If thats an S5 13BT, I personally would run the S4 waterpump housing, which would then afford you the option of using the aluminum water neck instead of the often brittle plastic S5 neck. The S4 neck can also be drilled to accomodate a water temp probe for a gauge or thermo switch for an Efan (many of the S4 TII's had a thermoswitch already installed in place for the helper fan for the AC condensor)
#13
Rotary Revolutionary
iTrader: (16)
Joined: May 2006
Posts: 3,881
Likes: 2
From: Jacksonville, Tampa & Tallahassee
If thats an S5 13BT, I personally would run the S4 waterpump housing, which would then afford you the option of using the aluminum water neck instead of the often brittle plastic S5 neck. The S4 neck can also be drilled to accomodate a water temp probe for a gauge or thermo switch for an Efan (many of the S4 TII's had a thermoswitch already installed in place for the helper fan for the AC condensor)
You can also take this opportunity to drill and tap the back to the wp housing for a gauge if you havent already, and inspect the waterpump since the coolant seemed to be in such poor condition.
Thread
Thread Starter
Forum
Replies
Last Post


