Return of a Limited....
#26
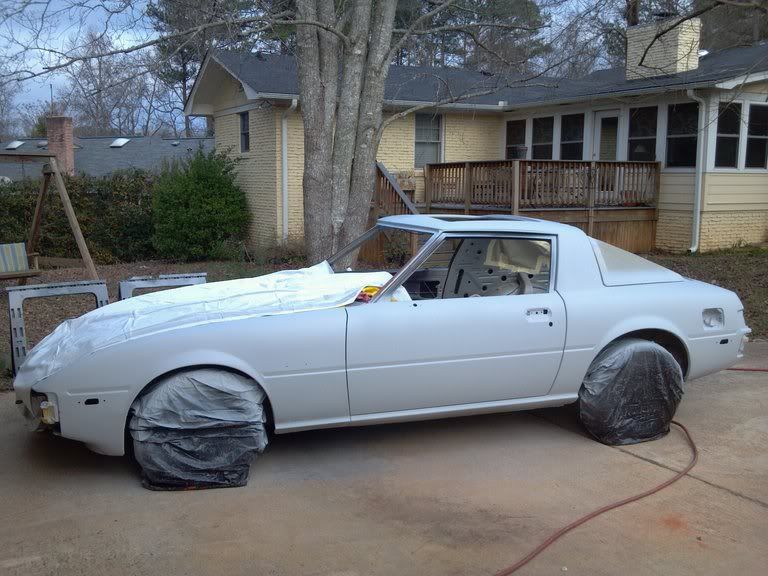
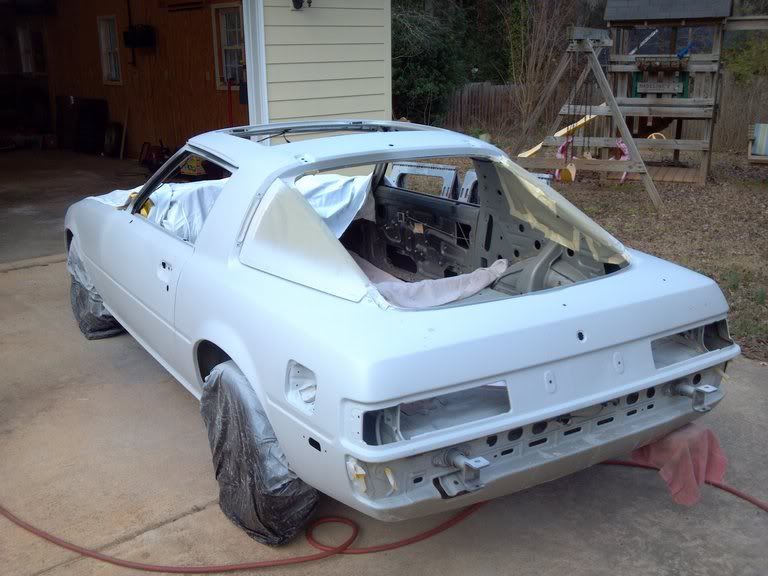
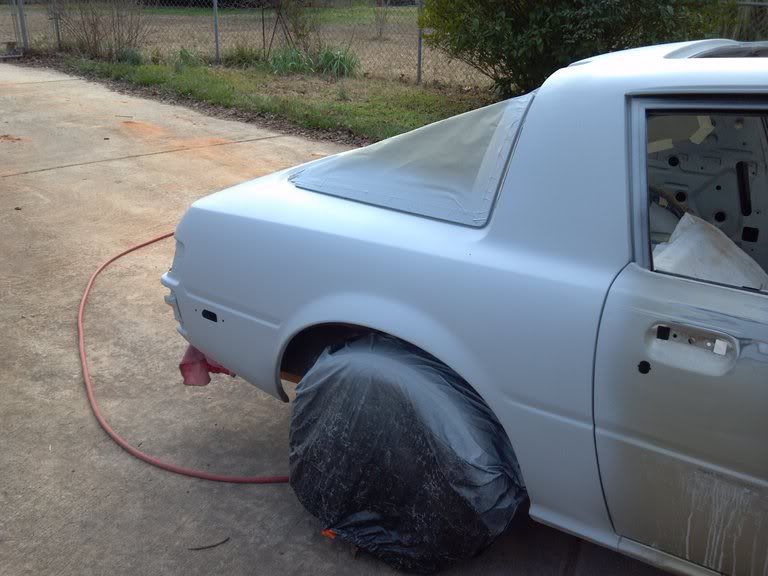
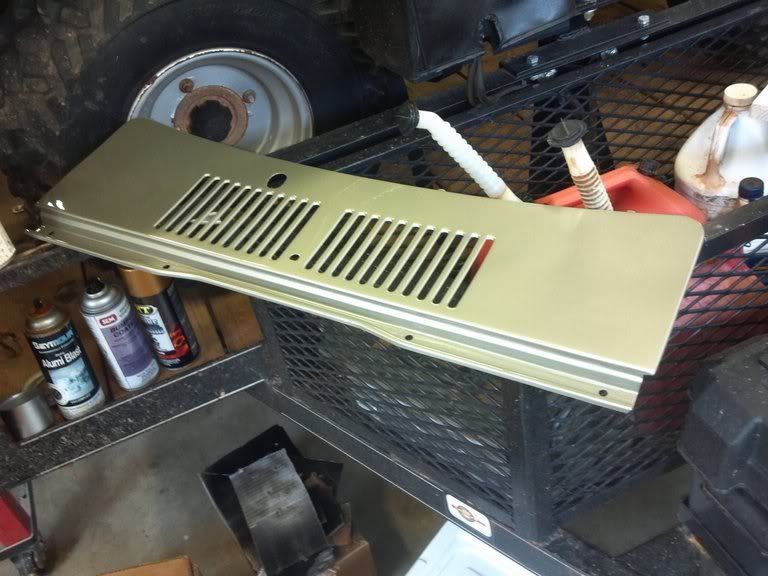
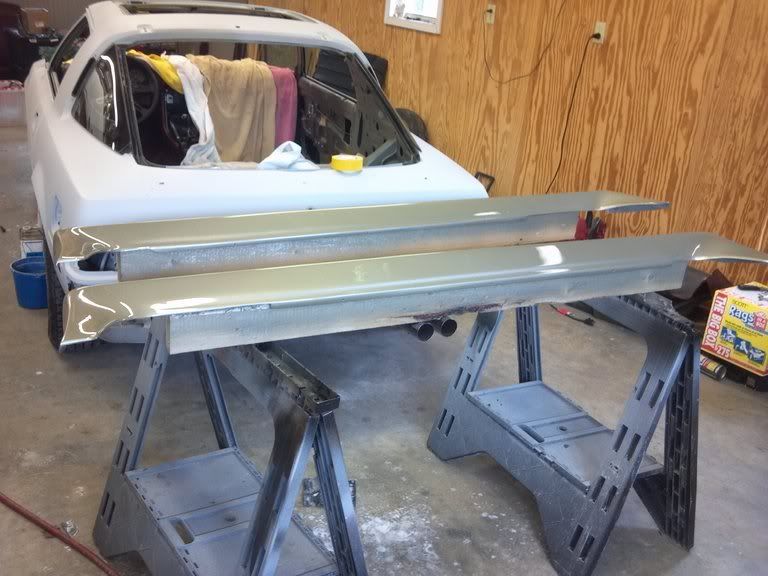
Got some cooperation from Mother Nature this weekend and got a bunch of priming done. Entire drivers side, rear (above bumper), roof, and the pass rear quarter panel were all ready for full primer, so sprayed them while I could. Now to work on getting the rest of the passenger side and hood ready..... Also primed the gas door, front cowl panel, and the sideskirts today. Will have to cross fingers for another good warm weekend soon so I can continue....so far so good, I am happy with my progress....


#27
Always Wanting to Learn
iTrader: (49)
Joined: Aug 2011
Posts: 3,078
Likes: 42
From: Cambridge, Minnesota
Looks awesome, hope the good weather keeps up and you're able to get her done quickly, efficiently, and accurately. Hope it comes out well and looks fresh for you. Are you using an pneumatic (air) paint gun for your car?? Looks like you have a very even coat and I spied an air hose in the last 2 pics..
#28
Looks awesome, hope the good weather keeps up and you're able to get her done quickly, efficiently, and accurately. Hope it comes out well and looks fresh for you. Are you using an pneumatic (air) paint gun for your car?? Looks like you have a very even coat and I spied an air hose in the last 2 pics..
#29
Still working on paint and body, no rush lately, been too cold to spray primer, so not much i can do on that front until I get some at least mid 60's weather....
This weeks project has been figuring out a direct fire mod to do on the car to improve spark, and also eliminate at least one igniter (just dont trust em). Started reading up and asking about DLIDFIS and TFIDFIS setups (thanks T G Farrell and Jeff20B for all your help this week, I now have a way better understanding of the whys and hows of these mods and the benefits they can provide.
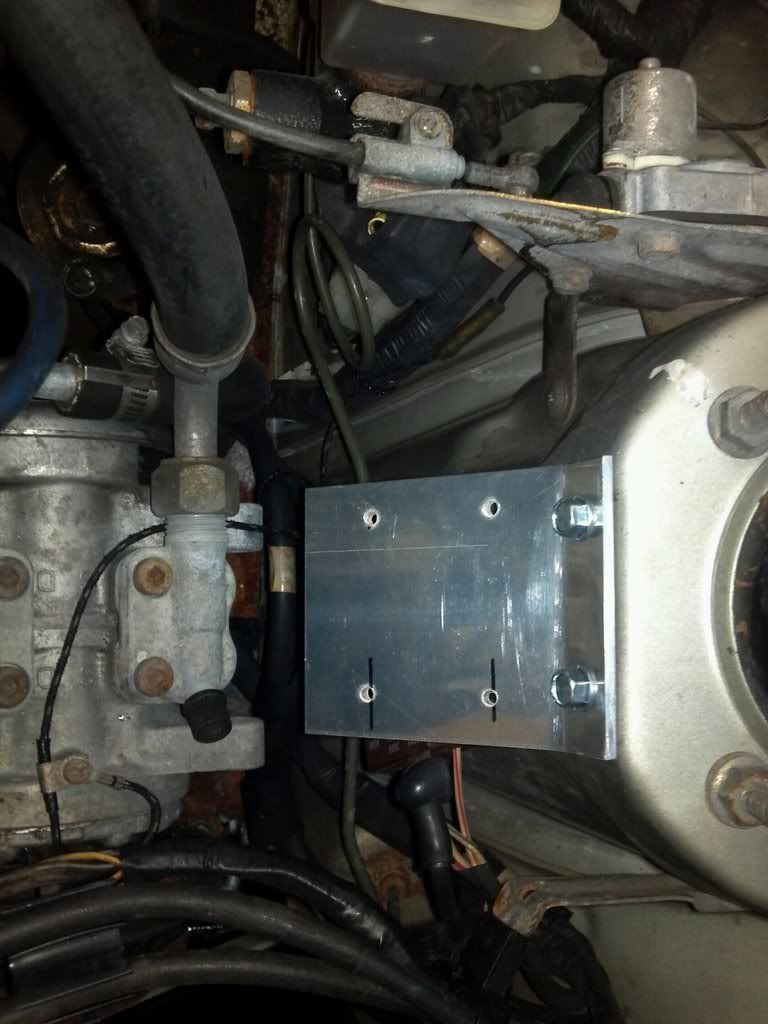
For my car I sorta combined both ideas, as I wanted the setup to look semi-factory as well as be functional. I decided to run the leading ignition off the 2 stock coils thru 2 HEI ignition modules mounted on a bracket i made to go on the strut tower. Going to retain the trailing ignition (just cause) and run it off the stock trailing igniter in the dizzy but use a TFI coil mounted in the space between the 2 stock coils and the strut tower. The reason for the TFI coil is simply space, its shorter than the stock cannister coils, and fits tyhe space I want to utilise perfectly. I found a stock coil bracket from a mid 90's Mazda 626 that will with very little modification (trimming an ear off and redrilling a mounting hole) mount perfectly to hold the coil.
So far, I have gotten the HEI module bracket test fit and the modules temporarily mounted on it so I can run the 8 wires to the modules. Ran out of the proper size heat shrink tubing tonight, so couldnt finish that, will do so tomorrow. I have been taking a few pictures and will have them up sorta as a "step by step" pictorial on this thread soon.
#30
Car is coming along nicely. Looks like you had very little to no rust repair...(lucky dog) Ignition upgrade interests me. I am anxious to do a DLIDFIS myself as I have heard it is a nice upgrade and you can feel the car runs better and revs up smoother.
#31
Today has been devoted to getting my ignition rewired using the DLIDFIS/TFIDFIS i mentioned earlier. Thought I would put up a step by step pictorial of this just in case somebody wants to duplicate the setup. My goal was to make it look as factory as possible, yet be easy to service if needed.
First, I made an aluminum bracket to hold the 2 HEI modules and bolted it to the strut tower:
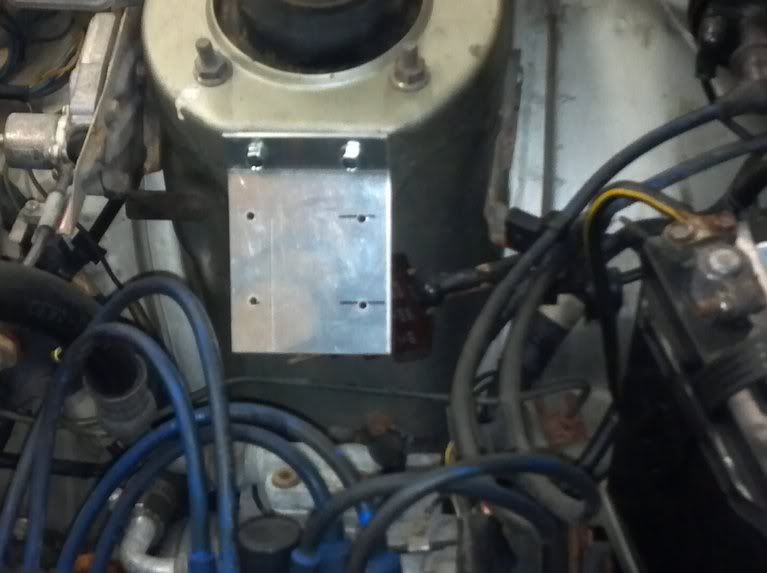
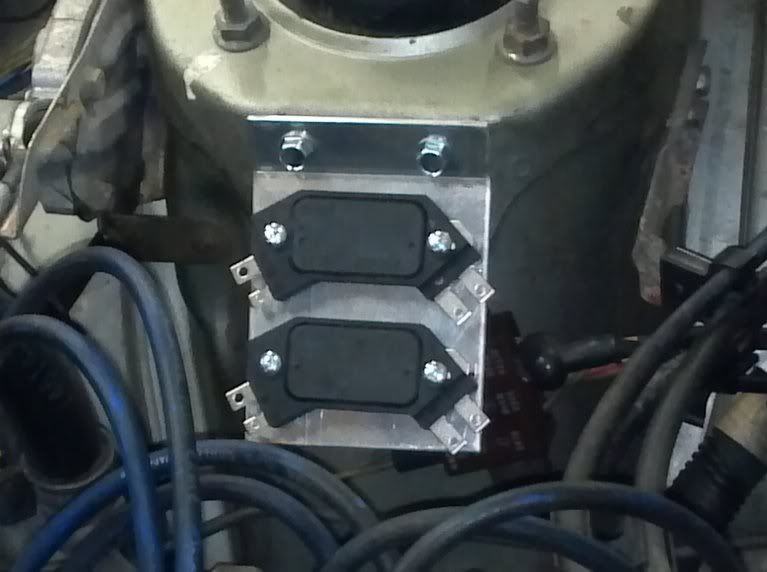
Next, I started wiring the HEI modules, out of the car, as its easier to work on, dont forget to wire the grounds for the modules.
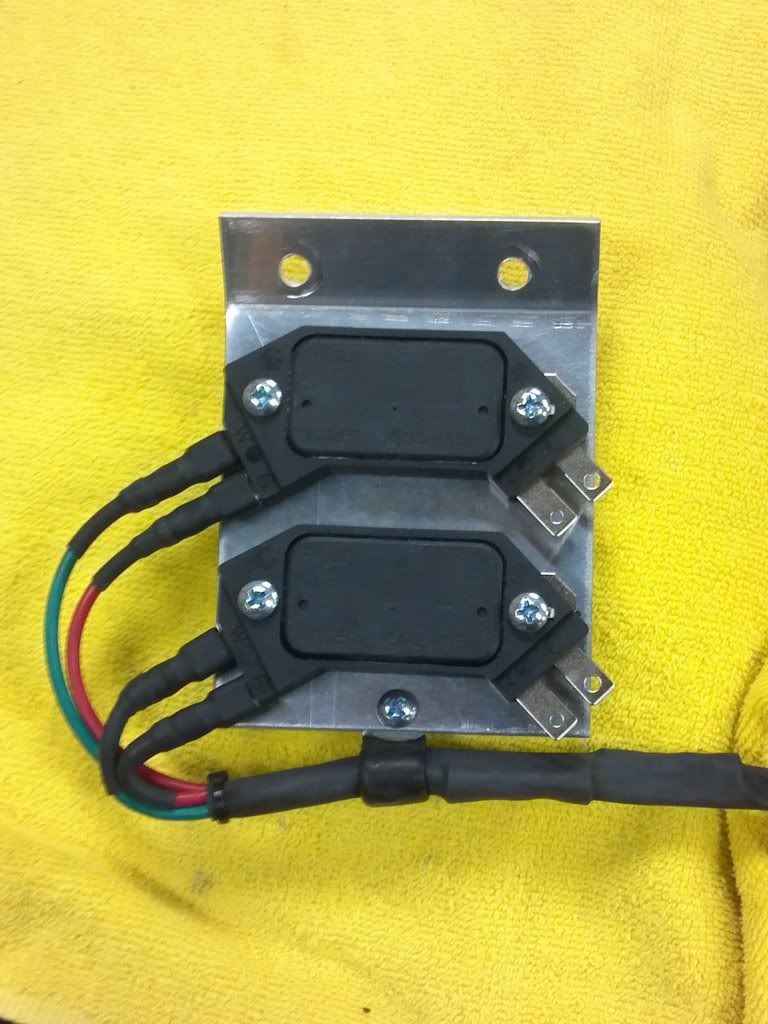
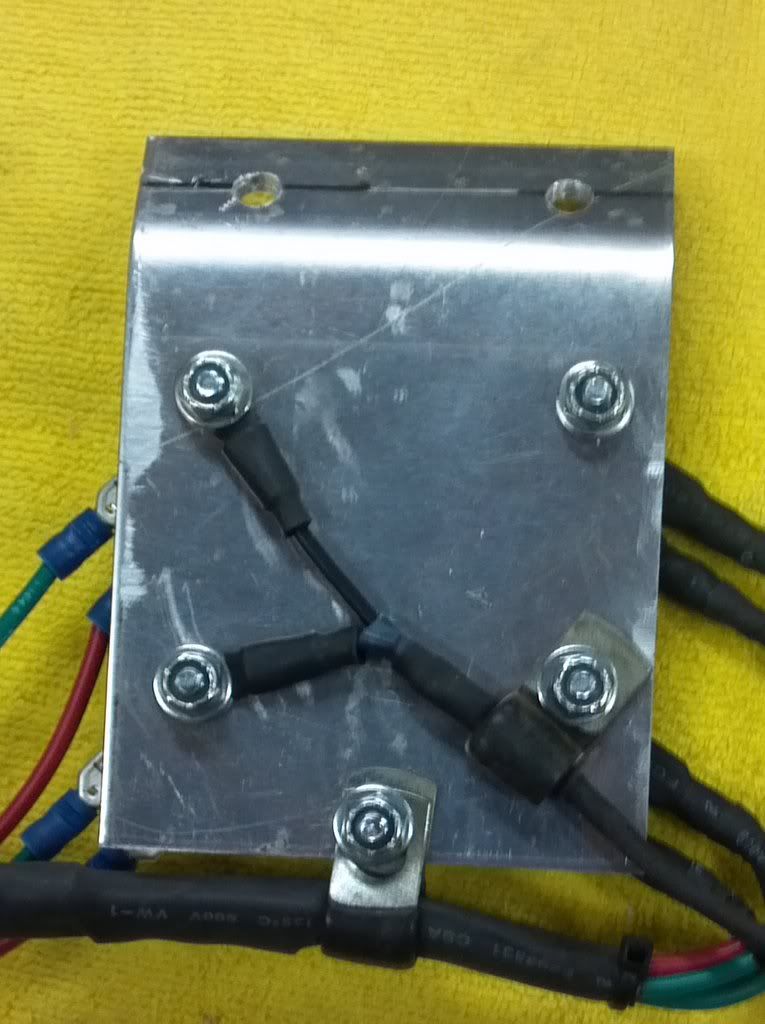
First, I made an aluminum bracket to hold the 2 HEI modules and bolted it to the strut tower:


Next, I started wiring the HEI modules, out of the car, as its easier to work on, dont forget to wire the grounds for the modules.


#32
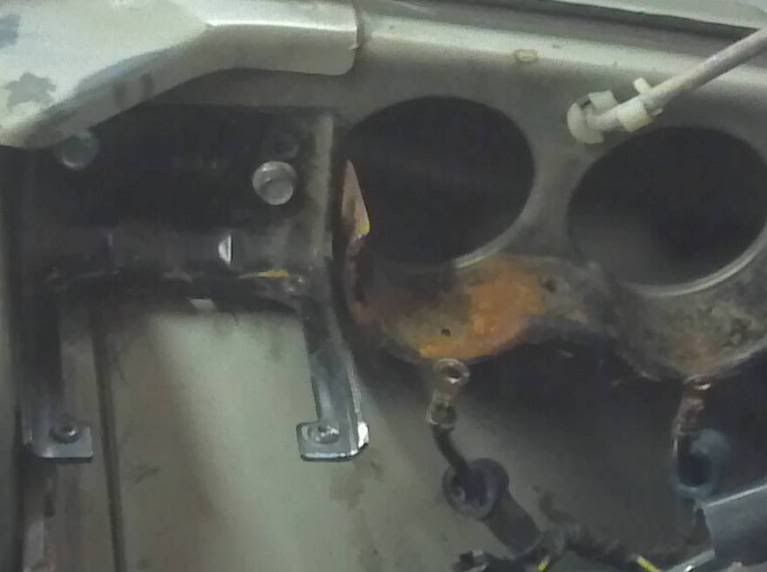
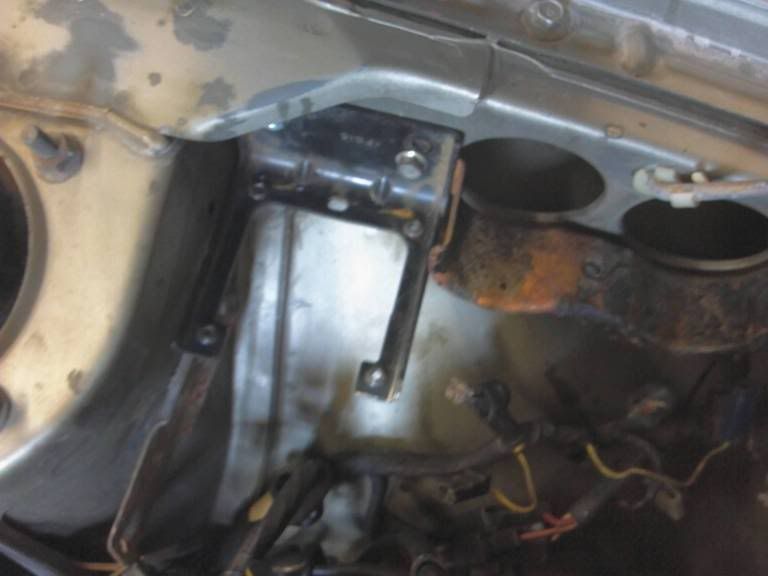
After running the wires per T G Farrell's and Jeff20B's mods, with a very little doctoring to add the TFI coil to the trailing ignition, I mounted the TFI coil bracket on the fender between the stock coils and the strut tower:
Then I hooked all my wires up (per diagrams) ran new custom fit 8mm MSD ignition wires from the leading coils to the leading plugs and from the trailing coil to the distributor cap:
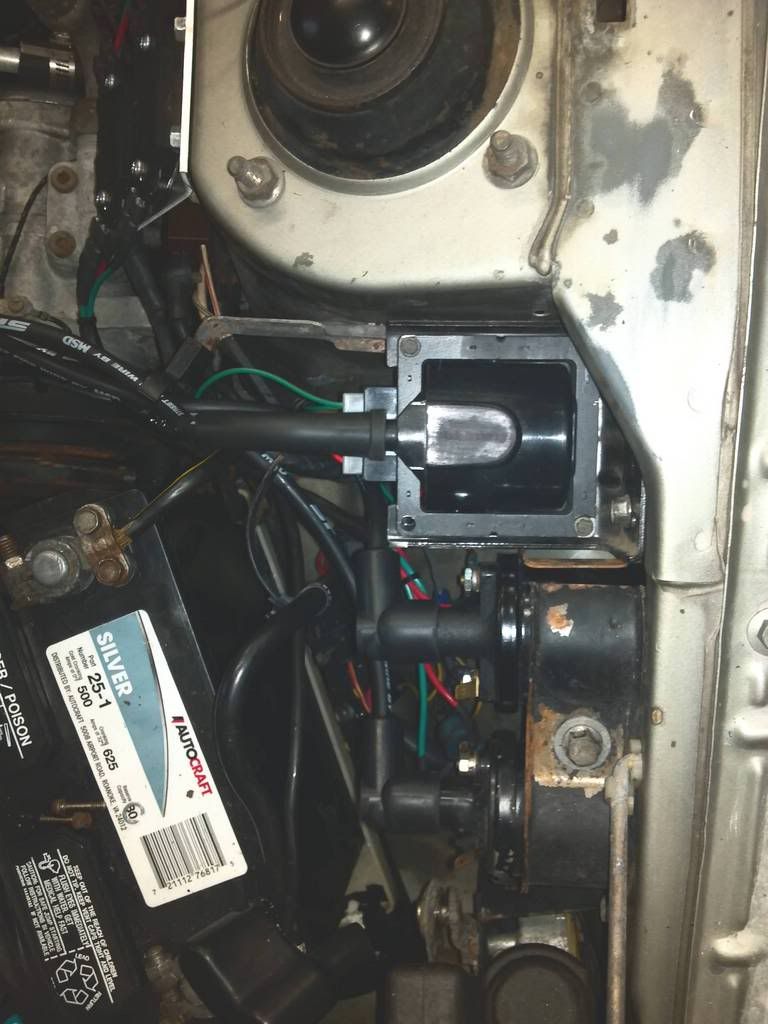
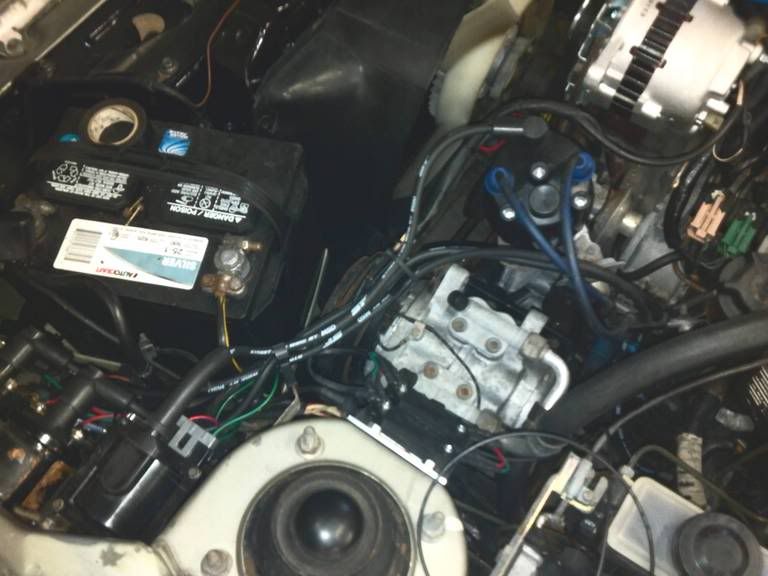
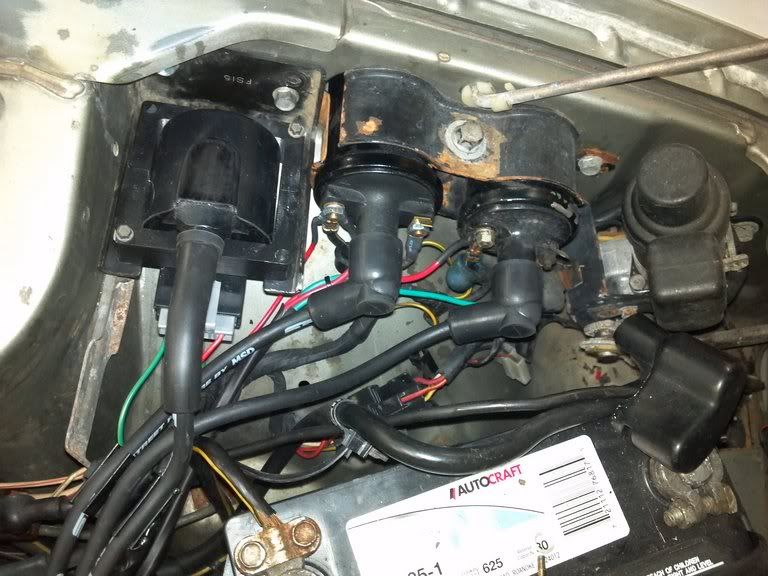
Double checked all my connections, fired it up, cranked good, and ran great, so this mod was a success. Still need to disassemble the module plate again to polish it and to add the heatsink paste on the backside of the modules, but other than that this mod is done. Pictures dont show it, but I have run new plug wires (MSD 8mm) to both trailing plugs as well. Very happy with the look, it truly looks almost factory. Will report any problems/tweaks etc when I get the car back on the road in a few months after paint....


Then I hooked all my wires up (per diagrams) ran new custom fit 8mm MSD ignition wires from the leading coils to the leading plugs and from the trailing coil to the distributor cap:


Double checked all my connections, fired it up, cranked good, and ran great, so this mod was a success. Still need to disassemble the module plate again to polish it and to add the heatsink paste on the backside of the modules, but other than that this mod is done. Pictures dont show it, but I have run new plug wires (MSD 8mm) to both trailing plugs as well. Very happy with the look, it truly looks almost factory. Will report any problems/tweaks etc when I get the car back on the road in a few months after paint....
#33
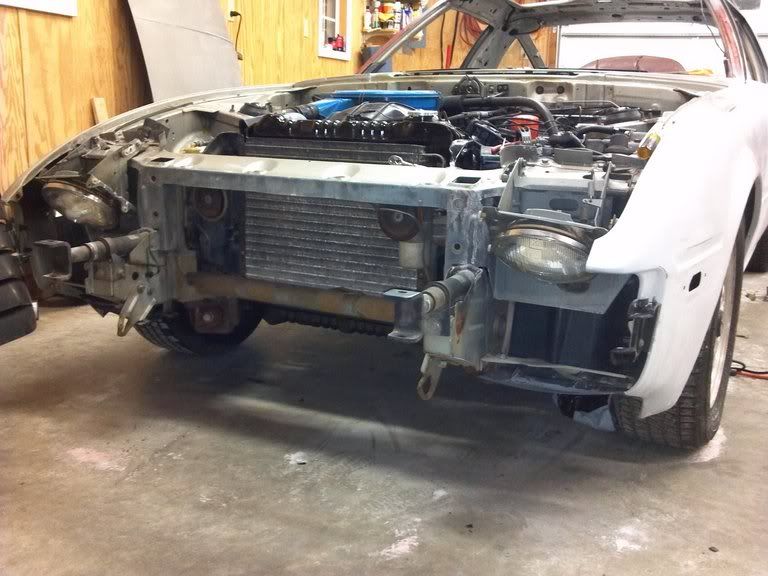
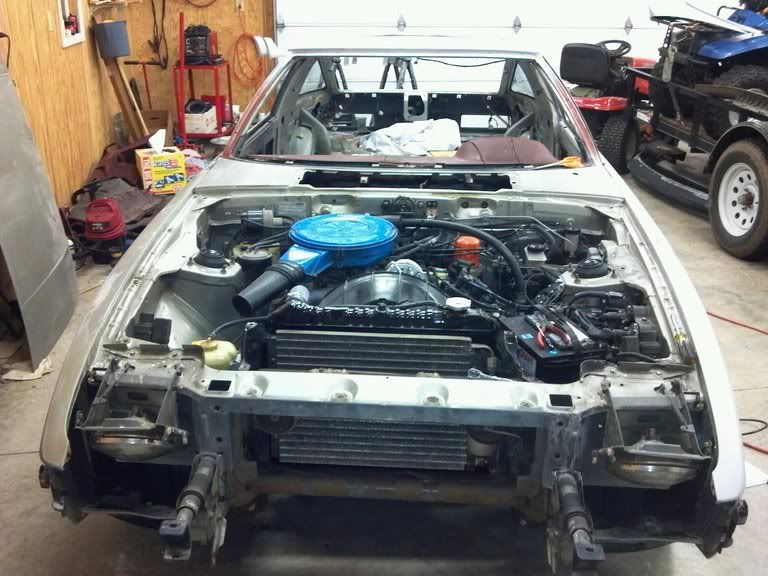
Finally talked myself into pulling the hood and nose off the car for paint....she sure does look funny with no frontend on it....sure is easy to get to stuff under the hood though....glad I started bagging and tagging all the nuts and bolts that came off this car...no way i can remember what went where. Also taking detail pictures of anything that I "think" might be confusing when going back together (wire routing, etc)...little lesson I learned a long time ago working on old Camaros...


#34
Nice progress. I also own an '83 LE I do still have badges and stuff laying around. If you need then you will have to wait until summer as I am currently deployed. I am also going to do some bodywork and repaint mine this summer.
Best of luck and great story BTW.
Best of luck and great story BTW.
#35
Thanks for the offer on the LE badges, i have my originals that are in good shape and bought a set off a forum member who just parted out an LE...(I think i bought about half the car,lol) Been trying to round up "2'" of everything LE...bought a 2nd set of LE wheels, have 2 sets of center caps, several miscellaneous red interior pieces, only thing I am currently looking for is an extra stock radio head unit, I have an extra EQ, stick balancer, and amps... I figure this stuff isnt going to get any easier to find, especially since there cant be too many of these cars left....good luck working on yours, give me a shout when ya get home and get started if ya need anything!
#36
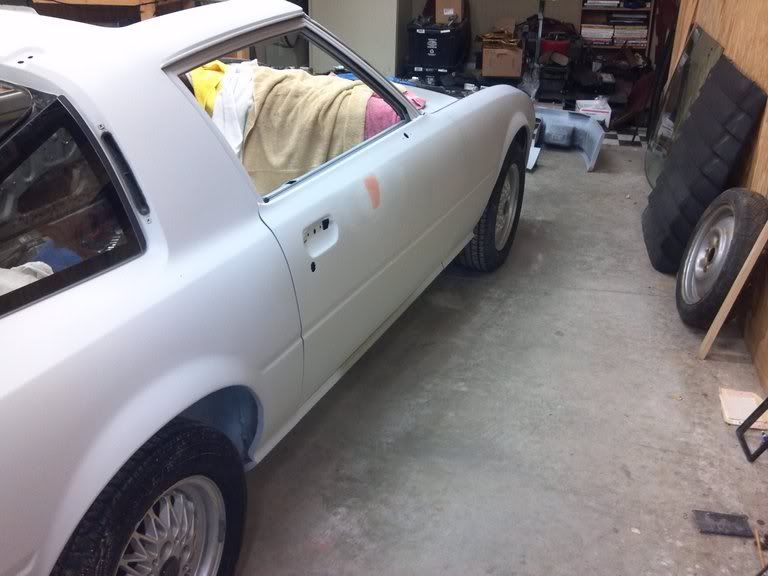
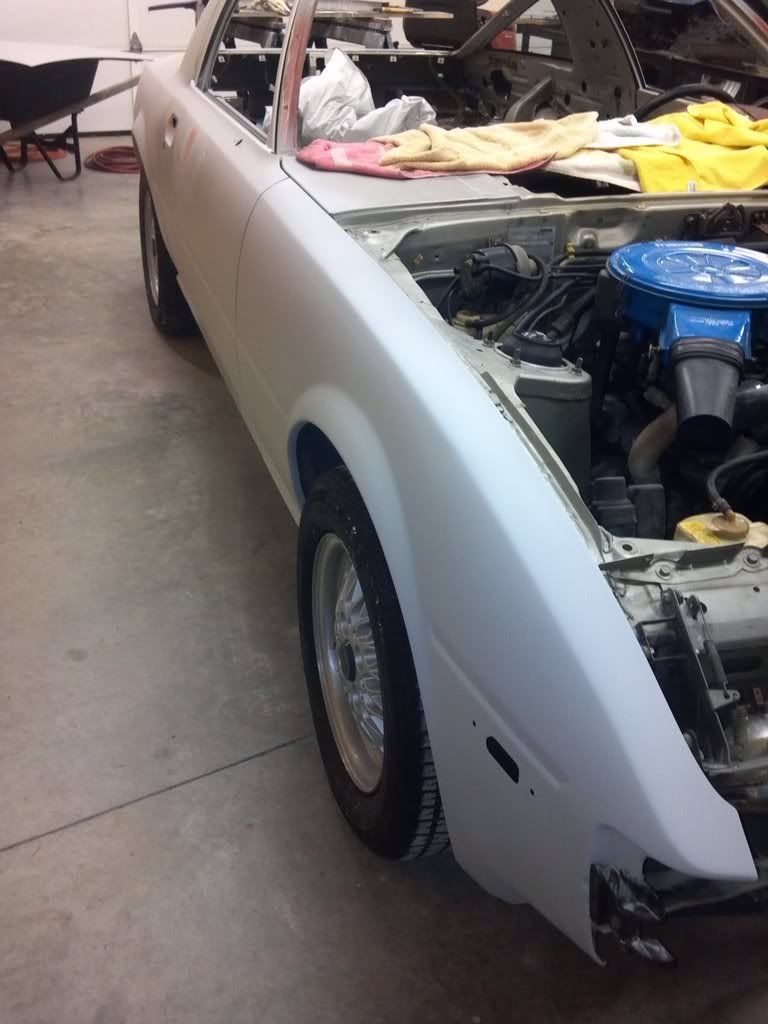
Got some warmer than expected temperatures today, so decided to finish priming the car. Taped off the little stuff inside, backed her out of the shop about 2pm and taped a drop cloth around the engine bat to keep the overspray out and mixed up some primer. Started off by repriming the few areas I had done light sanding/filler work on previously, then finished my body's priming by getting a good coat on the passenger fender and door. Then rolled the car back in the shop, got the hood out and finished the priming on it. That means the entire car is now primed, and I will be able to truly start wetsanding to get ready to spray color very soon. First up will be painting the black on the door window frames, then the wetsanding on the body (as over spray wont matter much from the black. Anyways, looks like everything is coming together nicely....next warmish day i get i have some loose parts that I might try to get color on (headlight doors, nose, cowl, etc. I am anxoius to see how the new Chateau Sllver paint will look....has been about 8 months since I bought the car....
#38
I agree. get em while you can. Parts will most likely get scarcer, especially for the special editions cars. Your old sweetheart is looking good even in primer.
#39
Just for you Ray I will go outside tomorrow, back the car out, and take a few pictures.....by the way, the brown headliner I got from ya is at the upholstery shop...will be maroon here very soon...car is coming together nicely (wow, thats an oxymoron since just about everything that can be unbolted off of it is off, lol)
#40
Thanks Banzai...I am hoping to have her painted and start putting her back together by the end of spring. That would put me on the road sometime this summer, then next winter i will start on the suspension restoration.....
#41
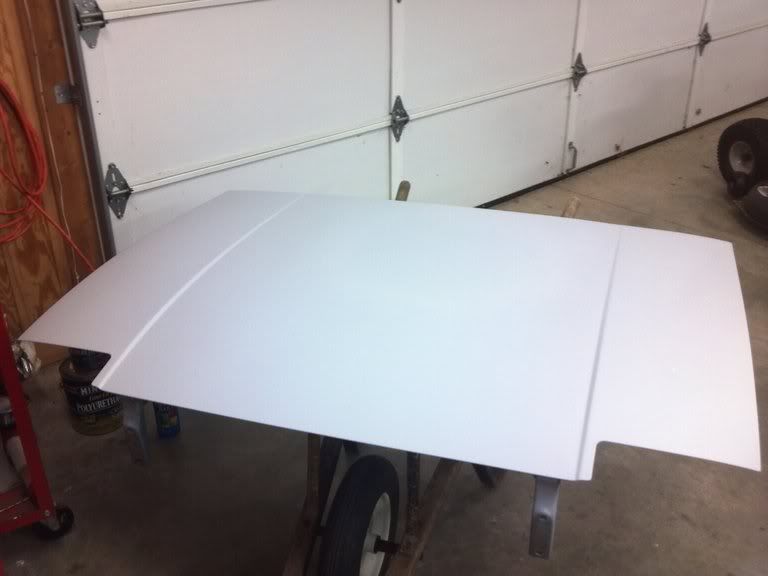
First, heres the hood in grey.....
Then the passenger side.....
#42
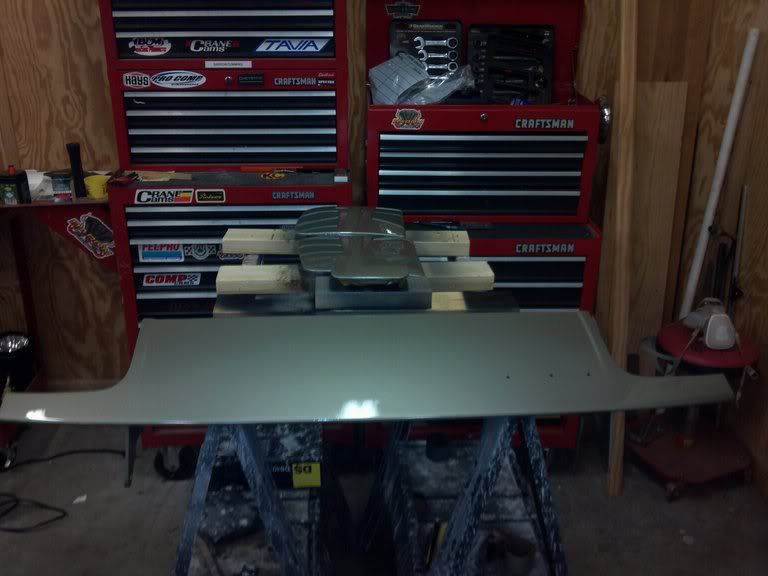
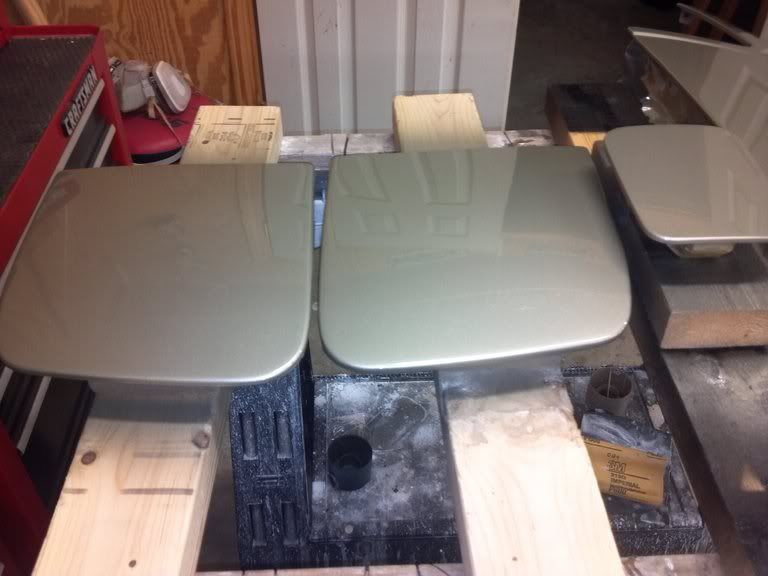
HAd good weather today, was a bit over 70 degrees, so I decided around lunch time to spray some of the parts off the car. Put 3 coats of Chateau Silver and 3 good coats of clear on the nose, cowl, headlight lids, gas door, and the sideskirts, so we have color! Looks like it laid out pretty well, very very little trash for an outside job.....I am happy....


#46
You know how these things are Chris....you replace all the parts on them, then ya start over again as it breaks....its a never ending process....you will be ahead of me soon. Thanks for the compliment!
#48
No, I'm not a body guy, just been playing with cars for several decades and picked up a few tricks along the way. Painted everything outside a piece at the time and moved em inside to dry. Keeps bugs/airborne trash, etc to a minimum. Also makes it fun planning on how to make everything "portable" with wet paint on it. Most pieces are set on blocks of wood that I can put on sawhorses and then easily pick up and carry inside. Did get one bug that made a good spot in the clear on one of the headlight lids today before I fished him out. Left a dimple in the clear after it dried. Will wetsand the clear and get it slick, then respray it with clear next time I paint.
Last edited by 83Limited; 02-29-12 at 09:10 PM.
#50
The key to successful bodywork is taking the time to do it right and using the right products to do it. If you have never done bodywork, I would recommend reading up on it thru online sources and or books. Also it helps if ya have friends at a body shop to ask questions of. Its not hard, just meticulous. Many people have trouble when they try to use too much filler (bondo) and cant get the panel to look flat. Thats the art. Takes time, trial and error, and a good eye. Spraying, for me at least is easy. As long as you have a decent gun (i'd recommend a mid line gravity feed HVLP gun, mine is a devilbiss starting line) you can lay the paint out. The key is to be sure your primer/bodywork is sanded as close to perfect as you can get, as modern paints do not "fill" at all and will mirror the surface texture underneath. I final sand my primer with 600 grit. Pick your brand of paint, read up on the specifics (tip size,# of coats, etc) and play with the gun to get it adjusted to spray like you want. Base is easy, just coat in light wet coats until you get good cover. Clear is where many people have problems. You spray it too light or with the wrong air pressure and you have lots of "texture" (orange peel), too heavy and you have runs. The easiest way to explain a good clearcoat is to spray it to the point where its is just about to run. You will learn to recognize this point, trust me. Beauty of clear is you can sand any imperfections (even runs) out using 1200 grit paper and buff it back out, or if you get trash in it (like one of my headlight lids) sand it back to dead flat (be very careful not to sand thru the clear) and simply reclear again without having to mess with color.... ALways remember, with paint, 90% (at least) of the finished look is controlled by everything you do BEFORE the first coat of paint....


