
Project Resurrection: Running Log
 03-22-12, 10:13 AM
#401
Yep; only about 5 weeks behind original schedule.
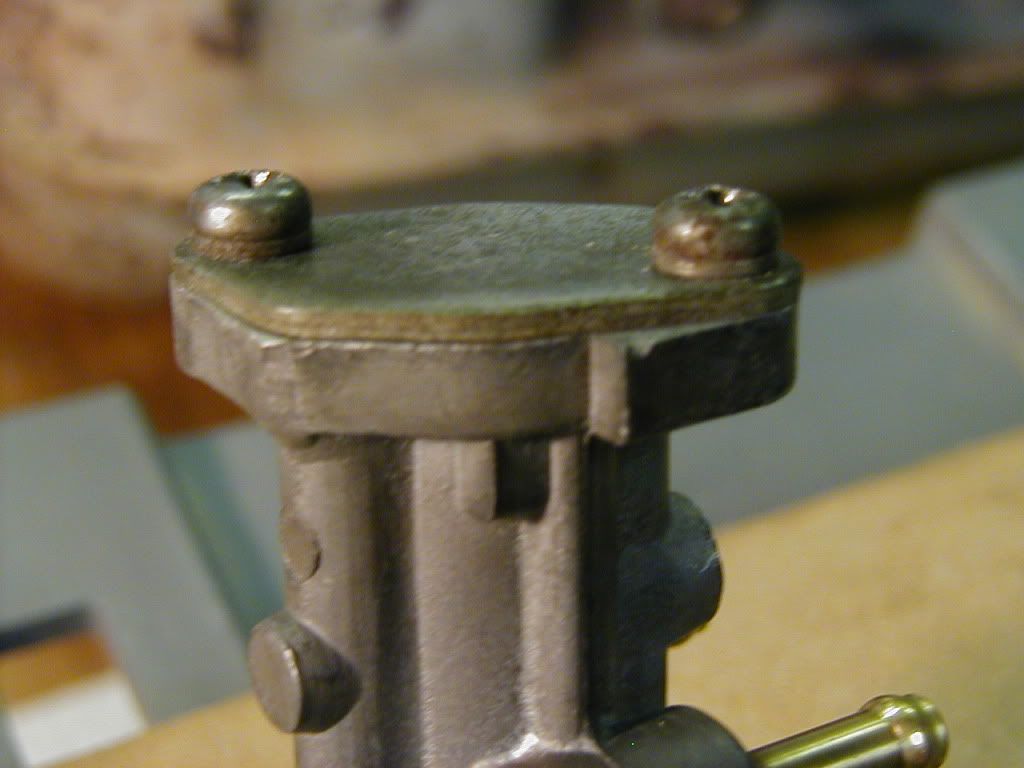
I lost about an hour last night trying to remember/research which way the holes in the engine mounts go (up, or down).
The FSM does not even mention removing/installing them, and the only photos of them within are well-nigh unto illegible, & shot from an odd angle. But I'm pretty sure I have them right (openings up) based on what pictures there are of original factory work.
Eventually I need to take my lifting rings back off, and paint them again. Or maybe I'll see about getting them replated, or try nickel-plating them myself. They always get bunged up when you have to pull an engine.
Next phase is to alternate between getting the engine hooked up and dressed out, and working on the carb to try to figure out why the damn thing likes to flood after shutting down.
I'd hoped to be able to procure a rebuild-worthy second carb of the right year and build to serve as a test mule, but every single time I've tried has fallen through. Each one either ends up being the wrong year, or non-California, or already gone, or some other thing happens to every lead I chase down.
Frustrating, but realistically, the carb I'm looking for is a minority build and so many of the original Cali cars have been scrapped due to the smog rules out here that they are just hard to locate.
So I'm going to have to punt with this carb and parts from several other 'close but not exact' partials I'm now the proud owner of.
 03-26-12, 10:31 AM
#403
No kidding; the tiniest thing can come up and detail your 'critical path' for the day.
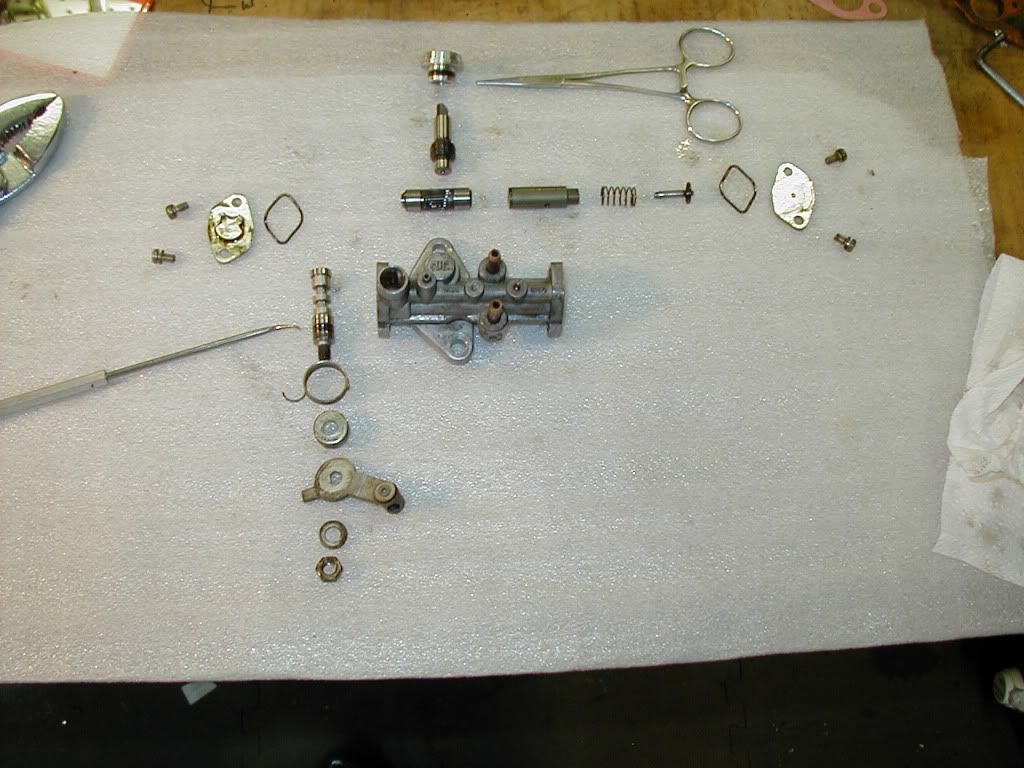
Case in point: I decided it was time to replace the o-rings and do an internal visual inspection on my MOP; unit is original to the car, has never leaked nor even been apart, but >30 years is asking a lot of some o-rings, & I wanted to make certain it was all to spec inside.
Exploded view, for those who have never had one apart:
I did my research beforehand, and Saturday morning I went off to buy o-rings based on measurements given in the archived thread on the subject.
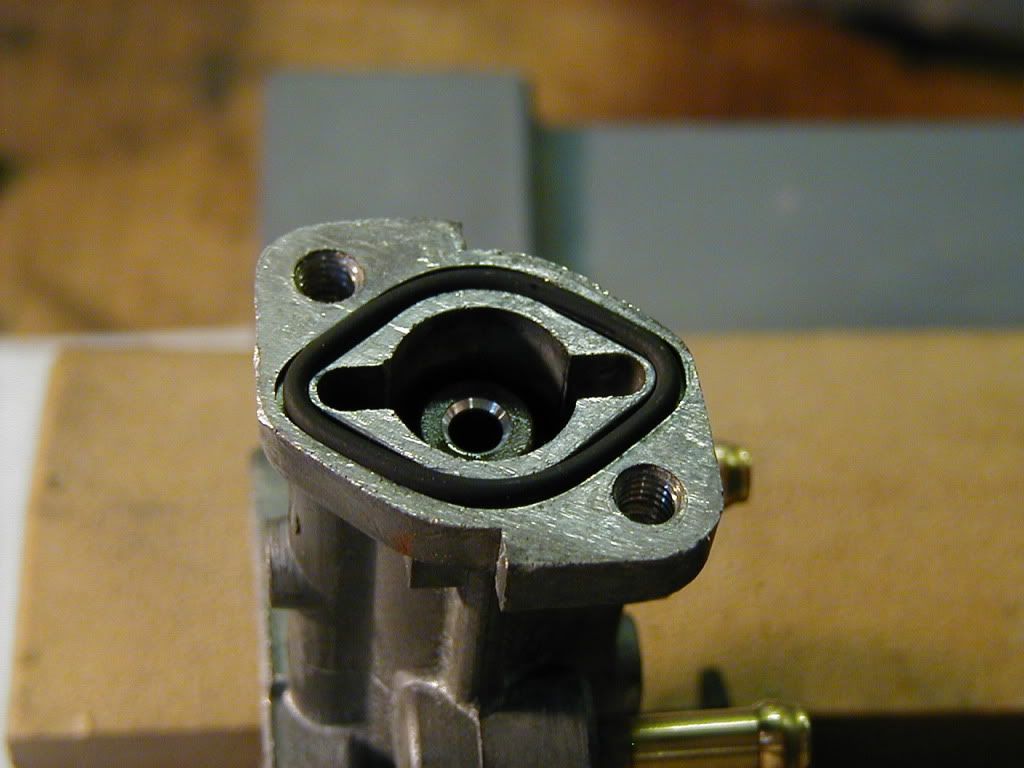
I discovered after I got home that the end-cover o-rings specified in the archived thread (1/16" thickness) are too large in thickness by about 0.08mm; they are difficult to keep in the grooves, and they actually force the end covers of the MOP to bow out slightly; though they would seal properly, the increased standoff distance at the center of the end cover would actually reduce MOP output volume since it would shorten the pump's 'stroke' by 0.005".
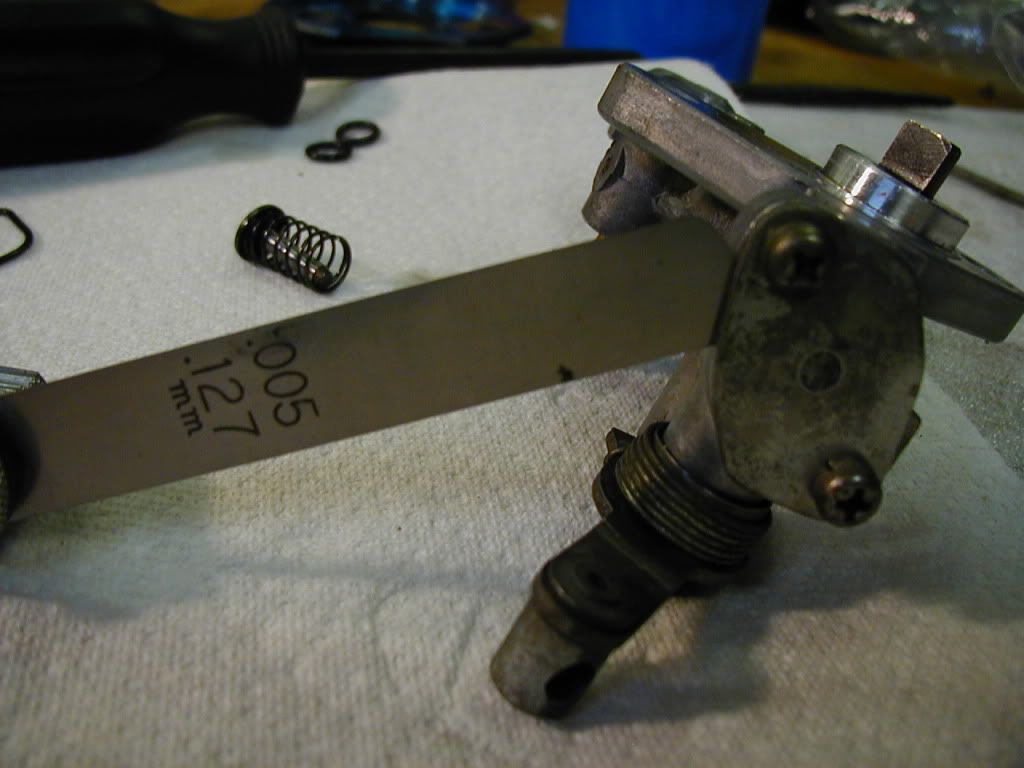
The gap created would also allow water/dirt to enter, possibly causing corrosion.
Based on calculations & measurements, the correct o-ring thickness should be 1.5mm, not 1/16" (which is 1.58mm).
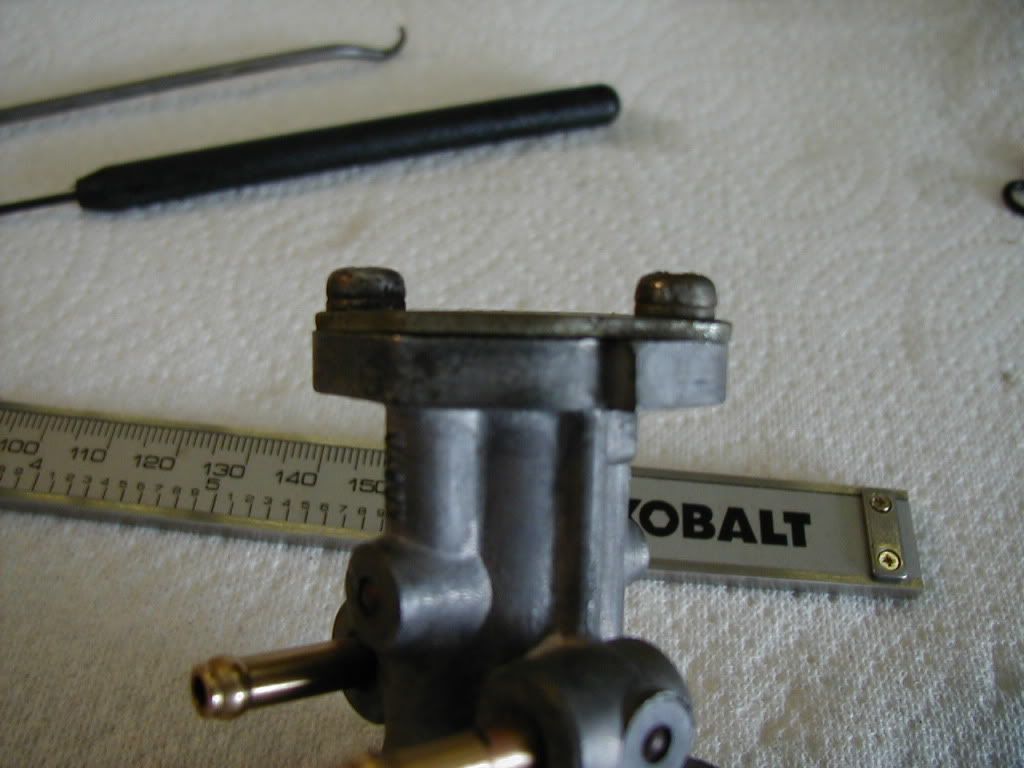
Way to figure an end-cap o-ring thickness is to measure the cross-sectional area of the groove it fills (width times depth, including any clearance for the covering part, if any) and then calculate the diameter of a circle of the same cross sectional area, selecting a ring that is closest in size. That way, when the ring is 'squeezed' into the groove, it fills it almost perfectly without getting forced out between the two parts.
In this case, the o-ring groove is 1mm deep, 1.8mm wide, and the cover is to fit with zero clearance, so the CCA of the groove is 1*1.8=1.8 sq mm.
The formula to get the diameter of a circle of given CCA is 2*(sqrt(area/pi)), which in this case gives a diameter of 1.514mm... so a standard 1.5mm thickness o-ring is what is needed.
Which of course I had no way of buying until today... so the MOP didn't get mounted this weekend.
Case in point: I decided it was time to replace the o-rings and do an internal visual inspection on my MOP; unit is original to the car, has never leaked nor even been apart, but >30 years is asking a lot of some o-rings, & I wanted to make certain it was all to spec inside.
Exploded view, for those who have never had one apart:
I did my research beforehand, and Saturday morning I went off to buy o-rings based on measurements given in the archived thread on the subject.
I discovered after I got home that the end-cover o-rings specified in the archived thread (1/16" thickness) are too large in thickness by about 0.08mm; they are difficult to keep in the grooves, and they actually force the end covers of the MOP to bow out slightly; though they would seal properly, the increased standoff distance at the center of the end cover would actually reduce MOP output volume since it would shorten the pump's 'stroke' by 0.005".
The gap created would also allow water/dirt to enter, possibly causing corrosion.
Based on calculations & measurements, the correct o-ring thickness should be 1.5mm, not 1/16" (which is 1.58mm).
Way to figure an end-cap o-ring thickness is to measure the cross-sectional area of the groove it fills (width times depth, including any clearance for the covering part, if any) and then calculate the diameter of a circle of the same cross sectional area, selecting a ring that is closest in size. That way, when the ring is 'squeezed' into the groove, it fills it almost perfectly without getting forced out between the two parts.
In this case, the o-ring groove is 1mm deep, 1.8mm wide, and the cover is to fit with zero clearance, so the CCA of the groove is 1*1.8=1.8 sq mm.
The formula to get the diameter of a circle of given CCA is 2*(sqrt(area/pi)), which in this case gives a diameter of 1.514mm... so a standard 1.5mm thickness o-ring is what is needed.
Which of course I had no way of buying until today... so the MOP didn't get mounted this weekend.
03-26-12, 10:49 AM
#404
Moderator
iTrader: (3)
Join Date: Mar 2001
Location: https://www2.mazda.com/en/100th/
Posts: 31,138
Received 2,797 Likes
on
1,979 Posts
wow, neat. you know i've seen MOP's apart, i've taken them apart, i've read the pictures where it explains how they work, and i still don't really get it....
03-26-12, 12:17 PM
#405
It's a fixed-piston, sliding-cylinder pump combined with a rotary valve; the 'piston' is that little pin to the right; the cylinder is the piece it slides into, which is also a rotating valve.
The cylinder rotates so that the two holes in it line up in turn with a) the oil feed paths top and bottom, and b) the outlet ports on the sides of the housing, at the appropriate times.
The little projections on the left end of the driven gear interact with the cam shaft, changing the amount of 'stroke' of the pump based on cam shaft rotation (which is changed by throttle position.) more throttle results in a longer stroke, giving a larger 'shot' of oil each time the ports line up for output.
Pretty cool little design, actually.
03-27-12, 10:12 AM
#407
Its funny working as a mechanic for the last 12 years I have found that as so much new technology is put out year after year, it becomes a little overwhelming at times. I put it all in to one of 3 categories...1. it interests me and I want to learn it and master it. 2. I don't understand it completely but have figured out how to fix it correctly 3. can't wrap my head around it and hope to god it doesn't come back to bit me in the ***...lol
that being said...the MOP falls in as a 2...and I'm ok with that. But I just ordered block off plates for both the fb and the glc...so maybe I just crave simplicity in my old age.
Divin...you engine bay is really inspiring, as well as your little details that you refuse to take the easy way out on...and yet after looking at your pics I dont even want to open the hood on my cars...lol. Anxious to see it all back together again.
 04-07-12, 05:18 PM
#410
Moderator
iTrader: (3)
Join Date: Mar 2001
Location: https://www2.mazda.com/en/100th/
Posts: 31,138
Received 2,797 Likes
on
1,979 Posts
its actually nicer in real life too, which is rare!
04-07-12, 11:48 PM
#411
if this car is at seven stock 15...I'll look at it...but only with one eye...lol. I have issues...when seeing really clean cars, rather than getting inspired...I get angry because my current situation doesn't let me have enough time to focus in on those tiny little differences that make a car "really clean" It doesn't mean I don't like what I'm looking at...it means I don't like myself for not doing my own cars that way...lol...please tell me I'm not alone in my funk!
04-08-12, 12:19 AM
#412
Chugging along, Jim; Sidetracked a bit on some paint touchup work that needed to be worked out. In fact, spent today pulling both headlight assemblies out, with the intention of repainting part of the engine bay that got heavily oversprayed when the car was painted back some years ago. Best to do it while everything forward of the water pump is still out of the car.
Just found out that the touch-up gun I bought doesn't work right (doesnt cut off cleanly when the trigger is released), so if I can't coax it into proper operation, it's gotta go back to the store.
Repainted my battery pedestal, radiator supports, engine lift eyes, & coil clamp today, as well as wire-brushing the hose fittings and bypass cover for my FMOC in preparation for nickel plating. wire-brushed the exhaust flange of your old air duct to a nice shine, and started the process of thermo-steeling the cracked inserts for my modified version of your old thermal reactor. Pretty typical Saturday, heh.
04-09-12, 12:15 AM
#413
Wow... that didn't go well.
Paint went down pretty OK (a little dark, so a bit thick), but the clearcoat... ouch. Gonna have to strip it all off and do it again next weekend. After some gun-adjusting practice - - It's not supposed to be reduced, but it came out of the gun in blobs, & re-wetted the paint, which now looks horrible.
Didn't have that problem airbrushing it previously for small touchups, but this gun is new to me.
Bummer.
04-09-12, 05:36 PM
#414
Moderator
iTrader: (3)
Join Date: Mar 2001
Location: https://www2.mazda.com/en/100th/
Posts: 31,138
Received 2,797 Likes
on
1,979 Posts
Wow... that didn't go well.
Paint went down pretty OK (a little dark, so a bit thick), but the clearcoat... ouch. Gonna have to strip it all off and do it again next weekend. After some gun-adjusting practice - - It's not supposed to be reduced, but it came out of the gun in blobs, & re-wetted the paint, which now looks horrible.
Didn't have that problem airbrushing it previously for small touchups, but this gun is new to me.
Bummer.
Paint went down pretty OK (a little dark, so a bit thick), but the clearcoat... ouch. Gonna have to strip it all off and do it again next weekend. After some gun-adjusting practice - - It's not supposed to be reduced, but it came out of the gun in blobs, & re-wetted the paint, which now looks horrible.
Didn't have that problem airbrushing it previously for small touchups, but this gun is new to me.
Bummer.
so it'll have to come off, but we were going to paint it anyways, so nobody cares.
04-11-12, 10:57 AM
#417
It's a Kobalt SGY-AIR87. Operates at 43PSI. It has a 1.3mm tip. It has adjustable air, trigger, and fluid flows but they are not calibrated numerically.
It's one of the few with a low enough air demand that my cheesy little pancake air compressor can keep up with it.
It's one of the few with a low enough air demand that my cheesy little pancake air compressor can keep up with it.
04-11-12, 01:03 PM
#418
If the clear seems to be coming out too thick then turn up the air pressure to like 50 or so (I think I have my gun at closer to 55 to really atomize the paint).
Each gun is different but on mine (an Ingersoll Rand 270G) if the paint flow adjustment allows for anything more than about half travel on the trigger I get way too much paint coming out and tends to run, you might be trying to lay down too much clear at one shot so take a look at that adjustment.
Also, how wide is your fan pattern? Could be too narrow causing it all to come out in clumps...
04-11-12, 04:18 PM
#419
I remember it being like 3, inches wide & 6 high on the color coat, but didn't do a pattern test with the clear.
I really need to mix up a cupful and do some test spraying. I have some large sheets of cardboard that would work well for that, just need the time.
The clear costs $$ of course, but I had to buy like a quart of it, so I have enough I can use to test settings. The color coat is a bit more precious now. Only bought a pint.
Eventually, I'd like to repaint the inside of my hood.
04-12-12, 10:43 AM
#420
common sense prevails....
iTrader: (7)
Join Date: Jul 2008
Location: Chino and Lake Arrowhead Calif
Posts: 1,669
Likes: 0
Received 9 Likes
on
9 Posts
It's a Kobalt SGY-AIR87. Operates at 43PSI. It has a 1.3mm tip. It has adjustable air, trigger, and fluid flows but they are not calibrated numerically.
It's one of the few with a low enough air demand that my cheesy little pancake air compressor can keep up with it.
It's one of the few with a low enough air demand that my cheesy little pancake air compressor can keep up with it.
04-12-12, 12:43 PM
#421
Harbor freight is good for consumables like cutoff wheels etc, and possibly tools you don't plan on using very often. Most of the stuff is crap as are the "helpful" employees there...
DD: As much as it sucks to use up $160/gallon clear on testing thats basically what you'll need to do. Like I said in a earlier post, turn the air pressure up and make the fan wider and you should see better atomization of the clear...
DD: As much as it sucks to use up $160/gallon clear on testing thats basically what you'll need to do. Like I said in a earlier post, turn the air pressure up and make the fan wider and you should see better atomization of the clear...
04-12-12, 04:53 PM
#423
 I actually bought one of their $11 'professional' sprayguns first; thing is so badly made that the needle couldn't even retract fully when the trigger was released; continually pissed air once the trigger had been pulled. I tinkered with it for a couple evenings before declaring it to be full of irreparable design flaws.
 It's not even worth the gas I'd burn to drive up to Montclair to return it, so it's just kind of laying around until I'm next headed that way. Or maybe use parts of it to make something else.
04-17-12, 09:34 AM
#424
Man, the "what did you do...today?" thread really sucks the steam out of a build thread... I'll need to catch this up sometime soon.
Shorty update; Paint's fixed nicely, exhaust is half in, currently refurbing the wiring harness.
Shorty update; Paint's fixed nicely, exhaust is half in, currently refurbing the wiring harness.
04-17-12, 12:29 PM
#425
Moderator
iTrader: (3)
Join Date: Mar 2001
Location: https://www2.mazda.com/en/100th/
Posts: 31,138
Received 2,797 Likes
on
1,979 Posts
i wonder if anyone has noticed i haven't touched mine in weeks?