Team Chihuahua Rocket Bunny RB25 RX7
#26
 I'll rock on with what I have for now and maybe change down the line...
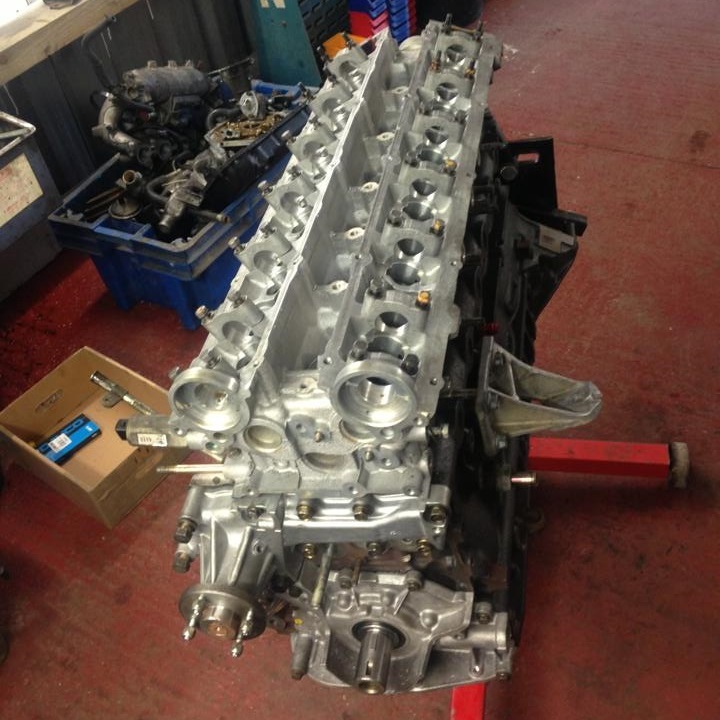
So just a quick update, I have ordered the GTR style intake manifold, ACL Race Bearings, Trust Washers, a huge intercooler, 3" alloy radiator and the crank / oil pump is going away to be polished along with some headwork it should turn up trumps
 Its 2k I didn't want to spend but needs must, at least it will be a kick *** engine afterwards
#27
Another small update :
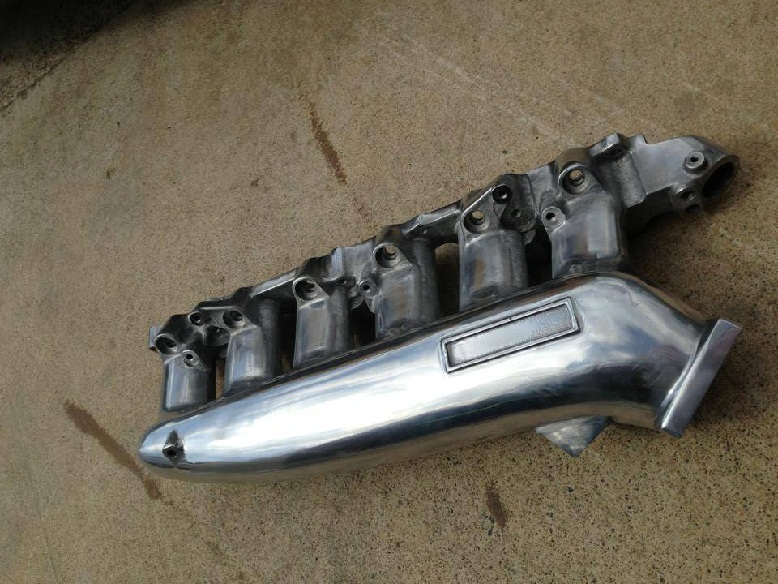
GTR Style Intake Plenum arrived from Garage-D :
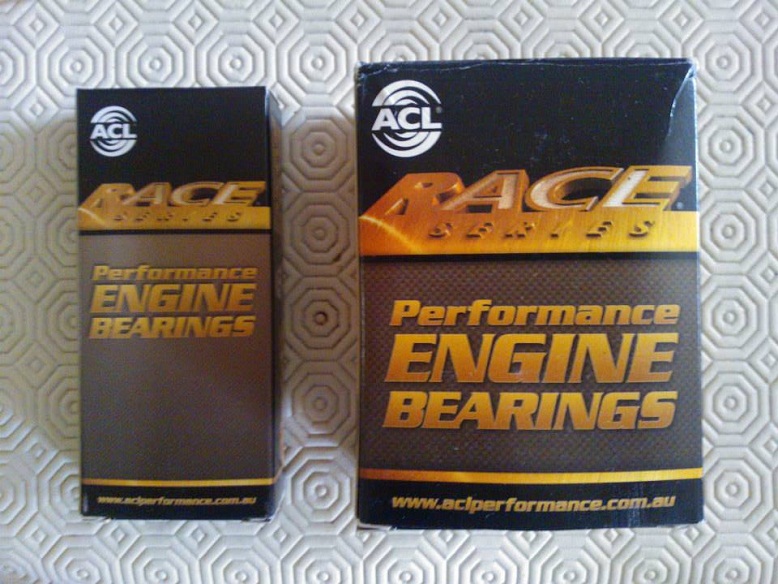
ACL Race Bearings and Trust Washers arrived from the states, posted them up to Gripfab :
And I decided to clean off my wheel polishing workbench :
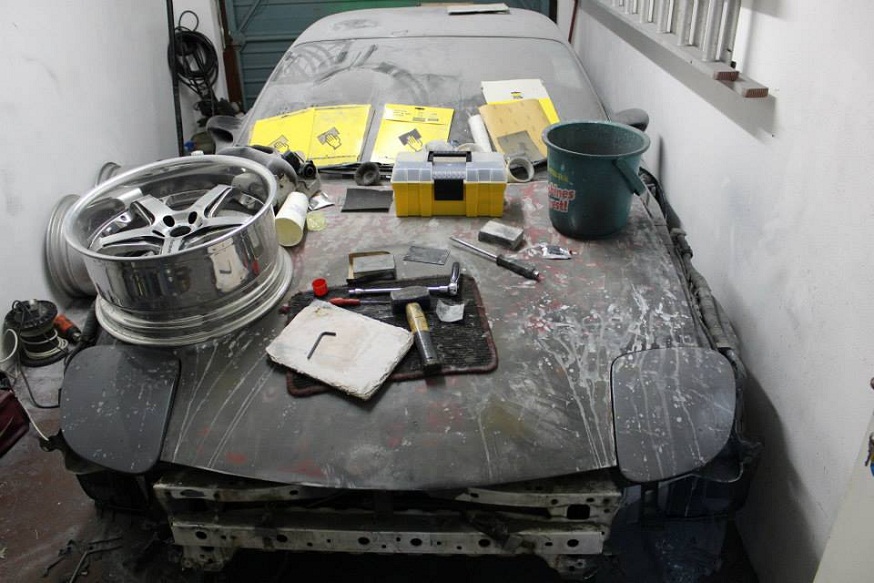
So she is all powerhosed down and ready for 6 cylinders, should be going up to Gripfab next week as the RX8 is coming home
GTR Style Intake Plenum arrived from Garage-D :

ACL Race Bearings and Trust Washers arrived from the states, posted them up to Gripfab :

And I decided to clean off my wheel polishing workbench :

So she is all powerhosed down and ready for 6 cylinders, should be going up to Gripfab next week as the RX8 is coming home


#28
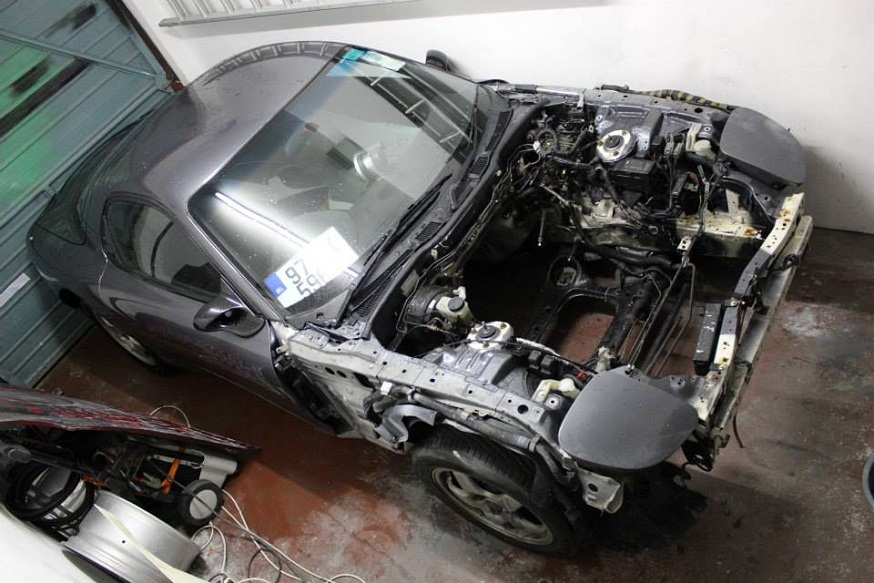
Pulled the S13 shell out of the driveway, RX7 out of the garage and got them ready for their trip to Gripfab last night :
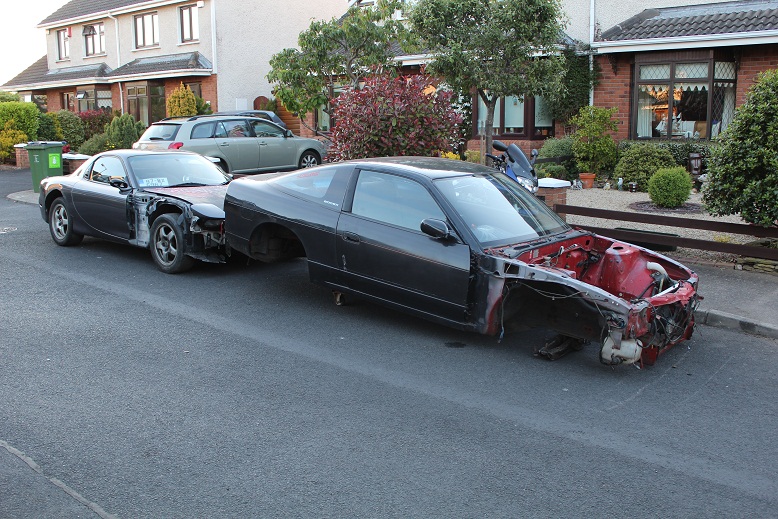
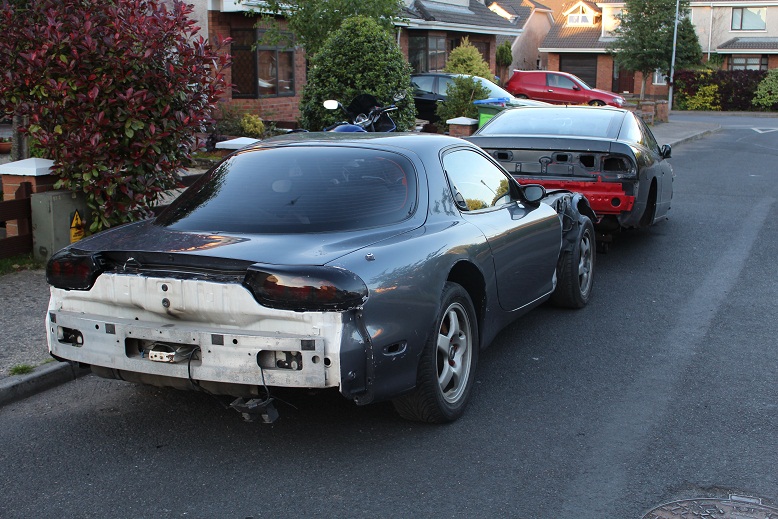
Should be seeing more of the RX7 come the end of July middle of August, plan is to rebuild the engine, fit it and get her going. So now off she goes :
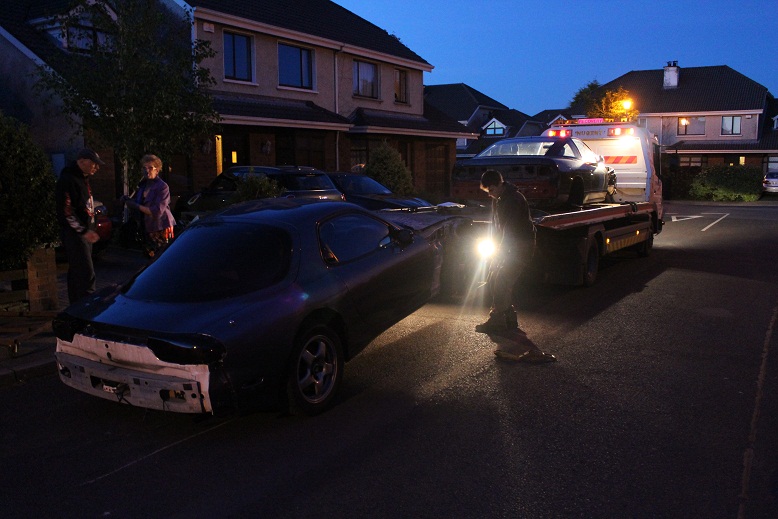
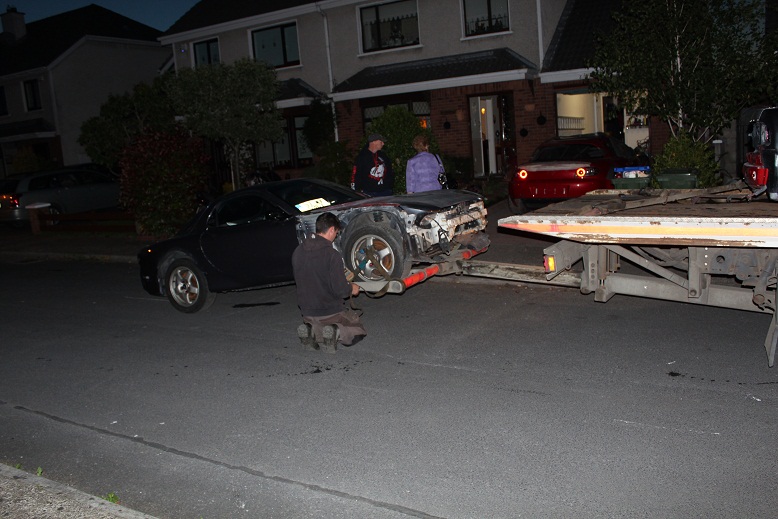
In the meantime looks whats back in the driveway to keep me busy


Should be seeing more of the RX7 come the end of July middle of August, plan is to rebuild the engine, fit it and get her going. So now off she goes :


In the meantime looks whats back in the driveway to keep me busy

#32

Agreed but straight 6 will do for now

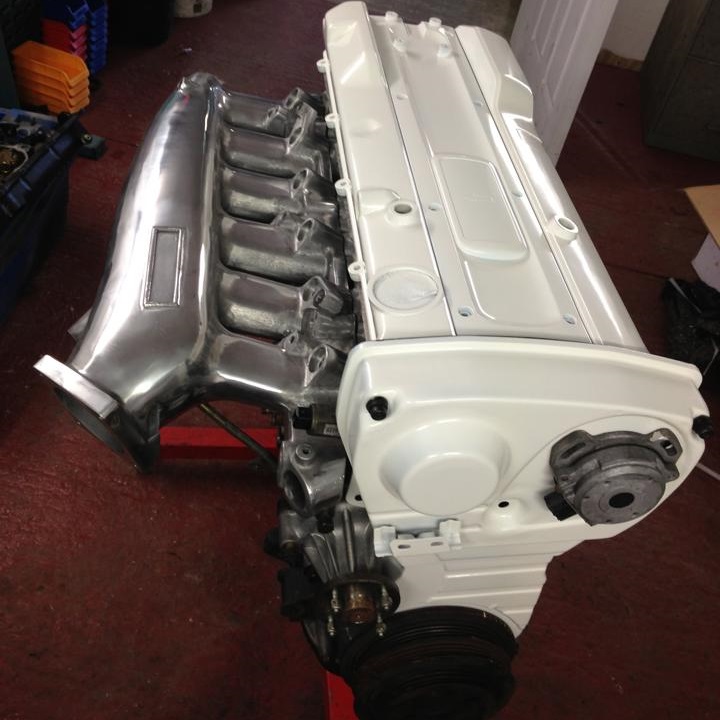
Small engine update, said while it was all apart may as well freshen up the engine so the block has gone black and the covers super white, looking forward to seeing her finished now
 May polish up the turbo housing now too.
#33
Well I haven't posted an updated on the RX7 in quiet a while so I thought it best to check in  Realistically it has been issue after issue with the build but these are the joys of going custom. As you all know the bearings were in sh*t so the freshly built engine had to be rebuilt. As the piping wouldn't allow the bonnet to close I went for the GTR style intake plenum which has brought along its on problems as it faces the throttle body directly into the back of the light motor but there is a fix being worked.
What took a while to figure out was the placement of the engine and we learned that the RB25 sump just wouldn't cut it regardless of how it could be modified so Brendan S. sourced an RB30 sump however it was too deep and would hit the road so that had to be modified also, arrrgggghhhh....
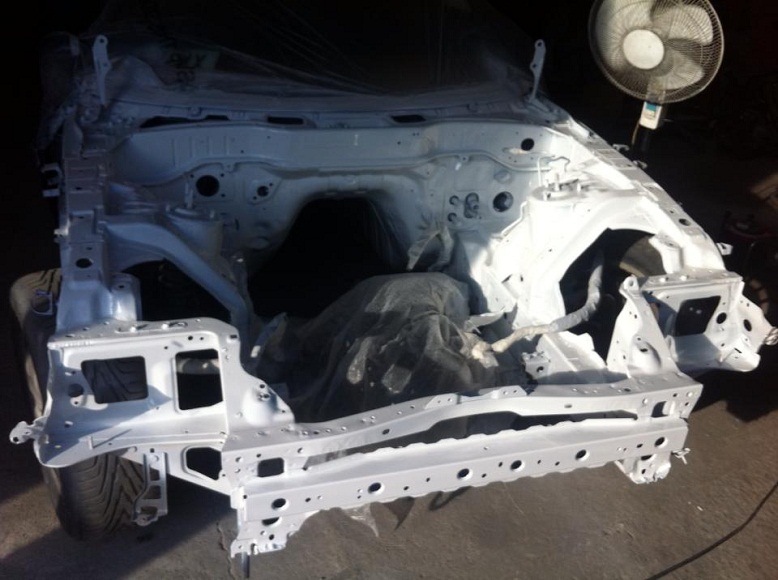
So yesterday the engine bay got a fresh lick of paint and now it should be going back together, its been a long journey but getting all the mechanical side of things sorted first was key and we're on the home stretch. All this would not have been possible without the aid of Gripfab so massive shout out to John, Brendan and Bryan, cheers lads for converting not only the RX7 but the RX8 and sure we've a KP61 to go at yet
More updates to follow over the next week or two. Tis good to be on the way back with this one, it will be the weekend bus after all
 Realistically it has been issue after issue with the build but these are the joys of going custom. As you all know the bearings were in sh*t so the freshly built engine had to be rebuilt. As the piping wouldn't allow the bonnet to close I went for the GTR style intake plenum which has brought along its on problems as it faces the throttle body directly into the back of the light motor but there is a fix being worked.
 What took a while to figure out was the placement of the engine and we learned that the RB25 sump just wouldn't cut it regardless of how it could be modified so Brendan S. sourced an RB30 sump however it was too deep and would hit the road so that had to be modified also, arrrgggghhhh....
So yesterday the engine bay got a fresh lick of paint and now it should be going back together, its been a long journey but getting all the mechanical side of things sorted first was key and we're on the home stretch. All this would not have been possible without the aid of Gripfab so massive shout out to John, Brendan and Bryan, cheers lads for converting not only the RX7 but the RX8 and sure we've a KP61 to go at yet

More updates to follow over the next week or two. Tis good to be on the way back with this one, it will be the weekend bus after all


#35
Bit of an update :
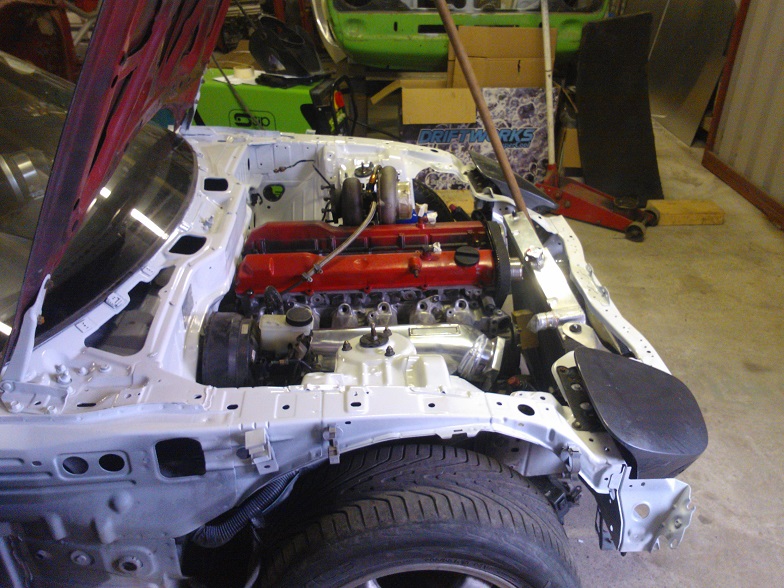
Nice and snug against the bulkhead :
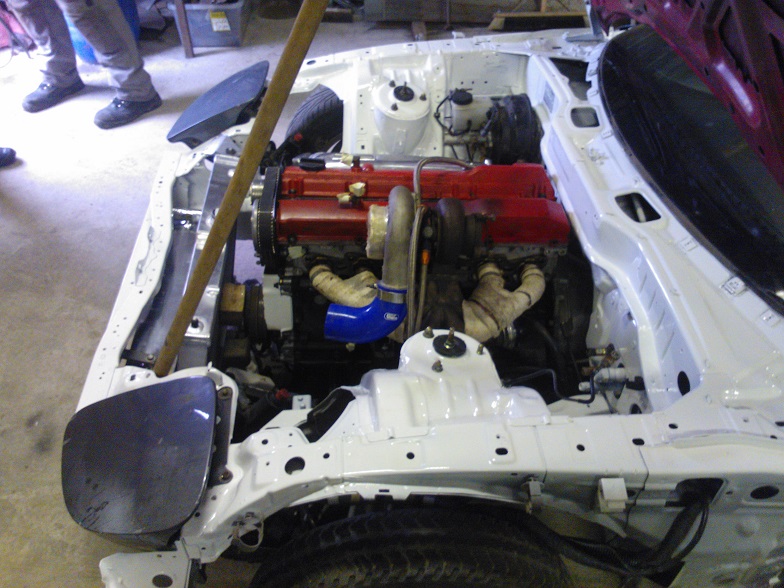
Turbo manifold has to be modified as the turbo sits too high :
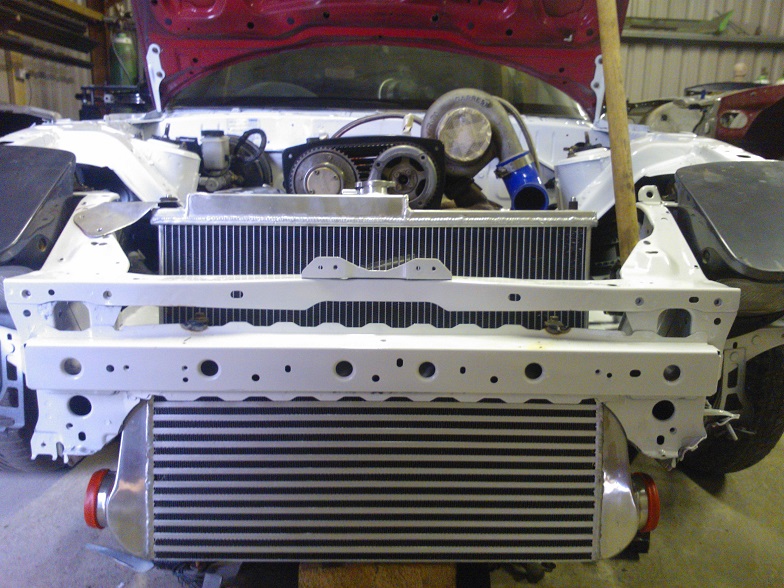
But she looks at home in the new white bay, mock up rockers on to keep the white ones clean for now...
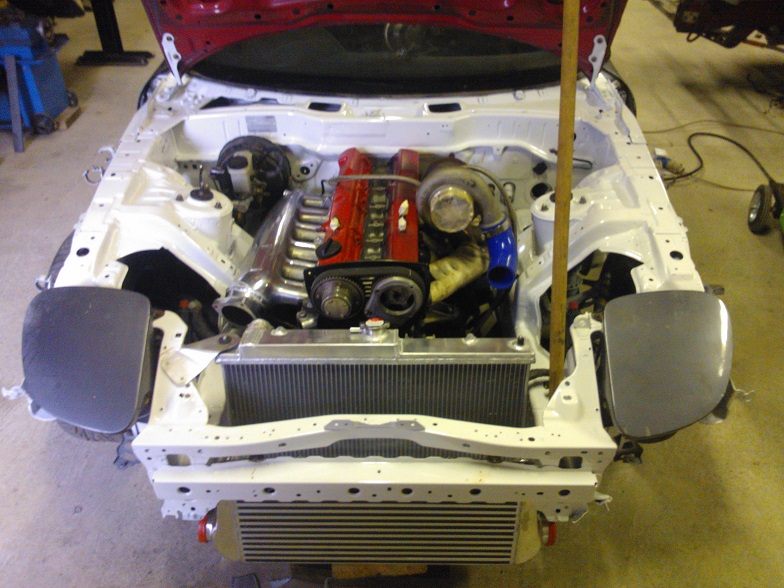
Intake plenum had to be chopped and modified as it pointed into the back of the headlight, adapter is being made up now for the throttle body as we'll be keeping all the piping 3"...
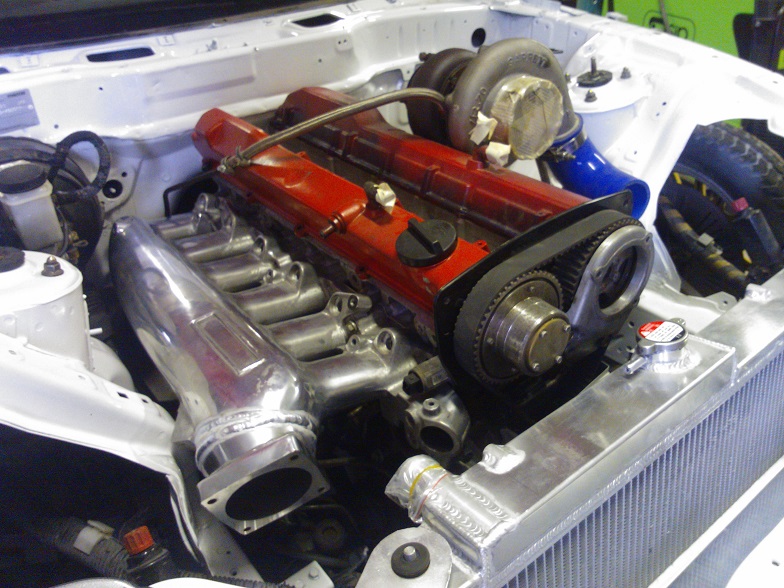
Top mounts for the rad and intercooler are made, next up the bottom, hence the wood

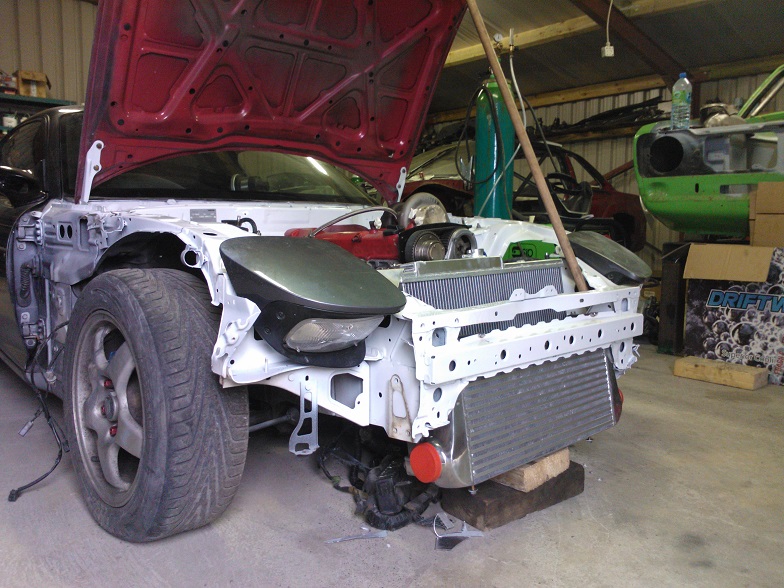
More next week

#36
So John dropped the bonnet and cut it so it would close, first run looked like this :
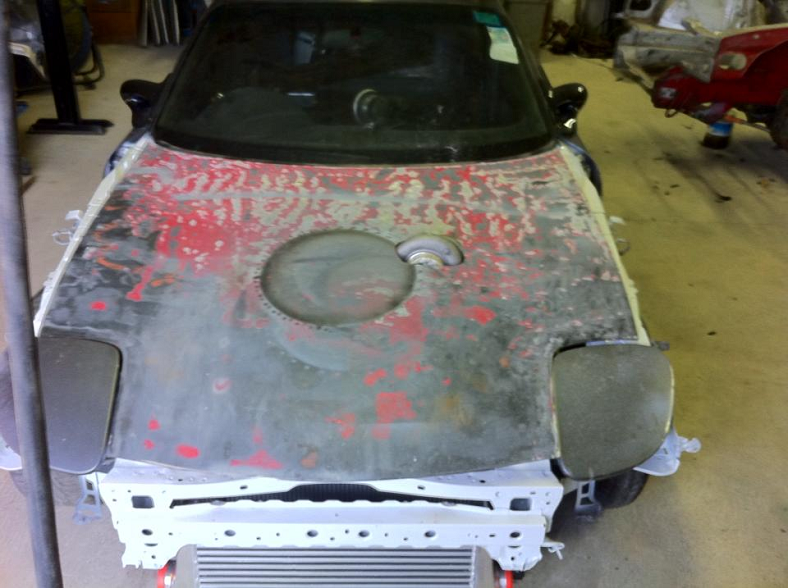
So that wasn't going to work, the only way around it was to chop the exhaust manifold in multiple places and basically make it work better, John did an awesome job cause I still wanted a bit of turbo to say hello So this is where we are at, I was going to build a hump into the bonnet but I may just polish the housing and tidy up the cut line, getting excited now to see her done
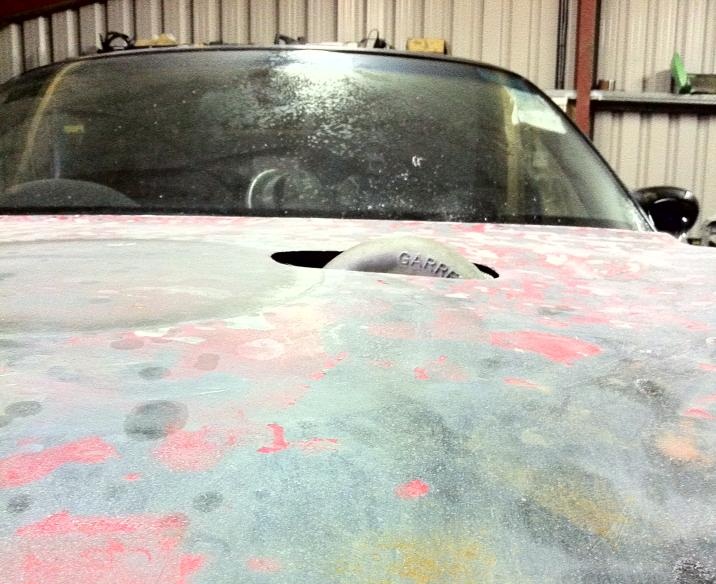

So that wasn't going to work, the only way around it was to chop the exhaust manifold in multiple places and basically make it work better, John did an awesome job cause I still wanted a bit of turbo to say hello
 So this is where we are at, I was going to build a hump into the bonnet but I may just polish the housing and tidy up the cut line, getting excited now to see her done

#38
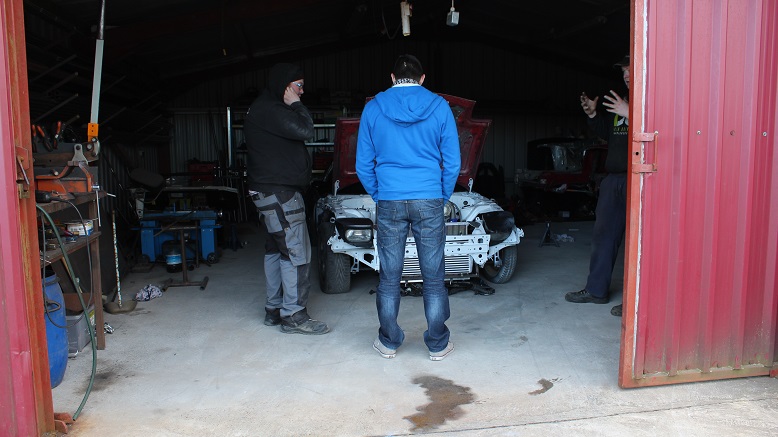
So while herself is watching X-Factor I'll throw up a few pic's, took a trip up to Gripfab today while on my way to Dublin.
There was alot of this :
Ice white :
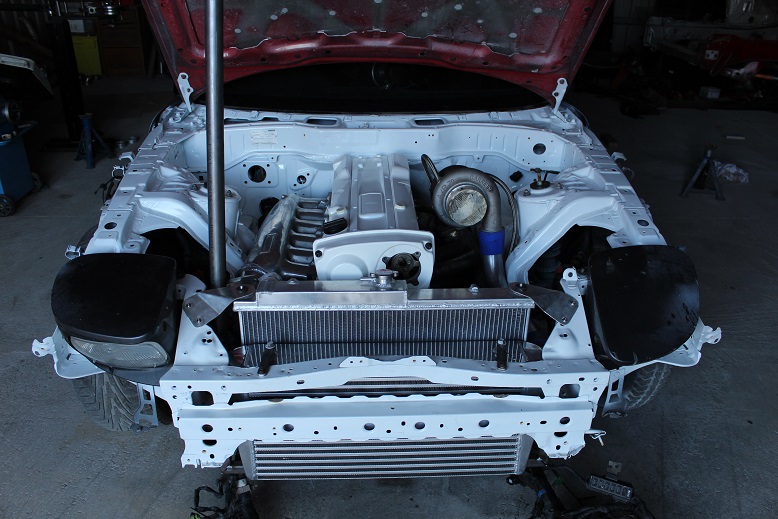
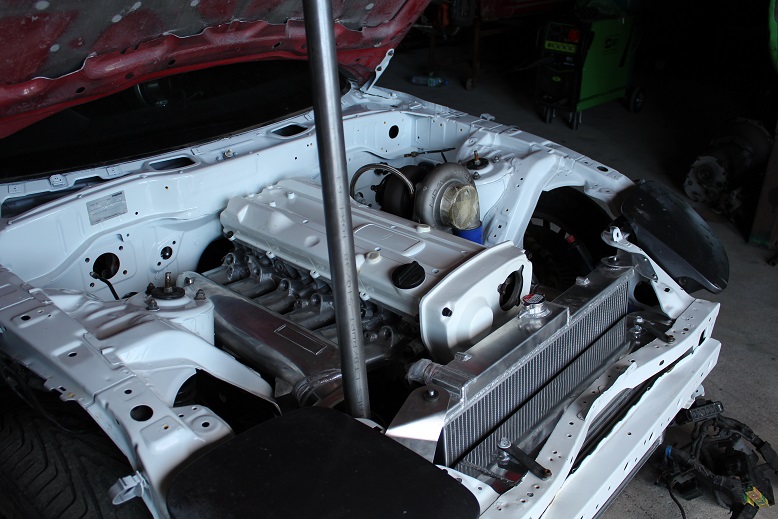
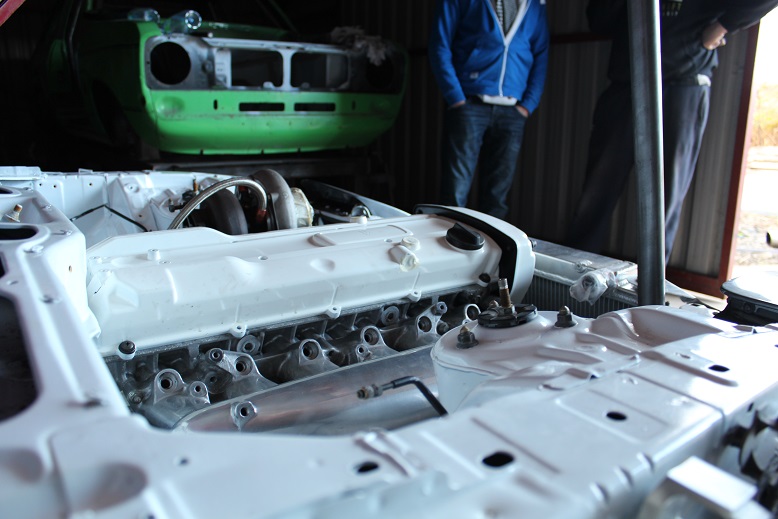
Is it just me or does the manifold look like spider legs

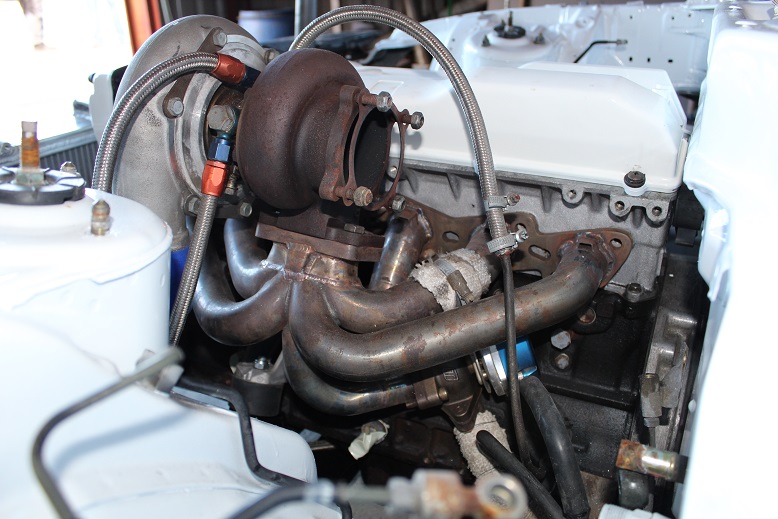
Pipes have worked out really short :
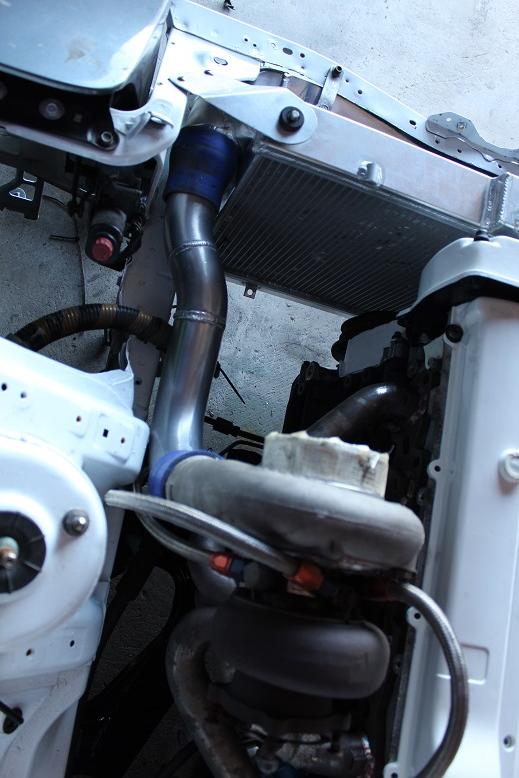
The throttle body still has to go back on so the pipe will be about 3inches LoL
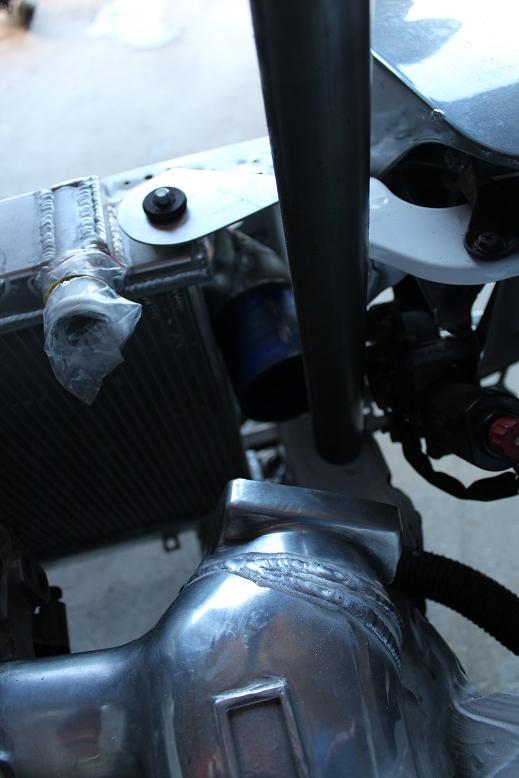
Hello beasty :
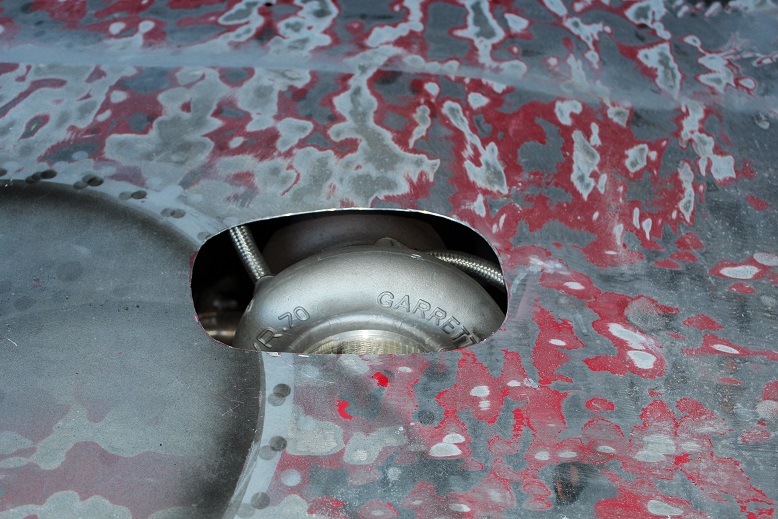
Should be back in the next 3-4weeks, the wiring is going to be a nightmare.
#39
With the help of Japanese Performance this is the new wheel set up for the Team Chihuahua RB25 RX7. Should be here sometime in February 
Fronts 18 x 11JJ Offset -22
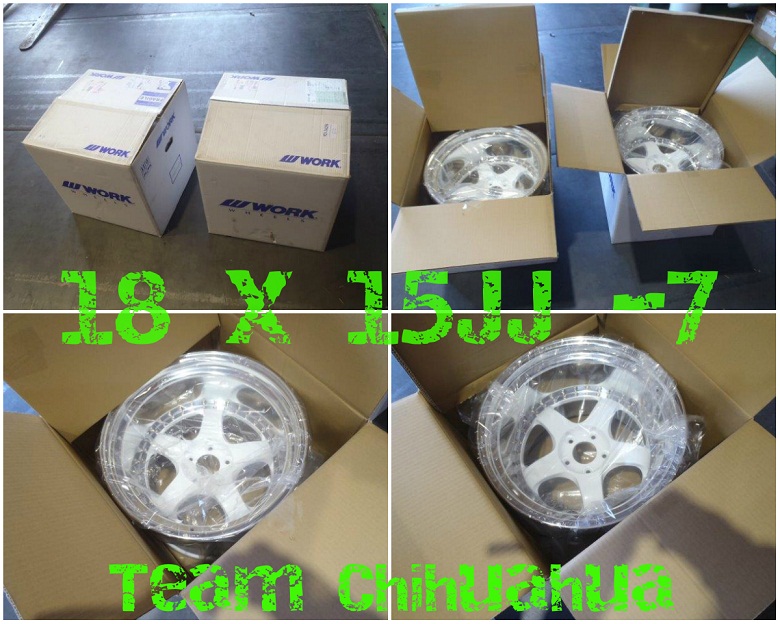
Rears 18 x 15JJ Offset -7 (The widest / lowest offset Meisters available on the market)


Fronts 18 x 11JJ Offset -22
Rears 18 x 15JJ Offset -7 (The widest / lowest offset Meisters available on the market)

#42
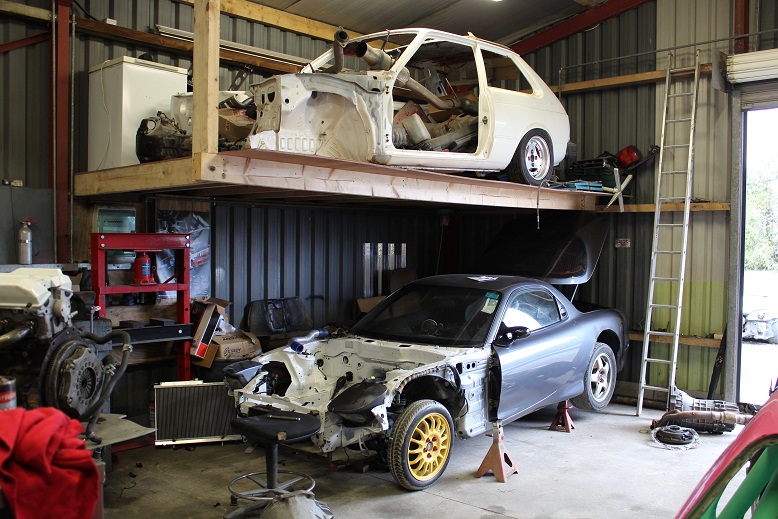
My two projects up in Gripfab, its known as Kruizer's Korner at this stage LoL
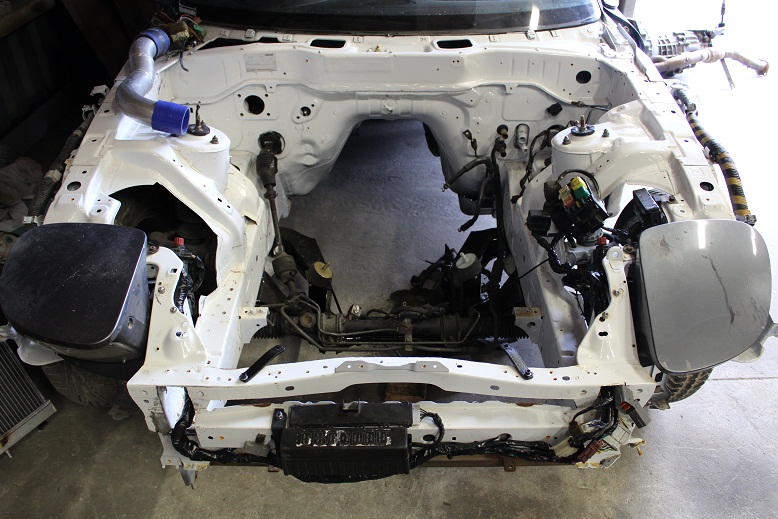
As you can see the wiring now goes on the outside of the front panel, sounds simple but is far from it, you can also see the subframe and how it holds the engine :
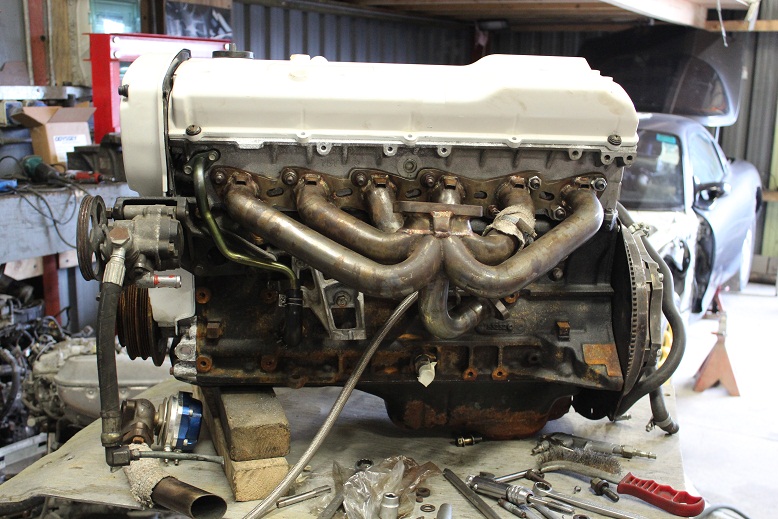
Manifold :
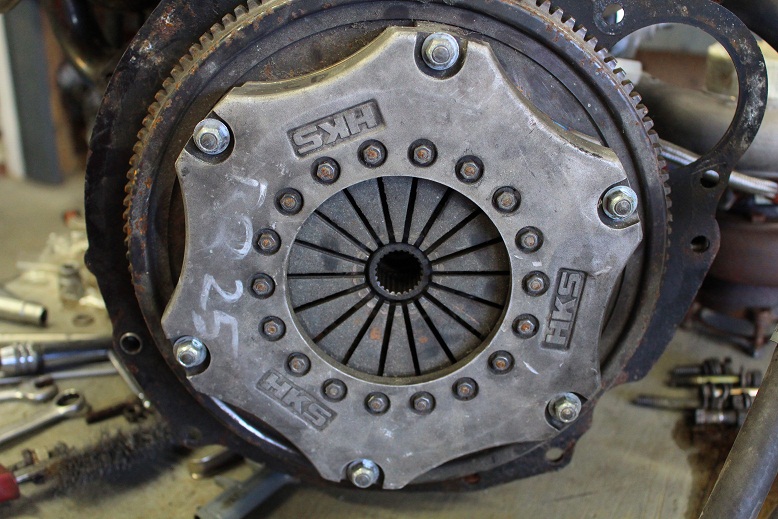
A nice look at the HKS clutch :
Car should be back in Limerick next week with some luck.

As you can see the wiring now goes on the outside of the front panel, sounds simple but is far from it, you can also see the subframe and how it holds the engine :

Manifold :

A nice look at the HKS clutch :

Car should be back in Limerick next week with some luck.
#43
So not a whole pile to update since my last post, have had a few issues with the wiring and the previous cowboy that worked on the engine but nothing Gripfab can't handle, should be ready for transport back to Limerick very soon 
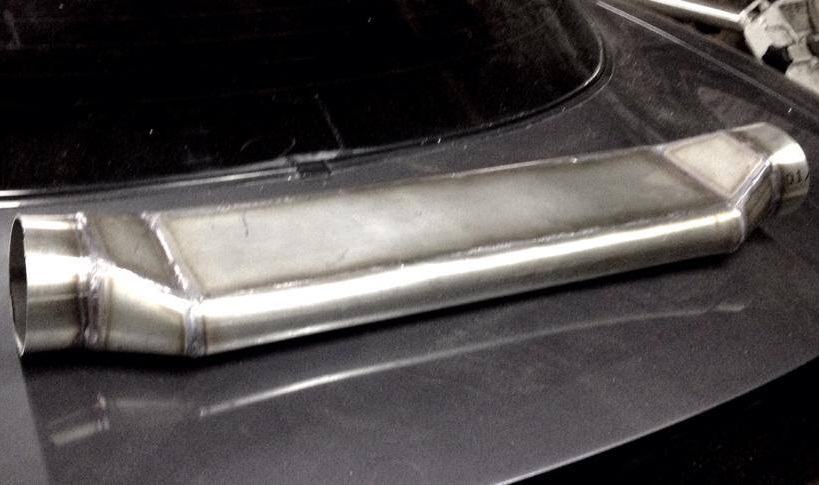
John got to make up this interesting section for the exhaust cross over :
And Dave in JDM Distro sent me on a few pic's of my wheels now that they are ready to leave Japan, will be 8 weeks before they arrive but I'm sure I'll be able to keep myself busy until then with the other cars, anyway enough talk pics :
Until next time....

John got to make up this interesting section for the exhaust cross over :

And Dave in JDM Distro sent me on a few pic's of my wheels now that they are ready to leave Japan, will be 8 weeks before they arrive but I'm sure I'll be able to keep myself busy until then with the other cars, anyway enough talk pics :

Until next time....
#44
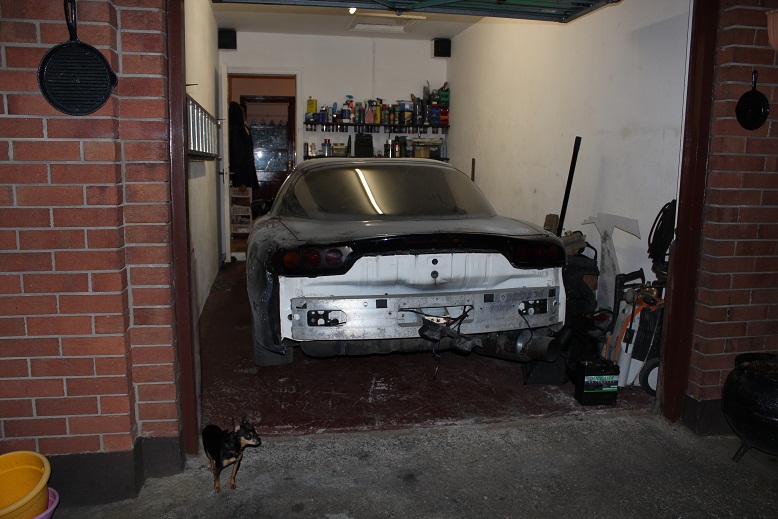
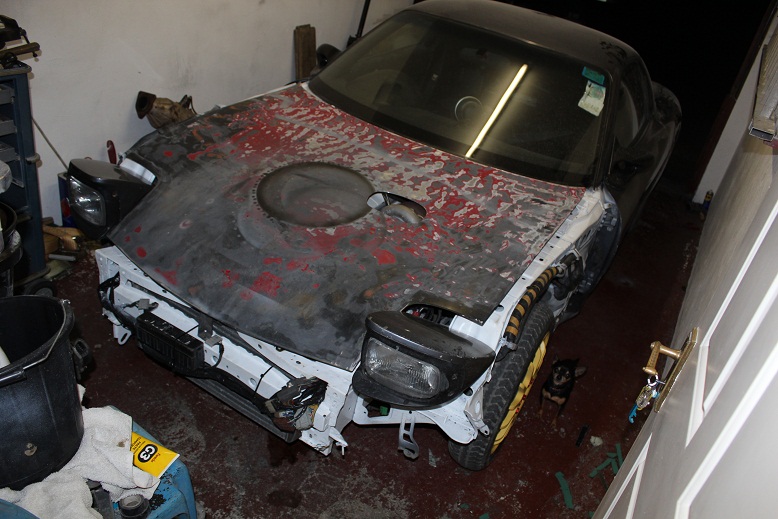
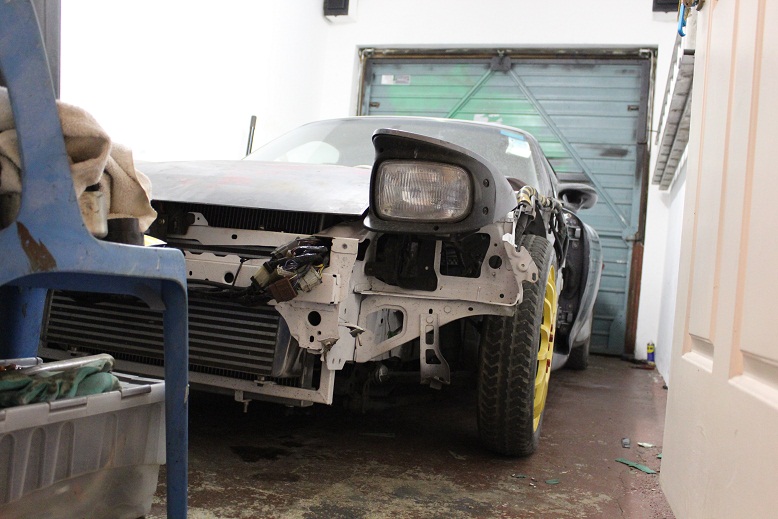
Right so after a very long time away, the beast is home, arrived late last night, needs a few niggle little bits done before I can get it mapped but nothing major. For the next few months it will be all bodywork and getting this beast looking as phat as possible, even Romeo came out to have a look, trying to find in the two of the pic's is like a game of where's wally 


#45
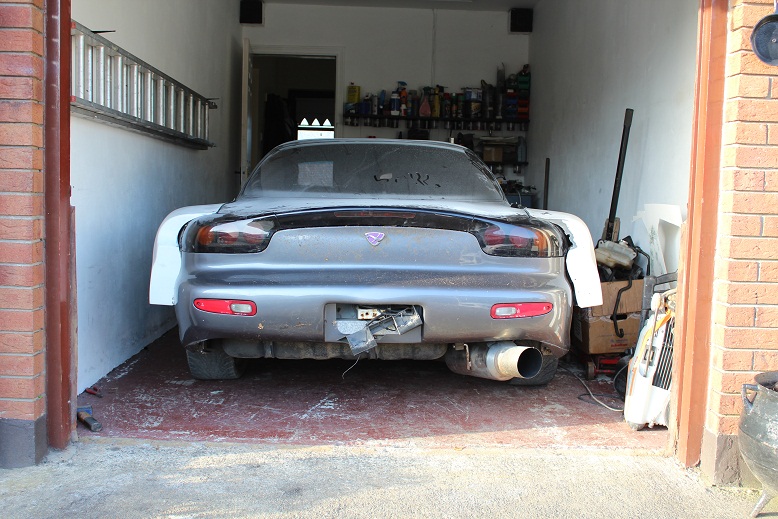
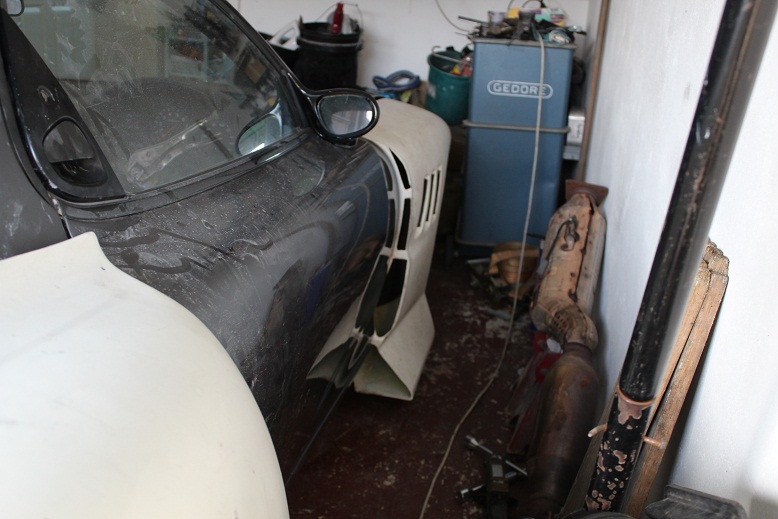
So I wanted to know how wide it was cause I have forgotten and this was the out come, not too bad. Thinking of keeping the standard bumper with a big *** diffuser.
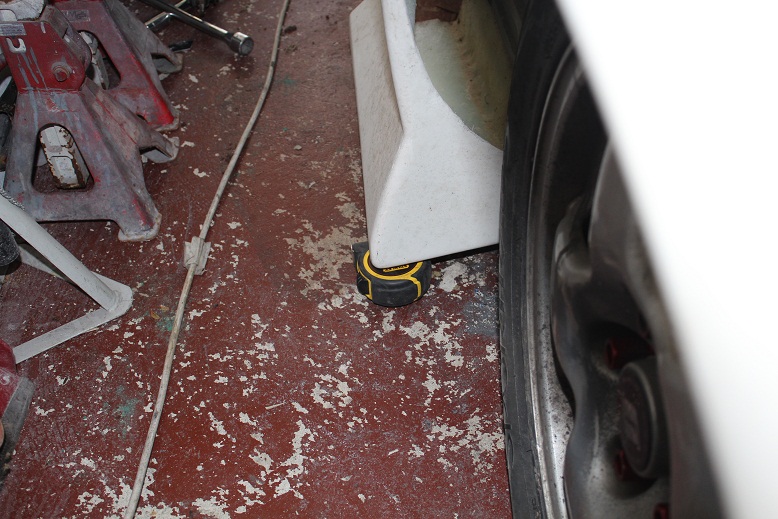
Wing is pretty low to the ground. Just a measuring tape on its side.
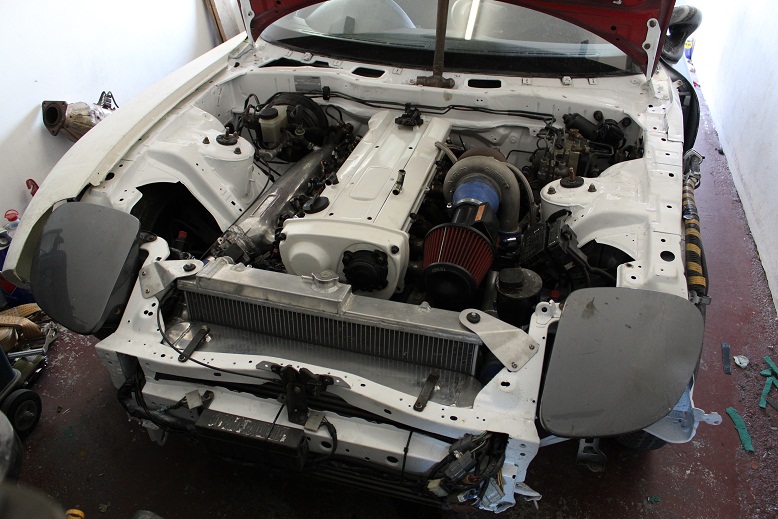
Engine looks at home
Oh and its first start up, I think ya need headphones cause it sounds off through my laptop speakers.
http://www.youtube.com/watch?v=7rGwR...ature=youtu.be

Wing is pretty low to the ground. Just a measuring tape on its side.


Engine looks at home


Oh and its first start up, I think ya need headphones cause it sounds off through my laptop speakers.
http://www.youtube.com/watch?v=7rGwR...ature=youtu.be
#46
So back to fibreglass, as said much earlier the fit is shocking however with a few bolts here and a heat gun burning the **** out of the kit it started to come right if only the wings it was a step forward.
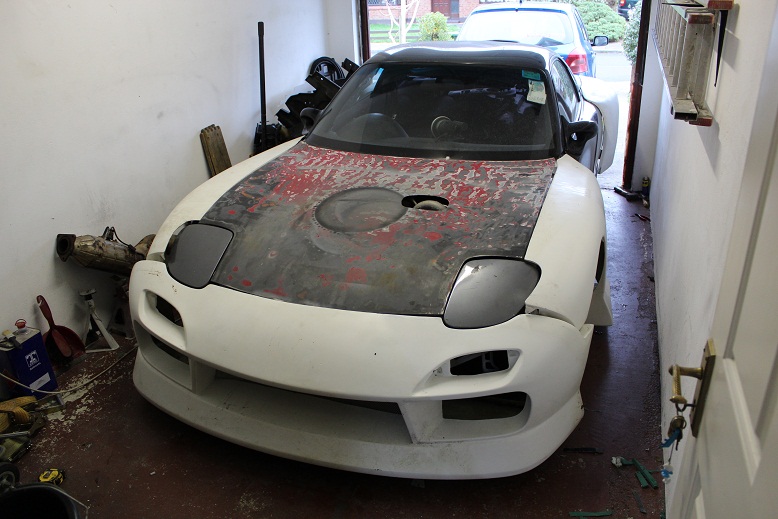
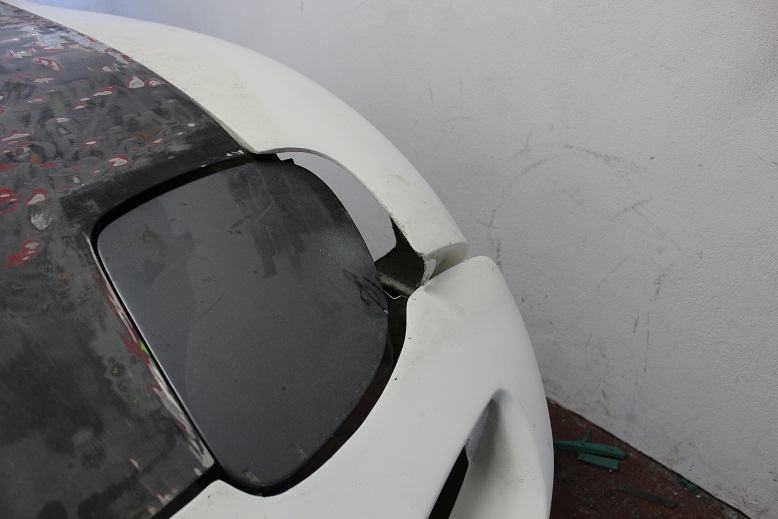
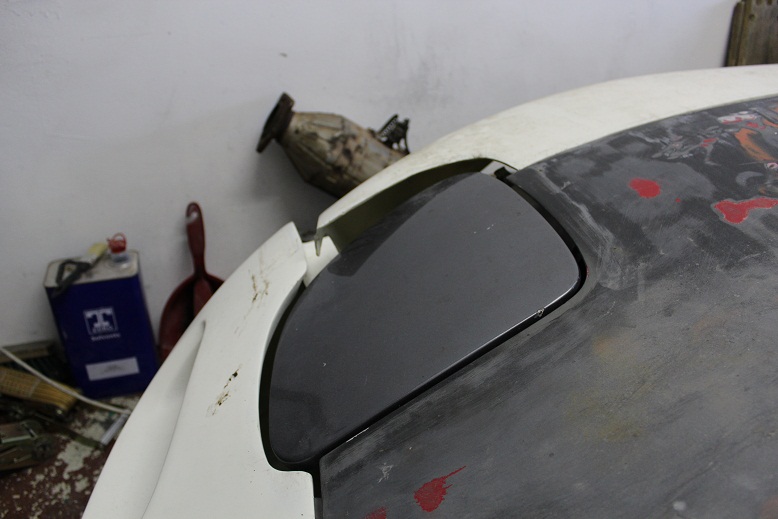
Only took 2 hours to get the wings to fit but looks alot better.
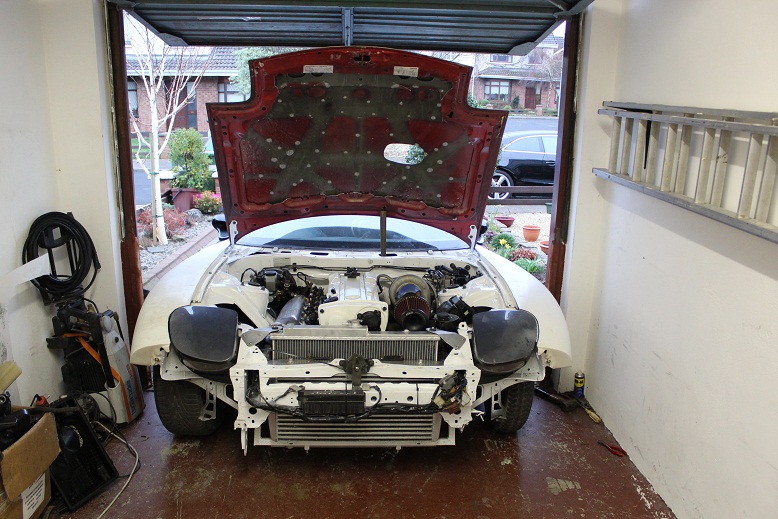
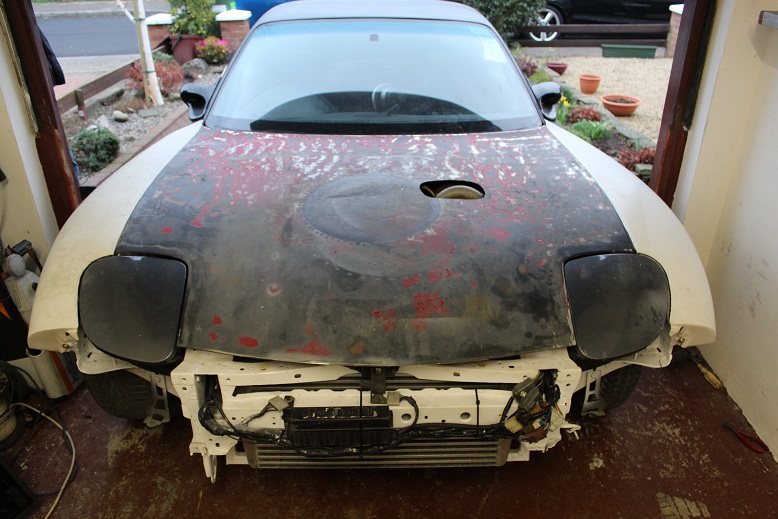
I have to do some trimming around the lights, adjust the hinges for the bonnet, move the power steering fluid bottle and the gaps should be some bit better. Screwed on the quarters too but again they need alot of work, be a while before its all sorted...
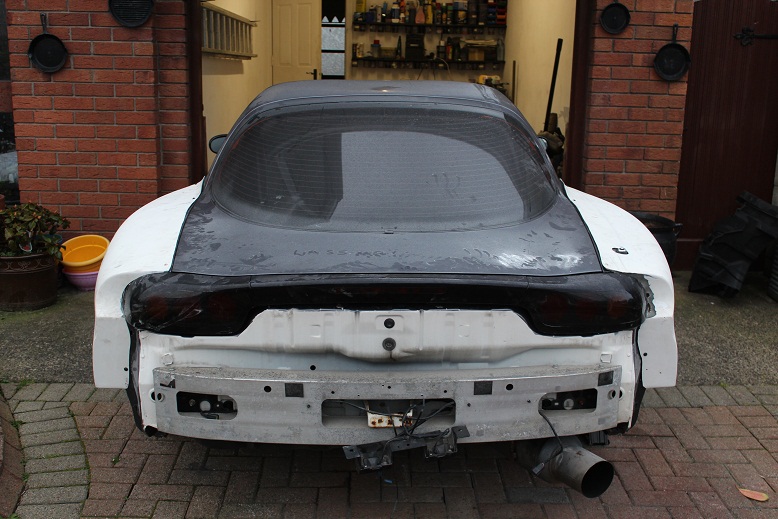


Only took 2 hours to get the wings to fit but looks alot better.


I have to do some trimming around the lights, adjust the hinges for the bonnet, move the power steering fluid bottle and the gaps should be some bit better. Screwed on the quarters too but again they need alot of work, be a while before its all sorted...

#47
So I had a spare hour and decided to see what way the skirts would line up to the wings and quarters, suprise, suprise, shocking was the answer, there seems to be a pretty decent gap on both sides, now it is even however I don't know whether to cut the skirts in the middle and move them forward to close it or leave them as is, there is strain on them already and I'd be afraid of the joint cracking tbh.
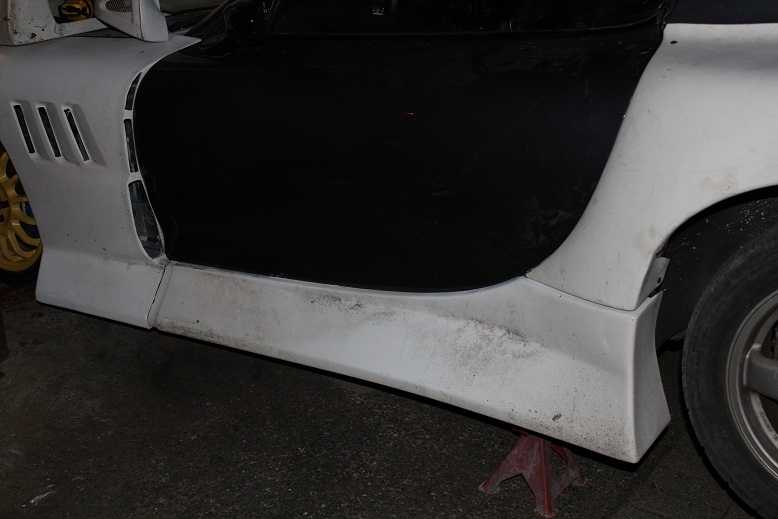
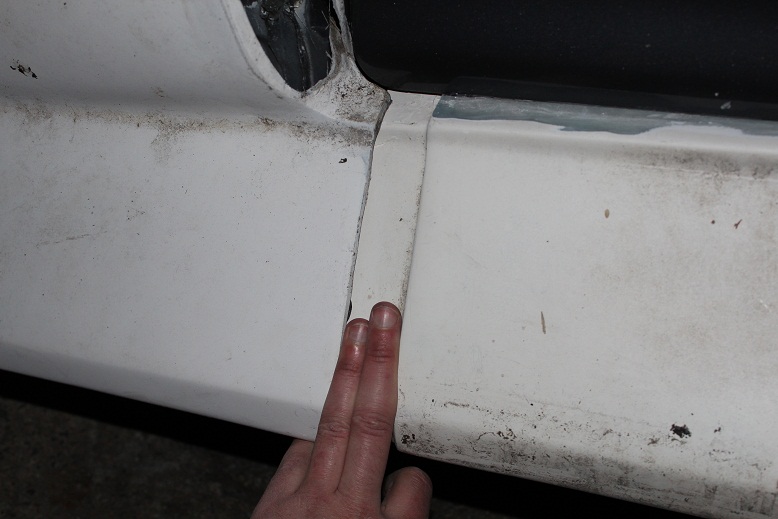
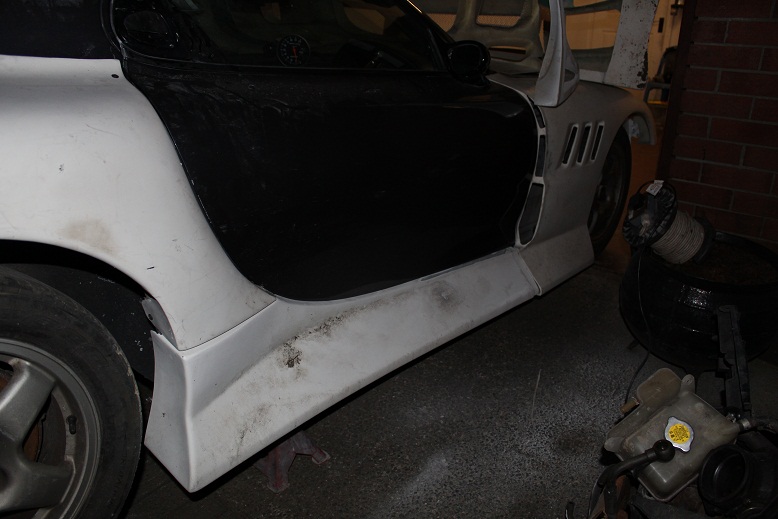
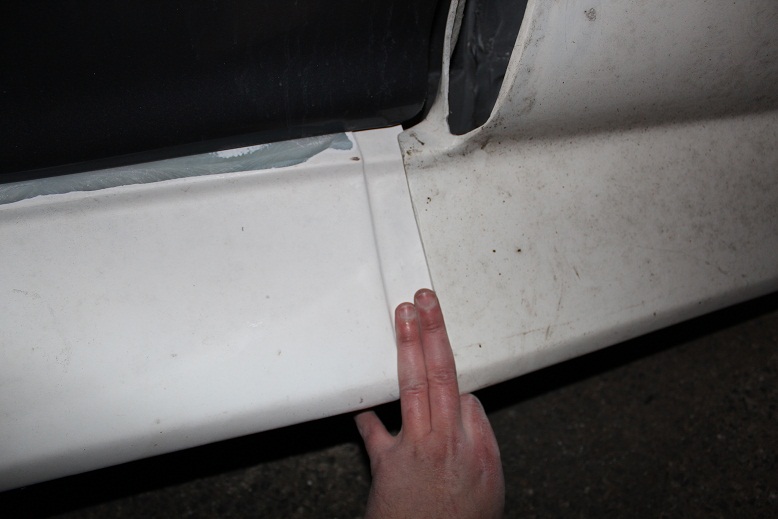
I reckon the easiest thing to do is use filler to build up the recess however still leave a joint and that should prevent the stress of making the skirts longer without cracking... So I then threw on the rear bumper, worse fitment than the front but I was hardly shocked, was thinking of binning the whole kit until I pushed it back in the garage, the presence of the car in the garage sold me, its going to be a long few months of work but I reckon it'll be worth it
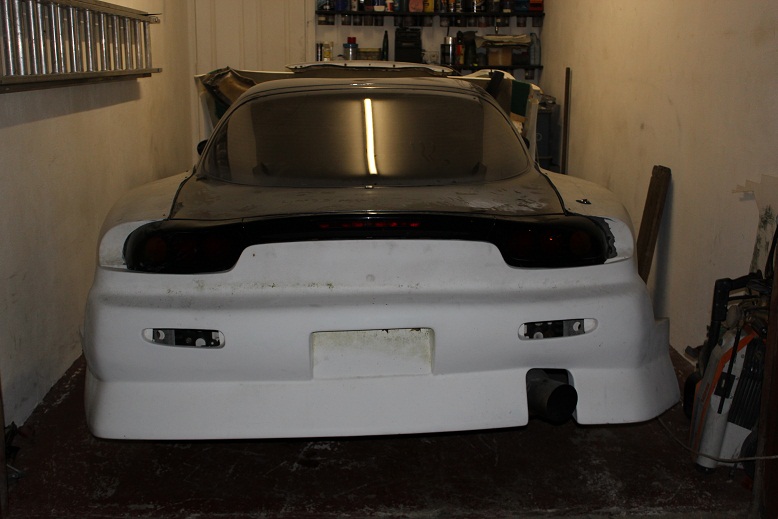


I reckon the easiest thing to do is use filler to build up the recess however still leave a joint and that should prevent the stress of making the skirts longer without cracking... So I then threw on the rear bumper, worse fitment than the front but I was hardly shocked, was thinking of binning the whole kit until I pushed it back in the garage, the presence of the car in the garage sold me, its going to be a long few months of work but I reckon it'll be worth it


#48
So I spent an hour or so heating and twisting the bumper :
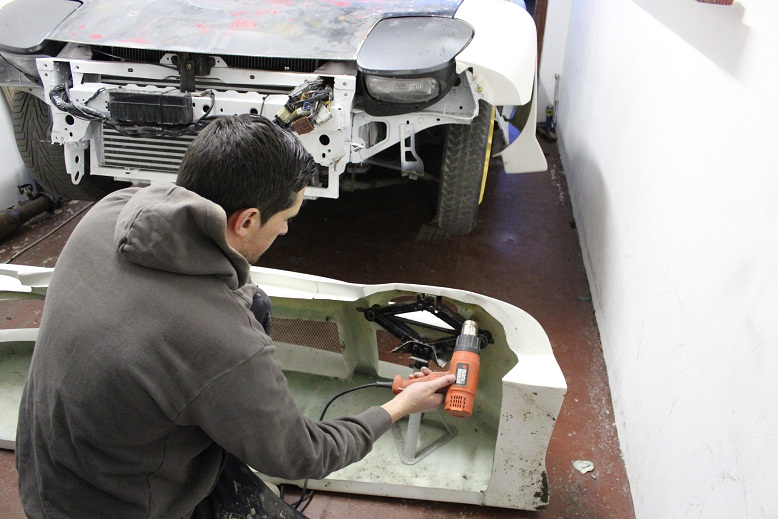
First issue was the bonnet line, the bonnet wouldn't close, anyone who has fitted an aftermarket from bumper to an RX7 knows that the bonnet line is the hardest to get right :
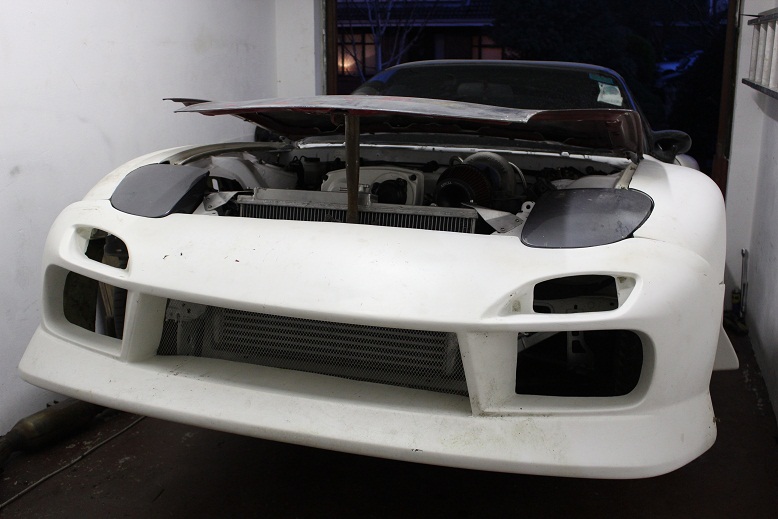
So ground back the front of the bonnet just a shave, pinned the bumper back from underneath and finally ground back the bumper just enough, the wings aren't lining up to the bumper at the sides yet but 3hrs was more than enough of looking at this thing :
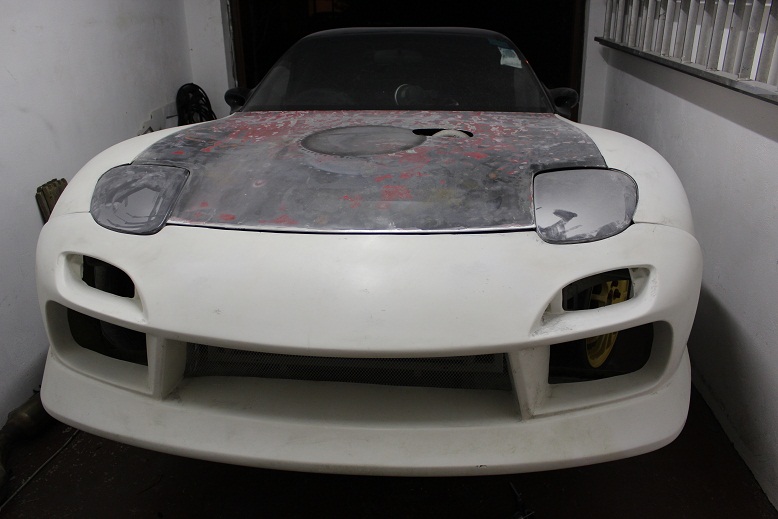
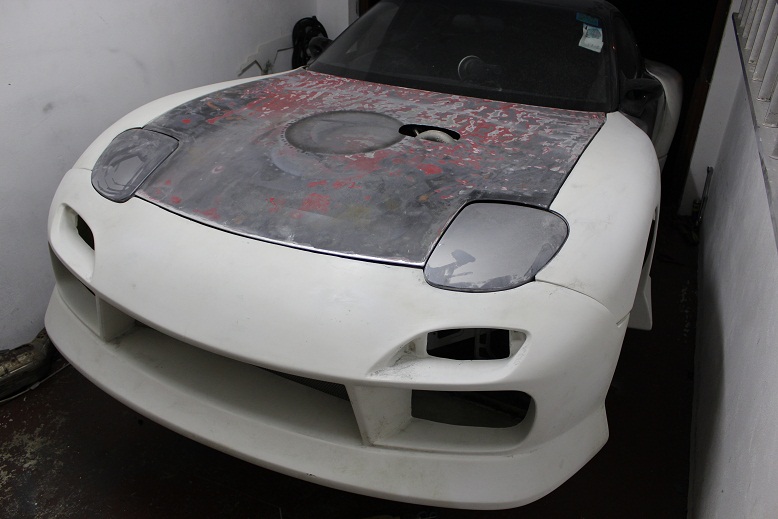

First issue was the bonnet line, the bonnet wouldn't close, anyone who has fitted an aftermarket from bumper to an RX7 knows that the bonnet line is the hardest to get right :

So ground back the front of the bonnet just a shave, pinned the bumper back from underneath and finally ground back the bumper just enough, the wings aren't lining up to the bumper at the sides yet but 3hrs was more than enough of looking at this thing :


#49
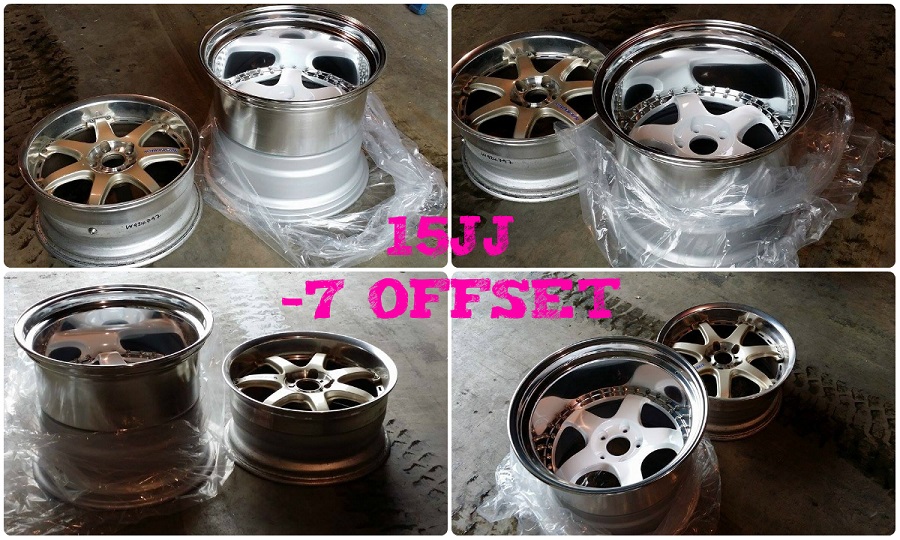
Anyways I got some good news yesterday, the Meisters have arrived from Japan, the baked beans diet is nearly over ha, ha... Collecting them in 2 weeks so should be interesting to see the fitment under the BN Sports Kit 


#50
So finally got some time to go up and collect the wheels but Romeo wanted to play hide and go seek instead :
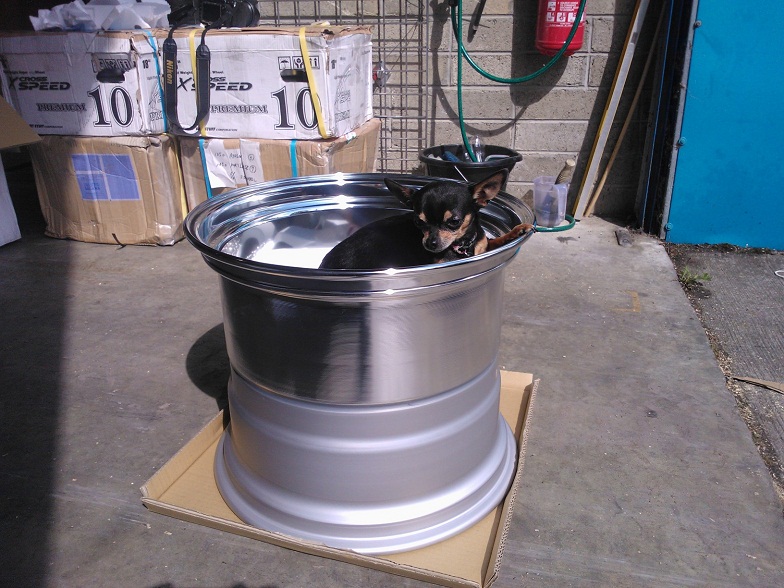
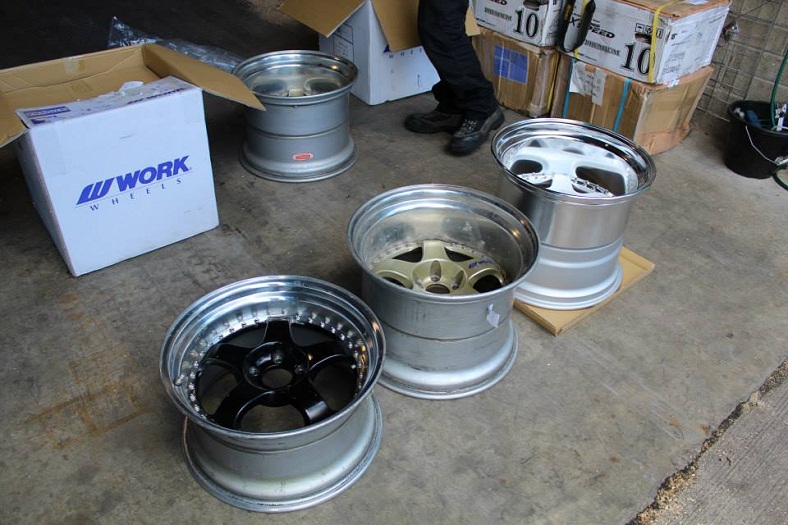
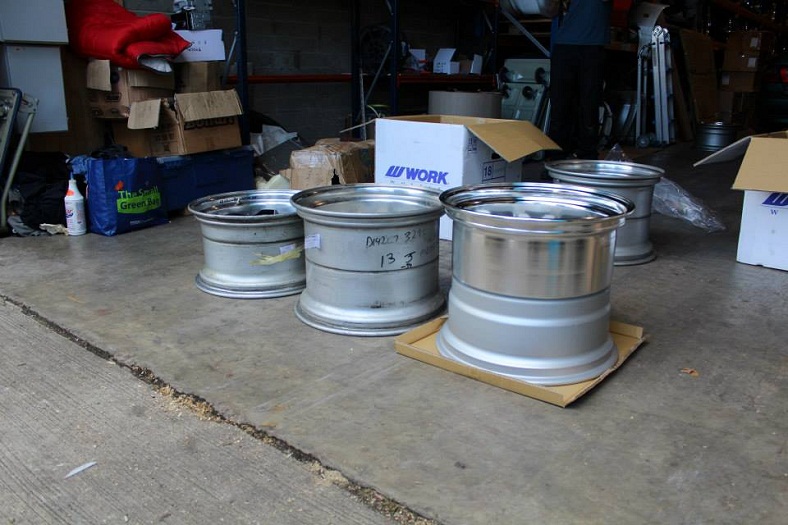
The thing is I bought 11jj's for the front but beside the 15jj's they looked crap so we put some 13jj's in the middle, so now I have 13jj's for the front and 15jj's for the rear Bye, bye 11jj's :
Phoebe whose Caesar's girlfriend jumped in for a quick pic :
:
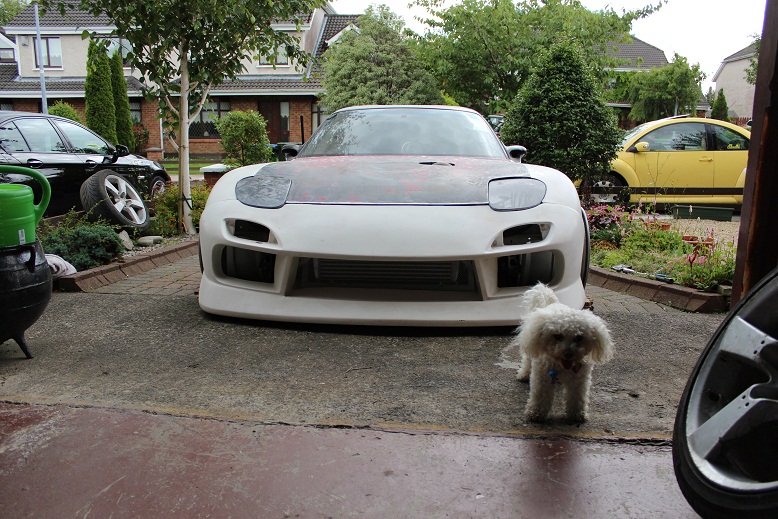
And here she is, 13jj up front -34 and 15jj on the rear :
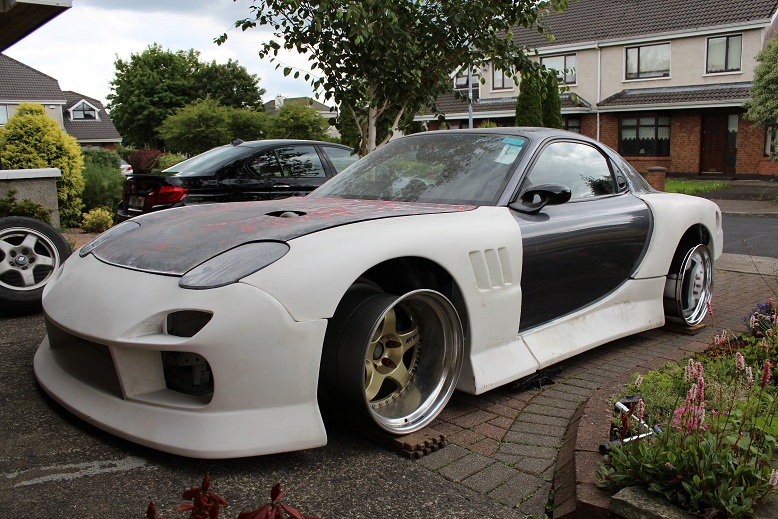

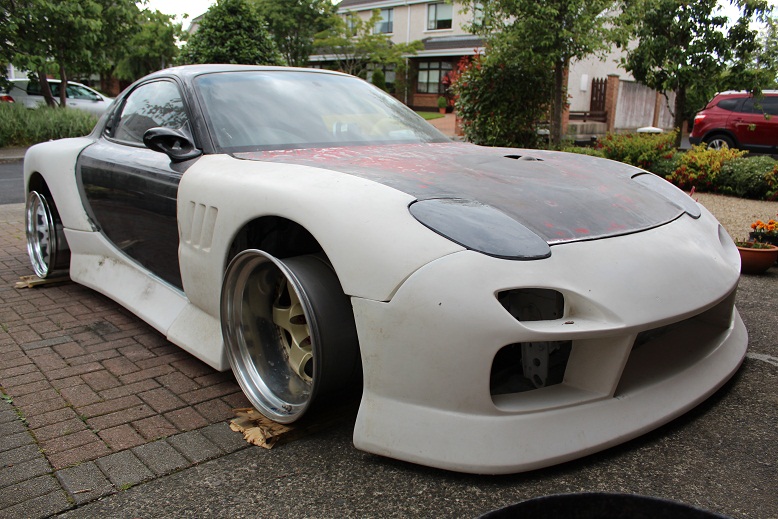

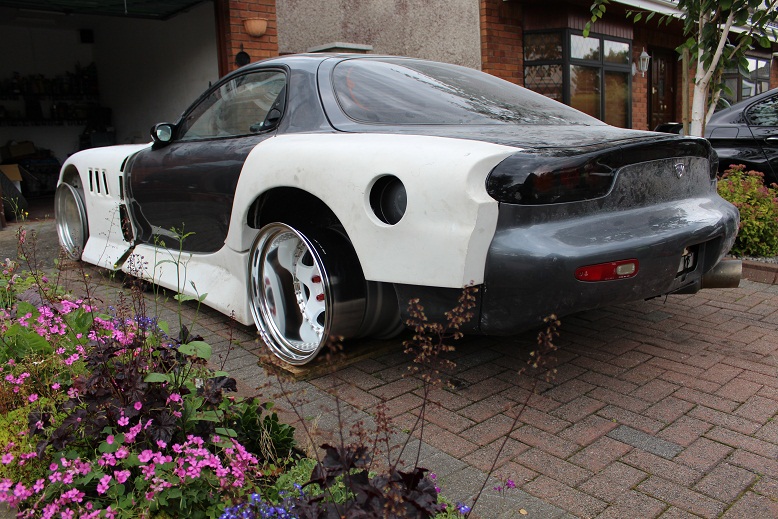

The thing is I bought 11jj's for the front but beside the 15jj's they looked crap so we put some 13jj's in the middle, so now I have 13jj's for the front and 15jj's for the rear
 Bye, bye 11jj's :

Phoebe whose Caesar's girlfriend jumped in for a quick pic
 :
:
And here she is, 13jj up front -34 and 15jj on the rear :


