When you click on links to various merchants on this site and make a purchase, this can result in this site earning a commission. Affiliate programs and affiliations include, but are not limited to, the eBay Partner Network.
For me, suspension and brakes are more important than HP. Even so, cost is always a consideration so I decided to give the tried and true GC/Koni combo a try. This decision was made before I blew my engine when my objectives were to have a fun track car on a budget. Of course, that plan has quickly gone out the window. Since I've got them, will see how these do. I went with 9/7k spring rates and hope that's not too soft with 255 RE-71Rs. I did replace the sways with Peter Ferrell bars. Will see how that combo works.
Without any road feedback on the new bushes and coilovers, I went ahead and replaced the sway bars. I got a used PFS set cheap so thought I'd give it a go. I can always revert back to stock if they are too aggressive. I also went with Improved Racing end links. These provide more adjustability which is good if you know how to fine tune a suspension, which I do not. Thankfully RP Performance Racing at Summit Point know their stuff.
I also installed Super Now sway bar brackets. These are shorter than stock which raises the bar and seem beefier. Gotta love the Super Now colors
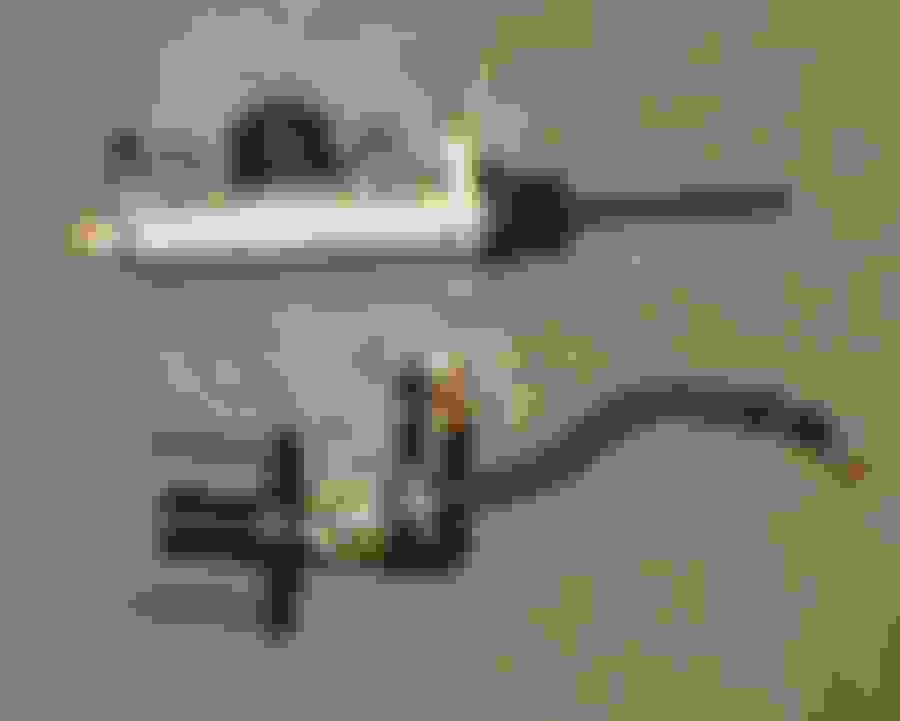
I always found the FD power steering fine for track duty, but have read a lot on the subject of going manual, so I thought I'd give it a try. Besides the potential benefits of driver feedback, you also loose some weight in the engine bay and make room for cooling or other aftermarket parts. I knew I wanted a better rack than a simple looped setup and was contemplating full depowering ala https://www.flyinmiata.com/tech/depower.php or going the Maval route when a Chips Motorsports rack came up for sale with little mileage. I jumped on it
I have since gotten it on the road and I must say, driving around town is a pain and I still am running stock tires. I would not recommend this mod for a street car.
How do you like the konis with the groundcontrol? How do the 9/7k spring rates feel driving around town?
Most people had good comments about the de-powered rack. So how bad is it for you? I'm still debating on doing this...so I'm just curious why you think its a pain...
Honestly, I don't have enough miles yet to evaluate the coilovers. They seem a little soft, but are currently dialed back all the way. Hope to get on the track soon to truly evaluate (this thread is lagging somewhat). As for steering, it's a real chore to turn the wheels at low speed. Forget trying to hold a cup of coffee, turn, and shift at the same time. At speed, it's still tough but much more manageable. Again, will see how my arms feel after a 20+ turn road course over the span of 25 mins.
Don't have any pictures at the moment, but when I first put them on, the front ride height was way low, I'm talking maybe I could barely get to 25" with everything set to max height. Seems the threaded sleeves that fit over the shocks were too short. I got new ones from GC that fixed the problem and I now have good ride height range (Don't know min to max but guessing around 23-27 +/- an inch)
I've got a sweet set of swaybar mounts, but I'm holding off cause I've been thinking the swaybar should low-point the frame in case the car ever high sides on something. And, in that case you'd want to throw away your swaybar mounts and not straighten your frame. Thoughts?
Not really sure in what situation where you might "high side" on something where the sway bar would protect the frame. At the track, I'm worried about going into a wall and don't think a lower bar will help there.
Think the higher bar is more about suspension geometries, but I'm no expert in that area. I ended up getting the Super Now's not because they were shorter, but because they are beefier than stock, which are a known weakness, especially with the beefier bar. I also was making a RHD Japan group purchase and that made the decision easier. If I wasn't getting anything else from them, I'd get the beefed up Mazdatrix mounts which I believe are AWRs
All those broken stock swaybar mounts are impact related, it's not metal fatigue from normal use.
They impact things because they're the low point on the front frame. Changing their mode of failure and location is going to have some implications, not necessarily related to cornering performance.
Honestly, I don't have enough miles yet to evaluate the coilovers. They seem a little soft, but are currently dialed back all the way. Hope to get on the track soon to truly evaluate (this thread is lagging somewhat). As for steering, it's a real chore to turn the wheels at low speed. Forget trying to hold a cup of coffee, turn, and shift at the same time. At speed, it's still tough but much more manageable. Again, will see how my arms feel after a 20+ turn road course over the span of 25 mins.
I'm not sure what your alignment specs are, but you could always try running with less caster angle to reduce steering force.
I am where you are on the fuel filter relocation and I don't want to do it lol.
Replaced the fuel hat today and tried to use some barbed fittings with the stock rubber hoses and it's a no go. Looks like I will have to go AN 90's off the hat and I'm trying to decide how far I'm going to go with it. Relocating and upgrading the fuel filter wasn't on my list but it rapidly becoming part of the scope creep we all know and love.
All those broken stock swaybar mounts are impact related, it's not metal fatigue from normal use. They impact things because they're the low point on the front frame. Changing their mode of failure and location is going to have some implications, not necessarily related to cornering performance.
The plan is to have no impacts
Originally Posted by afterburn27
I'm not sure what your alignment specs are, but you could always try running with less caster angle to reduce steering force.
Believe it's set at 6 deg of castor, camber is around -2
Originally Posted by ZoomZoom
I am where you are on the fuel filter relocation and I don't want to do it lol. Replaced the fuel hat today and tried to use some barbed fittings with the stock rubber hoses and it's a no go. Looks like I will have to go AN 90's off the hat and I'm trying to decide how far I'm going to go with it. Relocating and upgrading the fuel filter wasn't on my list but it rapidly becoming part of the scope creep we all know and love.
Relocating the fuel filter was easy for me since I had the rear sub-frame out anyways. Since I still have the stock hat and no AN fitting, I went with fuel line/hose. For the new line, just had to bubble flare it for the hose connection. IMHO, hard line is better/cheaper than AN hose, but it's a given it's harder to work with.
Believe it's set at 6 deg of castor, camber is around -2
Relocating the fuel filter was easy for me since I had the rear sub-frame out anyways. Since I still have the stock hat and no AN fitting, I went with fuel line/hose. For the new line, just had to bubble flare it for the hose connection. IMHO, hard line is better/cheaper than AN hose, but it's a given it's harder to work with.
That said, like what you are doing BTW
Thanks and thanks for the tip of flaring the hard line. I think I may use that tip and cut the hard line down the road to relocate the fuel filter. The weather is getting too nice not to get the car back up and running.
Did this mod before joining the forum. Primary reason was to improve airflow in the engine compartment and secondary was better weight
distribution (and to allow room for my sub-amp, see next post).
I mounted the battery in the rear deck. It fits in a Summit/Jegs battery box underneath the rear strut bar. It's bolted to the floor with
threaded rod. If I had to do it over, i'd use nutserts as it was a pain getting the nuts on the underside.
I connected the positive post to a cutoff switch, then to a 150A ANL fuse. If I did it again, i'd use a breaker vice a fuse. The neg is connected
to the strut brace nut and the positive is routed through the cabin on the passenger side then underneath the dash and through the firewall by the clutch pedal.
I went through the firewall before I learned there was a convenient opening under the fender.
Next was connecting to the main fuse block.
If you notice, I ghetto rigged a support to zip tie the fuse block to (not connected at the moment). I wish there was a better way to do this w/o redoing the harness
wiring. This will be something to get to later tho.
This was actually my first mod. Not having a bose unit, it was a pretty straight forward install. In my previous post, you may have wondered
why I didn't mount the battery in the rear bin as it would have a lower center of gravity. First, I did not want to hack up my bin and second,
that's where I installed my subwoofers.
I removed the bin lids and mocked up replacement lids using plexiglass which I connected to the hinges and drilled holes for 6" subwoofers.
The sub-amp and woofers were from my FC, so I thought i'd throw them in the FD (the 6" woofers fit perfectly in the FC rear speaker holes BTW).
The head unit is a Kenwood and I thought you could change the light color. Apparently, that's the more expensive model so I am stuck with blue light,
but that's ok because that goes with the bright white gauge colors in my gauge pod.
The stereo was nice when I was running the stock pre-cat and catback and everything was nice and quiet. Not now though
Since this is becoming more and more of a track car, i'll probably rip it out, but for now it's installed and not going anywhere.
With the tranny out, thought i'd change out the 5th gear synchro even though I wasn't having any real problems other than a couple missed shifts.
This wasn't a super complex repair. Biggest issue was making the extended gear puller.
David Geesaman also has a very good how-to on a complete transmission rebuild. It's a 28MB pdf that's well worth seeking out
(can email if anyone's interested)
I went ahead and replaced the synchro anyways. Another if I had to do it over again would be to replace the mainshaft rear bearing.
This needs to be pulled to access the synchro and pressure is applied to the edges of the bearing when pulling. This could damage the
bearing and should have been replaced as a cautionary procedure since it's not that expensive. I went ahead and reinstalled it.
Since I had placed a RHD Japan order for other things, I picked up a Super Now transmission cover. It's thicker and has beefy radiant fins.
Not sure how effective it really is, but since I was paying freight on other things, the price of the cover wasn't outrageous (unlike the Greddy diff cover)
Stock cover vs. Super Now
Main gears exposed. They seem in good order
I also put on a new clutch fork. Think this was an issue on '93's and was upgraded for the '94's so mine should have been fine, but I replaced it anyway.
Went with the ACT HD Pressure Plate and Street Clutch (ZX6-HDSS). Hopefully this should be good for my 350-400 power goals
Note new Excessive motor mounts
I was initially concerned about the clutch feel, esp for road course use. Hinson modified a Wildwood master cylinder to fit so I thought about using that
I ended up going OEM (new)
I don't have any hours under this setup so don't have any feedback yet.
Something to think about with synchro's. The FD and FC TII synchro's are interchangeable. There is a small difference and it's the FD ones are lighter. They made them lighter so the car would shift very quickly but due to this they can damage easily. The TII synchro has more mass and can take a bit more abuse in theory.
Just wanted to drop that info in case someone reads this and is tranny mauler
Wish I knew that earlier. Oh well, good knowledge for next time

 04-10-16, 11:32 AM


 )
)

