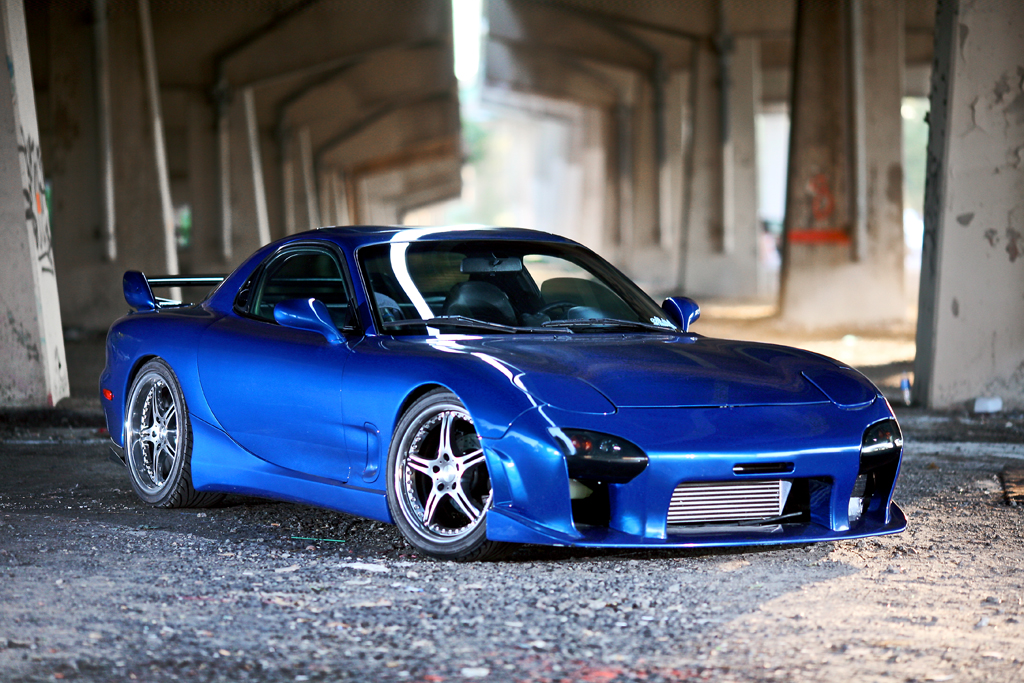
JhnRX7's 2017 Season Track Tour: Rotary FD & MX-5 Powah'ed
#29
Thread Starter
Golf Cart Hooligan
iTrader: (12)
Joined: Oct 2002
Posts: 993
Likes: 23
From: Philadelphia, PA

Thats not for a while though, I am happy with the power I am making and my efforts ($$$$) really need to be focused towards suspension right now.
#30
#33
That is one really sexy FD, very nice car dude. Only suggestion I have it to put some wire mesh in front of your finned heat exchangers (rad, IC, oil coolers), to protect the fins. I put this stuff in front of my OEM coolers and it works great. I will be putting another piece in front of my new radiator setup too...
http://www.pegasusautoracing.com/pro...p?Product=3641
g/l with the rest of your build, FDs are so much fun on a track!!!
http://www.pegasusautoracing.com/pro...p?Product=3641
g/l with the rest of your build, FDs are so much fun on a track!!!
#34
Thread Starter
Golf Cart Hooligan
iTrader: (12)
Joined: Oct 2002
Posts: 993
Likes: 23
From: Philadelphia, PA
UPDATE!
I participated in a track event this past weekend with the Porsche Club of America at NJMP (Thunderbolt track). It was a great chance for me to learn the car and build up some skills before next year when I plan on getting a lot more track time. The track is a bit intimidating at first but after the first couple sessions and you get used to the track and it is a blast!
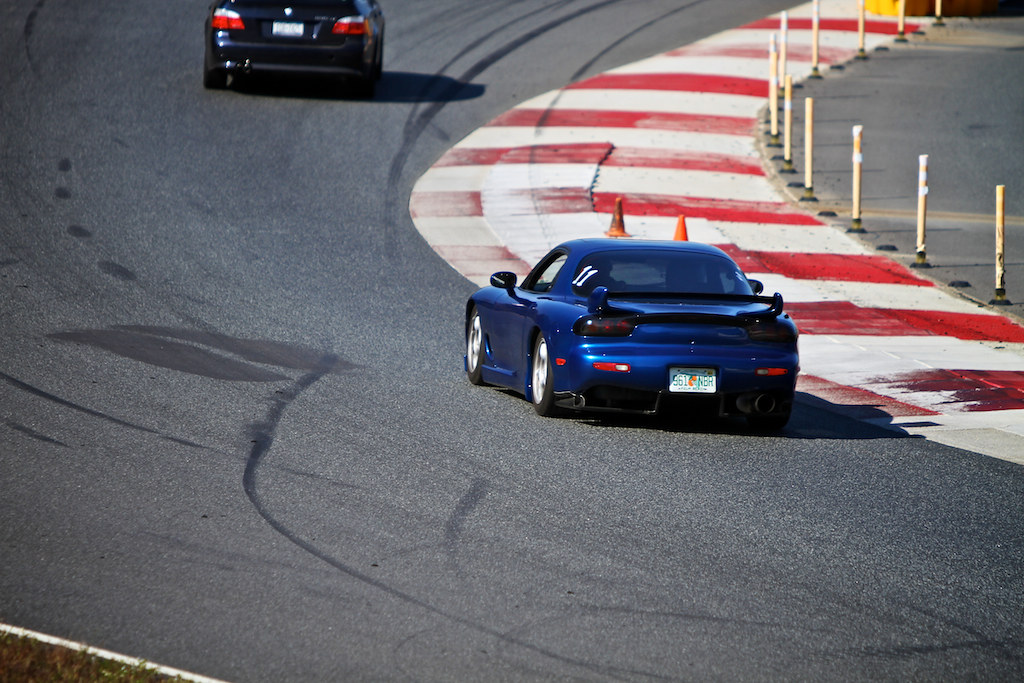
Even though the car was not quite ready for the track suspension wise, this was an invaluable experience for me to really know what needs to be done on the car over the winter. One of my biggest enemies over the weekend was body roll, there was a lot of it The traction was there, but the car just did not feel very stable in the corners which did not exactly inspire confidence in me.
New coilovers, bushings, and sway bars should solve that problem. I am still undecided on what brand of coilovers to go with, due to my budget I am thinking about going with stance. I will have to make that decision soon. My 100k+ mile old bushings took quite the beating this weekend as well, I now have some new clunks
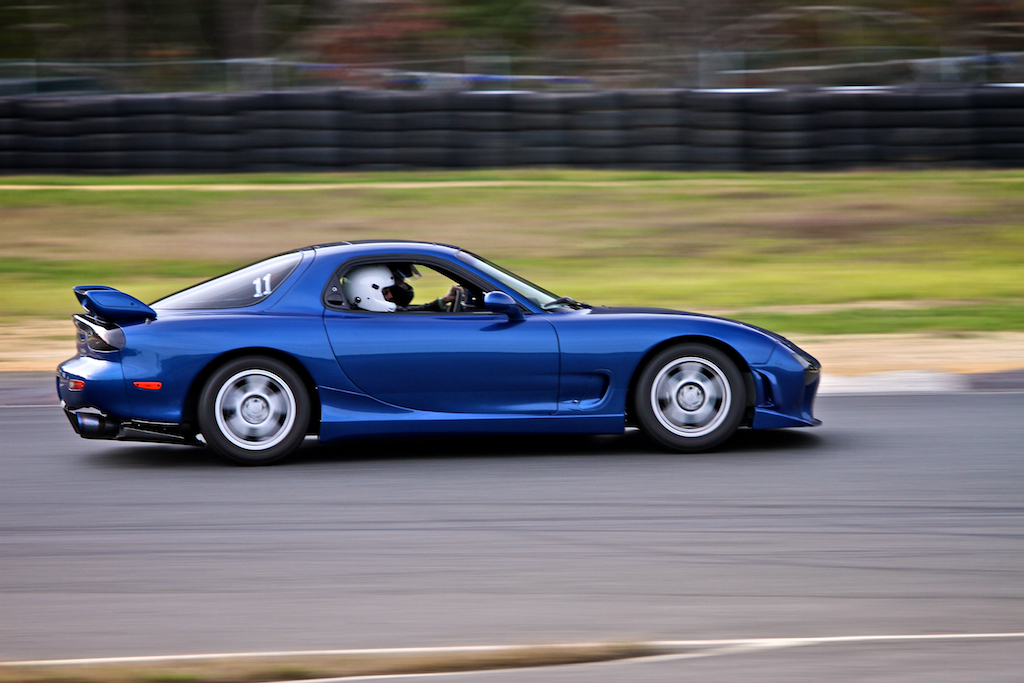
Body roll in turn 1.
Front end squatting under braking.
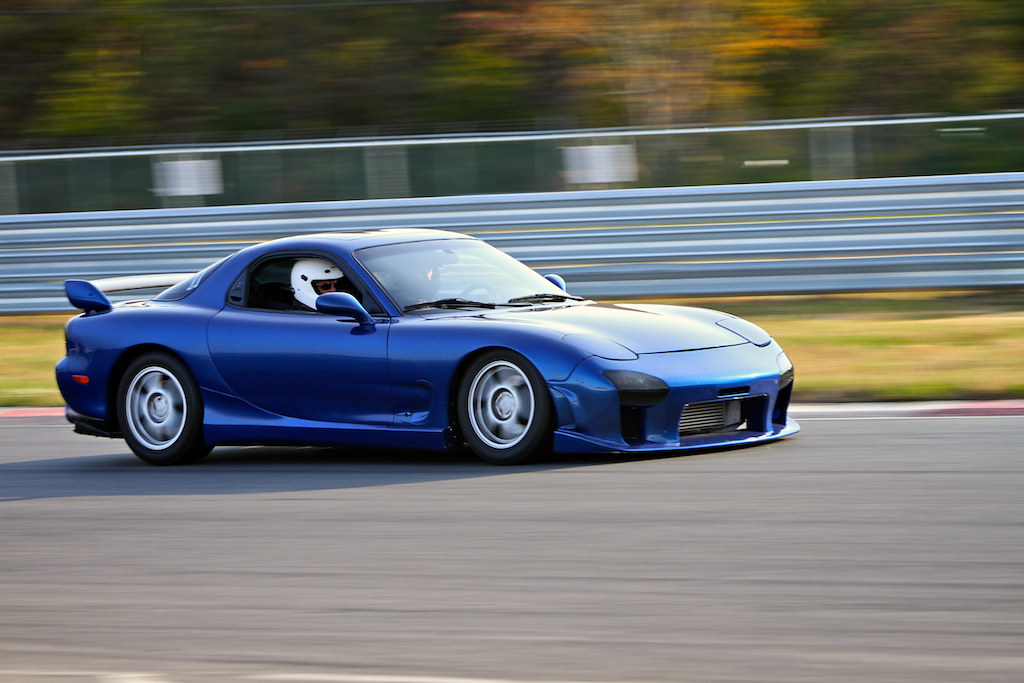
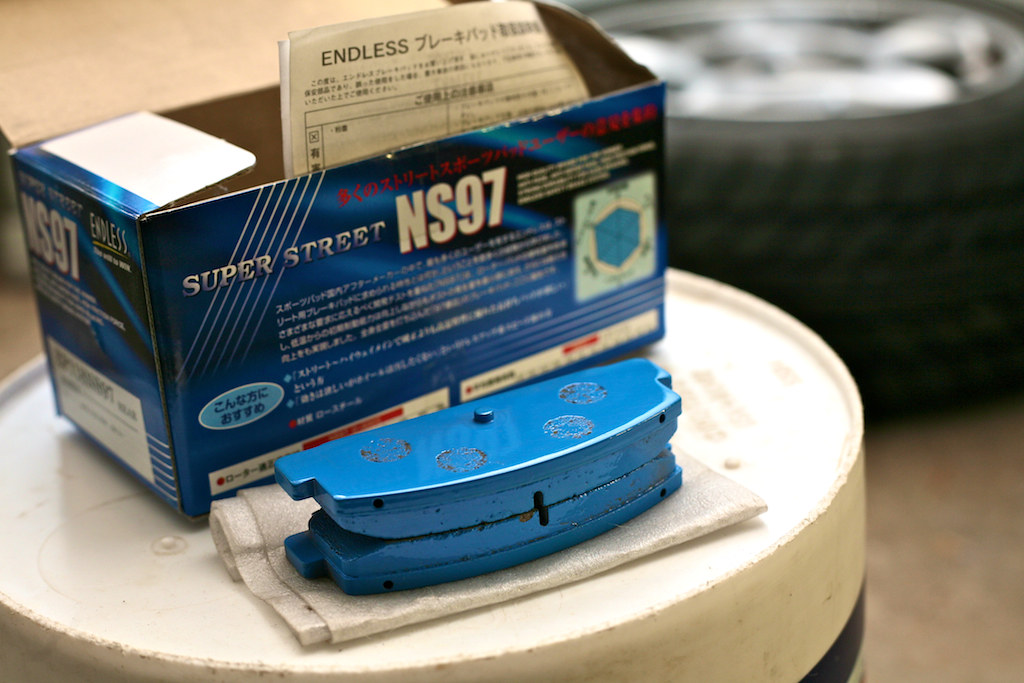
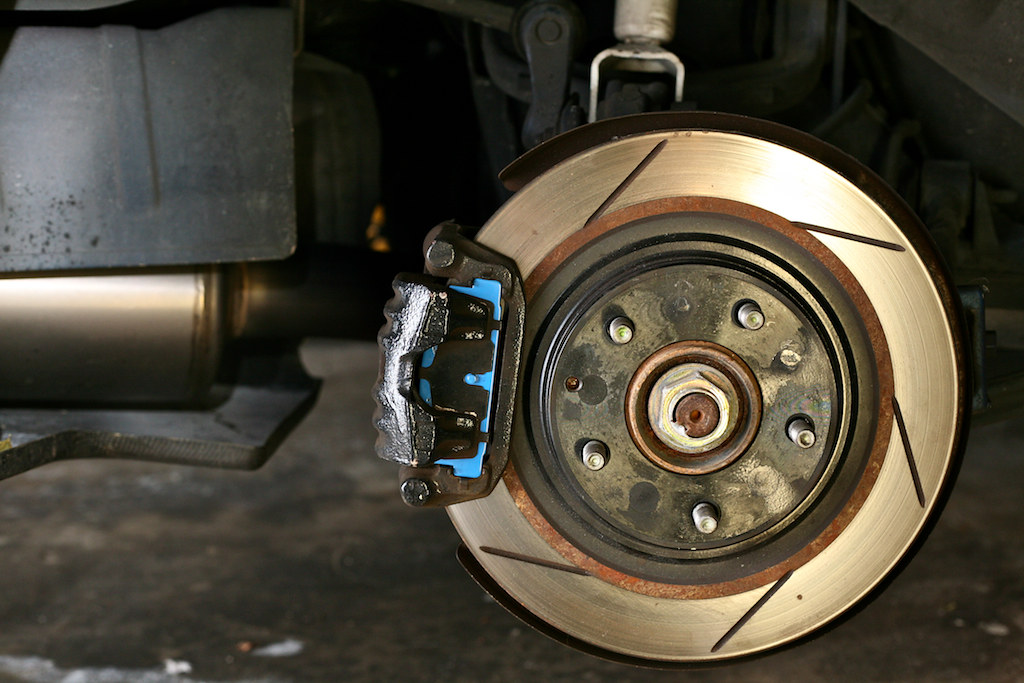
I was not exactly impressed with my braking performance either. I found myself letting off throttle and braking very early because my brakes just did not bite very hard. I had replaced my rear pads and rotors just before the event because my old pads were shot. I went with Endless NS97 pads which felt very nice compared to my old pads. However, when I replaced the pads I did not bleed the system at all and the pedal felt a bit soft afterwards... It probably would have felt better if I bleed the system a bit. I was running fairly new Hawk HP+ in the front and the brake fluid was fresh.
The motor ran flawlessly with the exception of a slight hesitation when the secondary injectors came online. Luckily I brought my tuning computer with me and I was able to get that sorted out. Later in the day I also noticed a bit of a stumble on tip-in, but it was not a big issue and I will work on solving that later.
My cooling system was top notch
 Saturday was a high of 68F and Sunday was a high of 72F. My water temps were rock solid at 83C on Sat and 85C with a peak of 86C on Sun. Intake temps were in the mid to low 20's C on Sat and high 20's C / low 30's C on Sun. I haven't done my ducting yet either, so I don't think I have much to worry about with my cooling system
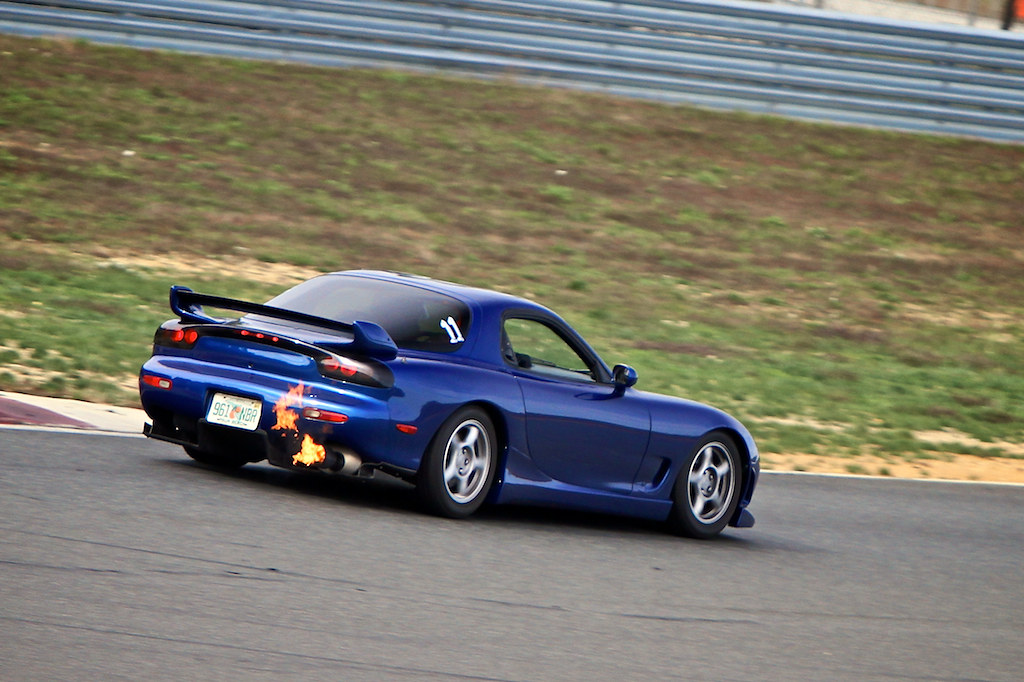
FIAH BALLZ!
I participated in a track event this past weekend with the Porsche Club of America at NJMP (Thunderbolt track). It was a great chance for me to learn the car and build up some skills before next year when I plan on getting a lot more track time. The track is a bit intimidating at first but after the first couple sessions and you get used to the track and it is a blast!

Even though the car was not quite ready for the track suspension wise, this was an invaluable experience for me to really know what needs to be done on the car over the winter. One of my biggest enemies over the weekend was body roll, there was a lot of it
 The traction was there, but the car just did not feel very stable in the corners which did not exactly inspire confidence in me.
 New coilovers, bushings, and sway bars should solve that problem. I am still undecided on what brand of coilovers to go with, due to my budget I am thinking about going with stance. I will have to make that decision soon. My 100k+ mile old bushings took quite the beating this weekend as well, I now have some new clunks

Body roll in turn 1.

Front end squatting under braking.

I was not exactly impressed with my braking performance either. I found myself letting off throttle and braking very early because my brakes just did not bite very hard. I had replaced my rear pads and rotors just before the event because my old pads were shot. I went with Endless NS97 pads which felt very nice compared to my old pads. However, when I replaced the pads I did not bleed the system at all and the pedal felt a bit soft afterwards... It probably would have felt better if I bleed the system a bit. I was running fairly new Hawk HP+ in the front and the brake fluid was fresh.


The motor ran flawlessly with the exception of a slight hesitation when the secondary injectors came online. Luckily I brought my tuning computer with me and I was able to get that sorted out. Later in the day I also noticed a bit of a stumble on tip-in, but it was not a big issue and I will work on solving that later.
My cooling system was top notch


FIAH BALLZ!


#37
Looks great John, car looks awesome on the track.
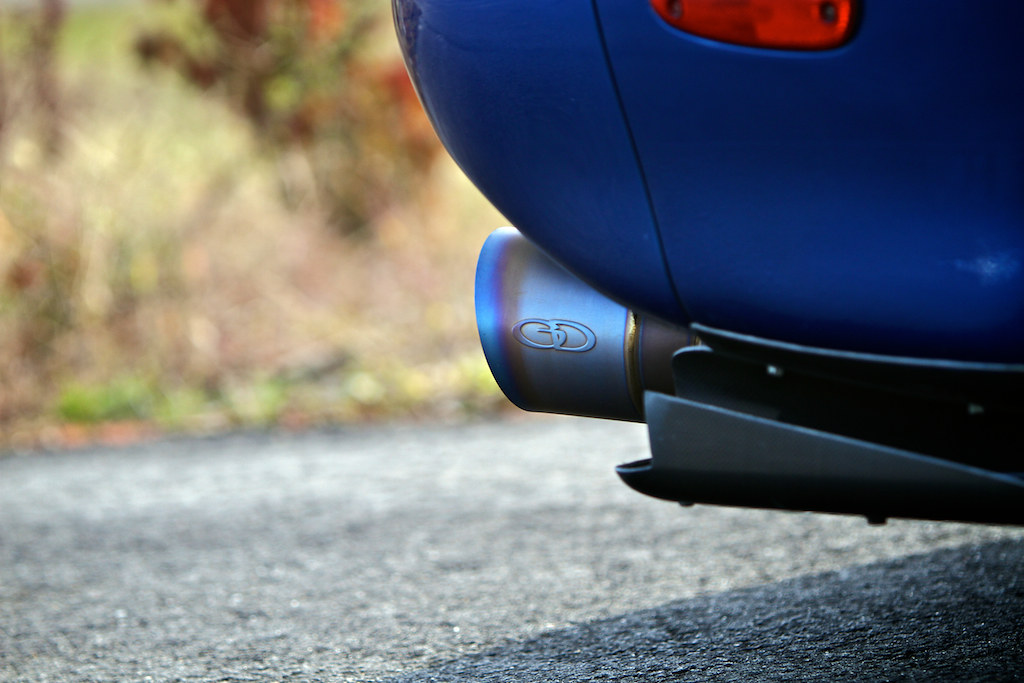
I see your exhaust tip turned blue too.
I really need to get my car on the track, seeing these pics make me jelous.
John
I see your exhaust tip turned blue too.
I really need to get my car on the track, seeing these pics make me jelous.
John
#38
Thread Starter
Golf Cart Hooligan
iTrader: (12)
Joined: Oct 2002
Posts: 993
Likes: 23
From: Philadelphia, PA
I am using 3mm Hurley apex seals with factory Mazda corner seals. Could that have anything to do with the flames? I would like to eliminate them or at least reduce them. I was hoping it had something to do with my map.
My tip def turned blue after the first day. I would like to get an EGT sensor to monitor / log my exhaust temps.
#42
Thread Starter
Golf Cart Hooligan
iTrader: (12)
Joined: Oct 2002
Posts: 993
Likes: 23
From: Philadelphia, PA
I had previously tuned the car to 11.1-11.6 AFR under WOT and I am still only running 10 psi.
I did notice in one of my logs from a while back while comparing TPS voltage to injector duty that as I let off the throttle and the throttle plates had closed completely injector duty did not go to 0% immediately. There was a brief moment during de-accell that it tapers down to zero, so maybe it is still injecting some fuel after I lift.

#45
Thread Starter
Golf Cart Hooligan
iTrader: (12)
Joined: Oct 2002
Posts: 993
Likes: 23
From: Philadelphia, PA
Interior Update
While I am building this car for track duty, the reality is that it will spend more time on the streets so a full interior is a must.
When I purchased the car almost 9 years ago the previous owner had recovered the tan leather seats with a quality black leather. However for whatever reason he thought it was a good idea to paint the carpet black. Needless to say after a few years the carpet started looking REALLY bad. I finally picked up a black carpet over the summer and tore out the entire interior to replace it.
The old carpet was so ugly I couldn't use my good camera for fear of damaging the sensor

I stripped the interior of everything except for the HVAC system. I decided that the headache of removing it was not worth the small section of carpet I would need to cut.

Finally! Black carpet!
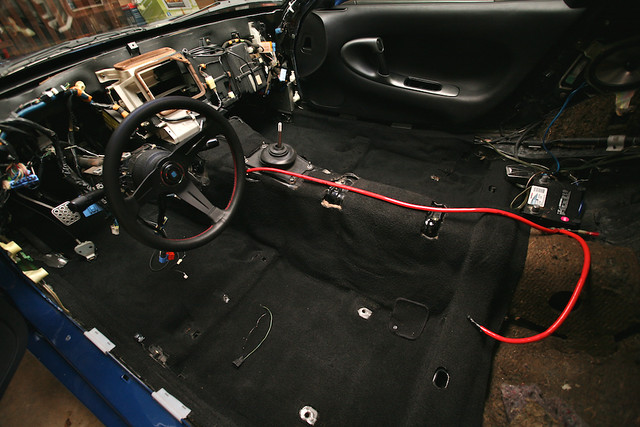

The next task was the door panels. I was having issues with my windows not rolling down all the way because the window seals would grab them and stop them from going down. I also wanted to stiffen up the factory panels and reduce or eliminate the cheap plastic sound when you pull on the panel.
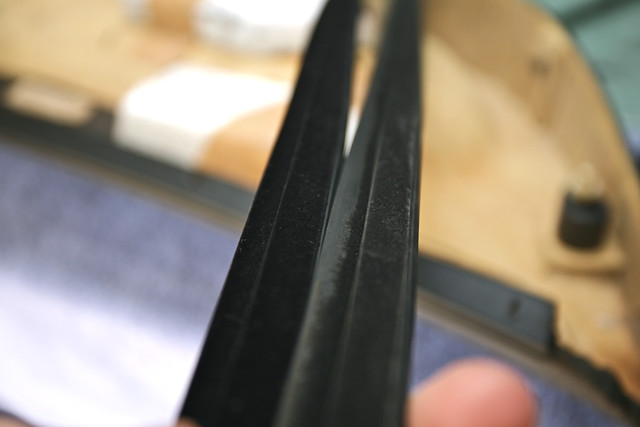
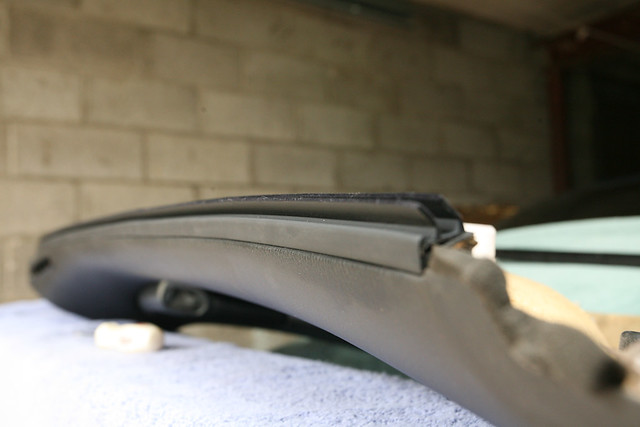
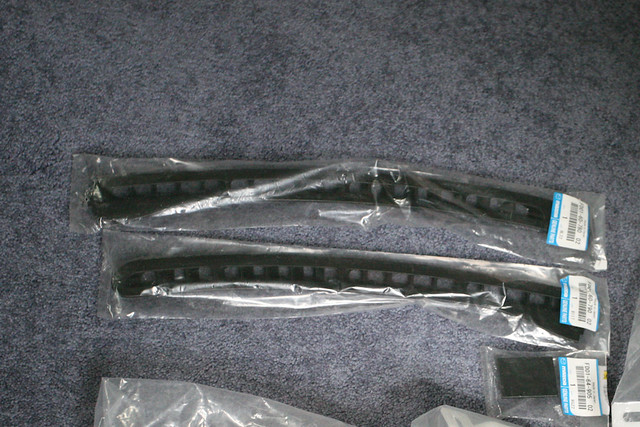
Window seals:
Old on right, new on left.
The felt had worn off and the rubber would stick to the glass stopping it from rolling down.
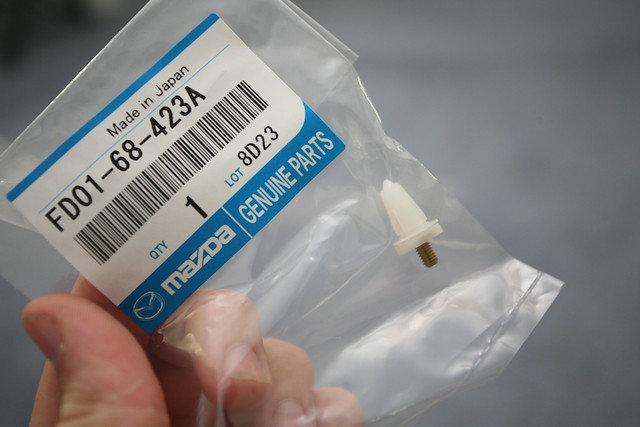
I also got some new door locator pins to replace the non-existant ones on my panels.
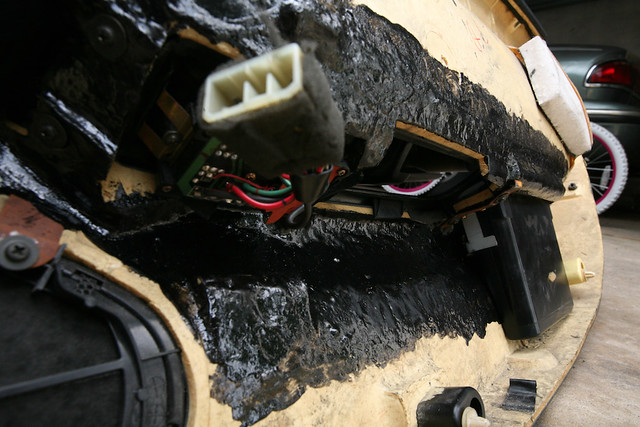
A while back I saw a fellow forum member use some liquid ABS plastic to coat the inside of the door panels. I figured I would give it a shot. It definitely added a bit of rigidity to the weak areas of the panel and even reduced (but not eliminated) some of the plastic creaking sounds due to less flexing of the panel.
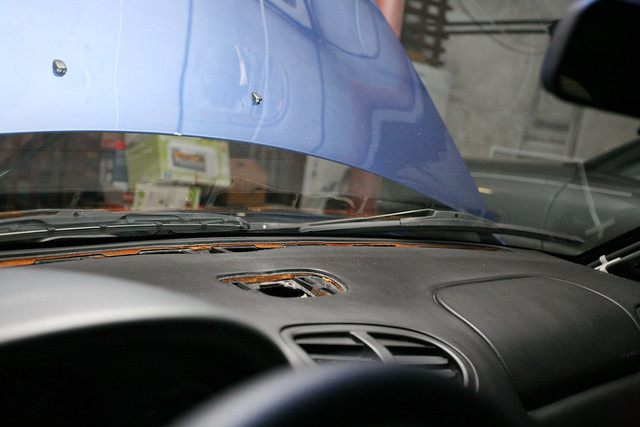
Another source of annoyance in the interior was the constant rattling coming from the broken defroster vents... a quick call to Ray Crowe at Malloy Mazda fixed that.
While I am building this car for track duty, the reality is that it will spend more time on the streets so a full interior is a must.
When I purchased the car almost 9 years ago the previous owner had recovered the tan leather seats with a quality black leather. However for whatever reason he thought it was a good idea to paint the carpet black. Needless to say after a few years the carpet started looking REALLY bad. I finally picked up a black carpet over the summer and tore out the entire interior to replace it.
The old carpet was so ugly I couldn't use my good camera for fear of damaging the sensor


I stripped the interior of everything except for the HVAC system. I decided that the headache of removing it was not worth the small section of carpet I would need to cut.

Finally! Black carpet!


The next task was the door panels. I was having issues with my windows not rolling down all the way because the window seals would grab them and stop them from going down. I also wanted to stiffen up the factory panels and reduce or eliminate the cheap plastic sound when you pull on the panel.
Window seals:
Old on right, new on left.
The felt had worn off and the rubber would stick to the glass stopping it from rolling down.


I also got some new door locator pins to replace the non-existant ones on my panels.

A while back I saw a fellow forum member use some liquid ABS plastic to coat the inside of the door panels. I figured I would give it a shot. It definitely added a bit of rigidity to the weak areas of the panel and even reduced (but not eliminated) some of the plastic creaking sounds due to less flexing of the panel.

Another source of annoyance in the interior was the constant rattling coming from the broken defroster vents... a quick call to Ray Crowe at Malloy Mazda fixed that.


#47
Thread Starter
Golf Cart Hooligan
iTrader: (12)
Joined: Oct 2002
Posts: 993
Likes: 23
From: Philadelphia, PA
Interior Update... continued
LED Gauge Cluster
A while back I had converted my cluster to white LED's via the Hypertite method of sanding off the red film on the back of the gauge faces. I lived with that for a while however it never looked good... The lighting was uneven, the gauges were very bright, and it was distracting at night.
Since I had already sanded off the film on the back I could not go back to stock. I decided to try out red LED's. The red looked MUCH better, however there was still the uneven lighting issue. I tried to solve the issue by adding more LED's.
RotaryAddicts Guide for LED Conversion
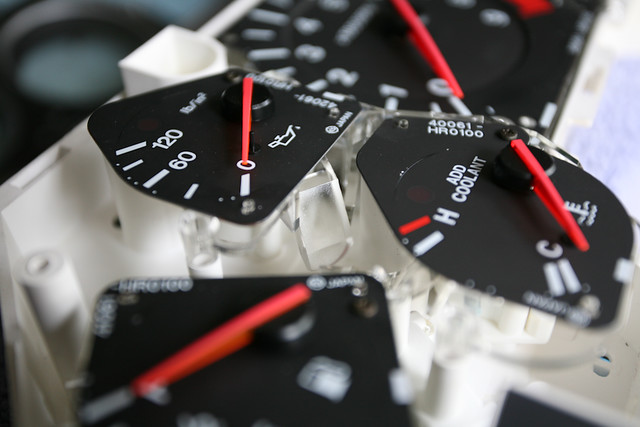
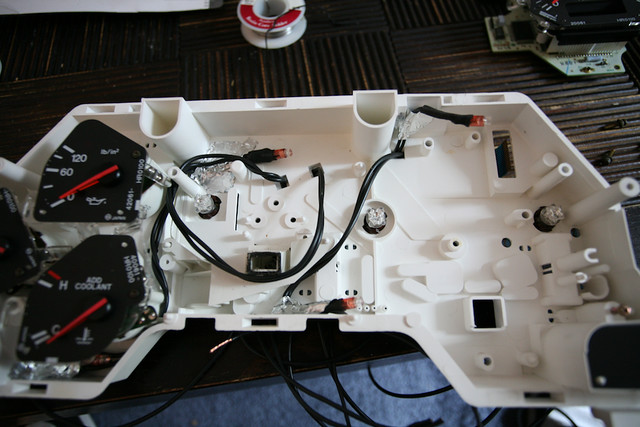
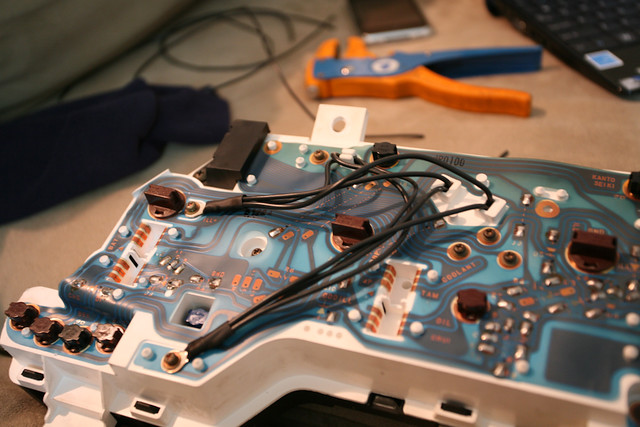
The extra LED's did a great job of evening out the light output, but the biggest difference was made by switching to circuit board style LED's.

After I had converted the cluster to red LED's the HVAC controls did not match so I converted them to LED's as well using NeoWedge 3mm and circuit board style 74 bulbs.
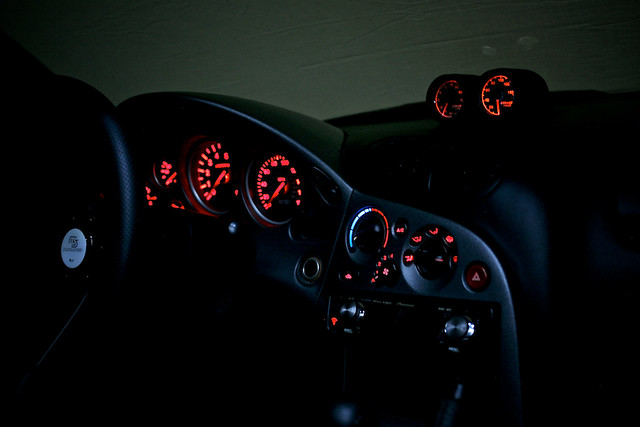
Here are some shots of the interior in its current state.

It was really hard to capture the true color of the cluster lights... this is the closest I was able to get.
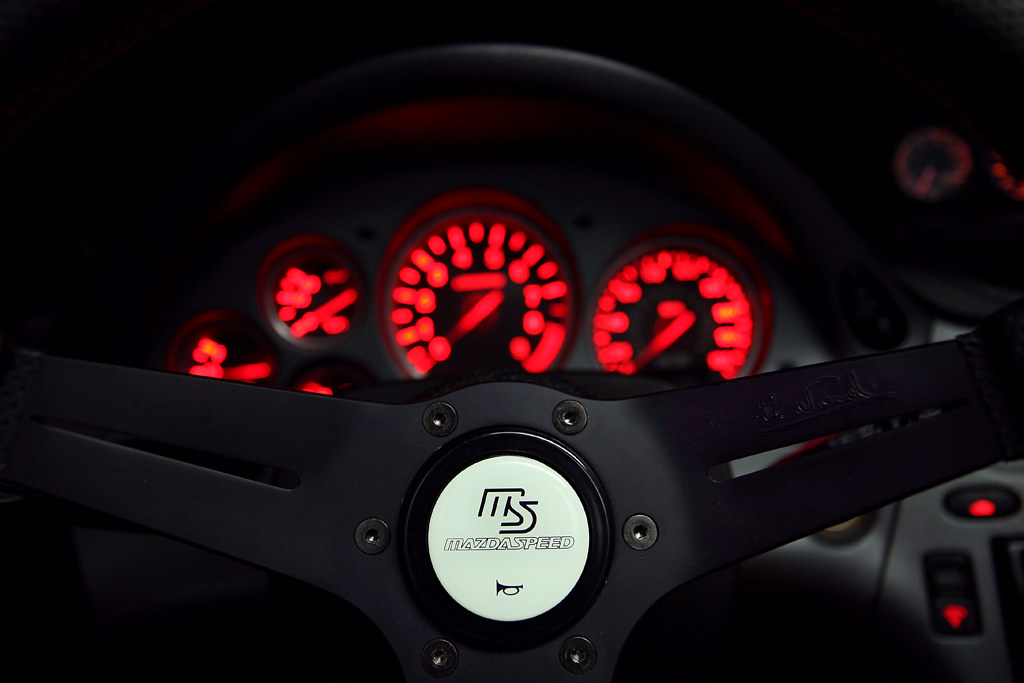
My Nardi 350mm Deep corn wheel and Mazdaspeed horn button I got from GoodfellaFD3S himself

Also my recovered shift **** done by fellow forum member hulandfd3s.
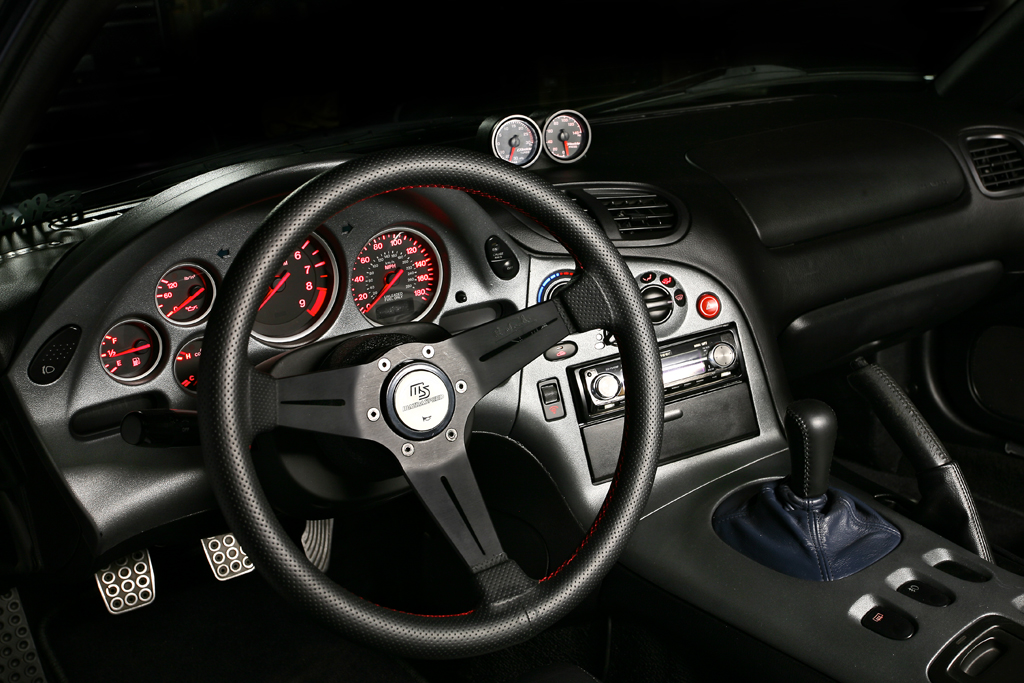
LED Gauge Cluster
A while back I had converted my cluster to white LED's via the Hypertite method of sanding off the red film on the back of the gauge faces. I lived with that for a while however it never looked good... The lighting was uneven, the gauges were very bright, and it was distracting at night.
Since I had already sanded off the film on the back I could not go back to stock. I decided to try out red LED's. The red looked MUCH better, however there was still the uneven lighting issue. I tried to solve the issue by adding more LED's.
RotaryAddicts Guide for LED Conversion


The extra LED's did a great job of evening out the light output, but the biggest difference was made by switching to circuit board style LED's.

After I had converted the cluster to red LED's the HVAC controls did not match so I converted them to LED's as well using NeoWedge 3mm and circuit board style 74 bulbs.

Here are some shots of the interior in its current state.

It was really hard to capture the true color of the cluster lights... this is the closest I was able to get.

My Nardi 350mm Deep corn wheel and Mazdaspeed horn button I got from GoodfellaFD3S himself

Also my recovered shift **** done by fellow forum member hulandfd3s.

#48
Where did you find the NeoWedge 3mm and circuit board style 74 bulbs ? Are the amount of LED the same as described on RotaryAddicts.com? Can you give us some more info regarding this =). I've got my cluster and everything out. This will be the best time to do that ;-).
Thanks in advance!
-AzEKnightz
Thanks in advance!
-AzEKnightz
#49
Thread Starter
Golf Cart Hooligan
iTrader: (12)
Joined: Oct 2002
Posts: 993
Likes: 23
From: Philadelphia, PA
Where did you find the NeoWedge 3mm and circuit board style 74 bulbs ? Are the amount of LED the same as described on RotaryAddicts.com? Can you give us some more info regarding this =). I've got my cluster and everything out. This will be the best time to do that ;-).
Thanks in advance!
-AzEKnightz
Thanks in advance!
-AzEKnightz
The NeoWedge are used in the HVAC controls. They did not fit very well but I was able to make them work. For the other LED's I have tried just about every style and the ones that worked the best were the circuit board style. They worked the best by far. Besides that, you can follow the RotaryAddicts guide for installation and quantity.
Also, If you have not already sanded off the film I would seriously consider just trying out the LED's first. It really is a pain to get an even light distribution and it took me very long to get it to a point that is acceptable to me... but its still not perfect.
As for the HVAC controls, that is not on the RotaryAddicts guide and I cannot remember off the top of my head how many bulbs you need. There is a post in the interior section about it if you search for it. The only advice for that I can give is that the heater / zone select ***** use 74 style bulbs.... go with circuit board style.
#50
Thanks for answering my questions. Now i've got some more if you dont mind =).
Did you actually switched all the LED to the circuit board type or did you add in a couple more of those to even out the brightness for the gauges?
Also, you've mentioned about the film on the guages which I havent done so. Are you saying that I should NOT remove the film and try it out with the new LED first and if all good leave it the way it is?
As for the NeoWedge is only used for the HVAC only correct?
CIRCUIT BOARD TYPE LED
Above is a link to the circuit board style LED for anyone who are also interested in this mod.
-AzEKnightz


