AEM methanol kit thoughts
#26
#27
Thread Starter
Tunning till I drop!
iTrader: (34)
Joined: Oct 2002
Posts: 802
Likes: 10
From: Chatsworth, CA
I'll verify this and if correct add a bit of fuel in the higher temp portion of the air temp vs. fuel table.
For now I've gone back to a tune that I had just before I moved from the stock SMIC to an SR Motorsports SMIC. Like magic the AFRs are back to normal. Well, they're a bit lean but between a conservative tune and WI I'm not too worried. I'll continue my slow and methodical approach until I have it corrected.
#28
Thread Starter
Tunning till I drop!
iTrader: (34)
Joined: Oct 2002
Posts: 802
Likes: 10
From: Chatsworth, CA
kit installed, part 3
OK, so the kit was used and needed a bit of love to complete it. I picked up a welding bung for the injector, water tank adapter + tubing connector, some weather pack connectors, a fuse holder for the pump, another for the junction box, and lastly a relay for the pump. Hmm ... I also made a few trips to Lowes for stainless steel hardware (pump mounting), tie downs for the tubing and rubber pump mounts.
Add to this some spare fuses, cat 5 Ethernet wire (for the low current stuff), a bit of 18 gauge cord to drive the water solenoid, wiring loom and some heat shrink tubing.
I decided to stick with the included 1mm jet for now ... after reading this. I have a 180psi pump so 1mm is a bit too much water, probably spot on when I start running 50/50 meth / water and then a bit too small when i move from 550/850 pri/sec to 550/1300 pri/sec. I'll deal with that last piece when I get there though.
Why post all of this? I think that far too many people dive into a project without thinking it through. Even with a brand new kit there are likely to be parts that are needed. Take your time, read, research and plan.
I'll add some picks of the system soon as well as walk through the install a bit. I'm planning on keeping it high level wit a few tangents ... unless someone starts to ask about specifics.
#30
Thread Starter
Tunning till I drop!
iTrader: (34)
Joined: Oct 2002
Posts: 802
Likes: 10
From: Chatsworth, CA
kit installed, part 4
Hi all,
Here's a few more details, via pictures ... but first, check out Dale Clark’s water / meth thread. I'm not going to go crazy with each bit as this thread covers most of it.
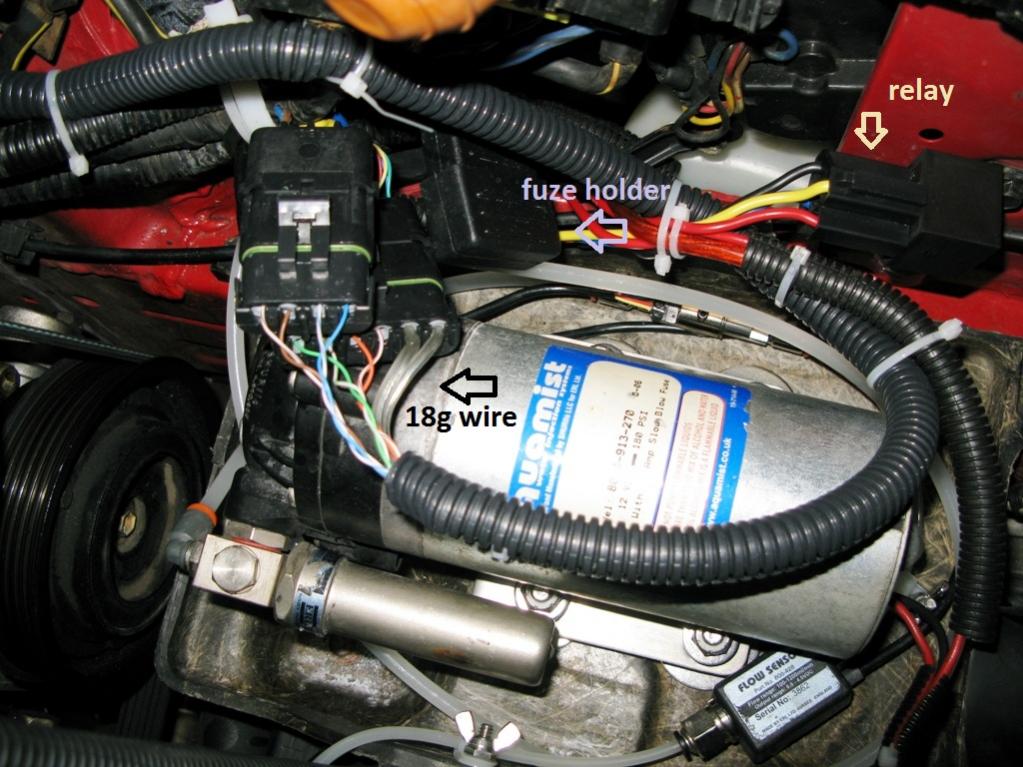
First up, here's the system sitting on my battery tray. The battery is in the passenger bin. The 18 gauge wire is used to drive the high speed solenoid as it draws about an amp and pulses rapidly. I'm sure that smaller wire would work ... goggle for wire size vs voltage drop ... this is what I have in my garage. Yep, fuse is spelled with an "s" and not a "z".
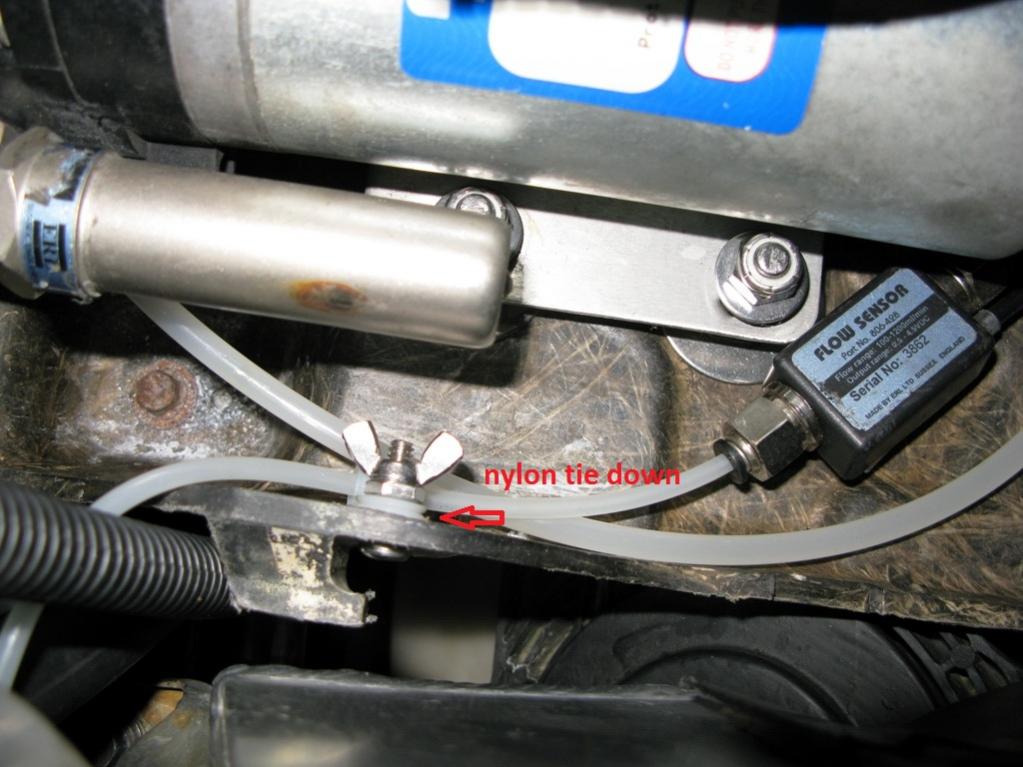
Next, here's the nylon tie down that I used to hold the water tubing down. Notice that I locked the screws down by tightening a wing nut into a regular nut. I did this as I couldn't tighten down the nylon straps very much and didn't want them to vibrate loose. The same could be said for the nuts holding the pump. These are nylon lock nuts. There are rubber plumbing washers under these nuts to isolate the pump's vibration. Since these cant be squeezed much, I'm relying on the nylon lock nuts to prevent it from coming loose. Last note, all of the hardware is stainless. This might be overkill but I like knowing that the install won't rust.
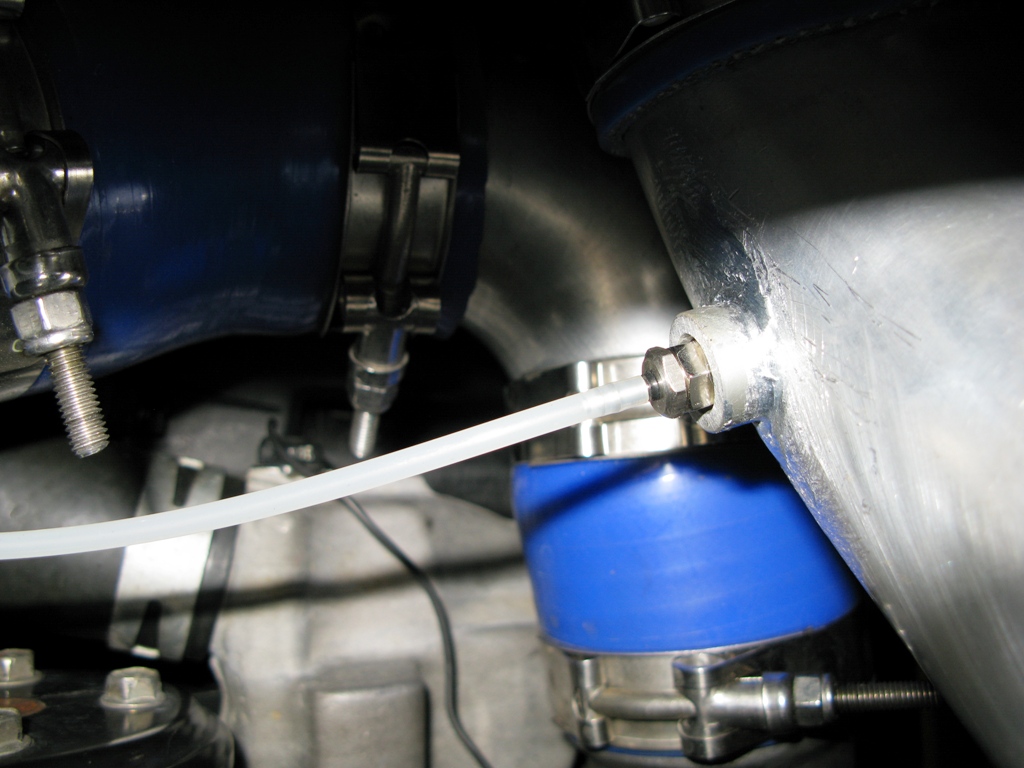
Here's a look at the injector in it's bung. I used Alumiweld to attach it.
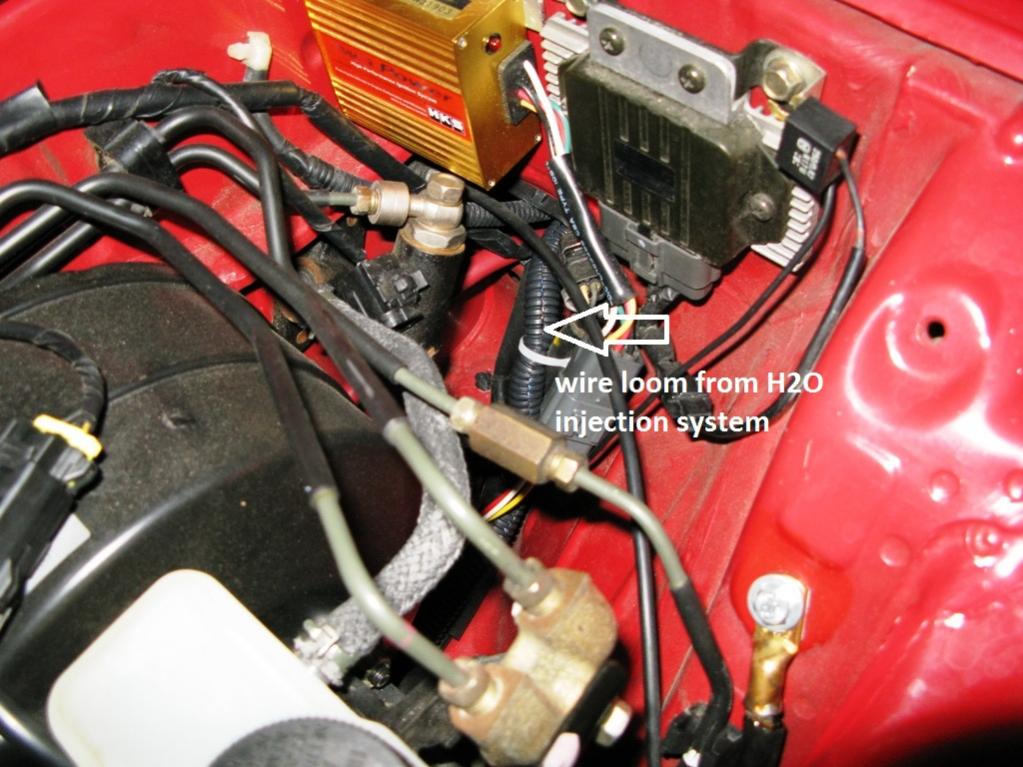
Here's the wire loom diving into my drivers side fender well. There's an unused rubber plug just below this entry point. The plug leads to the drivers foot-well, just above the fuse block. This is where I installed the control box that drives the whole setup. While I had the fender liner off I pulled the windshield washer tank, removed the pump, installed the Aquamist water tank adapter in it's place and lastly installed the water sensor per Dale Clark's instruction.
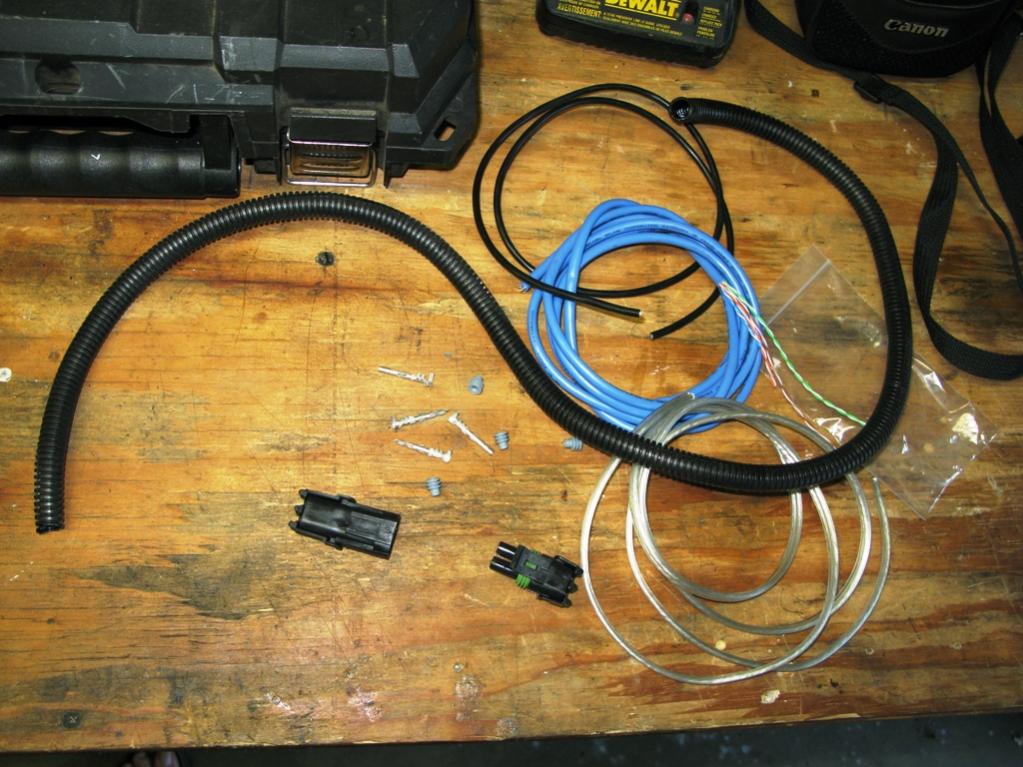
Here's a weather pack connector (un-assembled), Ethernet (cat 5) cord with the ends cut off, wiring loom and lamp cord (18 gauge).
I'm not showing the water tank as I didn't snap a pic before installing it ... check Dale's thread for that. The only thing that I did differently was to draw the water via the washer pump's mounting hole. Also, I haven't shown the connections to the fuel injection system. I'll post this soon.
Here's a few more details, via pictures ... but first, check out Dale Clark’s water / meth thread. I'm not going to go crazy with each bit as this thread covers most of it.
First up, here's the system sitting on my battery tray. The battery is in the passenger bin. The 18 gauge wire is used to drive the high speed solenoid as it draws about an amp and pulses rapidly. I'm sure that smaller wire would work ... goggle for wire size vs voltage drop ... this is what I have in my garage. Yep, fuse is spelled with an "s" and not a "z".

Next, here's the nylon tie down that I used to hold the water tubing down. Notice that I locked the screws down by tightening a wing nut into a regular nut. I did this as I couldn't tighten down the nylon straps very much and didn't want them to vibrate loose. The same could be said for the nuts holding the pump. These are nylon lock nuts. There are rubber plumbing washers under these nuts to isolate the pump's vibration. Since these cant be squeezed much, I'm relying on the nylon lock nuts to prevent it from coming loose. Last note, all of the hardware is stainless. This might be overkill but I like knowing that the install won't rust.

Here's a look at the injector in it's bung. I used Alumiweld to attach it.

Here's the wire loom diving into my drivers side fender well. There's an unused rubber plug just below this entry point. The plug leads to the drivers foot-well, just above the fuse block. This is where I installed the control box that drives the whole setup. While I had the fender liner off I pulled the windshield washer tank, removed the pump, installed the Aquamist water tank adapter in it's place and lastly installed the water sensor per Dale Clark's instruction.

Here's a weather pack connector (un-assembled), Ethernet (cat 5) cord with the ends cut off, wiring loom and lamp cord (18 gauge).

I'm not showing the water tank as I didn't snap a pic before installing it ... check Dale's thread for that. The only thing that I did differently was to draw the water via the washer pump's mounting hole. Also, I haven't shown the connections to the fuel injection system. I'll post this soon.
#31
Nice work James. Interesting place to install the pump - don't think I've ever seen anyone use that location but it is close to the water/meth source so should be ideal.
The kit definitely went to the right person
The kit definitely went to the right person

#32
Thread Starter
Tunning till I drop!
iTrader: (34)
Joined: Oct 2002
Posts: 802
Likes: 10
From: Chatsworth, CA
kit installed, part 5
So, I wanted to point out to the group where I had taped the secondary injectors to feed the FIA2 and then where I had spliced the Aquamist's junction box's boost control relay into the wiring for the RX7's waste-gate control solenoid but my HSV died, my work week was crazy, I went on vacation, --- list next ecuse here ---

OK, next time. This time, replacing a dead HSV (Aquamist's high speed valve) and first impressions of 50/50 water / meth (Boost Juice).
So, I'm happily boosting along, working my way through a few gallons of distilled water and adjusting the flow gauge scale and safety cuts when the gauge shows no flow under boost.

I went through the system, piece by piece, checking fuses, bypassing the pump relay to test it, etc. The HSV seemed to be frozen but the coil passed electricity. After a bit of Googleing I found a confirmed that this was a common issue and that this (link) is the replacement.
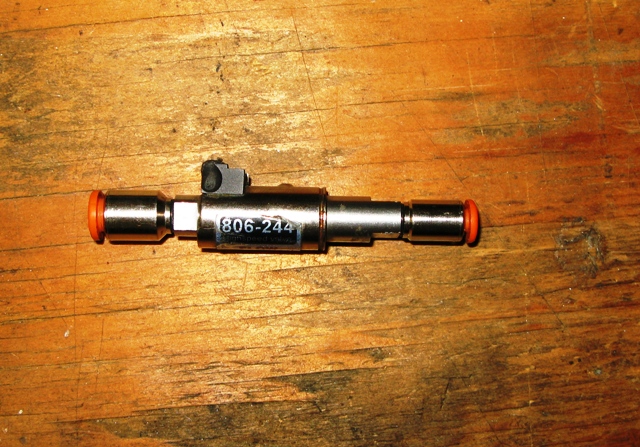
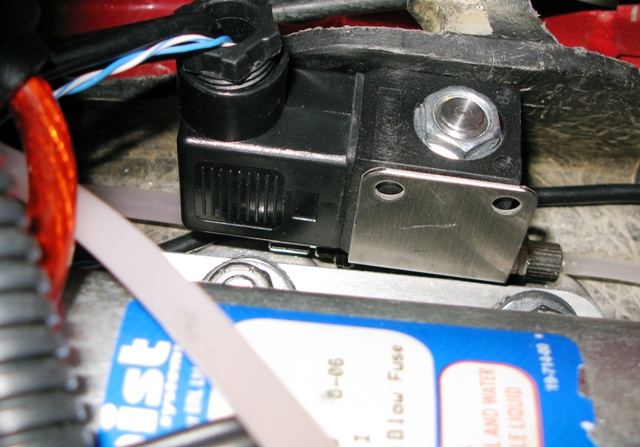
The new valve appears to be an improved version of the old one in the sense that the coil is much larger and external. I'm guessing that Aquamist beefed it up a bit to prevent failure. Anyway, here are some pics: (the old valve is on my workbench and the new is installed ... just in case it isn't obvious)
So, about the boost juice (50/50 meth and water). Wow ... temp drops like a rock under boost. After boosting the hard pipe before the inter-cooler is too hot to touch. The pipe after the water / meth injection is maybe tepid! This UIM is also only warm! The engine seems to love this. The hot engine (200f) has the same pull as it does just after thermostat opening (180F). Good stuff!
I'm now working my way through the fuel map in the PFC and slowly pulling fuel to bring the AFR's into check. They were approaching 10 in places that should have only been 11.87 ... conservatively. I'm so happy that I picked up a system that atomizes well and has a fail safe (the junction box's boost control). I wouldn't have been comfortable pulling fuel from the map without both of these.
I may even have enough injector duty left when I'm done to move from 10psi to 12. My stock (cleaned) injectors, intake, DP and cat back had opened the car up so much that I was already hitting an 85% duty cycle at 10 PSI.
Oh, and David ... don't even think about refunding money for the HSV. You've been more than fair so far. I tested the spare FIA2 that you gave me. It works great. I'll sell this and call it a day!
#34
Im a little late to this but have installed probably 6-8 of the AEM kits with only one small issue. They have been great for me and I run one on my personal FD.
I see you went another direction and im sure you will be happy.
For those reading and who have a touring edition car I found a great way to hide the whole setup which is utilize the rear windshield wiper tank and mount the pump below the tank in the spare tire area. The one down side to this is that the tank doesnt hold that much liquid but the entire setup is hidden and done very clean. Some would prefer the tank/pump be closer to the injector but for the guys with nice street cars that want a clean setup it works great.
Thread
Thread Starter
Forum
Replies
Last Post


