My build up thread!
 05-07-07, 07:46 AM
#1
tom port.. AKA streetport
Thread Starter
iTrader: (6)
Join Date: Jan 2005
Location: ludlow, pa
Posts: 4,659
Likes: 0
Received 0 Likes
on
0 Posts
My build up thread!
so some of you may have been following my tear down thread which is located here (CLICK HERE!) in which i will continue to add photos and such for when the interior gets taken out for spray. this weekend i was able sand down the engine bay and clean it all off with some reducer. 2 days prior i washed the bay with purple power and scrubbed it well to get all the carbon from the leaking exhaust. i will not be adding parts from the parts list ( CLICK HERE) but parts will be added later on as i will be recieving them.
on to the car!!
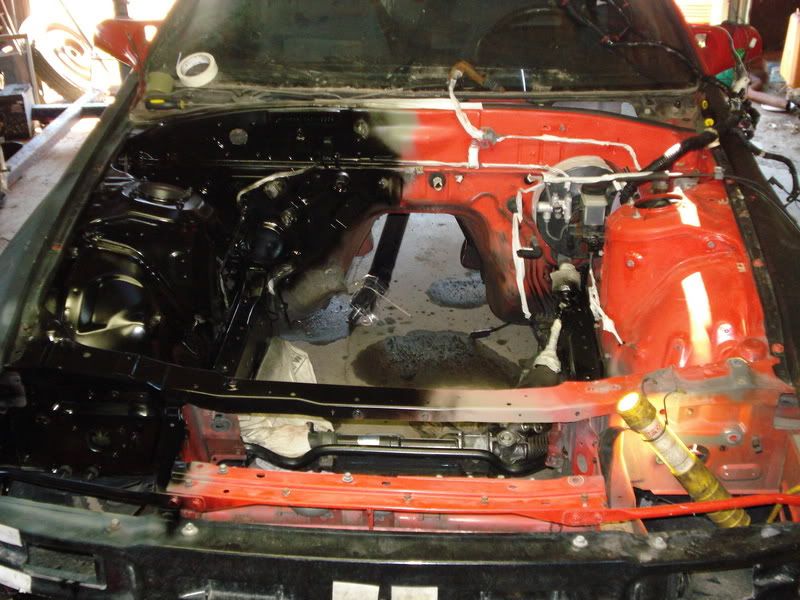
first you see the bay semi-taped off and wet sanded. after this pitcure i cleaned all the bay and blown it all off well with the air hose. i only bought 1 can of primer and 1 can of black gloss spray paint from duplicolor because i wasnt sure how it would look "rattle canned". i actually like it. i havent been able to see it in actual sunlight but i think it will turn out fine. you can also see on the drivers side how i had to paint that section also. after some inspection i discovered that in some point of this cars life, someone lost brake pressure! the brake fluid leaked all the way down and took every spot of paint with it! luckily the motor leaked oil like a sin afterwards and covered the exposed metal! after cleaning and removing some slight surface rust, i sprayed it down with very good primer and a few coats of paint.

here we have a pic with half the bay painted which was more or less a "test" to see how it would turn out. im gonna leave it this way because being the way i am ill be going back in the bay to touch up all the nicks and scratches i will be putting into it!
on to the car!!
first you see the bay semi-taped off and wet sanded. after this pitcure i cleaned all the bay and blown it all off well with the air hose. i only bought 1 can of primer and 1 can of black gloss spray paint from duplicolor because i wasnt sure how it would look "rattle canned". i actually like it. i havent been able to see it in actual sunlight but i think it will turn out fine. you can also see on the drivers side how i had to paint that section also. after some inspection i discovered that in some point of this cars life, someone lost brake pressure! the brake fluid leaked all the way down and took every spot of paint with it! luckily the motor leaked oil like a sin afterwards and covered the exposed metal! after cleaning and removing some slight surface rust, i sprayed it down with very good primer and a few coats of paint.
here we have a pic with half the bay painted which was more or less a "test" to see how it would turn out. im gonna leave it this way because being the way i am ill be going back in the bay to touch up all the nicks and scratches i will be putting into it!
 05-13-07, 07:49 PM
#3
tom port.. AKA streetport
Thread Starter
iTrader: (6)
Join Date: Jan 2005
Location: ludlow, pa
Posts: 4,659
Likes: 0
Received 0 Likes
on
0 Posts
update
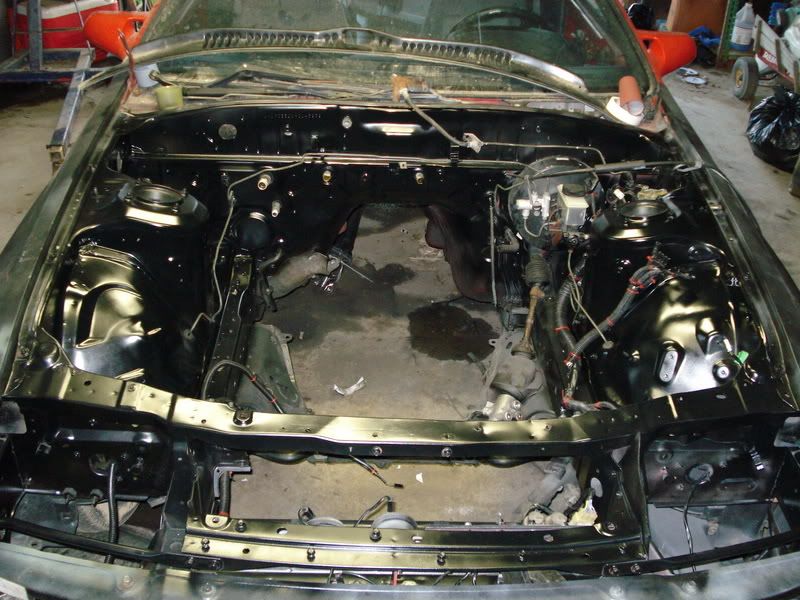
today i was able to finish the paint in the bay.
before this i DE-loomed the harness, checked for cuts abbrasions and heat damage , cut un-needed clips and wires and RE-loomed it with new tape and plastic looming. after this i finished painting and replaced the harness into its original place.
today i was able to finish the paint in the bay.
before this i DE-loomed the harness, checked for cuts abbrasions and heat damage , cut un-needed clips and wires and RE-loomed it with new tape and plastic looming. after this i finished painting and replaced the harness into its original place.
05-30-07, 08:09 PM
#4
tom port.. AKA streetport
Thread Starter
iTrader: (6)
Join Date: Jan 2005
Location: ludlow, pa
Posts: 4,659
Likes: 0
Received 0 Likes
on
0 Posts
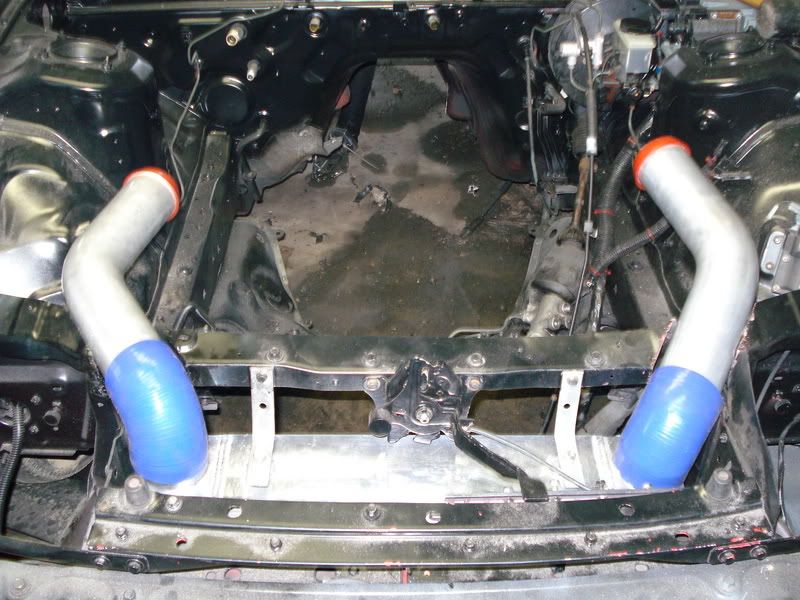
this week my V-mount IC came in i wasted no time in getting this started!!
here you can see the size of it.
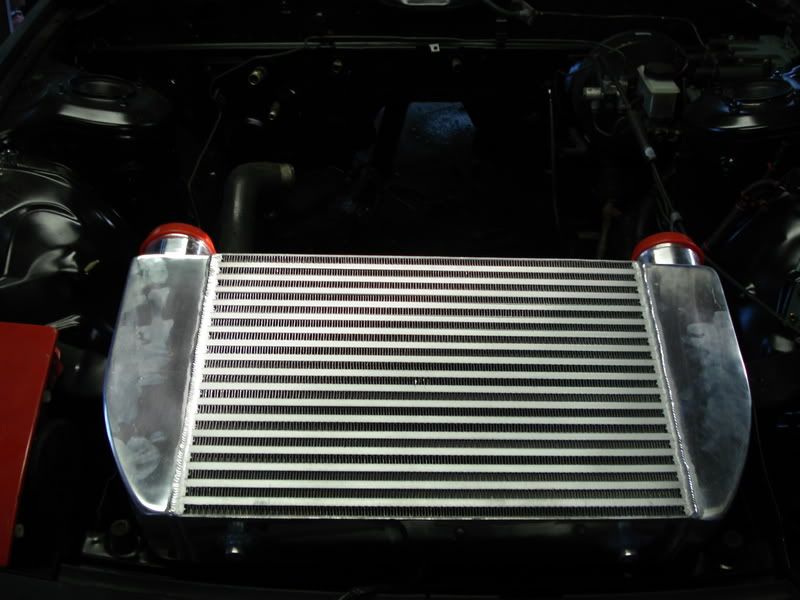
test fitting it revieled how muc room i have and whats needed to be taken out for it to fit.
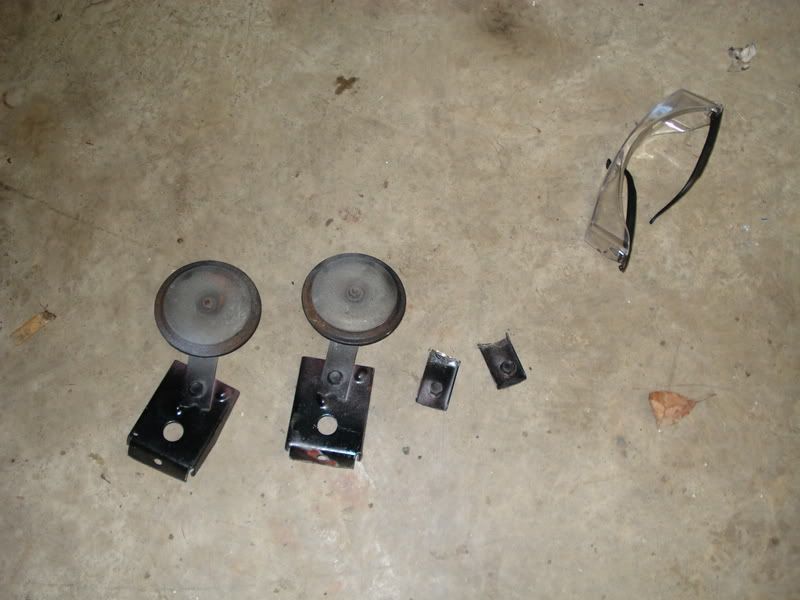
the horns and 2 brackets are shown in the way.
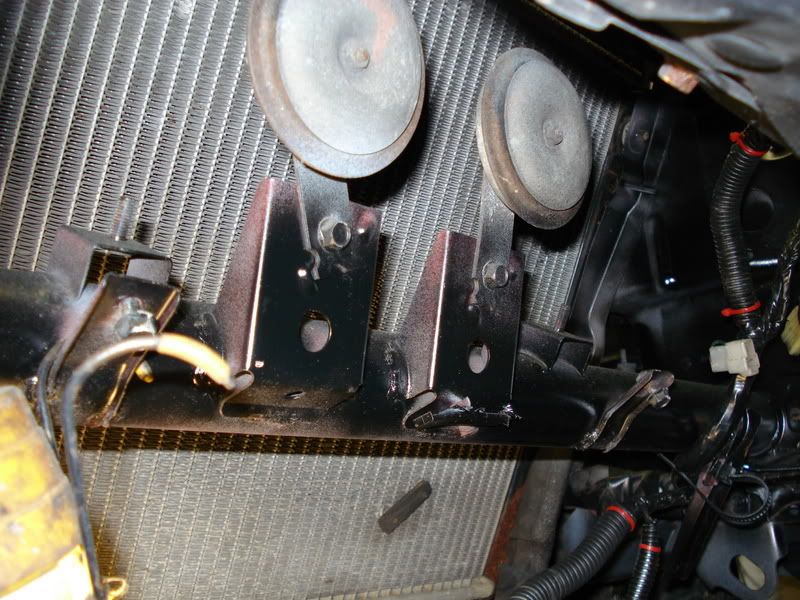
problem solved!!!
the stock radiator is only there for test fittings for when the KOYO comes.
here you can see the size of it.
test fitting it revieled how muc room i have and whats needed to be taken out for it to fit.
the horns and 2 brackets are shown in the way.
problem solved!!!
the stock radiator is only there for test fittings for when the KOYO comes.

Trending Topics
05-30-07, 08:59 PM
#8
tom port.. AKA streetport
Thread Starter
iTrader: (6)
Join Date: Jan 2005
Location: ludlow, pa
Posts: 4,659
Likes: 0
Received 0 Likes
on
0 Posts
are you going to mount the vmic as a fmic setup then?
How much did the v-mount run you and what size is it?
http://cgi.ebay.com/ebaymotors/ws/eB...3708960&rd=1,1
here i started getting the mounts ready to be placed. sitting and thinking i dont trust just these braces alone. i will add another across the botom of it just to be safe.
 05-30-07, 09:16 PM
#9
This is my social media.
iTrader: (22)
Join Date: Jan 2006
Location: WA
Posts: 2,744
Likes: 0
Received 0 Likes
on
0 Posts
Very nice man... I always wondered about using a V-Mount "type" IC and using it for a FMIC set-up. I am interested to see your progress, especially on this IC set-up. Keep up the good/clean work.
06-01-07, 06:58 PM
#10
tom port.. AKA streetport
Thread Starter
iTrader: (6)
Join Date: Jan 2005
Location: ludlow, pa
Posts: 4,659
Likes: 0
Received 0 Likes
on
0 Posts
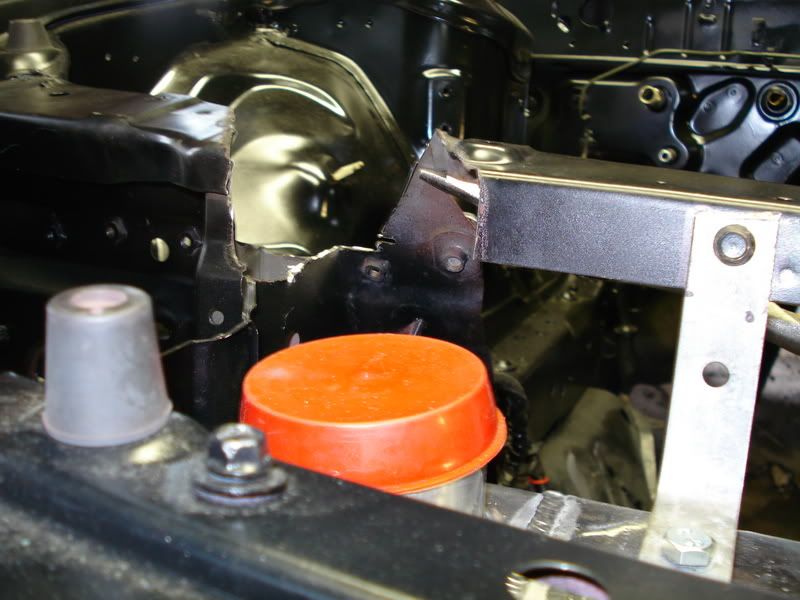
after the IC was mounted with bolts. i placed the hood latch on and noticed it will not clear because of the IC. so some more cutting was done.
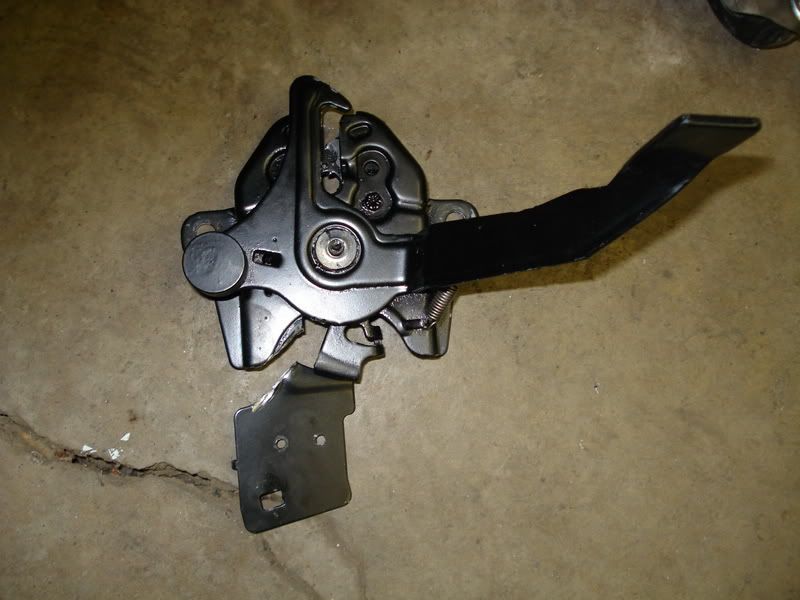
the relay for the hood latch had to be removed. since i dont need this ( 5 0ne5 triple gauge pod will replace idiot cluster) i didnt mind.
after that was cut i placed the latch back on and it works perfect.
now it was time to cut the latch support. after measuring with the IC piping lying across the support i began removing material untill the IC would fit and then i semi cleaned it up a bit.
here you see the cut made and vice grips holding the latch support to the radiator support.
06-01-07, 07:30 PM
#11
tom port.. AKA streetport
Thread Starter
iTrader: (6)
Join Date: Jan 2005
Location: ludlow, pa
Posts: 4,659
Likes: 0
Received 0 Likes
on
0 Posts
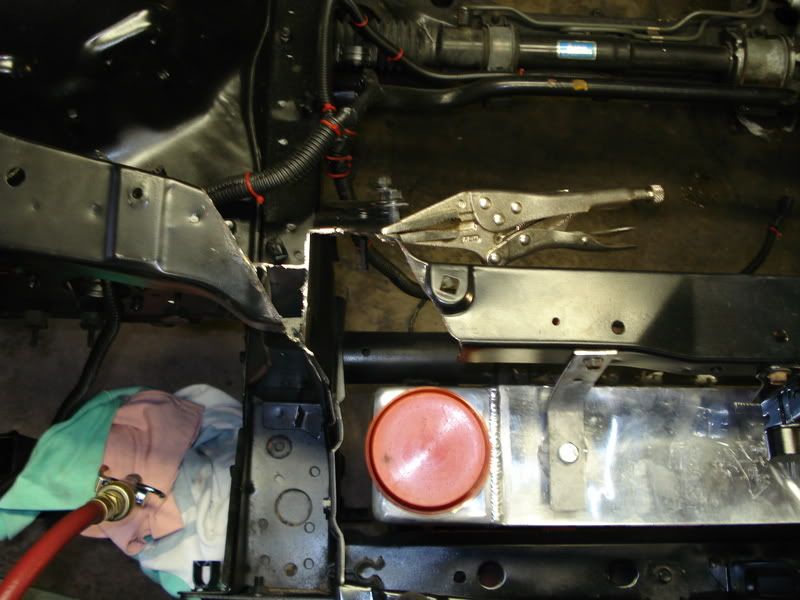
another angle shot.
after getting the piping to fit, the turn out was great!!
sometime this weekend i will box this side in before starting the other side so the latch support doesnt get all messed up.
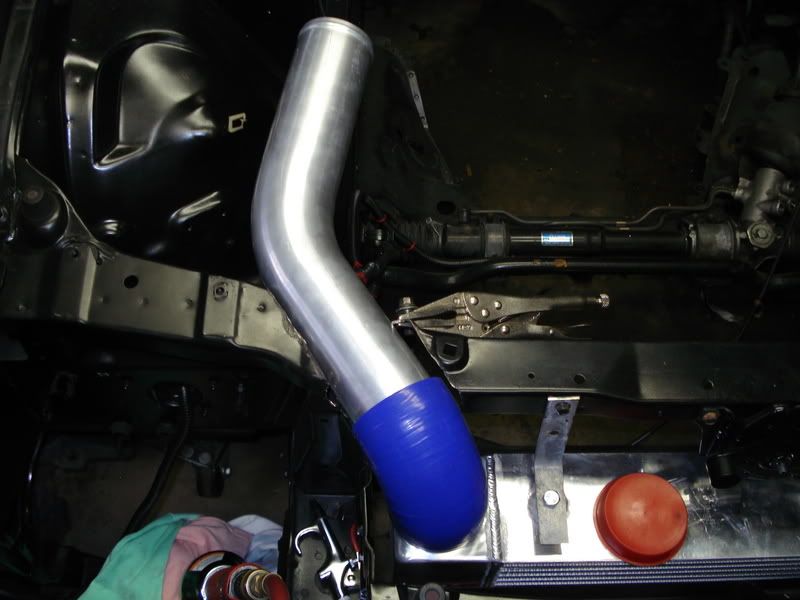
one more angle shot to show hood clearance
after getting the piping to fit, the turn out was great!!
sometime this weekend i will box this side in before starting the other side so the latch support doesnt get all messed up.
one more angle shot to show hood clearance
Last edited by 88rxn/a; 06-01-07 at 07:48 PM.

 06-02-07, 10:19 AM
#15
Engine, Not Motor
iTrader: (1)
Join Date: Feb 2001
Location: London, Ontario, Canada
Posts: 29,789
Likes: 0
Received 110 Likes
on
93 Posts
 I'd be more worried that most people eliminate the big fiberglass reinforcement bar behind the bumper when installing an FMIC, or cut away the tubular crossmember that has a major effect on the integrity of the car.
06-02-07, 03:10 PM
I'd be more worried that most people eliminate the big fiberglass reinforcement bar behind the bumper when installing an FMIC, or cut away the tubular crossmember that has a major effect on the integrity of the car.
06-02-07, 03:10 PM
#16
tom port.. AKA streetport
Thread Starter
iTrader: (6)
Join Date: Jan 2005
Location: ludlow, pa
Posts: 4,659
Likes: 0
Received 0 Likes
on
0 Posts
06-03-07, 08:45 PM
#17
tom port.. AKA streetport
Thread Starter
iTrader: (6)
Join Date: Jan 2005
Location: ludlow, pa
Posts: 4,659
Likes: 0
Received 0 Likes
on
0 Posts
little progress made today!
i ran out of gas for my MIG so i could only tac in the support.
**dont make fun of my welds!!!****
i havent welded in 7 years!!!!LOL
i plan on replacing the tank for my MIG soon so i can finish welding.
this is also what i have been doing while waiting for parts.
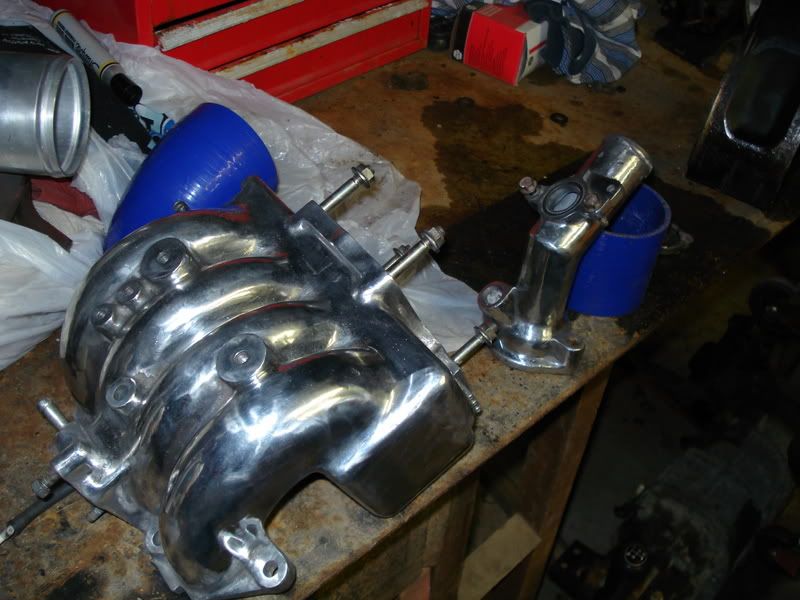
i should have polished it up a bit for there photo shoot to show how nice ithey turned out but itll do for now. i still a few parts to polish.
thanks!!!
i ran out of gas for my MIG so i could only tac in the support.
**dont make fun of my welds!!!****
i havent welded in 7 years!!!!LOL
i plan on replacing the tank for my MIG soon so i can finish welding.
this is also what i have been doing while waiting for parts.
i should have polished it up a bit for there photo shoot to show how nice ithey turned out but itll do for now. i still a few parts to polish.
thanks!!!
Last edited by 88rxn/a; 06-03-07 at 08:52 PM.
06-04-07, 12:32 PM
#18
tom port.. AKA streetport
Thread Starter
iTrader: (6)
Join Date: Jan 2005
Location: ludlow, pa
Posts: 4,659
Likes: 0
Received 0 Likes
on
0 Posts
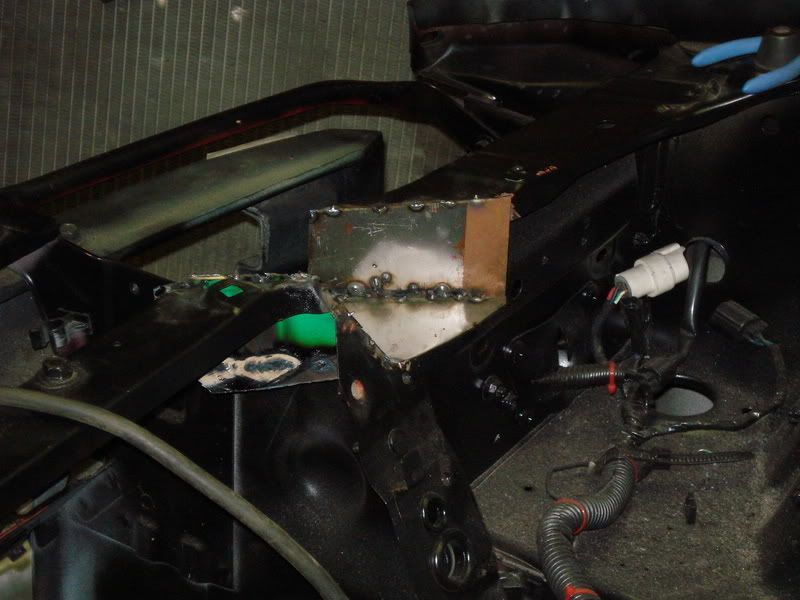
i got more argon today so i was able to finish up the welds. since i suck at it we wont expose my true tallent!!
but i will show you how i was able to finish the passenger side, sanded down the welds and painted it up. i then began cutting away at the drivers side. i didnt get into to much detail with pics and such because its the same preocess as the other side. i didnt finish however but i got the IC piping to at least semi-fit into the section i cut out. some more material needs removed in order to get it to fit properly like the other side.
but i will show you how i was able to finish the passenger side, sanded down the welds and painted it up. i then began cutting away at the drivers side. i didnt get into to much detail with pics and such because its the same preocess as the other side. i didnt finish however but i got the IC piping to at least semi-fit into the section i cut out. some more material needs removed in order to get it to fit properly like the other side.
06-10-07, 07:44 PM
#22
tom port.. AKA streetport
Thread Starter
iTrader: (6)
Join Date: Jan 2005
Location: ludlow, pa
Posts: 4,659
Likes: 0
Received 0 Likes
on
0 Posts
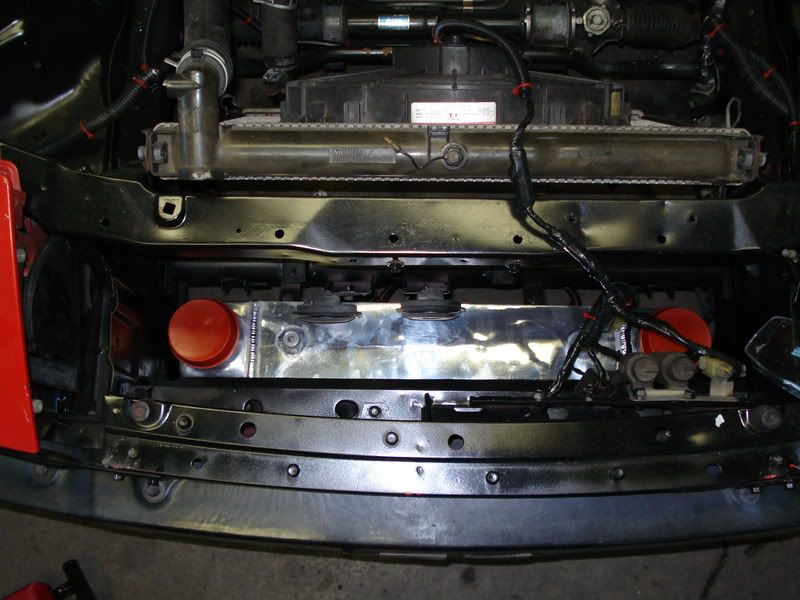
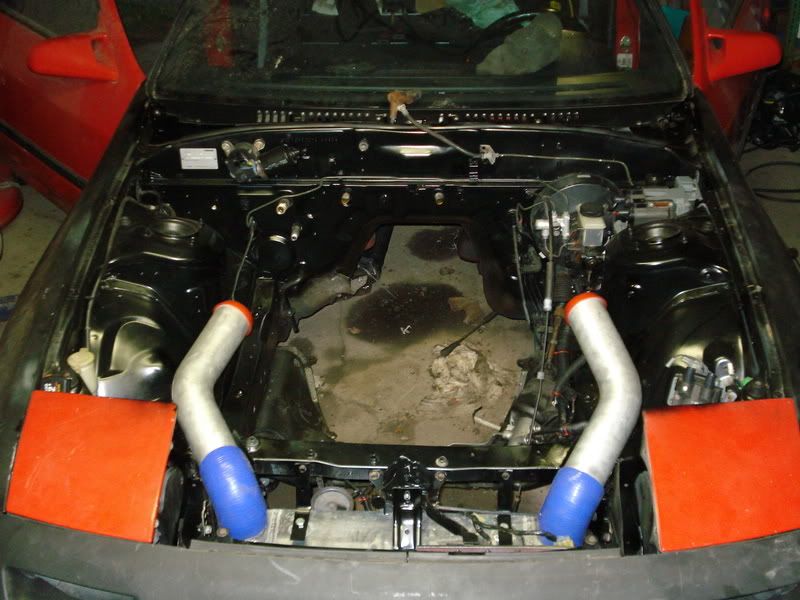
more progress was made today:
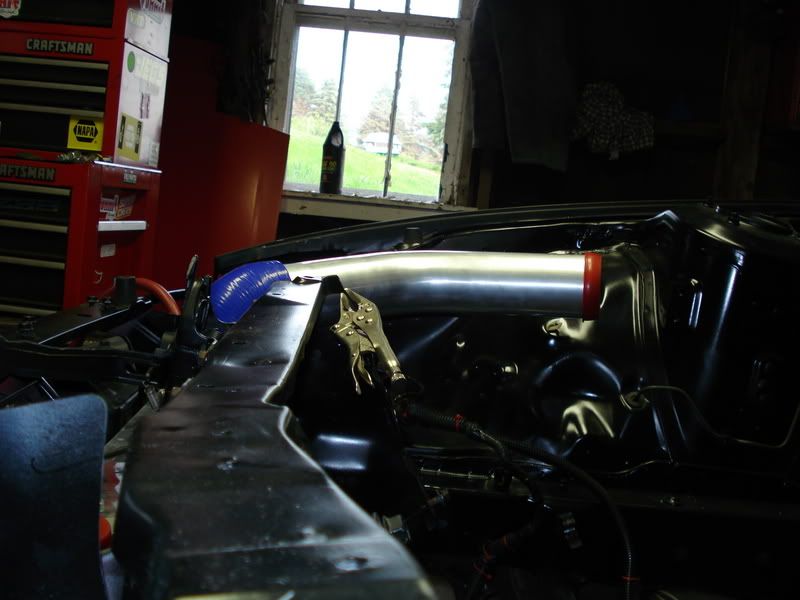
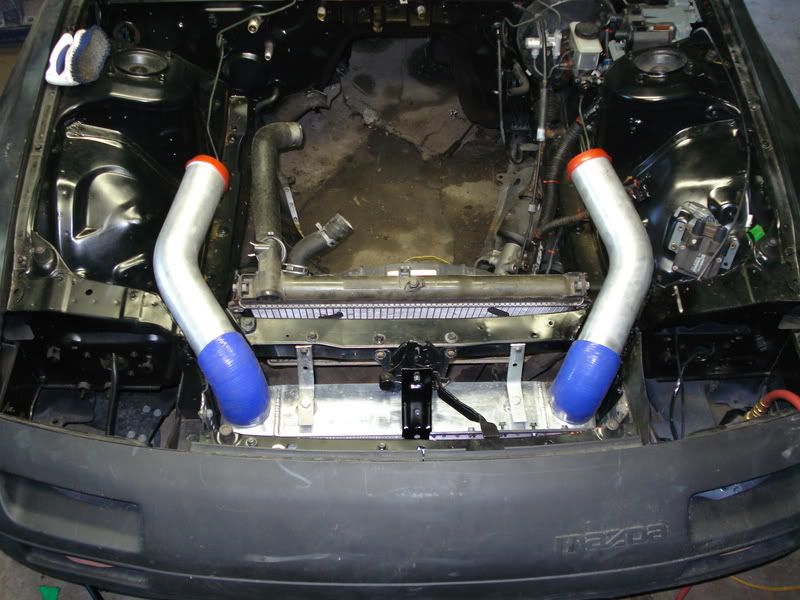
after i finished boxing in the other side and cleaning it all up i got it painted up. I went to LOWES today to get my strap to run across the bottom of the IC for more support. i then took the latch support and marked it off and cut a slight line across so i could bend it alot easier. after i bent it into place i was able to clean it up and weld the line i cut into it to give back the support it needed for the hood latch. then i painted it. as you can see it turned out well IMO. i really like how the shortness of the IC pipes are for more boost response instead of running the IC pipes down and around. total cost of this was about $350. money well spent i think!!
and now for the pics!!:
06-11-07, 08:36 AM
#24
tom port.. AKA streetport
Thread Starter
iTrader: (6)
Join Date: Jan 2005
Location: ludlow, pa
Posts: 4,659
Likes: 0
Received 0 Likes
on
0 Posts
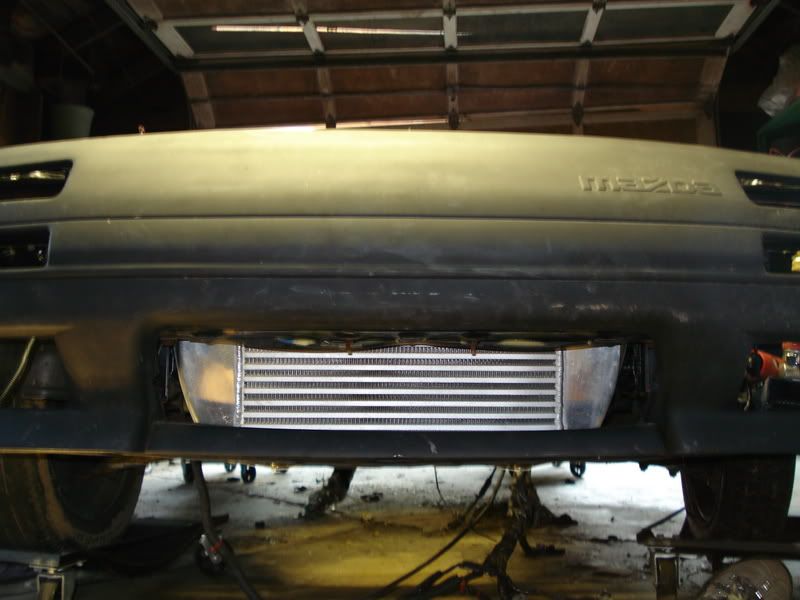
not at all. in fact i wasnt the first to do this. i seen 2 FC's with this done. another forum member and a V8 turbo swap. but i could never find a decent write up so i figured id get into detail on it so others could see how its done. glad you enjoy it!! the IC fits PERFECT where its at. i whish i could have found a 3 inch wide IC though for better RAD. cooling but i think ill be fine with proper ducting.
06-17-07, 03:19 PM
#25
tom port.. AKA streetport
Thread Starter
iTrader: (6)
Join Date: Jan 2005
Location: ludlow, pa
Posts: 4,659
Likes: 0
Received 0 Likes
on
0 Posts
yesterday everything was installed that could be without the motor being done (this will be done in 3 weeks!!!) i painted everything up and put it all back together. i must say, after putting all my brackets on and the hood latch support on, like i stated earlier...it is MUCH stronger than it was before i mounted the IC.
now i just gotta figure out how to make my prop-rod work again!!!LOL
after everything was installed i began removing the interior. not much was taken out but its all gonna get a good bath and sanded down for paint. tonite i should have it all removed hopefully.
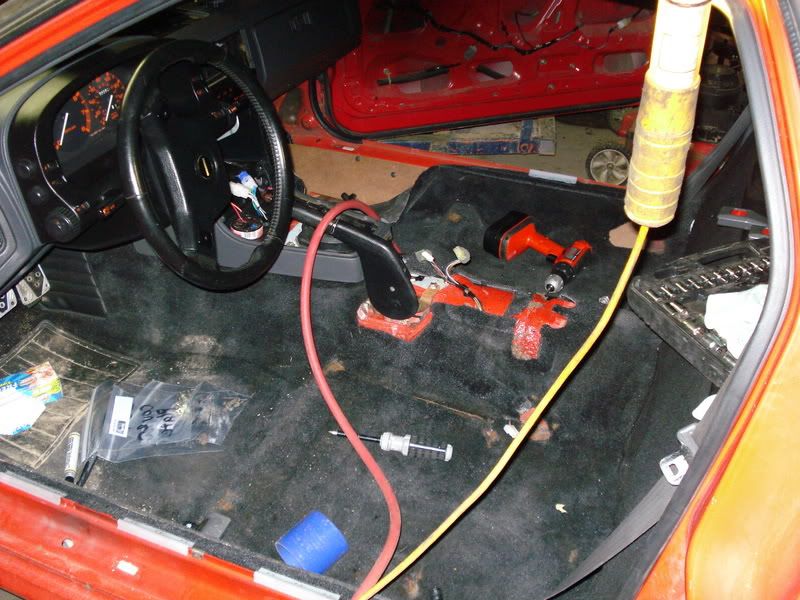
**note the plastic baggies on the drivers side floor...i label each baggie individually and place the bolts in them for each part thats taken out so that when it comes to re-installing it all....its a piece of cake!!!****
now i just gotta figure out how to make my prop-rod work again!!!LOL
after everything was installed i began removing the interior. not much was taken out but its all gonna get a good bath and sanded down for paint. tonite i should have it all removed hopefully.
**note the plastic baggies on the drivers side floor...i label each baggie individually and place the bolts in them for each part thats taken out so that when it comes to re-installing it all....its a piece of cake!!!****
Last edited by 88rxn/a; 06-17-07 at 03:25 PM.