time to rebuild :D progress updated
#52
^ Wow, awesome rides! Do you have an AW11 also?
BTW, it's funny how 3rd gen people do rebuilds so casually (like it's time for another upgrade) compared to 2nd gen people. 2nd gen people usually go "oh, no.. rebuild... i'm going to poop my pants".
BTW, it's funny how 3rd gen people do rebuilds so casually (like it's time for another upgrade) compared to 2nd gen people. 2nd gen people usually go "oh, no.. rebuild... i'm going to poop my pants".
#54
I used to have one with Bruce Turrentine but I couldn't find it. He actually did one for Atkins a long time ago. I'll keep looking for it for you.
#55
Thread Starter
rotor rotor pow.
iTrader: (1)
Joined: Mar 2005
Posts: 3,170
Likes: 1
From: Southern CA
wow we have the same taste in cars except differ on colours... lol
http://img183.imageshack.us/img183/6...2479ng6pa6.jpg
http://img170.imageshack.us/img170/4...1746ne8ux2.jpg
http://img183.imageshack.us/img183/6...2479ng6pa6.jpg
http://img170.imageshack.us/img170/4...1746ne8ux2.jpg

#56
Thread Starter
rotor rotor pow.
iTrader: (1)
Joined: Mar 2005
Posts: 3,170
Likes: 1
From: Southern CA
someone with new rotors can measure the original size, but as far as maximum clearance i have no idea how to determine that number. maybe by measuring the ends of the SST.. does anyone have one of these?
#57
Hey Alex, where up north are you? I'm going to be driving up to visit my uncle in a few weeks. Maybe I can help. Oh yeah, I'm currently ordering parts for a new shortblock, everything will be brand new, housings, irons, rotors, shaft, etc.
#58
Thread Starter
rotor rotor pow.
iTrader: (1)
Joined: Mar 2005
Posts: 3,170
Likes: 1
From: Southern CA
i talked to blake from pineapple again and he recommended crisco to seat soft seals and rtv for the housing feet and oil pan. so i'll save the tube of hylomar to give back to you whenever i get back to socal or if u drop by. lol.
still not sure what to do with the corner seal situation but i have been watching the rebuild videos linked from pineapple's site and they are super helpful for inspecting and measuring the rest of the rotor, inspecting the eccentric shaft, and endplay etc.
i just got the pineapple HD seals delivered yesterday, they seem like good high quality pieces. one thing that i noticed immediately is that they are round, unlike the square/retangle of oem seals. pineapple also tossed in 3 washers i asked for, to do the thermal pellet bypass and an instruction sheet explaining the mod and installation.

#59
Don't worry about the hylomar, I bought a new tube  . I found a 20B for $2,200, I'm going start work on it in December. Would your engine stand be able to hold it up?
  Eventually I'll convert to 20B, once that happens, I'll pass on my 13B to you.
 . I found a 20B for $2,200, I'm going start work on it in December. Would your engine stand be able to hold it up?
  Eventually I'll convert to 20B, once that happens, I'll pass on my 13B to you.
#60
Thread Starter
rotor rotor pow.
iTrader: (1)
Joined: Mar 2005
Posts: 3,170
Likes: 1
From: Southern CA
its a 750lb capacity stand so it will work fine  . next time i need to rebuild im pretty sure i'll b sending in the core to mazda and getting a reman. i don't think there will be enough reusable parts at that point.
 . next time i need to rebuild im pretty sure i'll b sending in the core to mazda and getting a reman. i don't think there will be enough reusable parts at that point.
#62
Thread Starter
rotor rotor pow.
iTrader: (1)
Joined: Mar 2005
Posts: 3,170
Likes: 1
From: Southern CA
 but if you check the manual there is a section on how to clearance them, its in a different section of the engine building. you need .002 .004 inches.
Last edited by sevensix; 08-29-07 at 05:02 PM.
#65
Thread Starter
rotor rotor pow.
iTrader: (1)
Joined: Mar 2005
Posts: 3,170
Likes: 1
From: Southern CA
installing rotor seals at the moment.. question about installing oil control rings..
i notice 2 rectangle markings 180 degrees separated on one side of each of the rings, i assume these face into the rotor in order to catch onto the squared off end of the spring? do i need to install the rectangular end of the spring into this notch on the control ring or will it seat itself? i installed 1 inner w/o doing this, will i need to take it out and reinstall?
also, service manual says i need to seat the control rings .4mm below the surface of the rotor. seems impossible to me, they're seated securely but are at least 1-2mm thickness rising above the rotor face. suggestions?
#68
Thread Starter
rotor rotor pow.
iTrader: (1)
Joined: Mar 2005
Posts: 3,170
Likes: 1
From: Southern CA
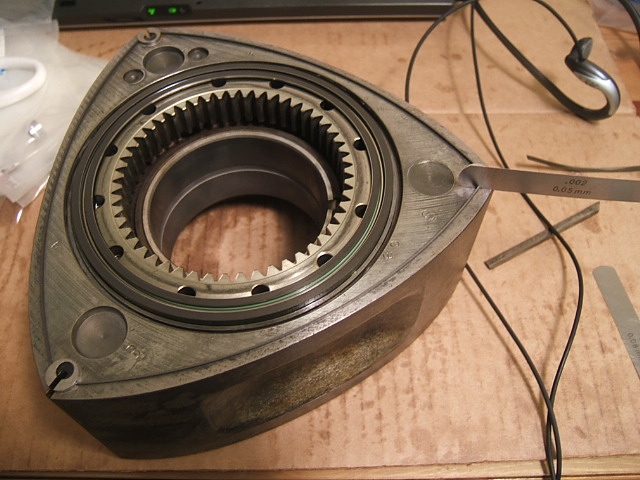
another question, side seal clearance. i'm using a .002 inch feeler gauge for clearance, i can fit the gauge in there but it doesn't slide freely.. the seal bites onto the gauge and holds it. do i need to sand more off? or have i already reached the right clearance?
for seating the oil control rings i used a block of wood to press on the old rings.
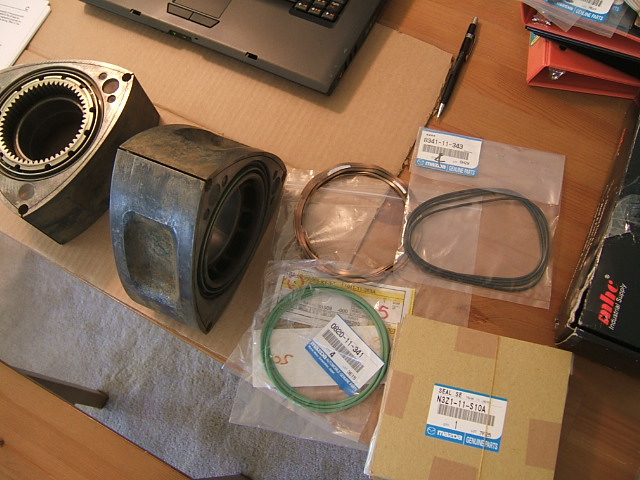
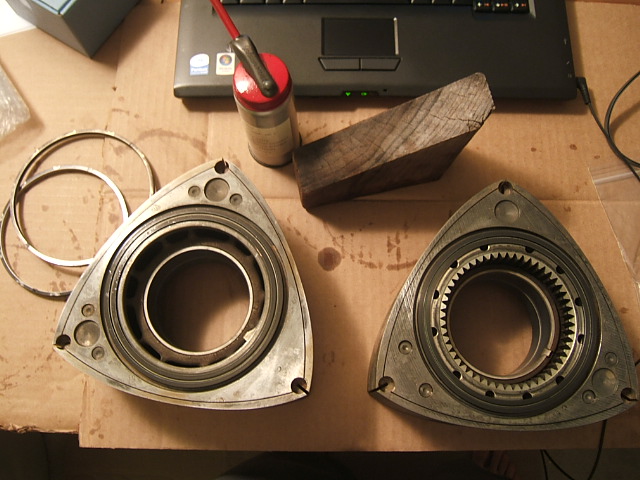
for seating the oil control rings i used a block of wood to press on the old rings.
#71
Thread Starter
rotor rotor pow.
iTrader: (1)
Joined: Mar 2005
Posts: 3,170
Likes: 1
From: Southern CA
some progress today
had some trouble with a gouge i put into the front housing surface, and wondering which way to install the apex seals. its the smaller pieces toward the rear from what i learned here, lol --> https://www.rx7club.com/general-rotary-tech-support-11/2-piece-apex-seal-install-directionality-rear-rotor-724468/
used some permatex high temp rtv between the housing/iron feet and for the tension bolts, crisco was used for all water seals, dowel o-rings, and also for install of apex springs and seals, as well as lubrication irons and rotor housing faces.
torqued the tension bolts to 27 ft-lbs, front and rear stationary bolts to 15 ft-lbs, oil regulator valve to 56 ft-lbs
Last edited by sevensix; 01-25-08 at 11:51 PM.
#72
Thread Starter
rotor rotor pow.
iTrader: (1)
Joined: Mar 2005
Posts: 3,170
Likes: 1
From: Southern CA
a few parts i picked up while the car is being rebuilt
tripower gauge pod, going to try to dremel for two 60mm apexi el gauges, amemiya steering gauge pod, converted steering to manual, removed a/c. also found a Feed boost gauge, set of pettit underdriven pullies, greddy type-s bov, mazdaspeed oil cap..
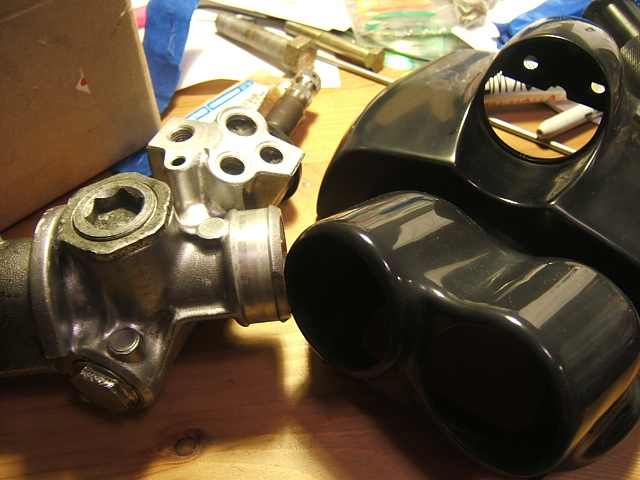
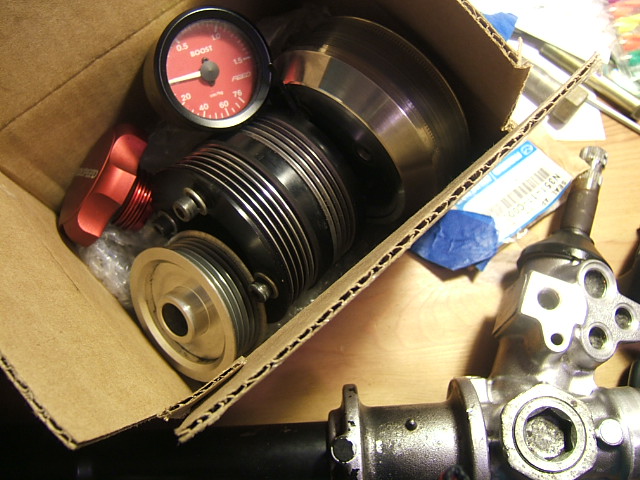
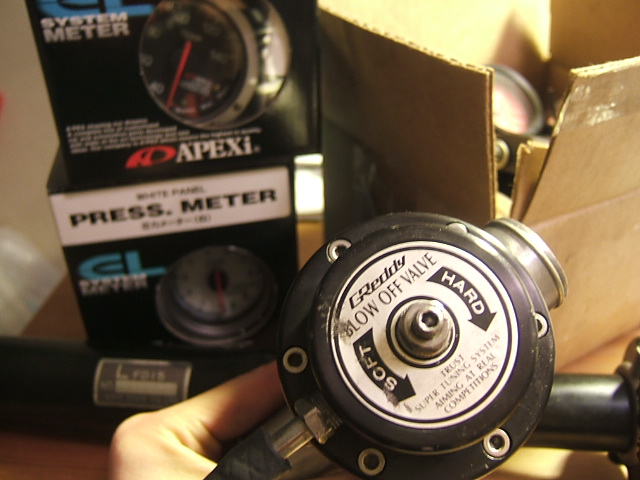
tripower gauge pod, going to try to dremel for two 60mm apexi el gauges, amemiya steering gauge pod, converted steering to manual, removed a/c. also found a Feed boost gauge, set of pettit underdriven pullies, greddy type-s bov, mazdaspeed oil cap..

#73
Thread Starter
rotor rotor pow.
iTrader: (1)
Joined: Mar 2005
Posts: 3,170
Likes: 1
From: Southern CA
flywheel installed
I locked down the flywheel to the rear housing to tighten counterweight and flywheel nuts.
counterweight to flywheel torqued 40ft-lbs, with new 8.8 M10 x 1.25 x 25 and grade 10 washers
flywheel nut installed with blue threadlocker and torqued to 150ft-lbs. then turned another ~60 degrees to approximate 350ft-lbs(see posts #12,13 here https://www.rx7club.com/showthread.php?t=642429). getting to 150 was pretty easy on the engine stand but i had to lay the engine on the floor to finish tightening.
found out torquing it the rest of the way is a 2 person job. it took me and my roommate to get turn it the extra 60 degrees; one to hold the block down while the other stomped on the breaker bar (24 inch).


#75
Thread Starter
rotor rotor pow.
iTrader: (1)
Joined: Mar 2005
Posts: 3,170
Likes: 1
From: Southern CA
dom..  help me with the end play! i measured out just about .004 which is ~.0024 too much, i'm aiming for .0016-.0018 link https://www.rx7club.com/general-rotary-tech-support-11/help-understanding-end-play-725801/
 help me with the end play! i measured out just about .004 which is ~.0024 too much, i'm aiming for .0016-.0018 link https://www.rx7club.com/general-rotary-tech-support-11/help-understanding-end-play-725801/


