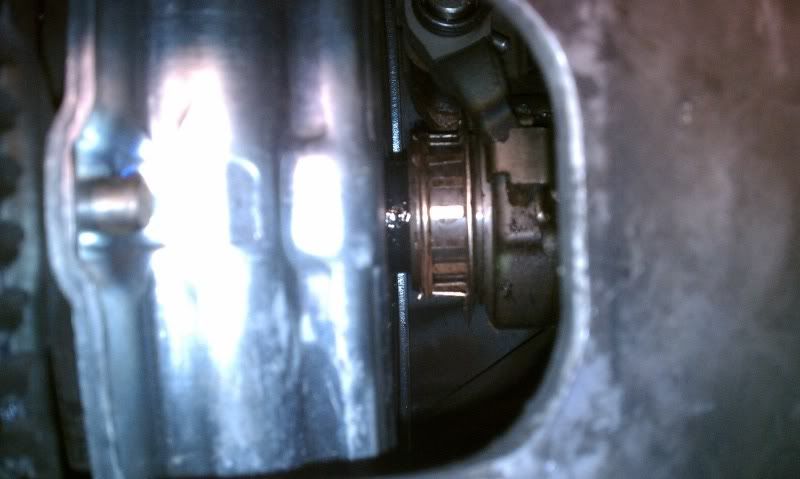
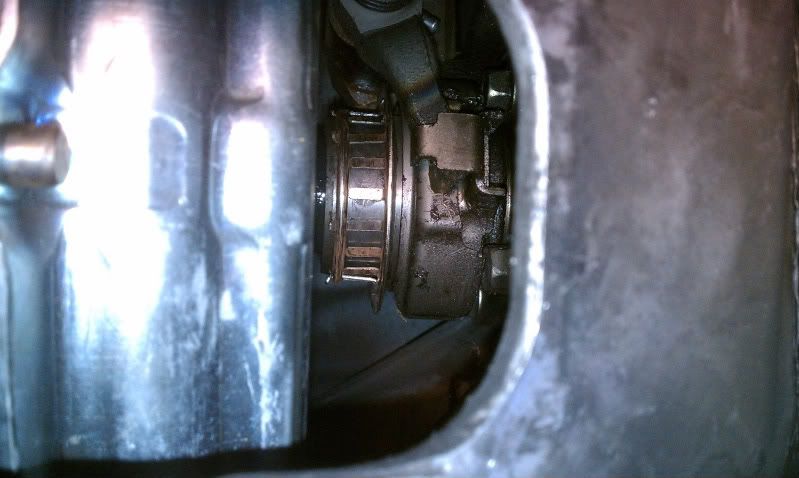
Starting off the new year with an engine pull!
#101
you're still waiting on the injectors right? to get the secondaries in without too much of a hassle, pull the LIM off, remove the secondary rail, put the injectors in, bolt on the rail, THEN bolt on the LIM, makes life easier since you've got everything else out right now.
#102
Ohhh I get it! Is it really that bad to install the injectors? I step into the engine bay where my radiator/intercooler would usually be so I'm not leaning over the car. I thought the injectors should be a direct drop in other than modifying the harness to clip in.
#103
#104
it can be. It's hard to get a wrench or socket in there at the correct angle. It's a tight fit, using shorter bolts will help too. I think it's just easier to do it with the LIM off, then hook everything up. It's not that it can't be done with the LIM on, I did it, it's just a pain and took me way more effort than it was worth.
#106
#107
So working on the car today, we have the engine mated to the transmission and all bell housing bolts, but I don't think we have the actual "connection" with the transmission because when I go to push the clutch pedal in, it just goes straight to the floor and stays there. I don't have to put any force on the clutch pedal or anything, I push it just a little and it basically shoots to the floor.
I've done a few searches, but it seems like it could be a master/slave cylinder problem? Checked the brake/clutch fluid and it's fine. I don't understand how this could be a problem if it was in perfect working order when we were pulling the engine out. Any suggestions?
All I am really waiting on are my injectors, once they get in, I'll be able to install those and put the radiator/intercooler in and then just start hooking everything up electrically.
#108
Eats, Sleeps, Dreams Rotary
iTrader: (13)
Joined: Aug 2002
Posts: 4,152
Likes: 0
From: Pittsburg, KS.
So working on the car today, we have the engine mated to the transmission and all bell housing bolts, but I don't think we have the actual "connection" with the transmission because when I go to push the clutch pedal in, it just goes straight to the floor and stays there. I don't have to put any force on the clutch pedal or anything, I push it just a little and it basically shoots to the floor.
I've done a few searches, but it seems like it could be a master/slave cylinder problem? Checked the brake/clutch fluid and it's fine. I don't understand how this could be a problem if it was in perfect working order when we were pulling the engine out. Any suggestions?
All I am really waiting on are my injectors, once they get in, I'll be able to install those and put the radiator/intercooler in and then just start hooking everything up electrically.
I've done a few searches, but it seems like it could be a master/slave cylinder problem? Checked the brake/clutch fluid and it's fine. I don't understand how this could be a problem if it was in perfect working order when we were pulling the engine out. Any suggestions?
All I am really waiting on are my injectors, once they get in, I'll be able to install those and put the radiator/intercooler in and then just start hooking everything up electrically.
#110
So I was able to get the ring back to the clutch and it connected but when I push the clutch to test it, there is no resistance. The clutch pedal does now pop back up, but no/little resistance. When I take a look through the peep hole when someone pushes it, the clutch is pulled just very slightly.
#112
First make sure the clutch fork is snapped into the pressure plate. From my experience you probably need to bleed the clutch. When you remove the slave cylinder the piston inside of it can extend too far and let air in the system.
So I was able to get the ring back to the clutch and it connected but when I push the clutch to test it, there is no resistance. The clutch pedal does now pop back up, but no/little resistance. When I take a look through the peep hole when someone pushes it, the clutch is pulled just very slightly.
#113
#114
if it keeps popping out, watch this video
http://www.youtube.com/watch?v=uPCi4RpGQCU
http://www.youtube.com/watch?v=uPCi4RpGQCU
#115
So I haven't updated in a while but the car is coming along pretty well. I have the following left to do.
1. Wire the injector harness into the engine wiring harness
2. Put the UIM/elbow/IC piping on
3. Connect the wiring harness to all sensors
4. Double check clutch/bleed clutch little more probably
5. Add oil/transmission oil
6. Load new base map (is this really needed for just start up? the base map has a tune for 550/1300 injectors, I now have 725/2000 injectors)
7. Cross fingers and hope the car starts up/doesn't leak/runs
Here is how it looks like right now, going to be in Vegas this weekend, so won't be able to get to the car again until two weeks from now.
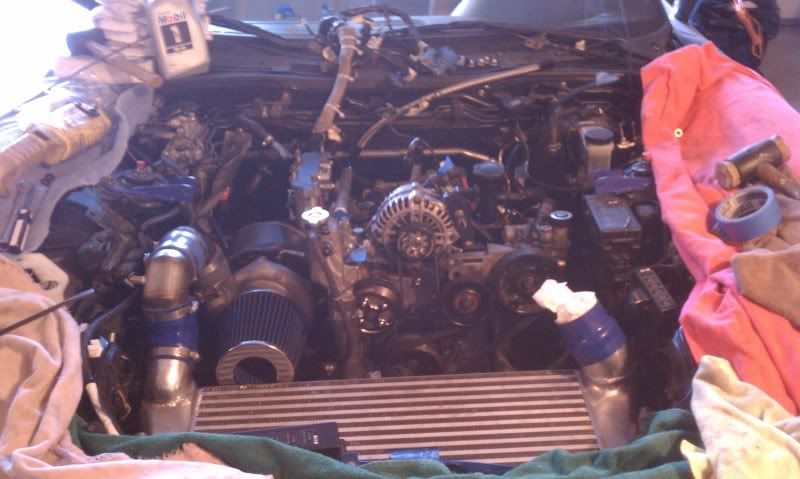

#117
Racing Rotary Since 1983
iTrader: (6)
Joined: Oct 2001
Posts: 6,136
Likes: 564
From: Florence, Alabama
use the map i sent you but since you changed injectors you will need to change the injector delivery numbers and the lag. i believe you can easily get these from Injector Dynamics or search the board as they have been posted.
finally, you will have to change the injector ontime (base fuel page) a bit.
proceed w caution here and don't hesitate to ask questions.
and don't forget to pull the fuel pump fuse (yellow 20 A near your left foot toes), pull the sparkplugs and crank the motor til you have oil pressure before starting.
howard
#118
#119
Joined: Mar 2001
Posts: 30,580
Likes: 567
From: FL-->NJ/NYC again!
Another option is to pull the EGI fuse, it's a pink 30 Amp fuse located in the middle of the row of fuses over by the driver's side headlight.
#120
#121
Well, I think the day is coming!
There are a few problems though
I go to put my UIM on and hook up the sensor that is underneath the UIM and well, the engine harness doesn't fit the sensor.
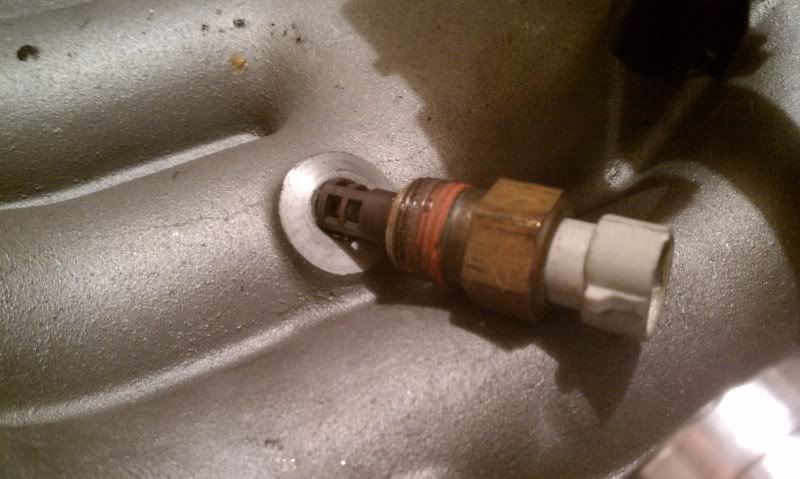
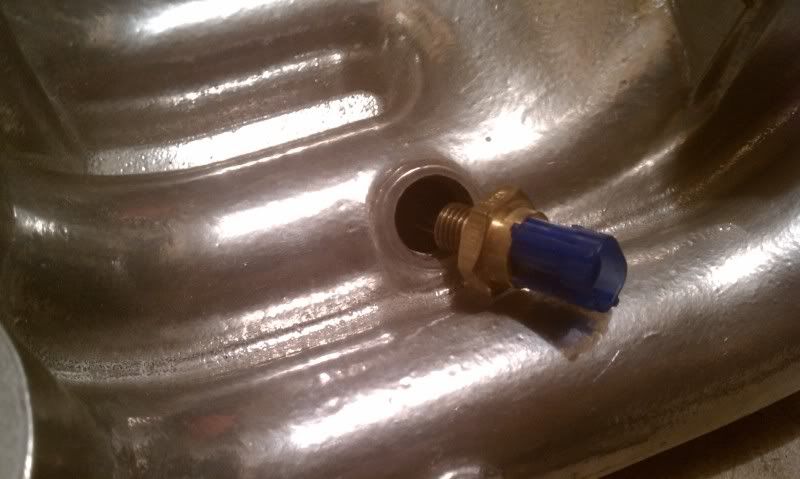
I purchased this UIM already ceramic coated from a user on here and it looks as though the sensor is an aftermarket one. I looked at my old UIM and the sensors threading is A LOT smaller and the fitting is different.
Here are some pictures of the sensor and the threading. Is there a way to find a connection or how exactly am I going to get this to work? Is it an essential part? I'm pretty sure this is the air intake temp sensor.
Also missing is, I do not know where my O2 sensor is that goes into my downpipe. I see pictures of it in when I first took pictures of the car, but where could this have gone? Is this part of the wiring harness? I'm totally at a blank right now.
Here is how the car sits right now
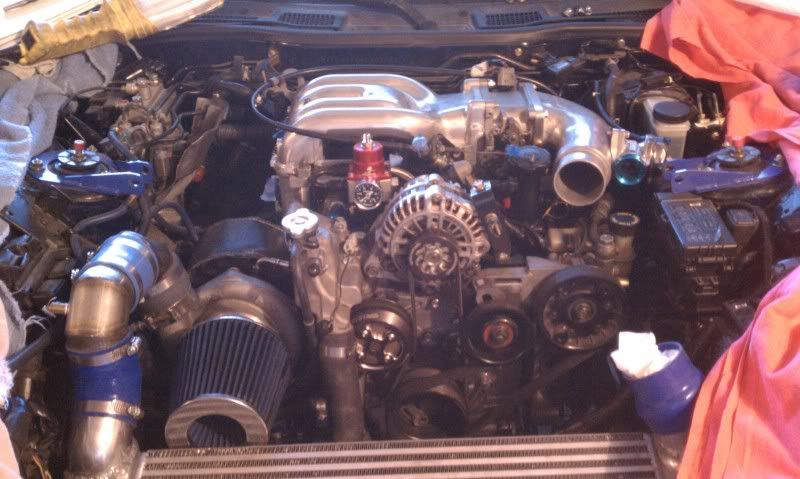
Things left to do:
1. Put the last IC pipe on
2. Add fluids (oil, transmission oil, 2-stroke oil, coolant)
3. Load new base map
START THE CAR!
There are a few problems though
I go to put my UIM on and hook up the sensor that is underneath the UIM and well, the engine harness doesn't fit the sensor.
I purchased this UIM already ceramic coated from a user on here and it looks as though the sensor is an aftermarket one. I looked at my old UIM and the sensors threading is A LOT smaller and the fitting is different.
Here are some pictures of the sensor and the threading. Is there a way to find a connection or how exactly am I going to get this to work? Is it an essential part? I'm pretty sure this is the air intake temp sensor.
Also missing is, I do not know where my O2 sensor is that goes into my downpipe. I see pictures of it in when I first took pictures of the car, but where could this have gone? Is this part of the wiring harness? I'm totally at a blank right now.
Here is how the car sits right now

Things left to do:
1. Put the last IC pipe on
2. Add fluids (oil, transmission oil, 2-stroke oil, coolant)
3. Load new base map
START THE CAR!
#123
Here is what I posted on the thread where I was having problems. You guys can see the difference in UIM.
the hole has been modified to fit this aftermarket sensor though. Here are the pictures. The one with the ceramic coating is the modified UIM with an aftermarket sensor. My stock one is the non-ceramic coated and has the sensor that fits the wiring harness.
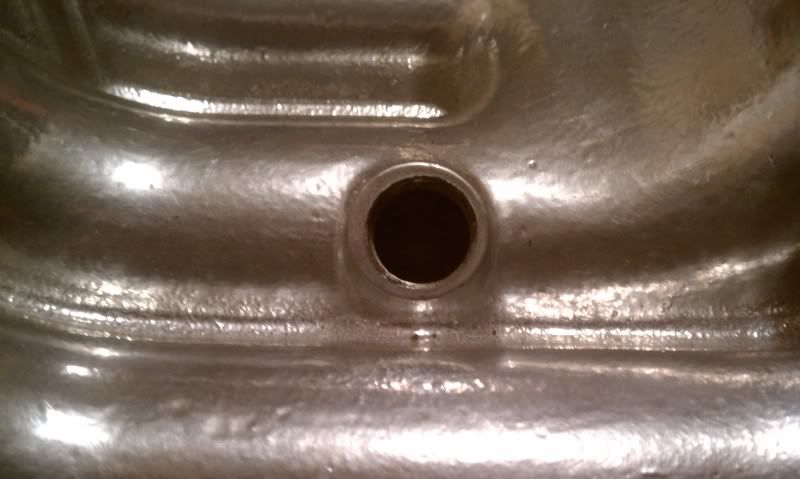
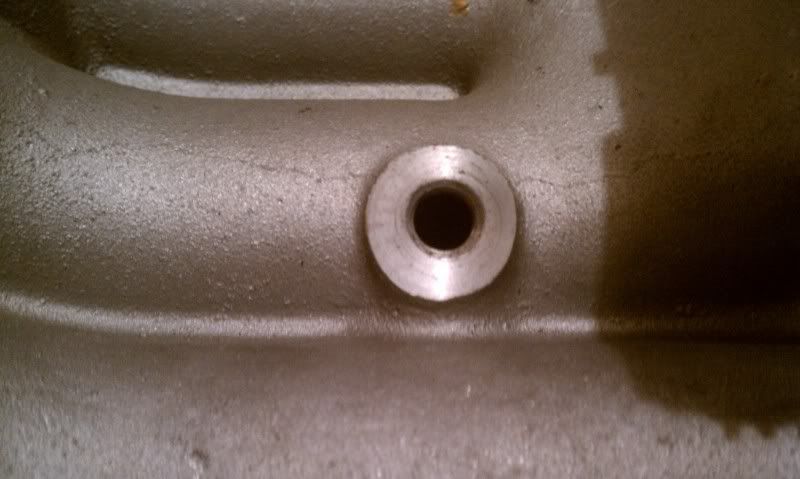
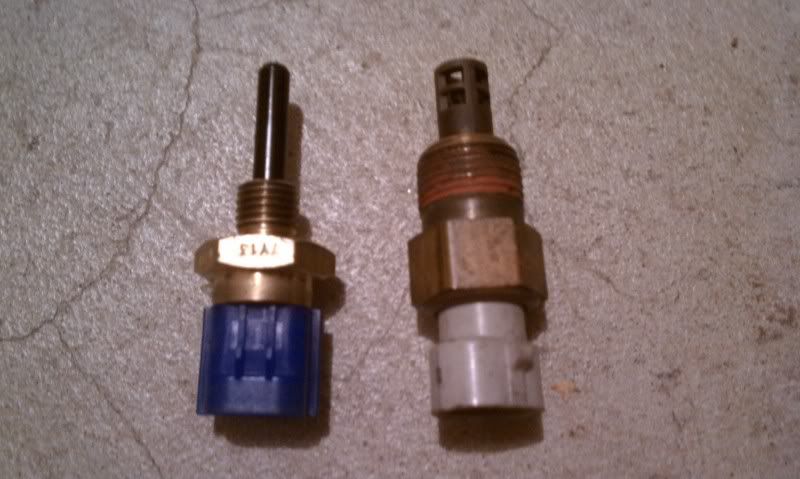
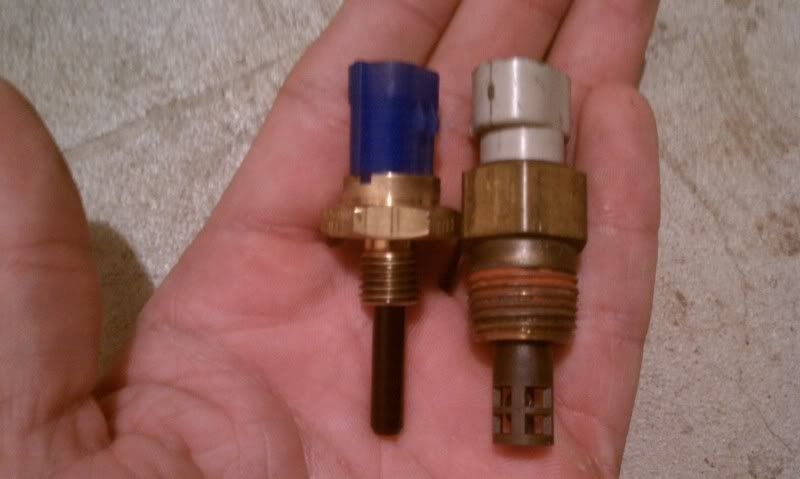
Aftermarket sensor trying to go into the non-ceramic coated UIM
Stock sensor trying to go into the ceramic coated UIM
Should I just reuse my non-ceramic coated UIM until I figure a fix for this?
the hole has been modified to fit this aftermarket sensor though. Here are the pictures. The one with the ceramic coating is the modified UIM with an aftermarket sensor. My stock one is the non-ceramic coated and has the sensor that fits the wiring harness.


Aftermarket sensor trying to go into the non-ceramic coated UIM

Stock sensor trying to go into the ceramic coated UIM

Should I just reuse my non-ceramic coated UIM until I figure a fix for this?
#125
So I was able to get the ring back to the clutch and it connected but when I push the clutch to test it, there is no resistance. The clutch pedal does now pop back up, but no/little resistance. When I take a look through the peep hole when someone pushes it, the clutch is pulled just very slightly.
3/4s of the way down under reassembly.
The wedge collar or ring should be in the clutch to begin with.
With slave cylinder removed reach in hole where slave cylinder mounts with a strong hook. Pull end of clutch fork toward rear of car until you hear throwout bearing "click" in the wedge collar. Install slave cylinder and push clutch pedal. If wedge collar pulls out of clutch, then it's bent.


