Rotary Extreme Twin Turbo Track V-mount Kit Full Review
#1
Thread Starter
rotary amuse
iTrader: (12)
Joined: May 2003
Posts: 2,947
Likes: 331
From: Massachusetts
Rotary Extreme Twin Turbo Track V-mount Kit Full Review
Product: Rotary Extreme Twin Turbo Track V-mount kit
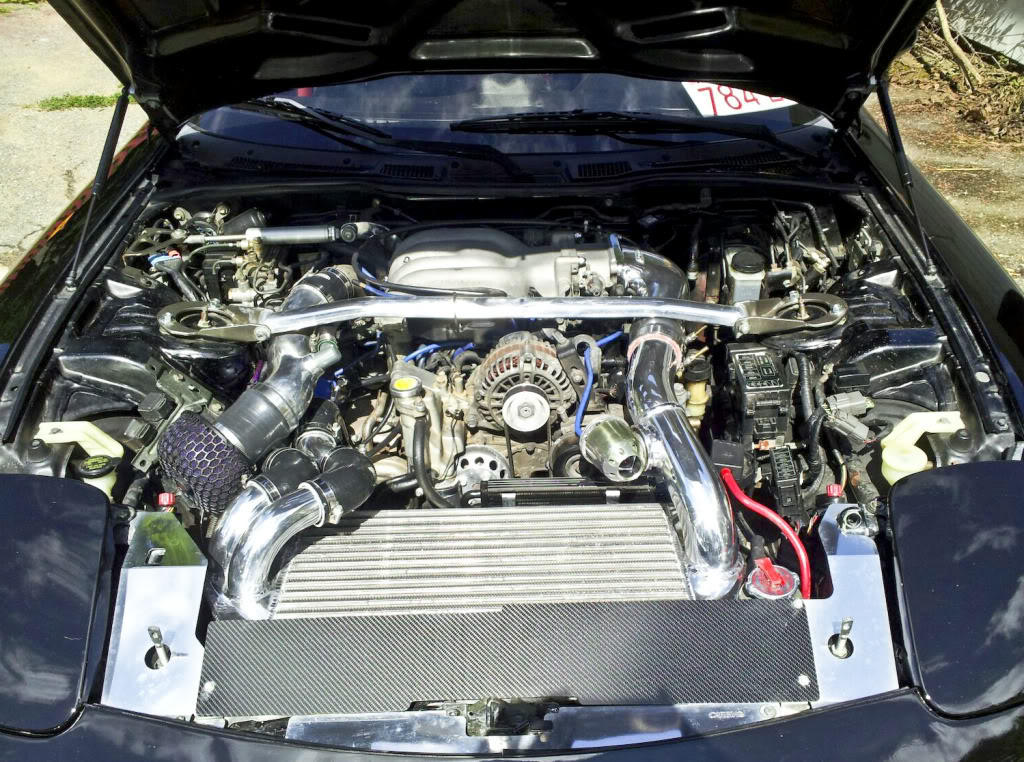
Anyone who puts their RX-7 through the paces knows that keeping the temps down is one of the main keys to success. I did not have much success on track with my front mount intercooler kit primarily due to the intercooler core retaining a majority of the air coming through the bumper and, unbeknownst to us, faulty fan wiring. If you aren't sure of the benefits of a v-mount intercooler, short and sweet, it splits the air flow between the radiator and intercooler, leaving you without having to compromise reliability for performance or vice versa.
I had been considering my options, looking into large stock mount and v-mount intercooler set ups. There are several great options out their, but between all of the kits manufactured by Chuck and Ben that I have been lusting over throughout the years, I knew whose kit I wanted. However, having seen their current 'off the shelf' twin turbo kit in person, I knew I wanted something a little larger than that.
I reached out to Ben at RE about my thoughts on what I wanted (twin turbo kit with a larger intercooler core similar to that of the Track kit that will work with my HKS Racing Suction kit) and where I wanted to go with my twin turbo kit (retain almost instant and efficient boost, reliability, and low temps,) seeing if a bespoke kit was possible. He was completely receptive to my ideas, having wanted to build something similar before I came to him. I thought of what he had in mind for a bit, and finally pulled the trigger on it.
Ben kept in touch throughout the entire development of the kit, double checking on my requested specifications. We had initially disagreed on certain things, but he took the time to help me fully understand where he was coming from, giving me the option of where I wanted my kit to go. Throughout the build, I would receive pictures of how it was coming along, with his excitement pouring through. He seemed just as amped about making it as I was about running it. I mean, if I could make something this badass, I'd be damn proud of it too!
Several months later, it arrived. Several months after that, we had it installed and road ready. My time constraints were what dragged the install out, as well as balancing several other pressing matters along the build.
Build Quality: 10 (out of 10)
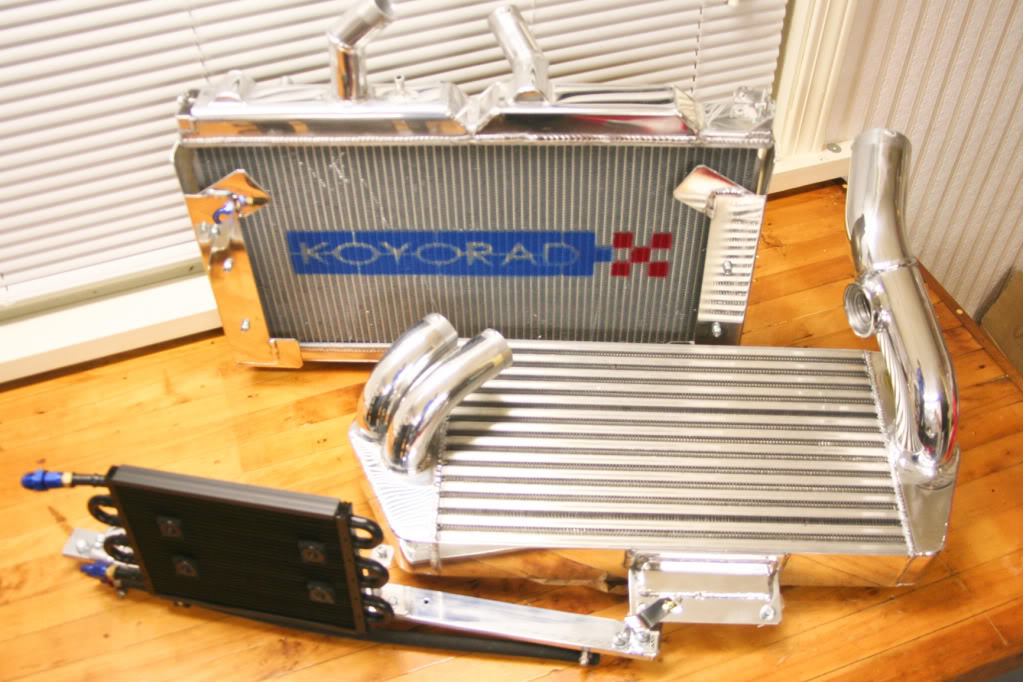
Installation: 9 (out of 10)
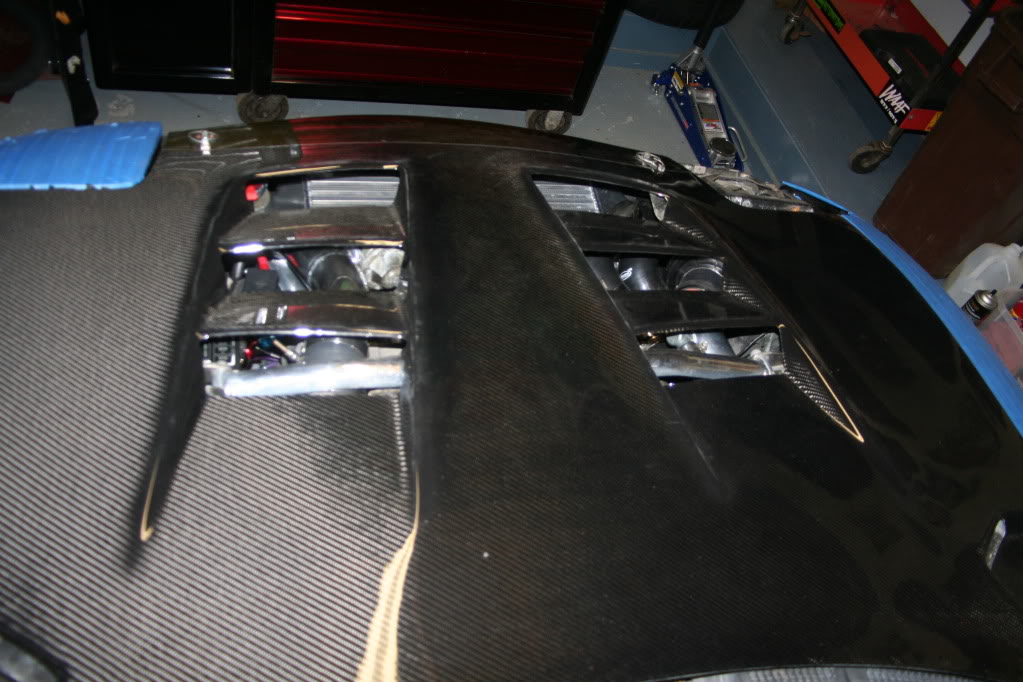
Performance: 9 (out of 10)
Price: 8 (out of 10)
Thanks to my good friends Mark, Brian, Adam, and Tony for help on install. Thanks to my fiance Heidi for her patience as I spent countless hours in the garage over several weekends.
Cheers!
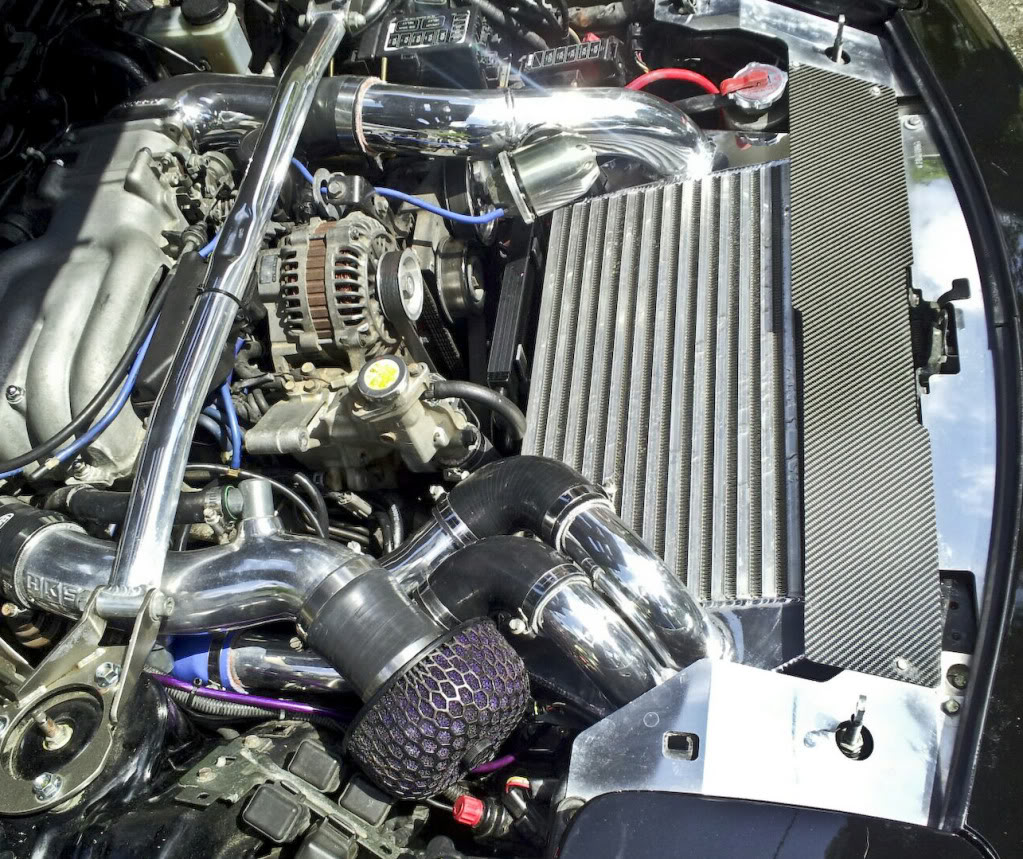
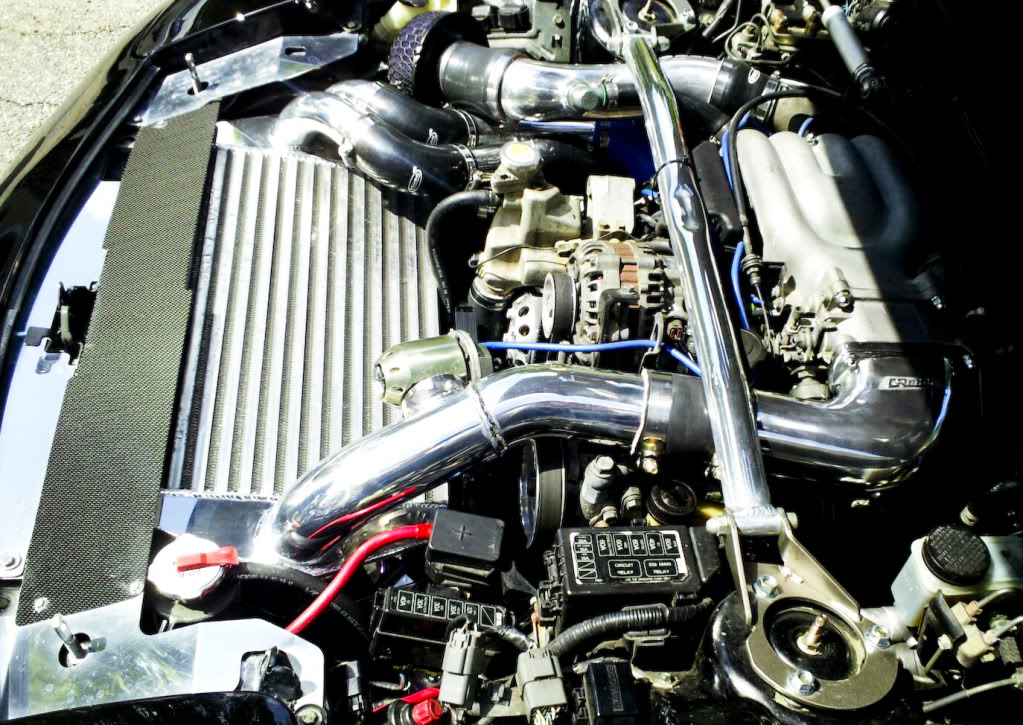

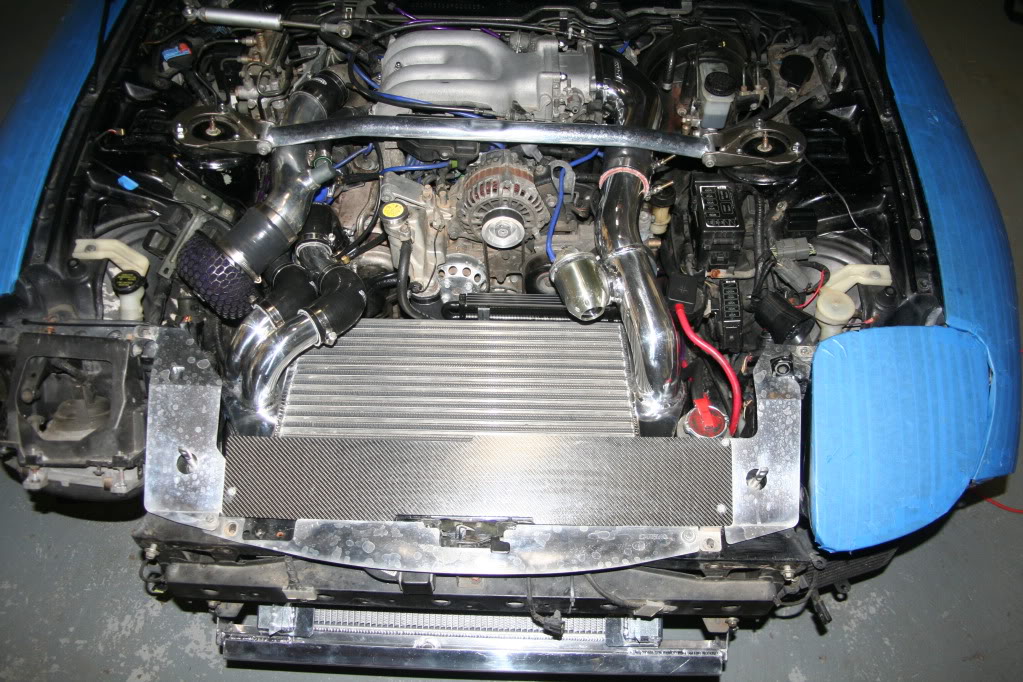
For those wondering - that is a Carbing cooling panel with a custom carbon fiber extension.

Garret bar and plate 900 CFM intercooler core, Koyo radiator, Derale Performance power steering cooler
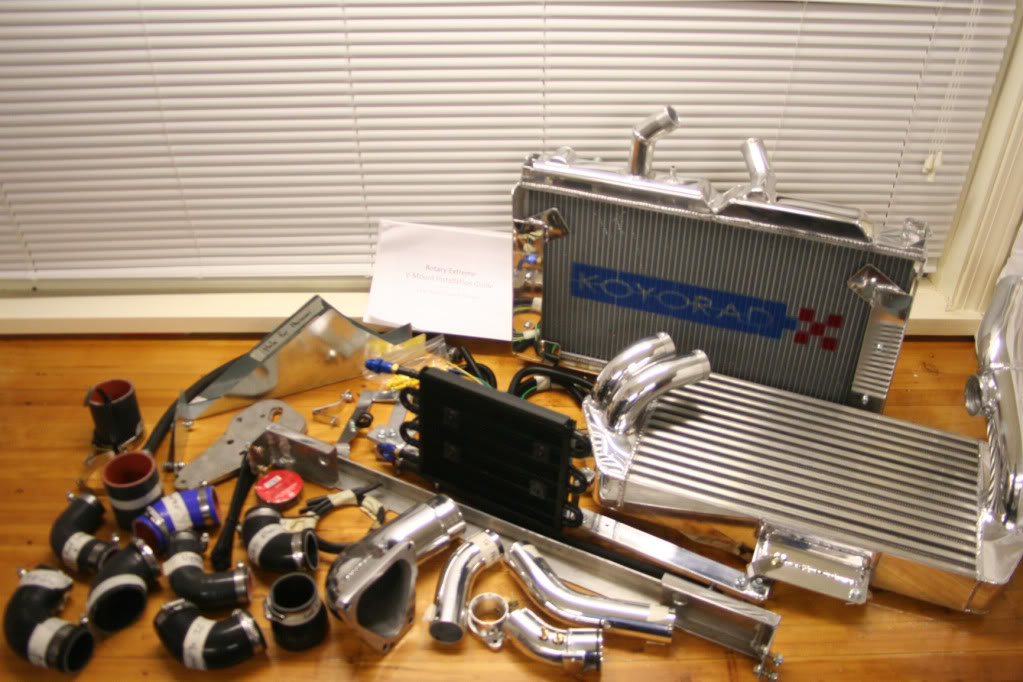
Intercooler with Aluminum 2.75" piping, 2" racing twin-row radiator, power steering cooler, 4-ply silicone intercooler connectors and silicone radiator hoses, replacement front frame rail bracket bar with brackets to support the back of the intercooler, reinforced lower radiator L-Brackets with welded cross bar, stainless steel 1/4 inch thick modified tow hooks. 2 T-Bolt hose clamps for the intercooler hose ( 2 T-bolt clamps for the V-mount pipe to Greddy elbow with the 4 ply silicone hose provided). 4 non-perforated worm clamps for the radiator hoses. All wires, zip ties, crimp connectors, electrical tape and plastic wire loom are included to extend the radiator fan harness to work with the V-mount configuration. Silicone 4-ply intercooler connectors are available in Red, Blue and Black.
Options purchased: GReddy Elbow, HKS blow off valve flange
Anyone who puts their RX-7 through the paces knows that keeping the temps down is one of the main keys to success. I did not have much success on track with my front mount intercooler kit primarily due to the intercooler core retaining a majority of the air coming through the bumper and, unbeknownst to us, faulty fan wiring. If you aren't sure of the benefits of a v-mount intercooler, short and sweet, it splits the air flow between the radiator and intercooler, leaving you without having to compromise reliability for performance or vice versa.
I had been considering my options, looking into large stock mount and v-mount intercooler set ups. There are several great options out their, but between all of the kits manufactured by Chuck and Ben that I have been lusting over throughout the years, I knew whose kit I wanted. However, having seen their current 'off the shelf' twin turbo kit in person, I knew I wanted something a little larger than that.
I reached out to Ben at RE about my thoughts on what I wanted (twin turbo kit with a larger intercooler core similar to that of the Track kit that will work with my HKS Racing Suction kit) and where I wanted to go with my twin turbo kit (retain almost instant and efficient boost, reliability, and low temps,) seeing if a bespoke kit was possible. He was completely receptive to my ideas, having wanted to build something similar before I came to him. I thought of what he had in mind for a bit, and finally pulled the trigger on it.
Ben kept in touch throughout the entire development of the kit, double checking on my requested specifications. We had initially disagreed on certain things, but he took the time to help me fully understand where he was coming from, giving me the option of where I wanted my kit to go. Throughout the build, I would receive pictures of how it was coming along, with his excitement pouring through. He seemed just as amped about making it as I was about running it. I mean, if I could make something this badass, I'd be damn proud of it too!
Several months later, it arrived. Several months after that, we had it installed and road ready. My time constraints were what dragged the install out, as well as balancing several other pressing matters along the build.
Build Quality: 10 (out of 10)
The kit itself is a work of art. Ben's passion for this shows throughout his work, as every little detail looks thoroughly thought out, with a perfect finish. I told him, I would consider him more an artist than an engineer. I have a passion for form beautifully intertwined with function (see Horacio Pagaini's Zonda R for example), and Ben's kit is absolutely perfect!

Installation: 9 (out of 10)
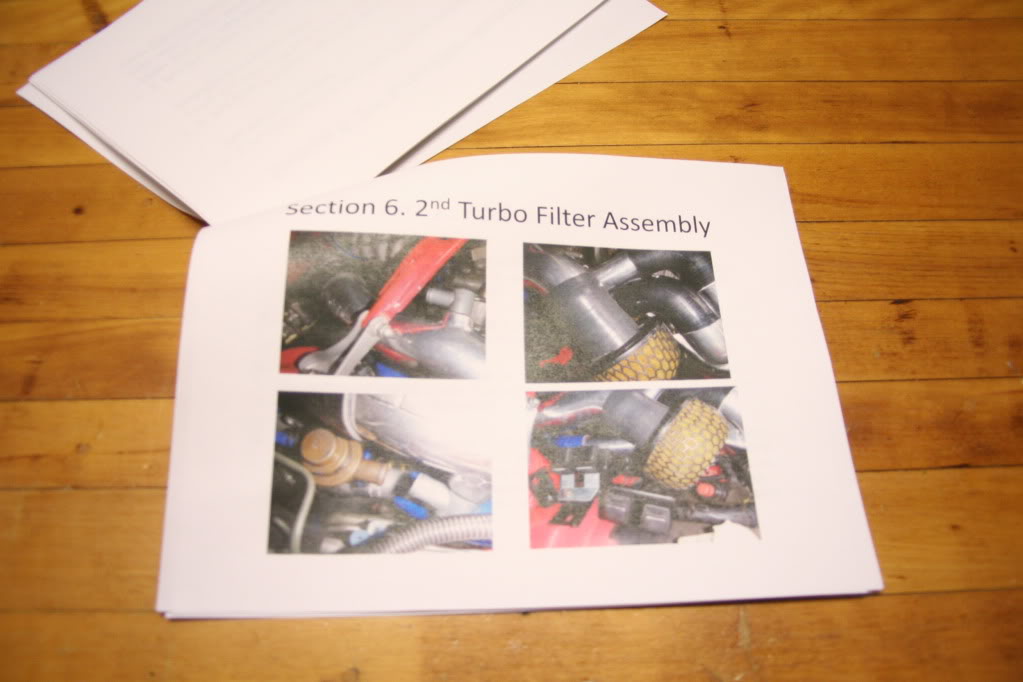
Ben had taken the time to write up step by step directions for installation, as well as providing a full write up from his other kits, as they share several steps. Considering he built the kit on his own car, shipped it with hopes that it will fit just as well in my bay knowing that no two FD's are exactly the same, the install went quite smooth. At times, some of the pictures were hard to interpret due to angle and directions, but we managed. Installing this on a lift would have made it easier, but we managed just fine with the car up on jack stands.
We spent some time under the car with the radiator line up, fan install and wiring, so a jack and jack stands at a minimum are a must.
We spent some time under the car with the radiator line up, fan install and wiring, so a jack and jack stands at a minimum are a must.
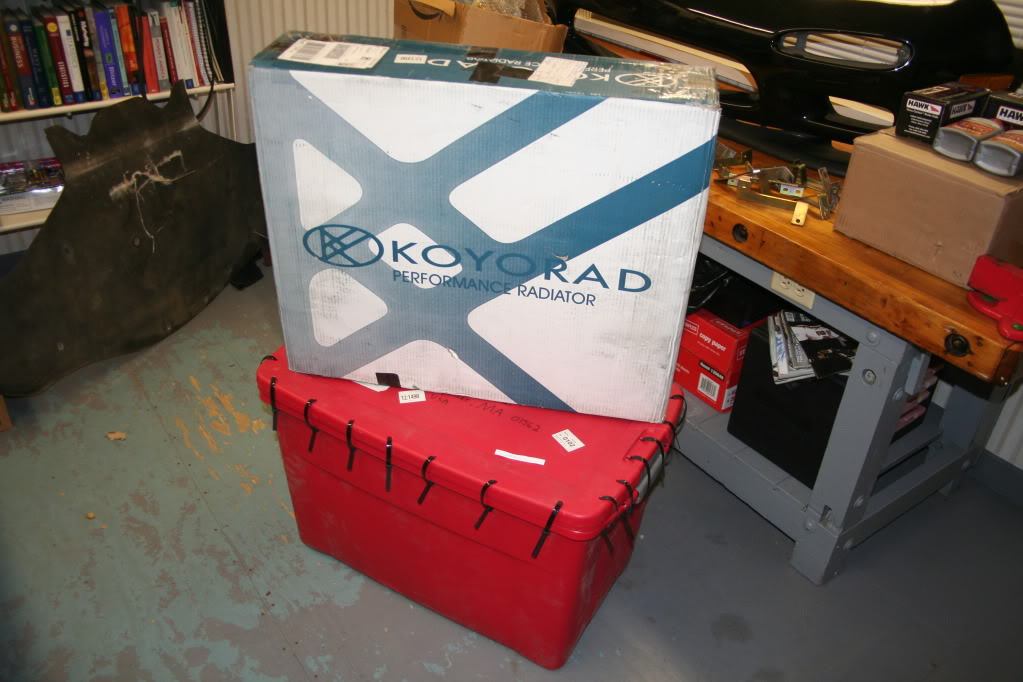
A lot of effort put in to making sure it arrived safely:

Everything you need for install:

Great directions:

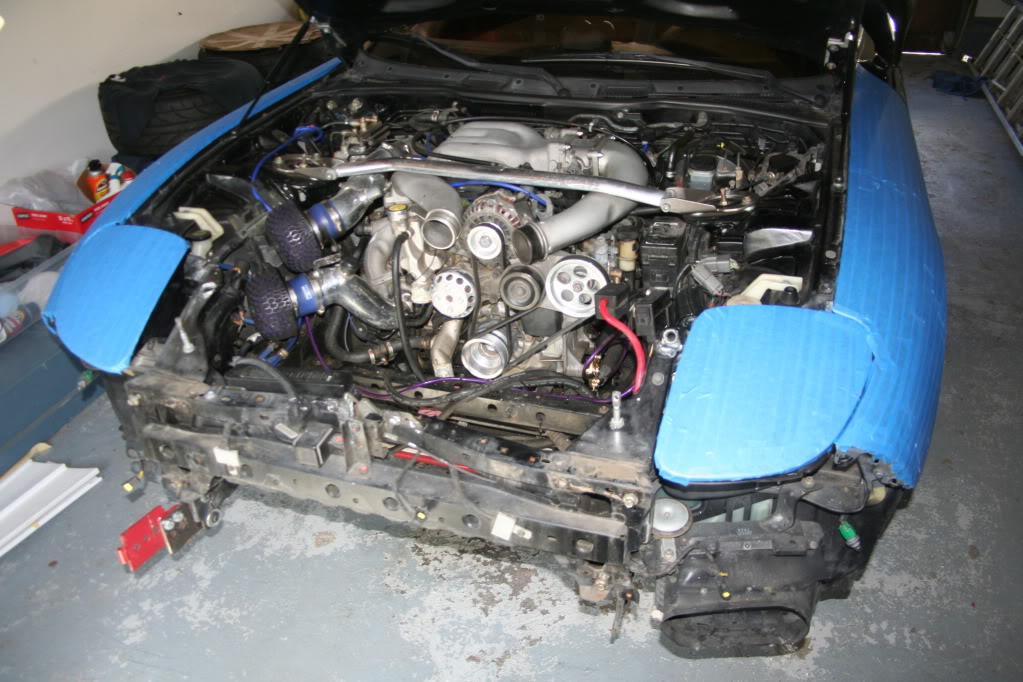
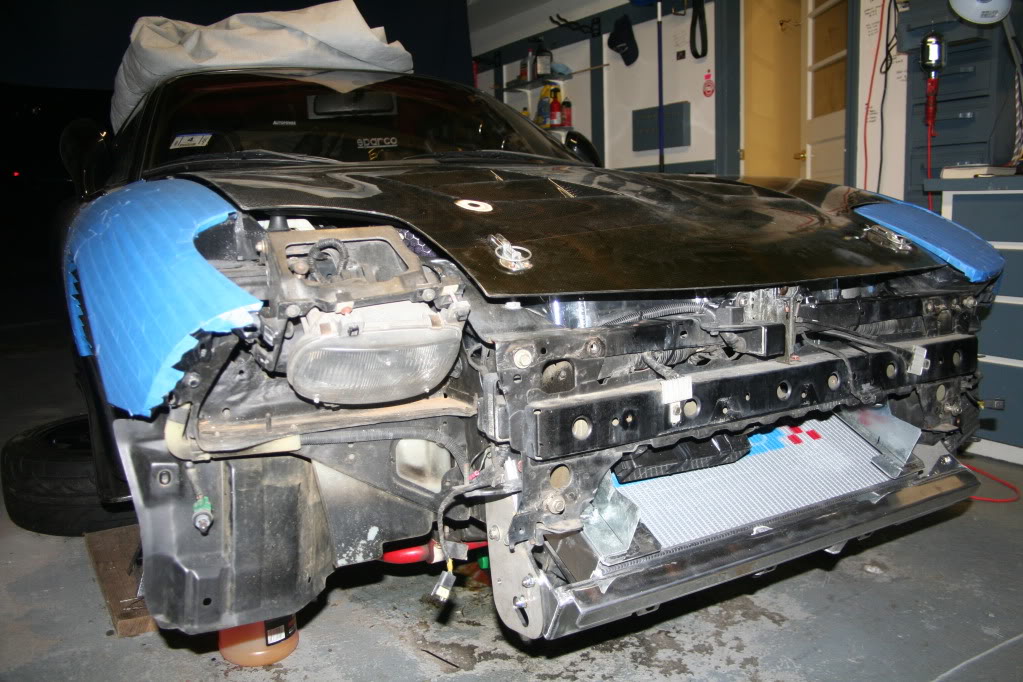
Prepped Mia for install. Remember to remove those headlight covers, worth the extra minutes to do so:


Performance: 9 (out of 10)
It is hard to gauge if it spools quicker than the twin set up with y-pipe, as we were unable to do back to back testing. However, the boost pattern between the primary and secondary turbos is smooth with predictable transition. Because each turbo has its' own piping, there is no empty pipe to fill, making it pressurized without hesitation as soon as the second turbo kicks in. The path isn't competing for flow to each turbo, where it isn't shoving air down the primary turbos throat as the secondary turbo kicks in. I give it a 9 out of 10 instead of a full 10 out of 10 as I can't actually say whether or not performance is truly better than performance with a y-pipe. With the butt dyno, however, performance feels predictable, smooth, and quick!
Price: 8 (out of 10)
I had spent over $3,000 by the time everything was said and done on install. Yes, this kit is more money than others. However, I didn't need to custom fabricate things to shoe horn this into my engine bay as I have heard you will with some other kits. I knew what I was getting into, and knew the money would be well spent on a Rotary Extreme kit. Judging by the pictures I have seen of other's kits, Ben's kit is on par, if not superior, with the likes of RE Amemiya's, Knightsports, and even GReddy's latest and greatest at almost $1,000 more. Bottom line: yes, it is expensive. I understand not everyone has the funds for an RE kit. Just know, you absolutely get what you pay for. Ben developed this kit without cutting corners, without jeopardizing quality to cut costs. You can get a decent kit for less, but I would bet the quality is not up to snuff to this.
Overall: 9 (out of 10)Flawless craftsmanship, a complete kit, great performance! It is a perfect option if you are looking for a twin turbo set up. It can work with an HKS RS intake, as is with my kit, or with the RE intake kit. He has built this kit to work on California cars needing emissions, built around the factory air pump. It even works with owners looking to retain A/C. The install itself was a little difficult, but not exactly rocket surgery. Ben made sure I had all the resources I needed to get the job done, including 24 hour tech support.
I will not have the only kit for long. Ben is doing an install on another lucky bloke with this kit out on his coast. So look out for some more feedback on this kit from the engineer himself. I know he should be just as happy with the performance as I.
Thanks Ben for working with me in bringing this idea to fruition. I am more than happy with the results!I will not have the only kit for long. Ben is doing an install on another lucky bloke with this kit out on his coast. So look out for some more feedback on this kit from the engineer himself. I know he should be just as happy with the performance as I.
Thanks to my good friends Mark, Brian, Adam, and Tony for help on install. Thanks to my fiance Heidi for her patience as I spent countless hours in the garage over several weekends.
Cheers!


For those wondering - that is a Carbing cooling panel with a custom carbon fiber extension.
#2
Wow, fantastic write-up.
I think because the core is so big and dense it affects the pri turbo spool time but the set-up tames the temps so you can push hard all day long.
Sorry about the miss wired fan, I really hope that wasnt the real initial issue.
It was important for me though to make the transition from pri to sec turbo more predictable so that you can throttle steer through corners and step on it at corner exit. I like twins because you can feather the throttle and get better response in very twisty technical roads.
Thank you again for your support, kind words and honesty.
Ben
#3
Here is an install I did with my intakes and full emissions plumed in. The customer wanted a satin finish. Wet sanding this kit is way harder then polishing it, but it looks cool.
Any track time yet.
Any track time yet.
Last edited by Rotary Extreme Sales 1; 08-10-12 at 09:01 PM.
#4
Eats, Sleeps, Dreams Rotary
iTrader: (14)
Joined: Jul 2003
Posts: 4,664
Likes: 86
From: Bay Area, CA
I had spent over $3,000 by the time everything was said and done on install. Yes, this kit is more money than others. However, I didn't need to custom fabricate things to shoe horn this into my engine bay as I have heard you will with some other kits. I knew what I was getting into, and knew the money would be well spent on a Rotary Extreme kit. Judging by the pictures I have seen of other's kits, Ben's kit is on par, if not superior, with the likes of RE Amemiya's, Knightsports, and even GReddy's latest and greatest at almost $1,000 more.
My Knight Sports v-mount install cost at least that much when the costs of AC and power steering components are factored in. (Write-up here.)
Good to see that the kit includes ducting and power steering cooling. Many of the expensive JDM kits ignore ducting and their approach to power steering involves hacking the stock lines.
Even though it was clearly not required for your purposes, it would be nice to see a kit with a real AC solution. The AC compatibility claims that v-mount vendors make are essentially meaningless. With enough custom work any v-mount is compatible with AC. A proper AC solution would include brackets to mount the condenser in the correct orientation, dryer mounting brackets if the stock ones can not be used, and custom AC hoses. (An additional complication is that US FDs have two AC systems with different fittings.)
Still, this may be the most complete FD kit out there.
#5
Nice. $3k is not at all bad given the evident quality (I have some RE gear and it is top notch) and the custom aspect.
My Knight Sports v-mount install cost at least that much when the costs of AC and power steering components are factored in. (Write-up here.)
Good to see that the kit includes ducting and power steering cooling. Many of the expensive JDM kits ignore ducting and their approach to power steering involves hacking the stock lines.
Even though it was clearly not required for your purposes, it would be nice to see a kit with a real AC solution. The AC compatibility claims that v-mount vendors make are essentially meaningless. With enough custom work any v-mount is compatible with AC. A proper AC solution would include brackets to mount the condenser in the correct orientation, dryer mounting brackets if the stock ones can not be used, and custom AC hoses. (An additional complication is that US FDs have two AC systems with different fittings.)
Still, this may be the most complete FD kit out there.
Thanks for the props though, it is greatly appriciated. I am continuously trying to improve my kits.
The newest version of this kit is 3k with my intakes. So everything you need is included.
Trending Topics
#8
#10
#11
Im kind of confused with the whole AC setup. Does this retain the AC? If so how much modifications does the AC need to still work?
Also with removing the y-pipe and runing seperate cooler pipes this removes the siquential system correct???
Also with removing the y-pipe and runing seperate cooler pipes this removes the siquential system correct???
#12
I provide you with brackets that puts the condensor ontop of the radiator. You can see it in one of the pictures I posted in this thread on the yellow car. You can also see that the dryer sits in its factory location, you just massage one hole and swing it and push it down a tad. The lines need to be bent but I show you how to bend them in the instructions you get with the kit. They are very detailed insturctions. You will need to replace the orings on the lines you disconnect in your ac system. So yes, if you have seen my instruction or my kit in person on a kit with a/c you can see its really not hard at all. So yes it works with a/c, modification required are you must re-shape the lines-carefully. Dont be scared, just take your time...lol.
The sequential set-up is still retained. You only remove the pri turbo side of the y-pipe. I provide you with a cnc piece that goes to the 2nd turbo charge relief and both that cnc piece and the new pri turbo cnc piece come with nipples and vacum lines to go the old lines that went to the y-pipe. The 2nd turbo intake also has a pipe comming off of it to have the charge relief plumed back into the intake.
Everything is complete!
The hardest part will be bending the a/c lines, well the scariest part. Until new replacement lines can be fabricated, this is what we have to do.
Don't worry, it's all good.
Ben
#14
#16
Are you talking about price numbers or HP numbers.
On my end I can tell you that I made the kit to support what ever The BNR twins can throw out. I read one guy made 452 whp, yes this kit will support that.
For pricing... too many options, pm me.
Questions for the OP, can you address the OP.
sorry Zum if I hogged your thread...lol
Ben
#17
#18
I'll swing by, but Im going to sanoma drift this weekend.
RE is doing good, I just cant build stuff fast enough.
I'll hit you up.
#20
#21
Thread
Thread Starter
Forum
Replies
Last Post
rx8volks
Canadian Forum
0
08-11-15 11:30 PM


