How to: Sakebomb Garage passenger door handle install
 03-17-11 | 01:57 PM
#1
Thread Starter
Joined: Jan 2011
Posts: 2,196
Likes: 230
From: California
How to: Sakebomb Garage passenger door handle install
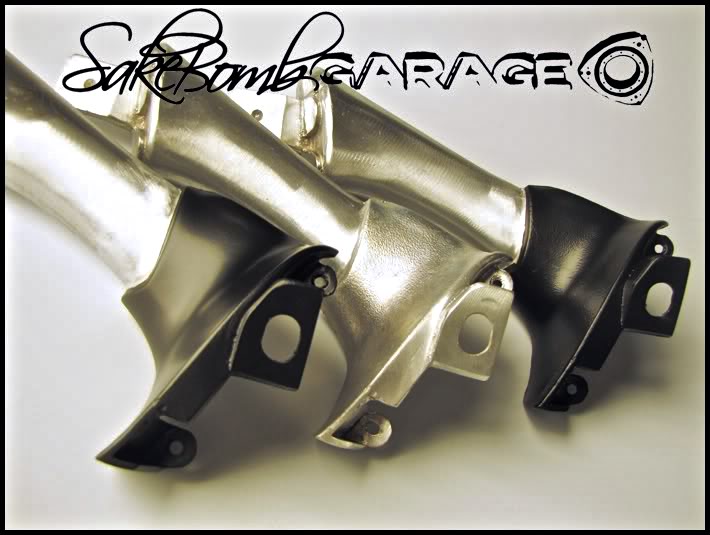
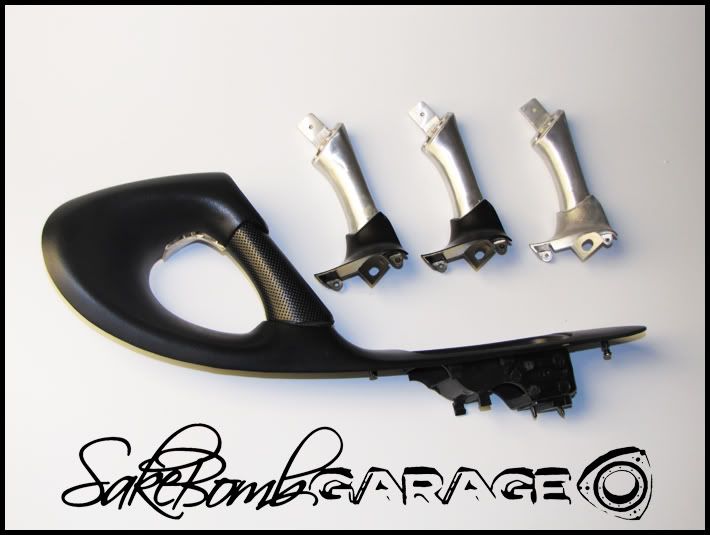
As many are aware we've recently replicated the weak plastic factory interior door handle with a cast aluminum replacement for a permanent solution. Now we don't have to read a list of rules and regulations to our passengers before they enter the vehicle. This guide can also be used if you need help removing the interior door panel for any reason 
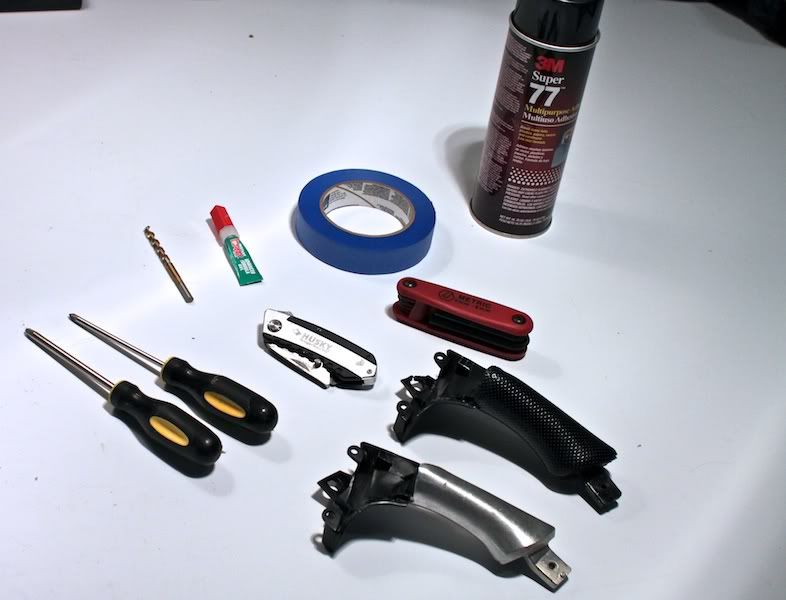
Before you start, you will need:
Tools
-#3, #2, and #1 size screwdrivers
-Allen wrench set (for included bolts)
-Thin plastic or metal spatula (for removing trim pieces)
-Razor/razor knife
-15/64” drill bit and drill
Supplies
-Painters tape
-‘Krazy Glue’ / ‘Super Glue’ gel
-3M Super 77 spray adhesive (or equivalent)
Door Panel Removal
1. Remove plastic door trim by gently popping off flag and lock covers
2. Pry up bolt cover on door cup (paint can opener works great for this) and remove bolt.
3.Gently pry up door cup (flat plastic spatula works great)
4. Remove three exposed panel trim screws
__________________
SAKEBOMB GARAGE LLC
www.SAKEBOMBGARAGE.com
Specialty aftermarket parts & service // Fremont, California
Contact: info@sakebombgarage.com
SAKEBOMB GARAGE LLC
www.SAKEBOMBGARAGE.com
Specialty aftermarket parts & service // Fremont, California
Contact: info@sakebombgarage.com
Last edited by SakeBomb Garage; 03-17-11 at 02:00 PM.
The following users liked this post:
zweetz32 (04-20-20)
03-17-11 | 01:58 PM
#2
Thread Starter
Joined: Jan 2011
Posts: 2,196
Likes: 230
From: California
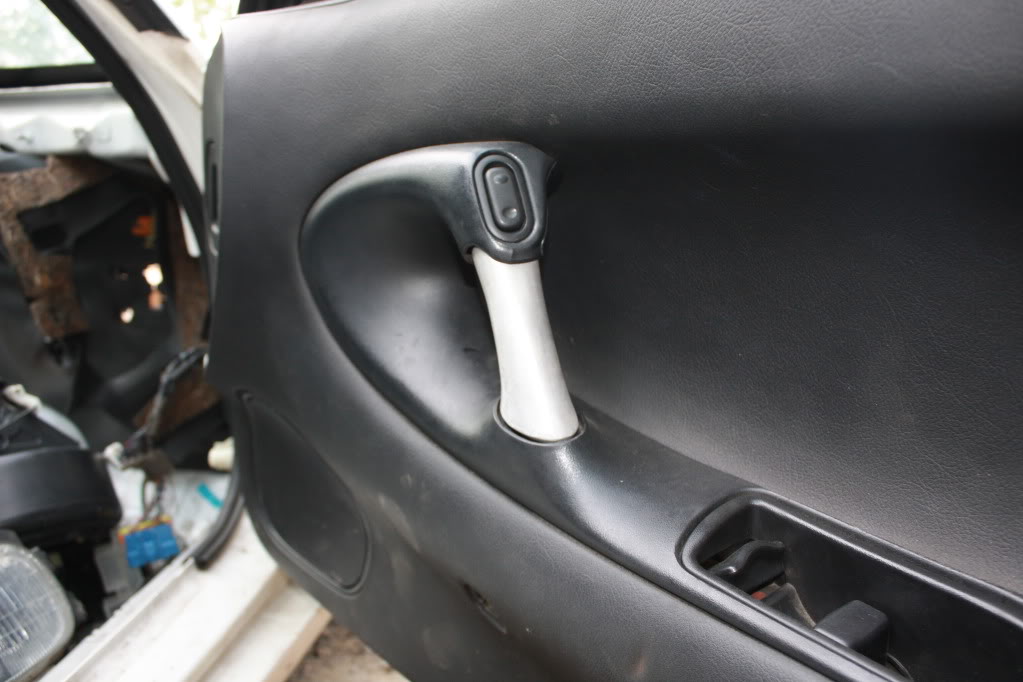
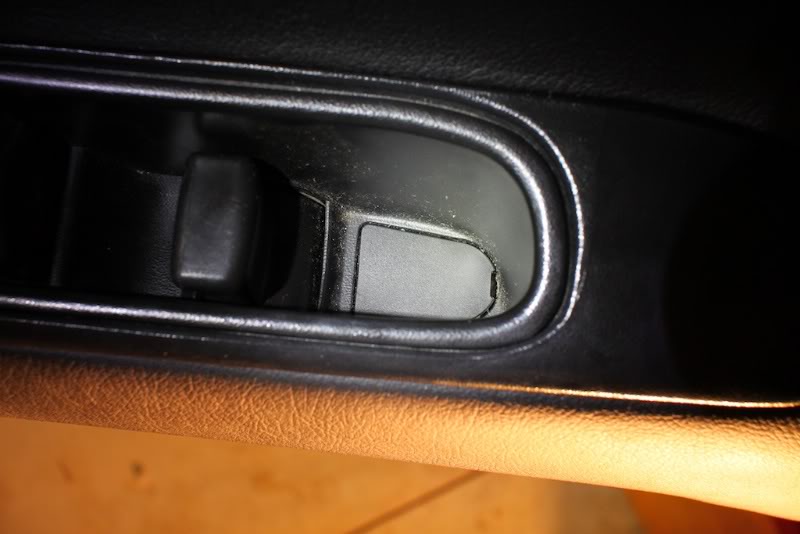
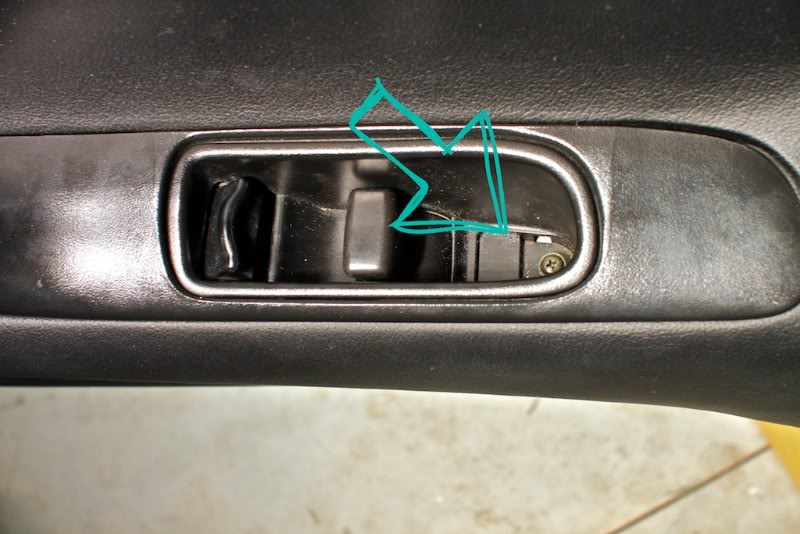
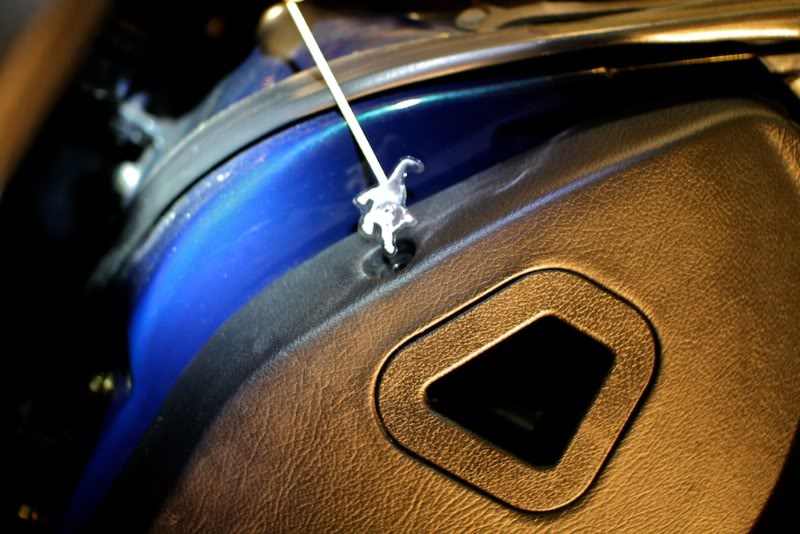
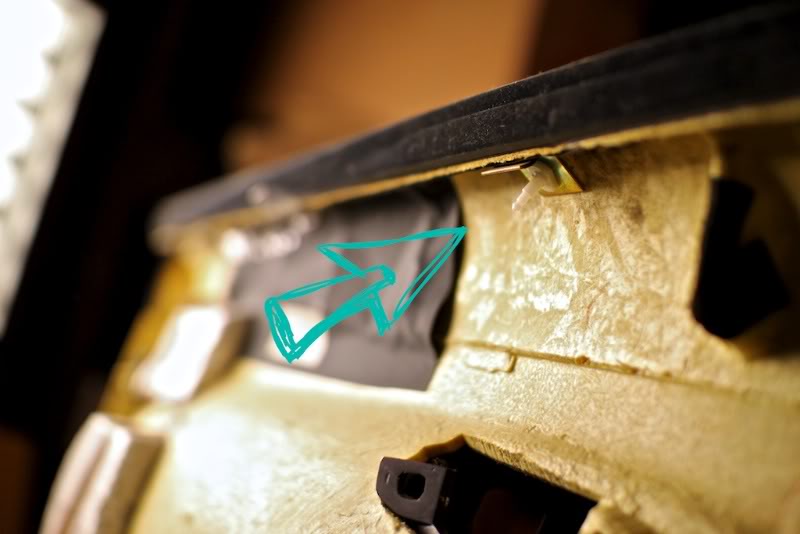
5. Gently pop out window switch (plastic spatula works great for this). Remove the short screw from inside the hole where the window switch was (this is the top structural mount
for the handle). Now pop out the screw cap in the center of the door panel and remove the long screw with a #3 Phillips head screw driver (this is the lower structural mount for the handle).
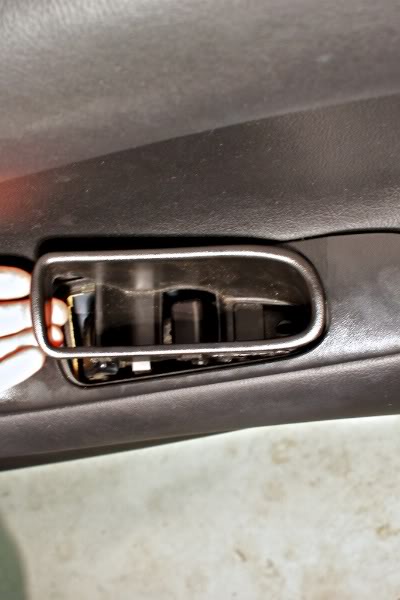
6. The door panel is now free. Lift entire panel straight UP, and out of the upper pin mounts, and remove the door panel.
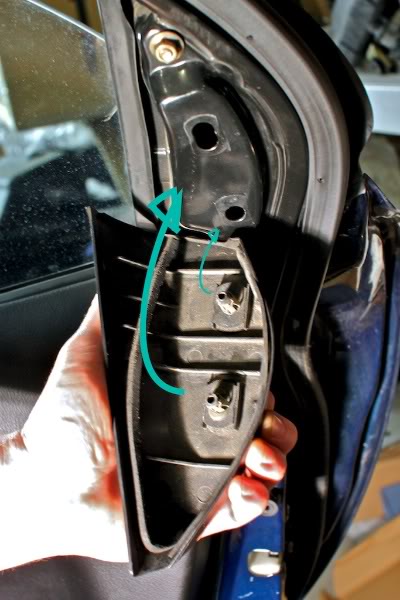
Door Plastic Removal
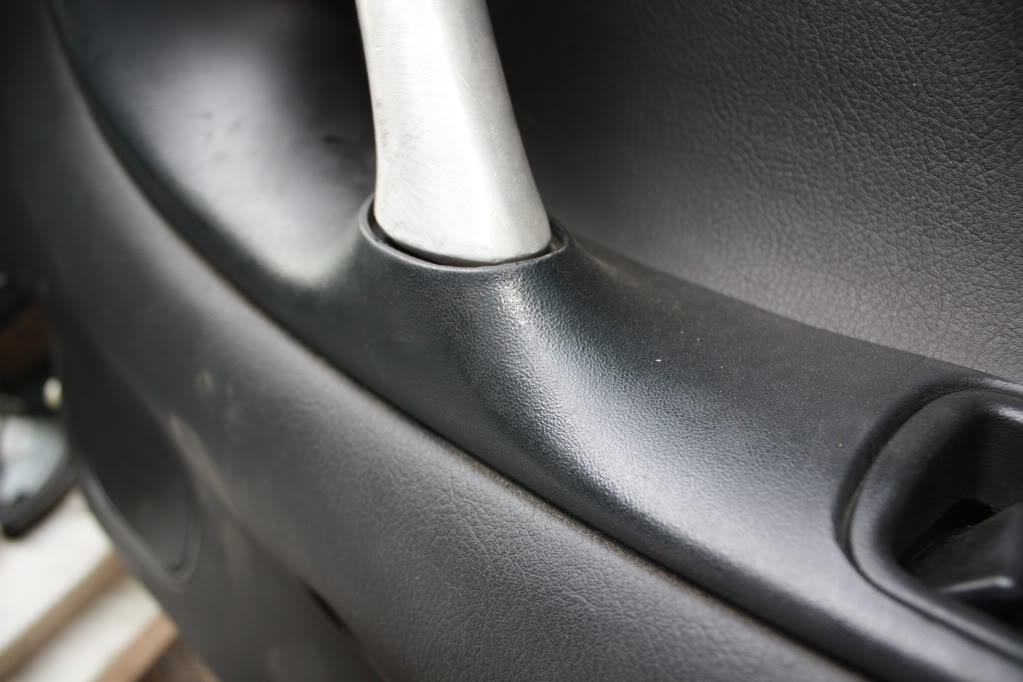
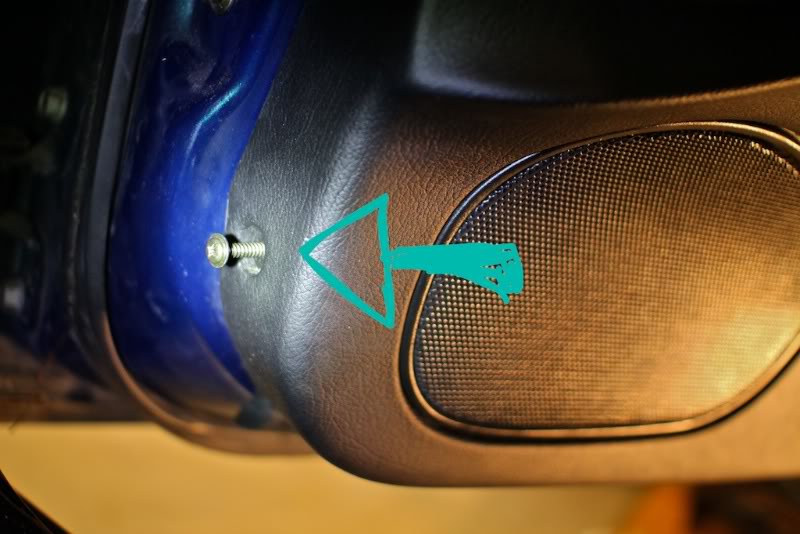
1. Remove screws attaching plastic to door panel (left most screw may have a clip)
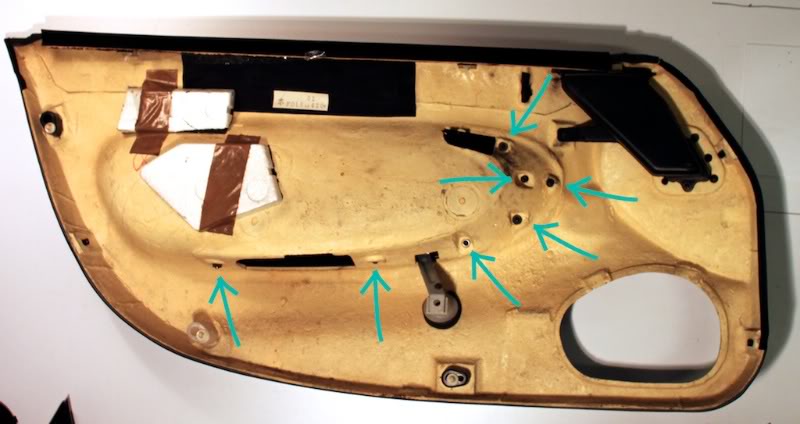
2. Remove screw attaching lower bracket to plastic spacer.
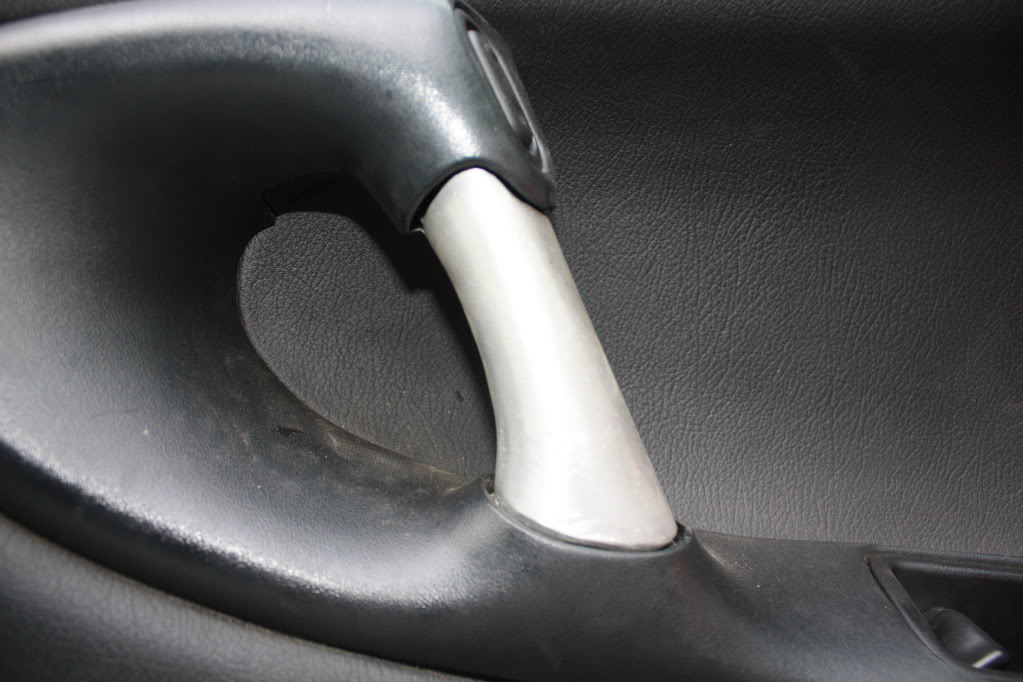
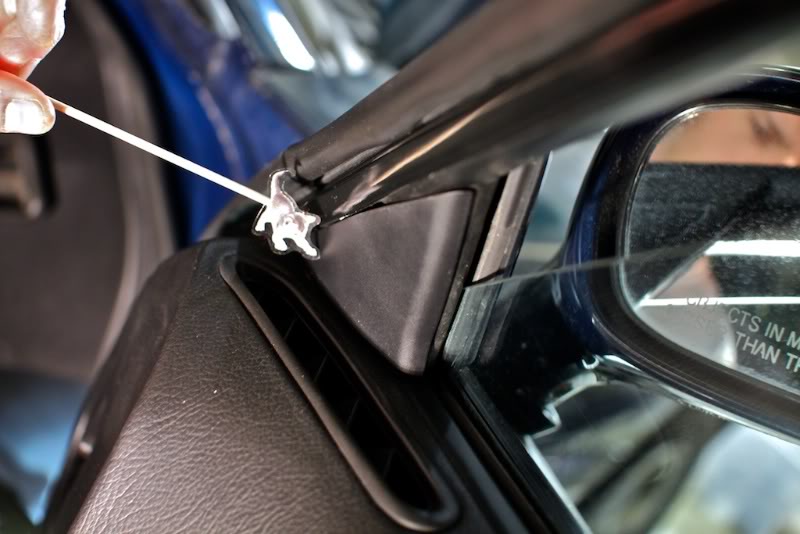
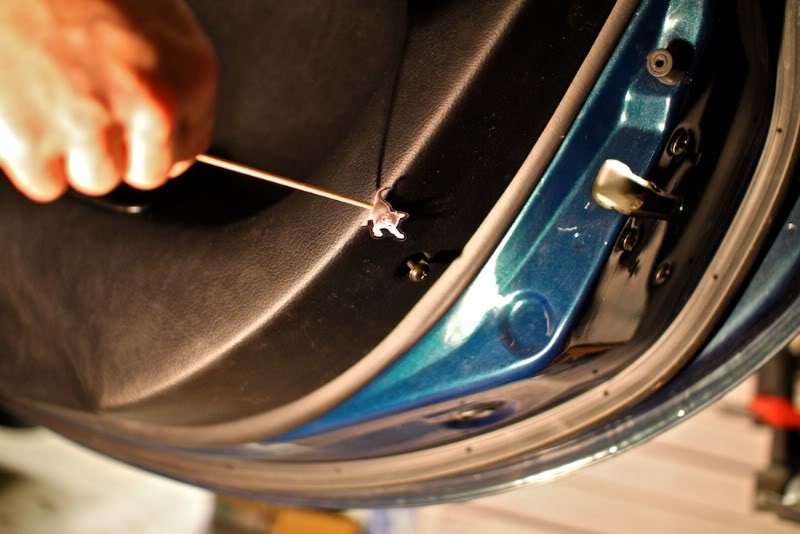
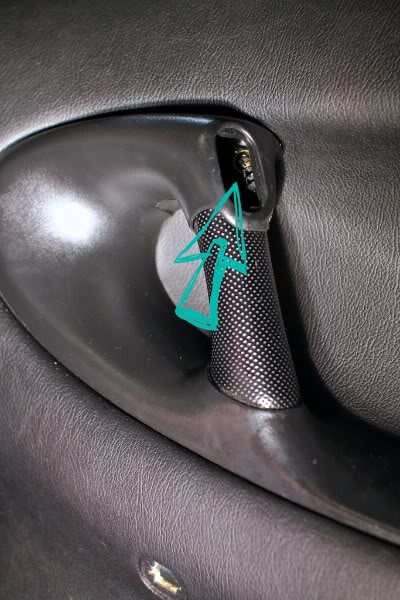
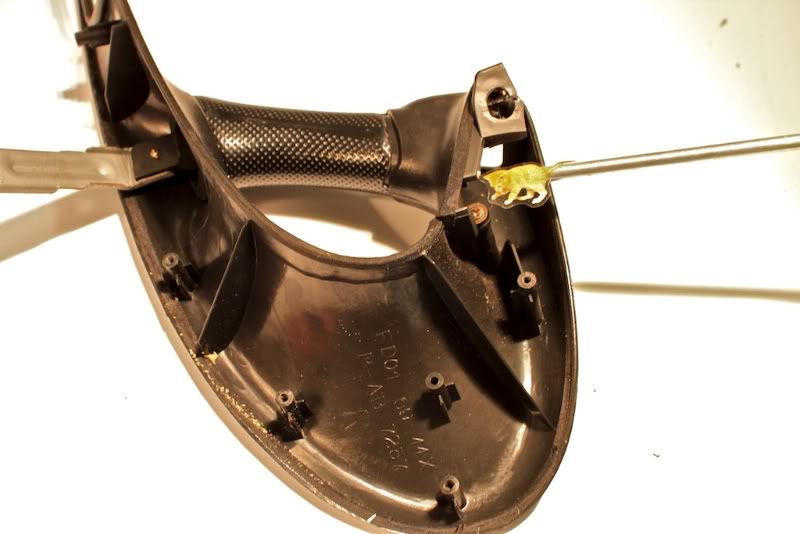
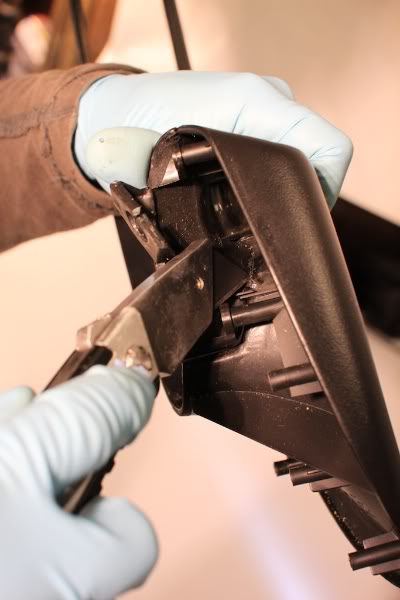
3. Remove two screws attaching top of handle to trim plastic (see kitty). Remove screws attaching lower door handle to plastic (not shown, near metal bracket). Replacements for these two lower screws (m5) are included with your handle.
3. Separate handle from plastic. The handle and plastic trim is fused together by Mazda with hot plastic at the factory. Score any fused areas with a sharp razor and carefully crack the two piece apart. (One quick motion is best so as not to stress the plastic but quickly break the fused bonds.)
4. Remove handle and bracket from trim plastic. Remove screw from bracket to lower handle. A replacement bolt (m6) is included with your new handle.
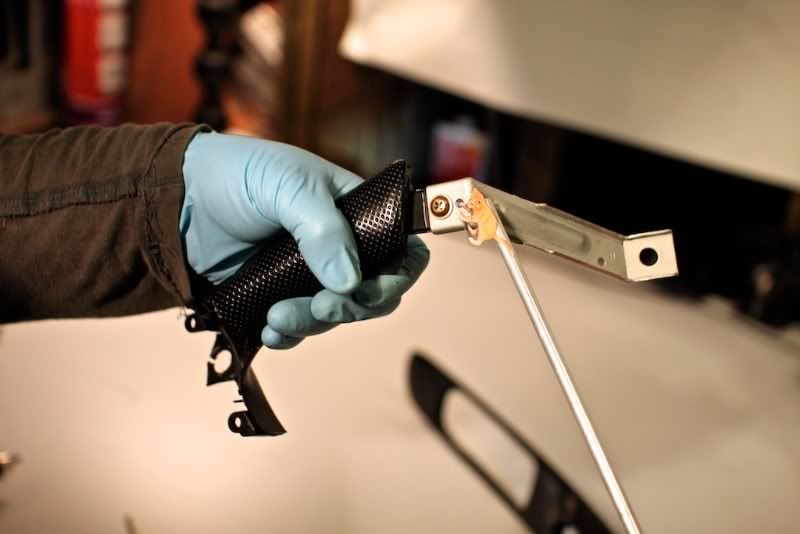
Aluminum Handle and Cover Installation
(Note: you can use whatever method you’d like to attach the cover, this is how we did it. Some people used gorilla glue.)
1. Using a razor, slice grip cover neatly down the middle at the seam on the back side. Remove cover.
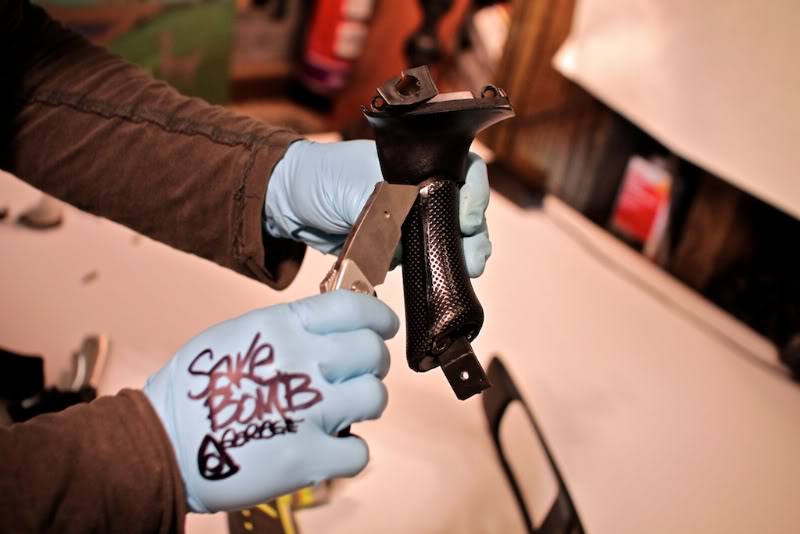
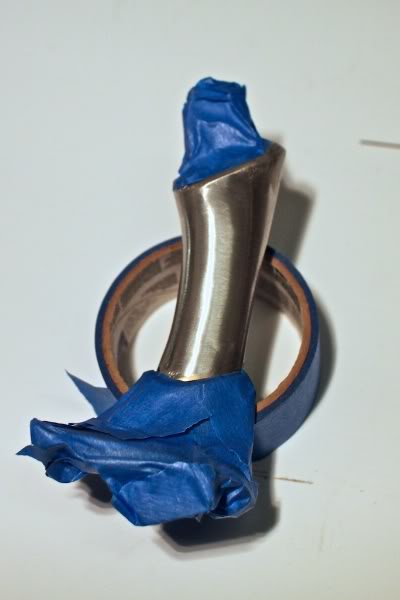
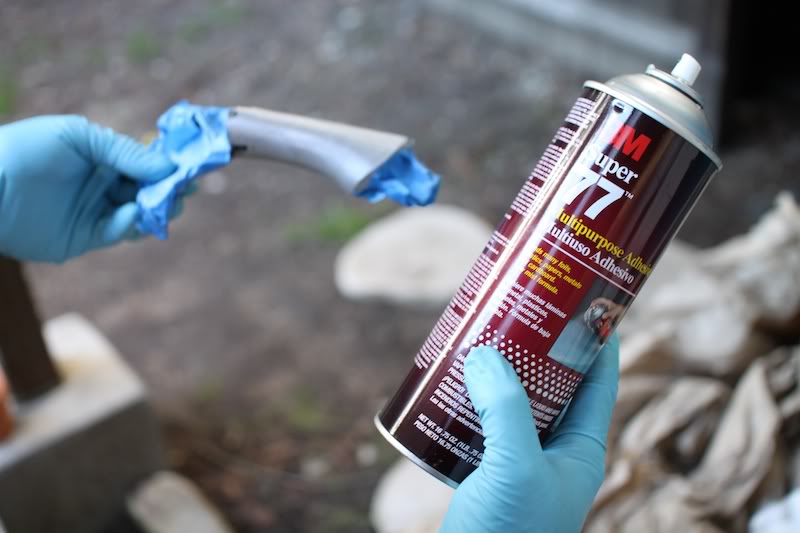
2. Tape/mask back side of grip cover, and exposed areas of aluminum handle.
for the handle). Now pop out the screw cap in the center of the door panel and remove the long screw with a #3 Phillips head screw driver (this is the lower structural mount for the handle).
6. The door panel is now free. Lift entire panel straight UP, and out of the upper pin mounts, and remove the door panel.
Door Plastic Removal
1. Remove screws attaching plastic to door panel (left most screw may have a clip)
2. Remove screw attaching lower bracket to plastic spacer.
3. Remove two screws attaching top of handle to trim plastic (see kitty). Remove screws attaching lower door handle to plastic (not shown, near metal bracket). Replacements for these two lower screws (m5) are included with your handle.
3. Separate handle from plastic. The handle and plastic trim is fused together by Mazda with hot plastic at the factory. Score any fused areas with a sharp razor and carefully crack the two piece apart. (One quick motion is best so as not to stress the plastic but quickly break the fused bonds.)
4. Remove handle and bracket from trim plastic. Remove screw from bracket to lower handle. A replacement bolt (m6) is included with your new handle.
Aluminum Handle and Cover Installation
(Note: you can use whatever method you’d like to attach the cover, this is how we did it. Some people used gorilla glue.)
1. Using a razor, slice grip cover neatly down the middle at the seam on the back side. Remove cover.
2. Tape/mask back side of grip cover, and exposed areas of aluminum handle.
__________________
SAKEBOMB GARAGE LLC
www.SAKEBOMBGARAGE.com
Specialty aftermarket parts & service // Fremont, California
Contact: info@sakebombgarage.com
SAKEBOMB GARAGE LLC
www.SAKEBOMBGARAGE.com
Specialty aftermarket parts & service // Fremont, California
Contact: info@sakebombgarage.com
03-17-11 | 02:10 PM
#3
Thread Starter
Joined: Jan 2011
Posts: 2,196
Likes: 230
From: California
3. Spray adhesive on back side of grip as well as aluminum handle following directions on can.
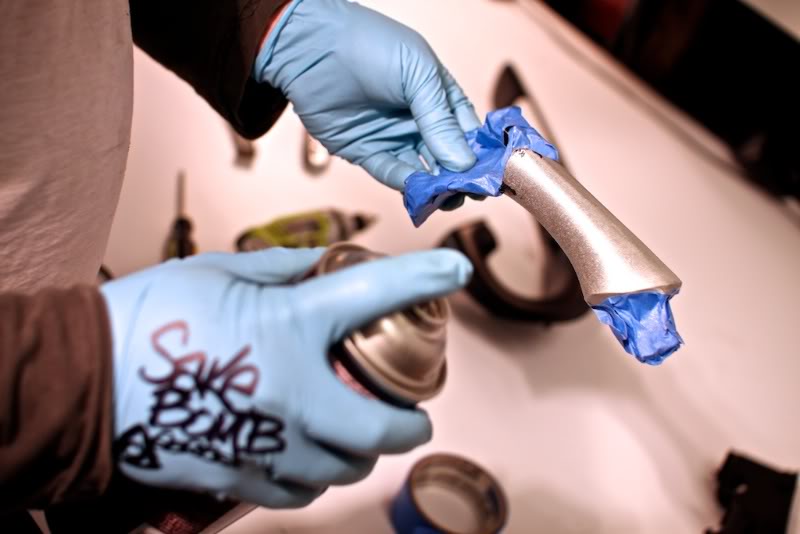
4. Apply grip to handle (this will take a few tries to get it to line up correctly). Make sure seam lines up, and wrap the top and bottom of the grip with tape to keep it in place. Add a few dabs of Krazy/Super glue gel to the center of the grip and let set (couple of minutes is all it takes). You may want to hold the seam together while it is curing.
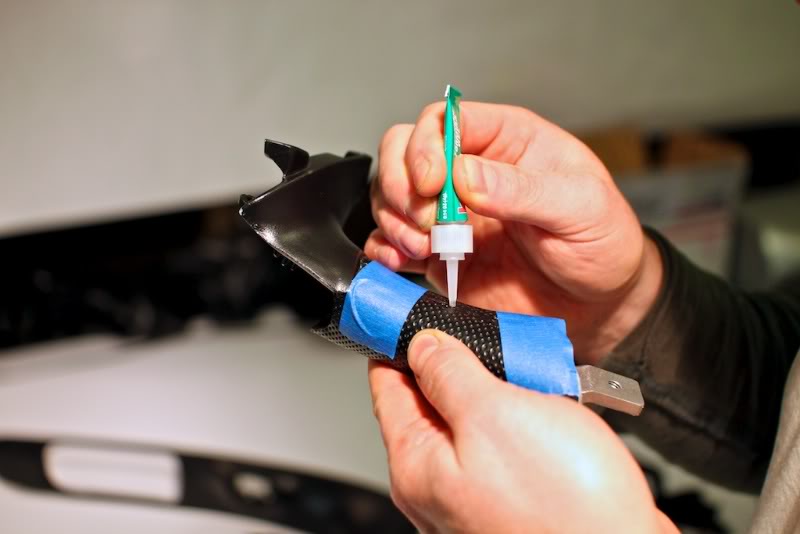
5. Remove the tape and repeat the process to the upper and lower half of the seam. After the grip cover is tacked in place, you may want to neatly run a final bead down the length of the seam. If any texture on the seem is felt afterwards, a razor knife can be used to scrape the seam flat.
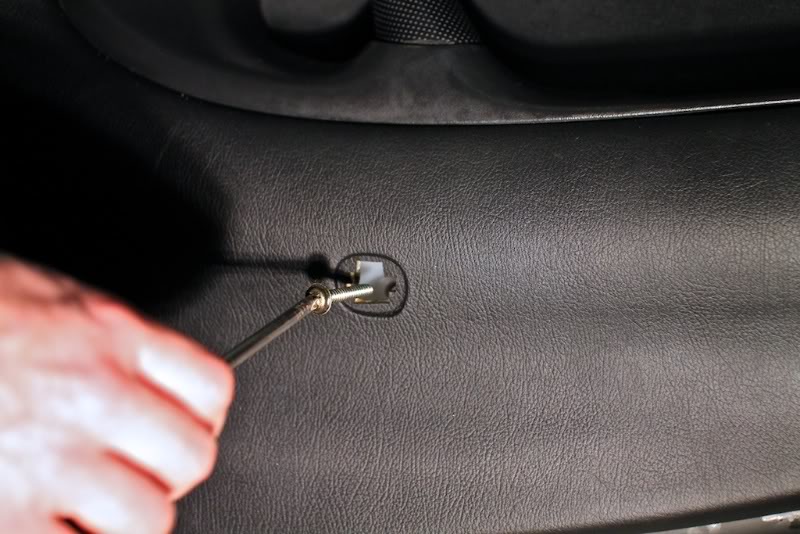
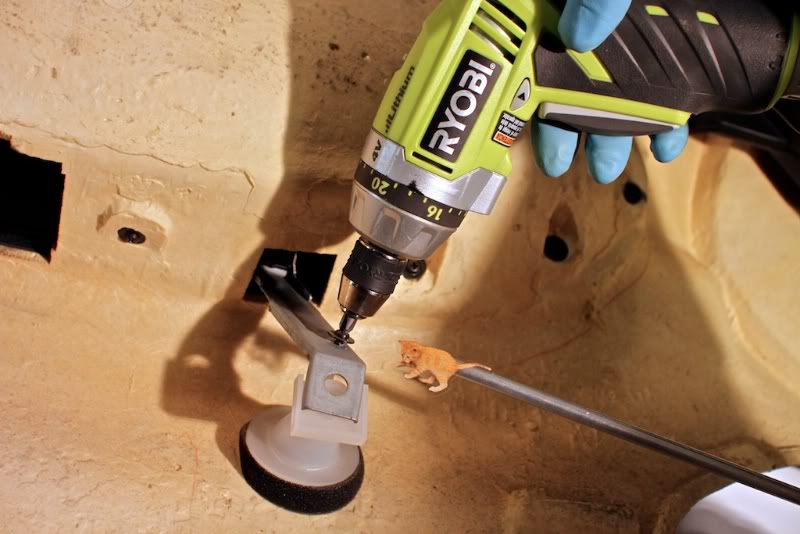
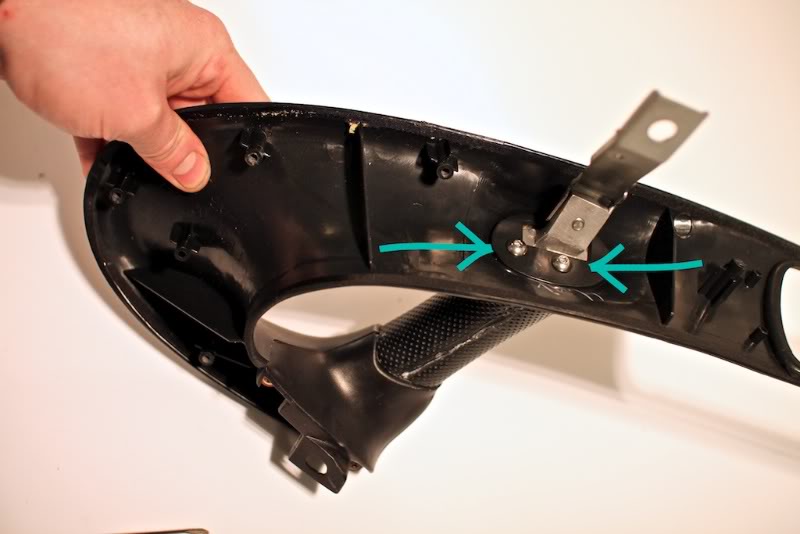
6. Using a 15/64” drill bit, enlarge the hole on the bracket to accept the new (included) m6 bolt, and attach the bracket to the handle.

7. Slide the handle with bracket through the door trim plastic, and reattach the two upper screws that were previously removed (take care not to over-tighten any screws going into the door plastic). Now replace the lower bolts (included) that attach the door plastic to the handle.
8. Reattach door plastic to panel, and panel to door. Reassembly is the reverse of removal... simply backtrack through the previous dis-assembly steps).
DONE!!
- Dan and Heath!
4. Apply grip to handle (this will take a few tries to get it to line up correctly). Make sure seam lines up, and wrap the top and bottom of the grip with tape to keep it in place. Add a few dabs of Krazy/Super glue gel to the center of the grip and let set (couple of minutes is all it takes). You may want to hold the seam together while it is curing.
5. Remove the tape and repeat the process to the upper and lower half of the seam. After the grip cover is tacked in place, you may want to neatly run a final bead down the length of the seam. If any texture on the seem is felt afterwards, a razor knife can be used to scrape the seam flat.
6. Using a 15/64” drill bit, enlarge the hole on the bracket to accept the new (included) m6 bolt, and attach the bracket to the handle.
7. Slide the handle with bracket through the door trim plastic, and reattach the two upper screws that were previously removed (take care not to over-tighten any screws going into the door plastic). Now replace the lower bolts (included) that attach the door plastic to the handle.
8. Reattach door plastic to panel, and panel to door. Reassembly is the reverse of removal... simply backtrack through the previous dis-assembly steps).
DONE!!
- Dan and Heath!
__________________
SAKEBOMB GARAGE LLC
www.SAKEBOMBGARAGE.com
Specialty aftermarket parts & service // Fremont, California
Contact: info@sakebombgarage.com
SAKEBOMB GARAGE LLC
www.SAKEBOMBGARAGE.com
Specialty aftermarket parts & service // Fremont, California
Contact: info@sakebombgarage.com
Last edited by SakeBomb Garage; 03-17-11 at 02:13 PM.


 03-17-11 | 03:34 PM
#6
Kitty sez "nice writeup!" Didn't know you guys were making these, KUDOS for filling a big void!
BTW, my recommendation is to NEVER EVER use power screwdrivers in the FD's interior. The plastic is SO damn brittle that hand tools big time reduce the risk of breaking things and stripping out threads.
Dale
BTW, my recommendation is to NEVER EVER use power screwdrivers in the FD's interior. The plastic is SO damn brittle that hand tools big time reduce the risk of breaking things and stripping out threads.
Dale

Trending Topics
03-17-11 | 06:34 PM
#8
Thread Starter
Joined: Jan 2011
Posts: 2,196
Likes: 230
From: California
The power screw driver was only used to remove screws, not re-install them
-Dan
-Dan
__________________
SAKEBOMB GARAGE LLC
www.SAKEBOMBGARAGE.com
Specialty aftermarket parts & service // Fremont, California
Contact: info@sakebombgarage.com
SAKEBOMB GARAGE LLC
www.SAKEBOMBGARAGE.com
Specialty aftermarket parts & service // Fremont, California
Contact: info@sakebombgarage.com
 03-18-11 | 12:29 PM
#11
Thread Starter
Joined: Jan 2011
Posts: 2,196
Likes: 230
From: California
We haven't taken nice product shots yet, so the site hasn't been updated.
If anyone is interested in the handle in either 93 or 94 finish feel free to PM us or write an email to sakebombgarage@gmail.com
Thanks,
Dan
If anyone is interested in the handle in either 93 or 94 finish feel free to PM us or write an email to sakebombgarage@gmail.com
Thanks,
Dan
__________________
SAKEBOMB GARAGE LLC
www.SAKEBOMBGARAGE.com
Specialty aftermarket parts & service // Fremont, California
Contact: info@sakebombgarage.com
SAKEBOMB GARAGE LLC
www.SAKEBOMBGARAGE.com
Specialty aftermarket parts & service // Fremont, California
Contact: info@sakebombgarage.com
03-18-11 | 05:29 PM
#12
We haven't taken nice product shots yet, so the site hasn't been updated.
If anyone is interested in the handle in either 93 or 94 finish feel free to PM us or write an email to sakebombgarage@gmail.com
Thanks,
Dan
If anyone is interested in the handle in either 93 or 94 finish feel free to PM us or write an email to sakebombgarage@gmail.com
Thanks,
Dan
 03-20-11 | 01:01 PM
#16
Thread Starter
Joined: Jan 2011
Posts: 2,196
Likes: 230
From: California
-Dan
__________________
SAKEBOMB GARAGE LLC
www.SAKEBOMBGARAGE.com
Specialty aftermarket parts & service // Fremont, California
Contact: info@sakebombgarage.com
SAKEBOMB GARAGE LLC
www.SAKEBOMBGARAGE.com
Specialty aftermarket parts & service // Fremont, California
Contact: info@sakebombgarage.com
03-21-11 | 09:02 AM
#18
03-21-11 | 09:10 AM
#19
03-21-11 | 09:18 AM
#20
This is definitely a product that every single FD owner should buy, period.
06-02-11 | 01:44 PM
#21
Thread Starter
Joined: Jan 2011
Posts: 2,196
Likes: 230
From: California
Up! We still have a few of these left in stock. Please PM us if you're interested.
__________________
SAKEBOMB GARAGE LLC
www.SAKEBOMBGARAGE.com
Specialty aftermarket parts & service // Fremont, California
Contact: info@sakebombgarage.com
SAKEBOMB GARAGE LLC
www.SAKEBOMBGARAGE.com
Specialty aftermarket parts & service // Fremont, California
Contact: info@sakebombgarage.com
06-02-11 | 08:22 PM
#23