Getting gauge (boost, etc..) wiring thu passenger firewall **write up**
#1
Thread Starter
Eats, Sleeps, Dreams Rotary
Joined: Apr 2001
Posts: 3,736
Likes: 9
From: Dallas, Texas
Getting gauge (boost, etc..) wiring thu passenger firewall **write up**
I don't know why people drill thru the firewall when there are plenty of openings that are easy to get to and run cable thru.
Currently, I am install Spa gauges with a boost/oil temp/fuel pressure/egt sensors. Also the PLX wideband is going in.
When I installed my boost gauge and went thru the drivers side firewall and it was a piece of cake. The passenger side wasn't bad at all either.
If you look under the ABS there is a nice pass thru into the fender well that the main wiring harness goes thru.
You can go thru the grommet where the main harness passes but I didn't want to potenitally FUBAR the main wiring harness. Instead I went to the side grommet. The only downside to this is you have to remove the fender to get better access.
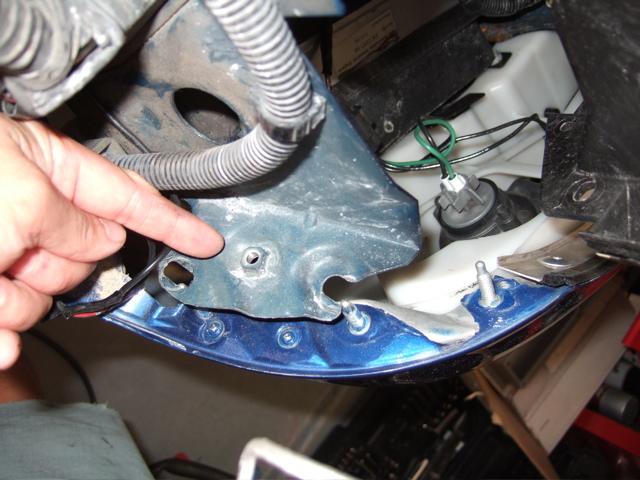
To remove the fender, you have to remove the 3 10mm nuts that hold the front bumper onto the fender. This also then gives you space to get the 10mm nut that holds the fender to the front frame (shown). You don't have to fully remove the front bumper just pull it away enough to get access.
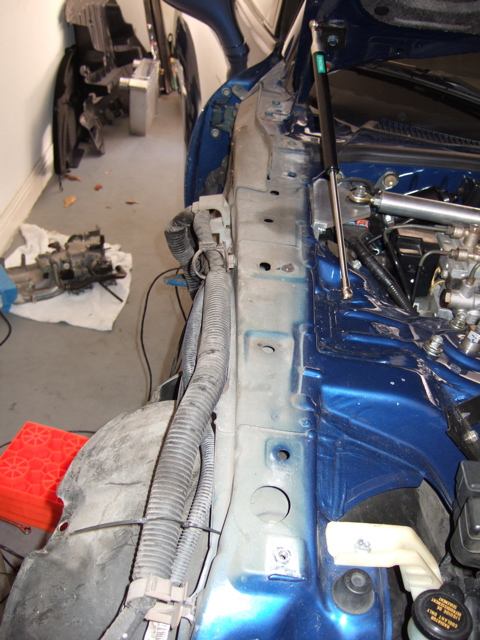
Then you have to remove the three 10mm bolts on top and two 10mm bolts on the bottom of the fender.
Then you have to loosen the one 10mm bolt by the door hinge.
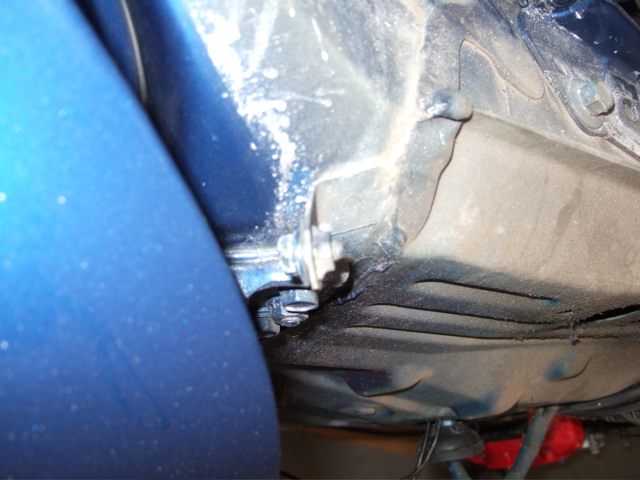
Then the bumper comes off easily. Next, just remove the rear portion of the fender liner. Once you do that you have a clear shot of the opening to the engine bay. You can also see the main harness and grommet here.
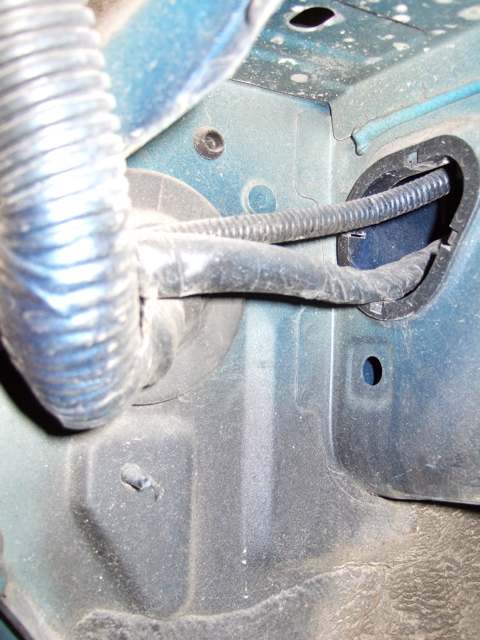
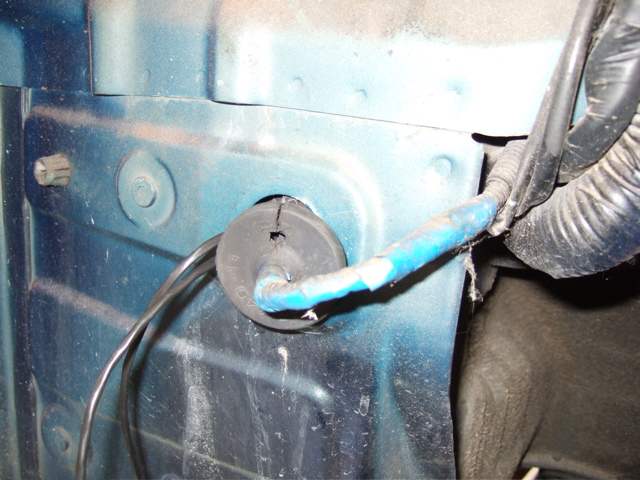
Here is the grommet on the side of the car that I chose to go thru. I cut a slit at the top of the grommet and enlarged an opening at the base of the slit. Make sure you don't cut into the harness!
Currently, I am install Spa gauges with a boost/oil temp/fuel pressure/egt sensors. Also the PLX wideband is going in.
When I installed my boost gauge and went thru the drivers side firewall and it was a piece of cake. The passenger side wasn't bad at all either.
If you look under the ABS there is a nice pass thru into the fender well that the main wiring harness goes thru.
You can go thru the grommet where the main harness passes but I didn't want to potenitally FUBAR the main wiring harness. Instead I went to the side grommet. The only downside to this is you have to remove the fender to get better access.
To remove the fender, you have to remove the 3 10mm nuts that hold the front bumper onto the fender. This also then gives you space to get the 10mm nut that holds the fender to the front frame (shown). You don't have to fully remove the front bumper just pull it away enough to get access.
Then you have to remove the three 10mm bolts on top and two 10mm bolts on the bottom of the fender.
Then you have to loosen the one 10mm bolt by the door hinge.
Then the bumper comes off easily. Next, just remove the rear portion of the fender liner. Once you do that you have a clear shot of the opening to the engine bay. You can also see the main harness and grommet here.
Here is the grommet on the side of the car that I chose to go thru. I cut a slit at the top of the grommet and enlarged an opening at the base of the slit. Make sure you don't cut into the harness!
Last edited by 7racer; 06-22-06 at 12:06 AM.
#2
Thread Starter
Eats, Sleeps, Dreams Rotary
Joined: Apr 2001
Posts: 3,736
Likes: 9
From: Dallas, Texas
I used a straighten cloths hanger to pass the wires thru.
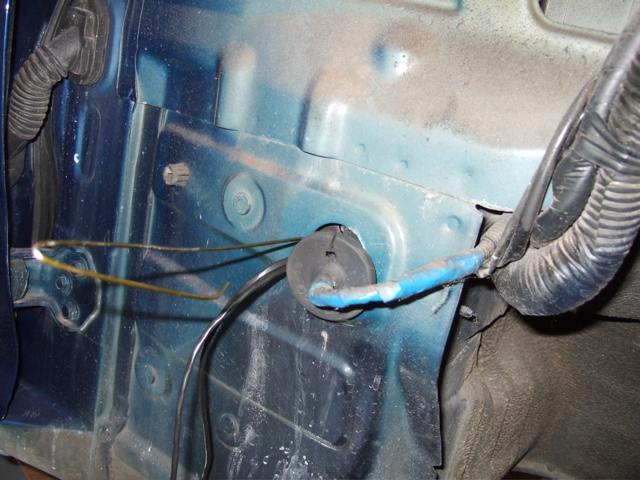
Here you can see where you enter into the passenger compartment. All I then did was tape the end of the wire to the hanger and pulled it back thru (the reason I did it this was was the end of my wire harness was smaller, it would have been harder to pass the gauge end due to the large size of the connector).
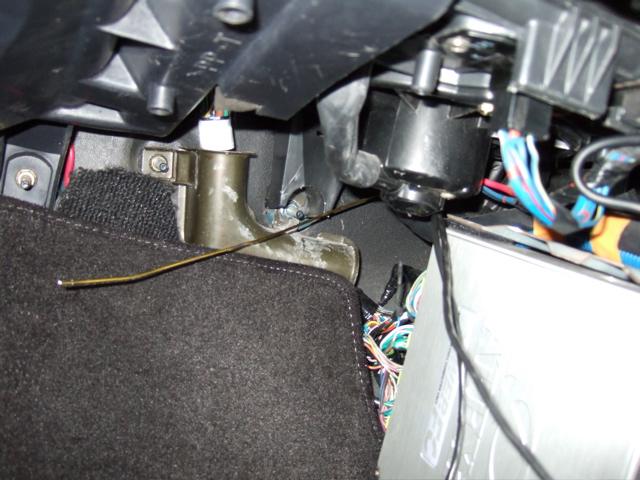
My connector ends for the SPA gauges have these funky plugs. Here you can see it routed into the engine bay to my oil pedestal (Respeed one) and fuel line.
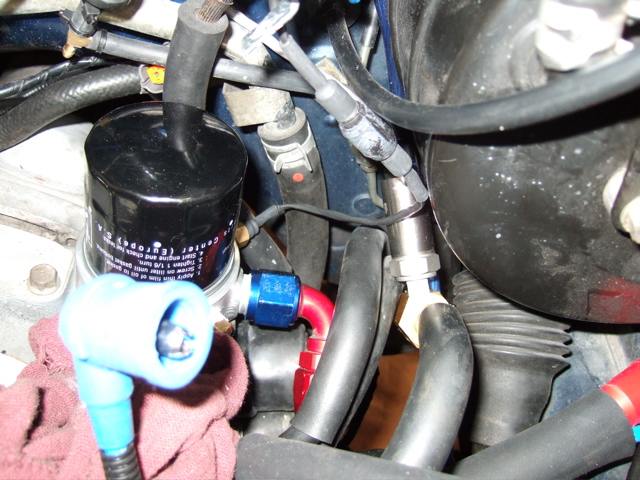
Once you get your wiring cable all hooked up, you can tie the extra length of the cable up. Also, as you can see, cutting the slit of the grommet still allows you to use it and once pushed back it, you can a nice tight seal.
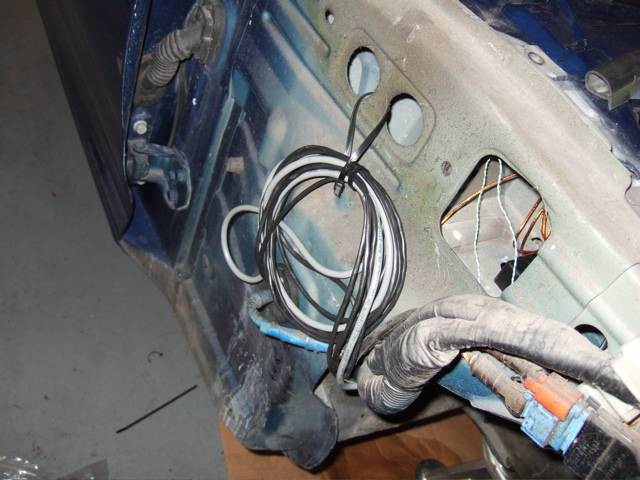
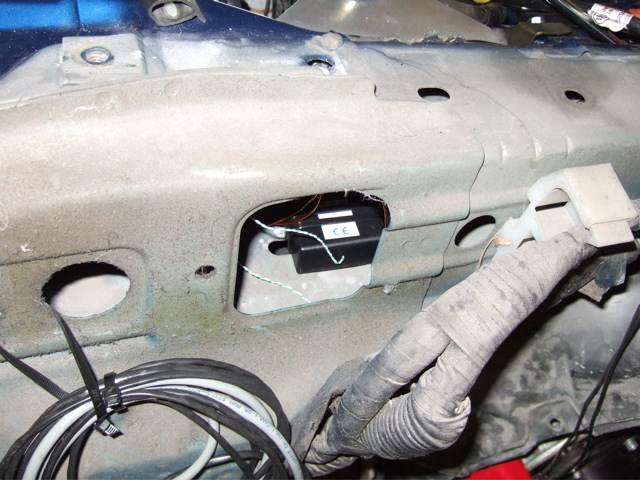
My EGT sensor has this funny box. There was a nice space to place it here. It didn't look like water drained into this area. The main windshield drain is further back.
Here you can see where you enter into the passenger compartment. All I then did was tape the end of the wire to the hanger and pulled it back thru (the reason I did it this was was the end of my wire harness was smaller, it would have been harder to pass the gauge end due to the large size of the connector).
My connector ends for the SPA gauges have these funky plugs. Here you can see it routed into the engine bay to my oil pedestal (Respeed one) and fuel line.
Once you get your wiring cable all hooked up, you can tie the extra length of the cable up. Also, as you can see, cutting the slit of the grommet still allows you to use it and once pushed back it, you can a nice tight seal.
My EGT sensor has this funny box. There was a nice space to place it here. It didn't look like water drained into this area. The main windshield drain is further back.
Last edited by 7racer; 06-22-06 at 12:04 AM.
#3
Thread Starter
Eats, Sleeps, Dreams Rotary
Joined: Apr 2001
Posts: 3,736
Likes: 9
From: Dallas, Texas
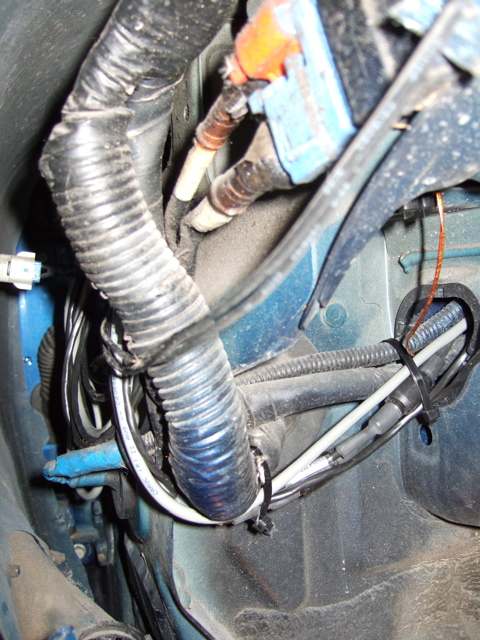
here you can see how nicely the wiring is laid out with no interference anywhere. This is with the fender back on. In total, the cables that you see are:
1) boost
2) oil temp
3) fuel pressure
4) egt
5) wideband
1) boost
2) oil temp
3) fuel pressure
4) egt
5) wideband
#5
off topic but..... hey did you happen to get that carpet off ebay? I got one very similar to yours.... looks fine/great, but does it fall apart easy? i pluck at mine and the "hairs" come off quite easy, but overall it still looks nice.... (50ish dollars, to make the car look a bit nicer)
#7
I just use the one that you can see after removing the fender liner. Cut a small slit in it and feed the wiring through. Very easy, very clean, very simple.
I can see doing what you did if I already had a lot of the car apart, but that'll be a real treat if you ever go to remove the gauge or whatever . I've learned that, for me at least, very few mods are "forever", I end up getting something new/better/different.
But, thanks for the writeup - there's more than one way to skin a cat, and it's good to document different ways of doing things - might not be good for me, but could work for someone else.
Dale
I can see doing what you did if I already had a lot of the car apart, but that'll be a real treat if you ever go to remove the gauge or whatever
 . I've learned that, for me at least, very few mods are "forever", I end up getting something new/better/different.
But, thanks for the writeup - there's more than one way to skin a cat, and it's good to document different ways of doing things - might not be good for me, but could work for someone else.
Dale
Trending Topics
#8
Nice write-up. Just pulling fender liner worked great for me, and is a fairly quick process. To chase wires I like to use a two foot long plastic wire tie, not so harsh on surrounding items as a coat hanger.
#9
Thread Starter
Eats, Sleeps, Dreams Rotary
Joined: Apr 2001
Posts: 3,736
Likes: 9
From: Dallas, Texas
Good points! I just liked the access I had going by the side grommet. Pulling the fender was easier than I thought.
Also, I like posting these kind of write-ups because other people input better ways of doing things, or someone who is about to do this finds a better way of doing it.
The plastic wire tie is a great idea!
Also, I like posting these kind of write-ups because other people input better ways of doing things, or someone who is about to do this finds a better way of doing it.
The plastic wire tie is a great idea!
#10
Yes good write up but you have made a mistake... When passing through the firewall always go through a rubber gromet. In the one picture you don't go through it. You pop out the OEM harness gromet and run your wires around it. In the near future those wires, boost lines, etc.. will rub through on the metal firewall. Always run them through a rubber gromet. 

#12
I'll add to the remove the fender liner chorus, I ran everything through the driverside grommet except the boost controller since what i wanted was all on that side. Took less than an hour and no body panels to realign.
#13
I understand the desire to use existing holes but if one is not convenient, why not create another in the same general area behind the fender liners and use a proper grommet? The metal is thin and this area was obviously meant for cable pass throughs.
You could group all the cables in a single flexible sleeve and go through one hole. If you decide later not to use it, put a rubber plug in it - just like on the driver side pass through that most people use.
You could group all the cables in a single flexible sleeve and go through one hole. If you decide later not to use it, put a rubber plug in it - just like on the driver side pass through that most people use.
#16
Old thread but wanted to say thanks for a brilliant way of getting the cables thru the firewall! Didnt want to drill in my firewall and already had my fenders off so this was the way to go!
#17
1. Remove driver side wheel
2. Remove driver side fender liner
3. Locate factory rubber grommet on firewall
4. Put hole in factory grommet and use wire to fish into cabin
5. Go into driver side cabin, near footrest and clutch pedal to locate fish wire
6. Complete install
7. Have a beer
Taking the fender off is completely unnecessary.
#18
half ass 2 or whole ass 1
iTrader: (114)
Joined: Nov 2011
Posts: 3,425
Likes: 481
From: okinawa to tampa
i just ran mine through the engine harness boot... i figured it was the most economical way. i made a small slit on the bottom and ran everything through. of course theres no right way to do it. whatever works, works
Thread
Thread Starter
Forum
Replies
Last Post
streetlegal?
New Member RX-7 Technical
13
03-17-22 03:46 PM


