aftermarket intake temp sensor and a front mount!
#1
Thread Starter
FREAK ALL OUT!!!
iTrader: (17)
Joined: Jul 2006
Posts: 1,071
Likes: 0
From: Vancouver, WA
aftermarket intake temp sensor and a front mount!
Hey guys I just got my blitz fmic installed and went for a 1 hour drive the other day and wanted to share this vid for a couple reasons.
1. It shows just how fast dudemansblahblahblah sensor works.
2. How my temps drop when I throw boost at it.(one of my pipes were leaking so I have not yet gotten on it full throttle)
The vid was done with my iphone while I was driving so its kinda blurry but you can still read it well. I will try and post up a longer one if you guys want and I have a passenger to hold the damn phone.
http://www.youtube.com/watch?v=qaLkVyZlNDw
-Chance
Trending Topics
#8
#10
got mine in and tuned, it's probably saved my motor now that air temps are dropping here (we hit high 40s last night!) and I was able to tune it with intake temps at 25C and it's amazing, NO MORE KNOCK!
#12
I'm running mine in the stock position also. Seems to work very well there. My engine was heat soaked the other night to 48c and in less then 30 secs from me backing out of a parking spot it dropped to 40*c, after moving steadily it then quickly dropped to 33*c. I was also able to increase the temperature just by letting off the throttle for a few seconds. Then as I rolled back on, it quickly dropped back to 33c. Makes tuning the IAT tables so much easier.
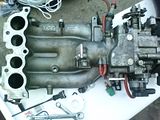
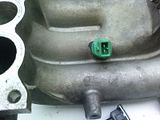
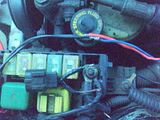
My install:
Remove old sensor, cut old IAT connector off, solder in bosch connector (2 wires* polarity makes no difference), tape or shrink wrap connections, install new sensor with cage clocked for air to flow through. Done!
My install pics (click for larger):


My install:
Remove old sensor, cut old IAT connector off, solder in bosch connector (2 wires* polarity makes no difference), tape or shrink wrap connections, install new sensor with cage clocked for air to flow through. Done!
My install pics (click for larger):


#14
No the gm sensor doesn't work with the PFC, or stock computer because the resistance curve is different. Not an issue with a haltech or other computer that allows you to change the scale of the IAT sensor.
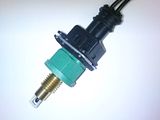
Here are the tested results of the sensor pictured which is for a triumph sport bike.
Tested @68 *F (20c) = 2.27 Ohms
Tested @176*F (80c) = 0.34 Ohms
(both are same ohm as stock and tested according to the FSM)
Here are the tested results of the sensor pictured which is for a triumph sport bike.
Tested @68 *F (20c) = 2.27 Ohms
Tested @176*F (80c) = 0.34 Ohms
(both are same ohm as stock and tested according to the FSM)
#16
from dudemaaanownsanrx7

Holy **** it's cold here in the mornings, I was seeing 17C on the way to class this morning, peaked at 21C.
I'm running a front mount for you guys who're wondering.

Holy **** it's cold here in the mornings, I was seeing 17C on the way to class this morning, peaked at 21C.
I'm running a front mount for you guys who're wondering.
#17
I just picked up a GM (AC Delco) AIT for my build part # 213-190, pig tail # PT778. Should work well with the microtech. The only thing I have not decided is if I should mount the AIT before or after the Methanol injection... hmm
=Benjamin
=Benjamin
#18
Thread
Thread Starter
Forum
Replies
Last Post
immanuel__7
2nd Generation Specific (1986-1992)
89
09-05-15 10:23 AM
befarrer
Microtech
3
08-22-15 05:52 PM


