AEM IGN-1A Mercury Marine ignition coil info/install
 03-08-13 | 01:54 PM
#151
03-12-13 | 03:55 AM
#152
You can "argue" for these coils all you want. Everyone knows you have these coils, what most don't know is that you have a Haltech which is a completely different installation to a Power FC. What I do not understand is why you push them on people that have a different EMS than you.
Anyone can install an HKS Twin Power in 20 min or less, NO custom bracket required, NO relocation of the coils, NO removing the upper intake, NO custom plug wires, No opportunity for ignition failure due to installer error. The Twin Power is far CHEAPER in the long run.
For the PFC just stick with the Twin Power, no reason to complicate things when there is no benefit. Anyone that wants to install these coils go right ahead, as I already said, this is my OPINION. If you want to drink the Kool-aid there are people willing to sell it to you for a profit.
The following users liked this post:
scotty305 (05-17-22)
03-12-13 | 05:14 AM
#153
Joined: Jan 2008
Posts: 4,831
Likes: 318
From: Indiana
You might want to consider becoming a forum vendor if you are going to continue to try to push your products and services on forum members. Would not want you to find yourself in hot water for violation of forum rules.
Good luck with your product.
Last edited by Banzai-Racing; 03-12-13 at 05:31 AM.
03-13-13 | 03:25 PM
#154

I OWN THE BEST CAR EVER
Joined: Oct 2005
Posts: 63
Likes: 0
From: CYPRUS
03-14-13 | 01:50 PM
#156
^I would try to PM Chris...maybe your emails are going to "spam" folders since your out of the country?
Just posted the following in my build thread... for the record I'm running Haltech PS2000.
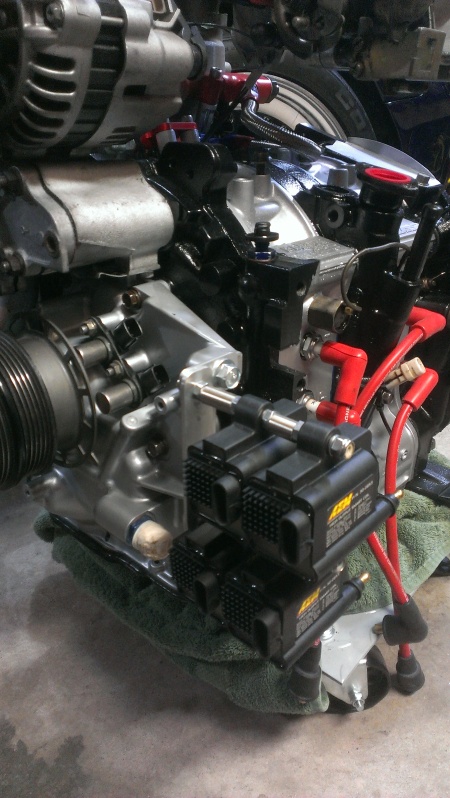
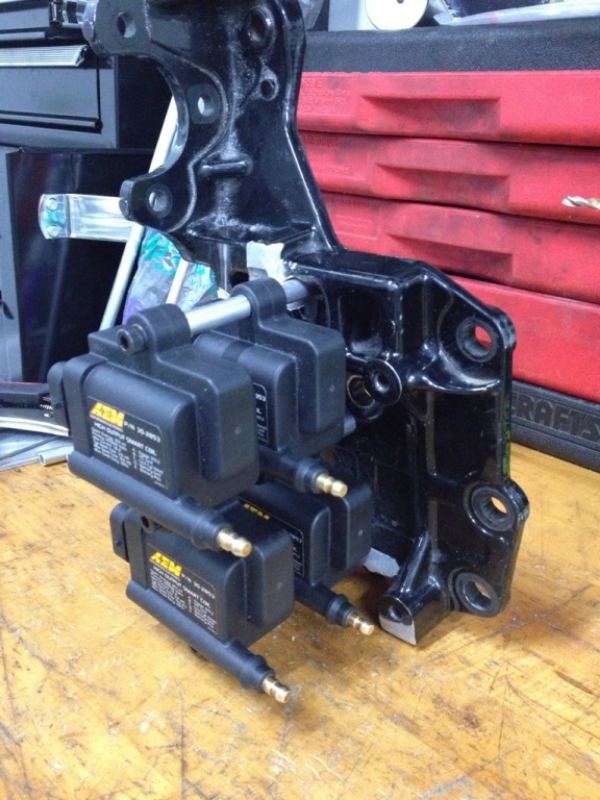
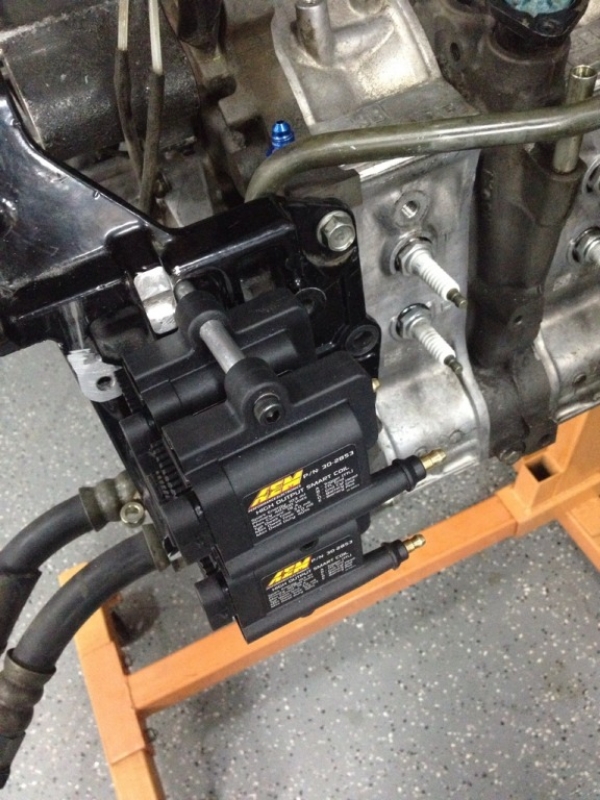
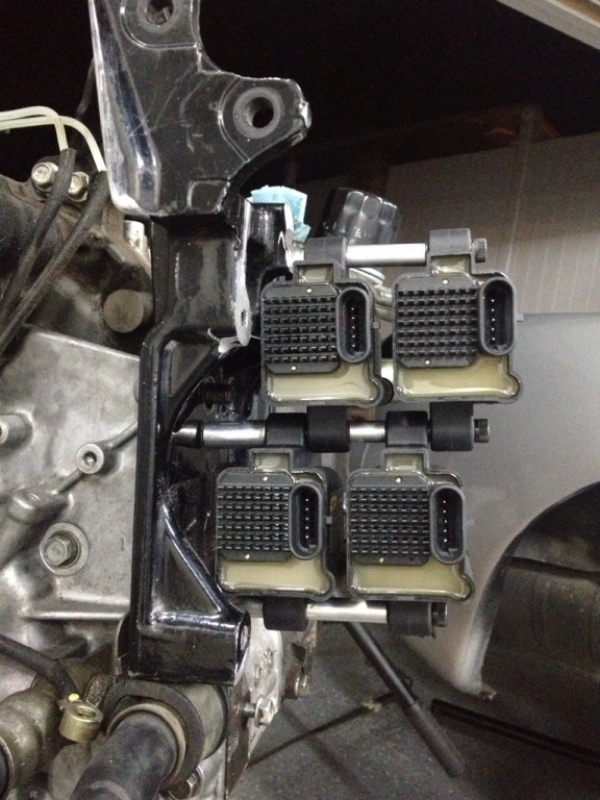
Got around to mounting the AEM coils on the PS/AC bracket to be nice and close to the plugs. Decided to use metric M6 bolts and drill & tap the bracket to mount in 3 locations. The center bolt came short so I took some aluminum rod, drilled and tapped it all the way through to make a nice fixed spacer in the center for the coil to mount to. A lot of grinding, cutting and sanding to make sure the coils don't touch the bracket... now it's ready for fresh powdercoat.
Just posted the following in my build thread... for the record I'm running Haltech PS2000.
Got around to mounting the AEM coils on the PS/AC bracket to be nice and close to the plugs. Decided to use metric M6 bolts and drill & tap the bracket to mount in 3 locations. The center bolt came short so I took some aluminum rod, drilled and tapped it all the way through to make a nice fixed spacer in the center for the coil to mount to. A lot of grinding, cutting and sanding to make sure the coils don't touch the bracket... now it's ready for fresh powdercoat.
03-15-13 | 02:47 PM
#157
I did. I also understand dwell time, duty cycle, and math. I've explained all this before on this forum. Years ago, most likely. So here's a refresher for those new to the game and wishing to parrot something else. On a 4-channel system, with universal dwell control, we set the IGN-1A coil to 4.5ms charge time. This is a setting that provides around 120mJ output. Max duty cycle at 8000 rpm is 60%, so we're not even beginning to work the coil hard.
Now on a 3-channel system, we obviously double the duty cycle on the leading coils, as Bumpstart is saying, since we're firing those coils twice as often. We recommend settings for the PFC/Datalogit that produce the charge time v. RPM curve shown below. Duty cycle for leading and trailing are also shown.

As shown, at 8000 RPM, leading charge time does need to drop to 3.5 ms. At this charge time, the coil is still producing around 100mJ of energy. Since most street-use combinations have a power curve that falls off precipitously above this rev range, there's not much use worrying about what is happening at 10k. If you're making power at 10k, you're most likely not using a PFC. If you are, then you may indeed need to look at an alternate ignition system.
At any rate, the math is simple and shows that this coil will work quite well in a wastespark application. One of the unique qualities of the coil is that it was originally designed for use in a 2-stroke application where duty cycle requirements demand a coil that can build a strong charge quickly. That's what this coil does. Bumpstart said, "the mercury coil will just have to be happy with 3.5 ms or less that can be fed at high rpms". I submit that it is quite happy at 3.5ms at high revs and the guys that are running them with the PFC seem to agree.
I'm still waiting on documentation on the output potential of the Twin Power. Anything?
Now on a 3-channel system, we obviously double the duty cycle on the leading coils, as Bumpstart is saying, since we're firing those coils twice as often. We recommend settings for the PFC/Datalogit that produce the charge time v. RPM curve shown below. Duty cycle for leading and trailing are also shown.
As shown, at 8000 RPM, leading charge time does need to drop to 3.5 ms. At this charge time, the coil is still producing around 100mJ of energy. Since most street-use combinations have a power curve that falls off precipitously above this rev range, there's not much use worrying about what is happening at 10k. If you're making power at 10k, you're most likely not using a PFC. If you are, then you may indeed need to look at an alternate ignition system.
At any rate, the math is simple and shows that this coil will work quite well in a wastespark application. One of the unique qualities of the coil is that it was originally designed for use in a 2-stroke application where duty cycle requirements demand a coil that can build a strong charge quickly. That's what this coil does. Bumpstart said, "the mercury coil will just have to be happy with 3.5 ms or less that can be fed at high rpms". I submit that it is quite happy at 3.5ms at high revs and the guys that are running them with the PFC seem to agree.
I'm still waiting on documentation on the output potential of the Twin Power. Anything?
03-28-13 | 09:28 PM
#159
 03-29-13 | 08:09 AM
#160
For those looking to do a mount similar to what is pictured above, I would encourage you to talk to Brandon at CJ Motorsports (username oorx7). I sent him some coils last week. He's working on a billet bracket to do a similar mounting scheme for his own car with intent to produce them. The idea is to keep the coils as close to the plugs as possible to eliminate the long wires associated with mounting them in lieu of the cruise module. Like anything CJ does, it will be top notch quality, I'm sure.
04-01-13 | 10:11 PM
#161
For those looking to do a mount similar to what is pictured above, I would encourage you to talk to Brandon at CJ Motorsports (username oorx7). I sent him some coils last week. He's working on a billet bracket to do a similar mounting scheme for his own car with intent to produce them. The idea is to keep the coils as close to the plugs as possible to eliminate the long wires associated with mounting them in lieu of the cruise module. Like anything CJ does, it will be top notch quality, I'm sure.
I guess location matters if you're not using quality plug wires... but who would go through all this effort and use cheap wire


 04-05-13 | 03:50 AM
#164
If you use the right wire the difference in length is absolutely a moot point unless you're mounting them in the passenger seat. For the wires I do I'm getting 40-50Ω for stock length wires and 90-100Ω for the cruise location. Considering most generic "performance wires" are in the Thousands (let alone OEM wire) it's really splitting hairs.
I guess location matters if you're not using quality plug wires... but who would go through all this effort and use cheap wire
I guess location matters if you're not using quality plug wires... but who would go through all this effort and use cheap wire
Plug wire performance is about more than resistance. If you were only concerned with resistance, you'd crimp a length of 0g silver wire to each end and be done with it. My main concern with long plug wires is EMI/RFI. Having 30" wires laying parallel on top of each other is just not good practice. Sometimes there is simply no way around a situation like this and compromises are made. Personal preference is a shorter wire for a cleaner look. But that preference is entirely subjective.
04-08-13 | 10:05 PM
#165
Plug wire performance is about more than resistance. If you were only concerned with resistance, you'd crimp a length of 0g silver wire to each end and be done with it. My main concern with long plug wires is EMI/RFI. Having 30" wires laying parallel on top of each other is just not good practice. Sometimes there is simply no way around a situation like this and compromises are made. Personal preference is a shorter wire for a cleaner look. But that preference is entirely subjective.

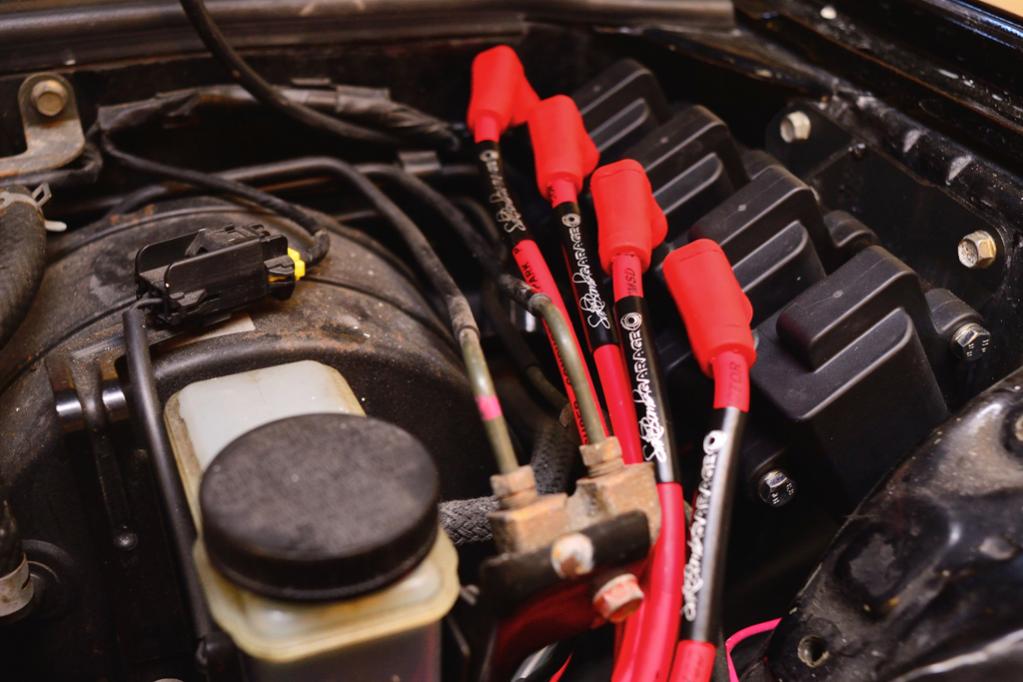
BPKLl+0M8Q~~60_35.JPG) 04-14-13 | 10:27 AM
04-14-13 | 10:27 AM
#166

Junior Member
Joined: Jun 2009
Posts: 1
Likes: 0
From: Gloucester, UK
Hi guys,
I've installed these coils on my FD, but I don't feel I'm getting the best out of them. I run a power FC and have datalogit. Could anyone advise/help me so I can changethe settings on the datalogit toget the best out of these coils, as I haven't been able to work out the settings on the Apexi for them yet.
I've installed these coils on my FD, but I don't feel I'm getting the best out of them. I run a power FC and have datalogit. Could anyone advise/help me so I can changethe settings on the datalogit toget the best out of these coils, as I haven't been able to work out the settings on the Apexi for them yet.
04-14-13 | 10:01 PM
#167
Parts:
(2) 1/4" threaded rod cut to length.
(4) 1/4" bolts, washers, and cap bolts
(8) 1.5" aluminum spacers from www.mcmaster.com
The holes from the Power Steering pump mount line up perfectly. Too easy. The OEM filler neck will not fit with this solution. I am making a custom one anyway.

(2) 1/4" threaded rod cut to length.
(4) 1/4" bolts, washers, and cap bolts
(8) 1.5" aluminum spacers from www.mcmaster.com
The holes from the Power Steering pump mount line up perfectly. Too easy. The OEM filler neck will not fit with this solution. I am making a custom one anyway.


 05-03-13 | 12:23 PM
#169
Parts:
(2) 1/4" threaded rod cut to length.
(4) 1/4" bolts, washers, and cap bolts
(8) 1.5" aluminum spacers from McMaster-Carr
The holes from the Power Steering pump mount line up perfectly. Too easy. The OEM filler neck will not fit with this solution. I am making a custom one anyway.
(2) 1/4" threaded rod cut to length.
(4) 1/4" bolts, washers, and cap bolts
(8) 1.5" aluminum spacers from McMaster-Carr
The holes from the Power Steering pump mount line up perfectly. Too easy. The OEM filler neck will not fit with this solution. I am making a custom one anyway.
05-03-13 | 06:17 PM
#170
I'll let you know how it works out. A rear brace would be easy to fabricate, if necessary.
05-04-13 | 09:20 AM
#171
For those wanting to put the coils in a similar spot, where the AC and/or PS would be, contact Brandon (user name oorx7) at CJ Motorsports. He's been working on a billet bracket.
Also, the Magnecores, built to order by Magnecore, in Panda's post are built for less than others are selling the MSD wires.
Also, the Magnecores, built to order by Magnecore, in Panda's post are built for less than others are selling the MSD wires.
05-04-13 | 10:38 AM
#172
Wouldn't the differences in wire length create some kind of un-even spark performance between the front and rear rotors ? Maybe if both leading wires we're the same length and both trailing the same, not both L & T to rotor number 1 being short and both wires to rotors number 2 being longer.. Is it irrelevant or would same length wires be ultimately better..
05-04-13 | 08:52 PM
#173
It's pretty much irrelevant for wires of this type, length and service (finite rise time pulse). The 'juice' travels at a minimum of 60% to 70% of the speed of light and the difference in loss isn't significant on wires this short. Hope this helps.
05-05-13 | 07:51 AM
#174
Racing Rotary Since 1983
iTrader: (6)
Joined: Oct 2001
Posts: 6,135
Likes: 562
From: Florence, Alabama
"The 'juice' travels at a minimum of 60% to 70% of the speed of light and the difference in loss isn't significant on wires this short."
it isn't often that you get great laughs out of an ignition thread... thanks for that, SOL.
i would like to add one consideration w re to the IGN-1A coils...
boot quality, fit and size are very important given the output.
short sloppy fit boots provide an easier avenue for the elec power.
it is easy to go overboard also. the primary plug wire kit i bought from Lance had plug boots that covered all the porcelain. i am not running them as i knew i would never be able to get them off the plugs. there is probably a happy medium. currently i am running some MSD boots w Lance's primary wire and coil boots.
Magnecor is also an excellent option and a good value given they are custom made for your specific app.
howard