3rd Generation Specific (1993-2002) 1993-2002 Discussion including performance modifications and Technical Support Sections.
Sponsored by:

99 y-pipes before and after pictures

Thread Tools
 
Search this Thread
 
Old 07-22-08 | 06:31 PM
  #1  
FDSeoul's Avatar
Thread Starter
Corea FD
iTrader: (8)
 
Joined: Dec 2007
Posts: 4,378
Likes: 1
From: San Diego
99 y-pipes before and after pictures

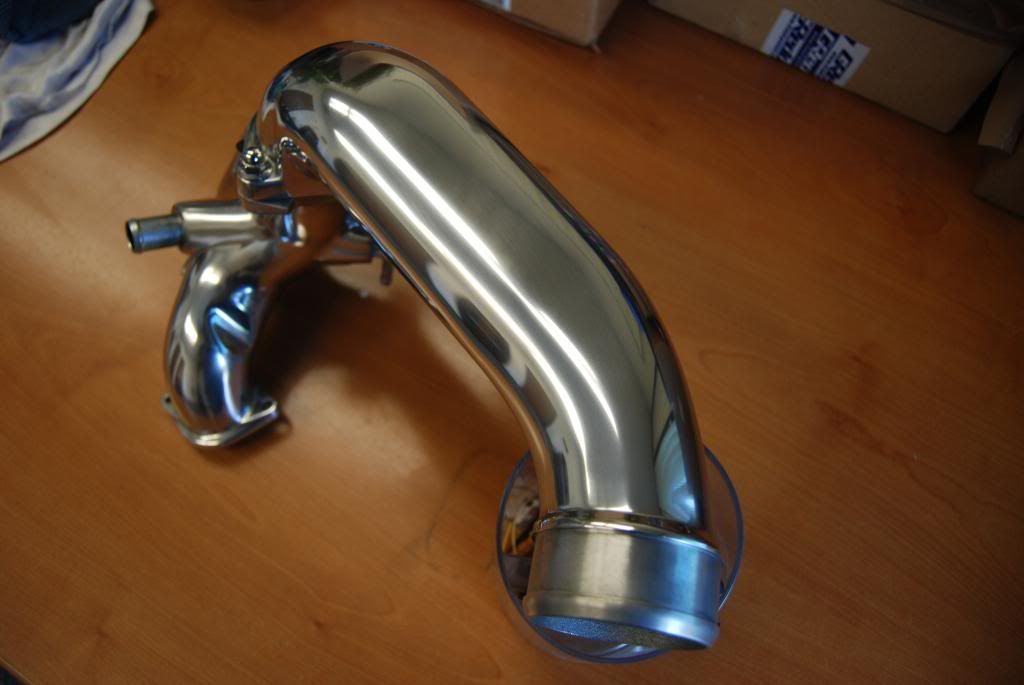
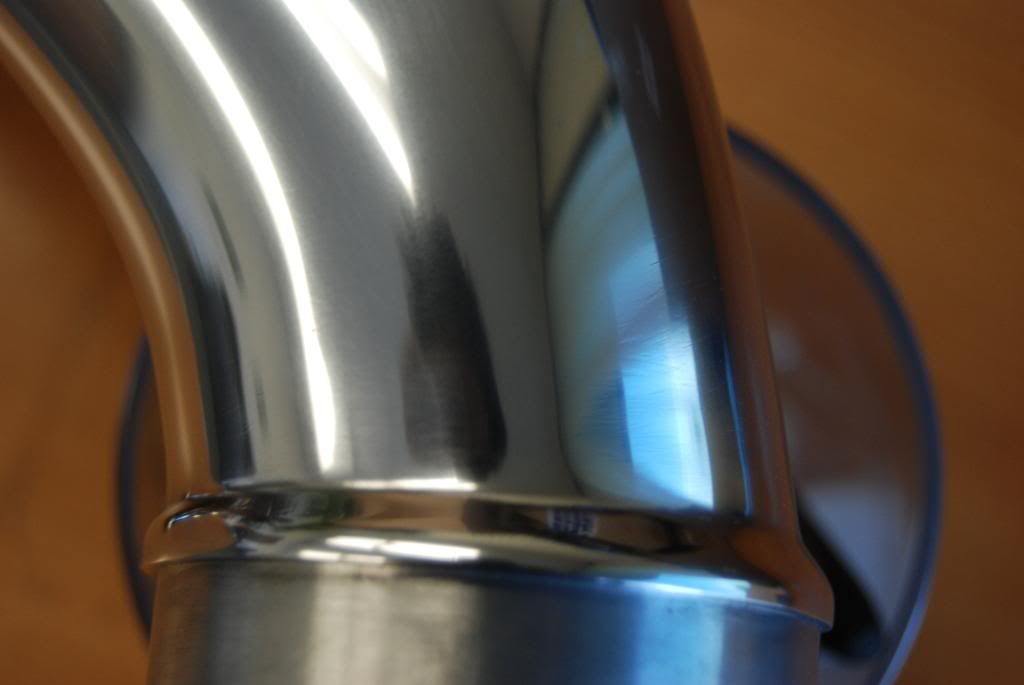
Once in a while you run across some great deal in the "for sale section" so i picked up two sets of 99 Y-pipes and with plenty of time @ the office sitting in front of the CPU and the result is *&^%$

before


after
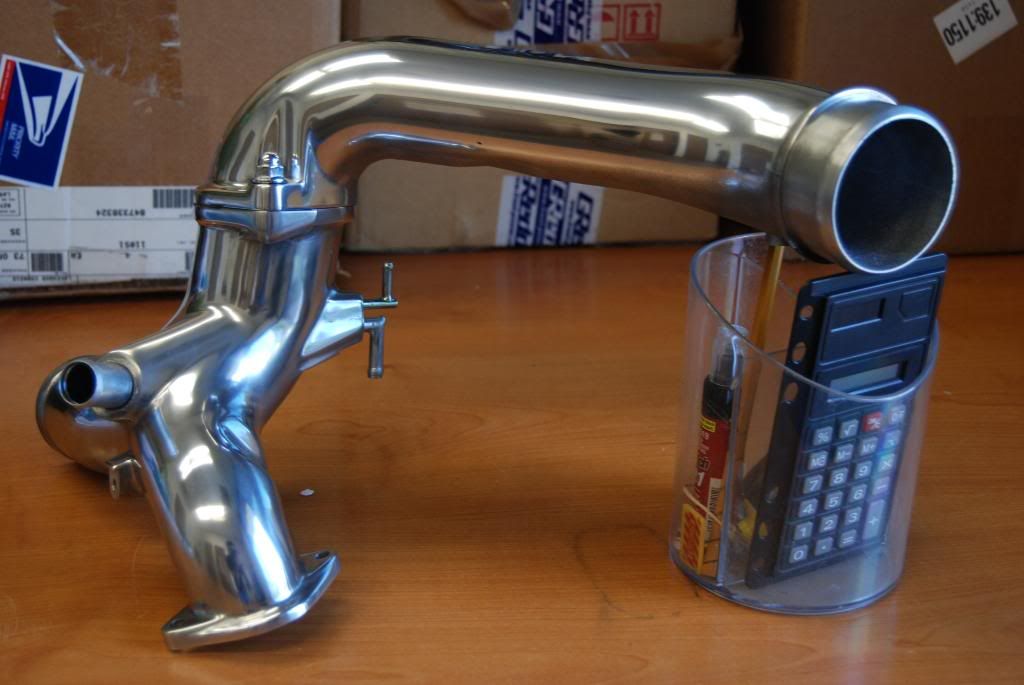


total cost:
$165 for the used Y-pipes
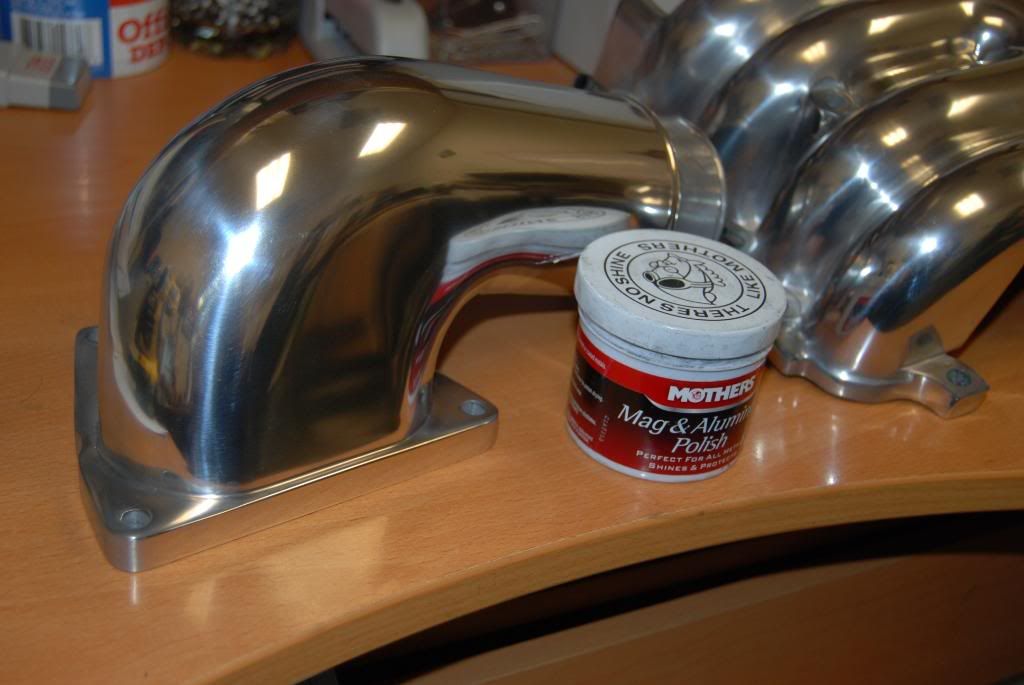
$15 for assorted sand papers in different grades and Mothers finishing polish for the mirror shine.
Old 07-22-08 | 06:42 PM
  #2  
dhays's Avatar
Rotary Enthusiast
iTrader: (1)
 
Joined: Dec 2007
Posts: 1,151
Likes: 0
From: University Place, WA
Impressive work! I admire your patience. I think I'd go nuts before I got half done.
Old 07-22-08 | 06:45 PM
  #3  
pinkrx7's Avatar
fadedvr=pink

iTrader: (2)
 
Joined: Nov 2005
Posts: 1,402
Likes: 1
From: Sacramento,CA
wow good results. can you post your steps?
Old 07-22-08 | 07:04 PM
  #4  
FDSeoul's Avatar
Thread Starter
Corea FD
iTrader: (8)
 
Joined: Dec 2007
Posts: 4,378
Likes: 1
From: San Diego
home depot paint section has the sand papers you will need
120 grit to start---once the rough cast surface is sanded down
400 grit to even out the surface
800 grit to refine even more
2000 grit wet sanding for the final prep

and then Mothers aluminum polish from any automotive store using 100% Cotton towel for final buff. keep in mind that i don't own a buffing wheel for a even brighter shine but mothers brand sells the power ball buffing attachment for your cordless drill goes a long way.
good luck and yes I have a lot of time and time and time on my hand.
Old 07-22-08 | 07:07 PM
  #5  
RotorRyan's Avatar
garage queen
iTrader: (3)
 
Joined: Jun 2008
Posts: 174
Likes: 1
From: edmonton, AB
ok so how long about did this take you?
Old 07-22-08 | 07:16 PM
  #6  
FDSeoul's Avatar
Thread Starter
Corea FD
iTrader: (8)
 
Joined: Dec 2007
Posts: 4,378
Likes: 1
From: San Diego
total time from start to finish i would say 8 days. spending total of 2 hours a day at it.
Old 07-22-08 | 07:47 PM
  #7  
dhowardFD's Avatar
Full Member
 
Joined: Dec 2007
Posts: 99
Likes: 0
From: virginia
looks good! i plan on trying to get the same results on the y-pipe and all the others sometime soon...
Old 07-22-08 | 07:54 PM
  #8  
RotorRyan's Avatar
garage queen
iTrader: (3)
 
Joined: Jun 2008
Posts: 174
Likes: 1
From: edmonton, AB
Originally Posted by FDSeoul
total time from start to finish i would say 8 days. spending total of 2 hours a day at it.
wow thats a looong time! looks great though
Old 07-22-08 | 08:53 PM
  #9  
mrb63083's Avatar
Lives on the Forum
iTrader: (4)
 
Joined: Feb 2002
Posts: 5,748
Likes: 1
From: Dallas
Shiny...

Looks great!
Old 07-22-08 | 08:56 PM
  #10  
FDSeoul's Avatar
Thread Starter
Corea FD
iTrader: (8)
 
Joined: Dec 2007
Posts: 4,378
Likes: 1
From: San Diego
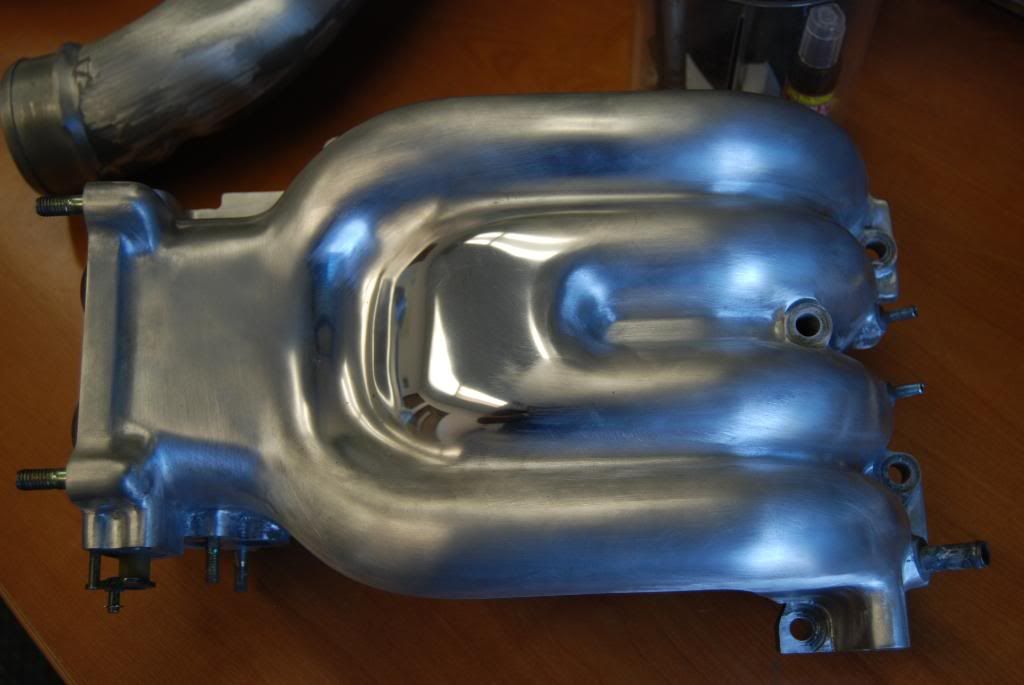
thanks guys!!!! I also have the Greddy Elbow and the I/C pipe polished up as well.
Same process no Buffing wheel used!!!


BEFORE PICTURES
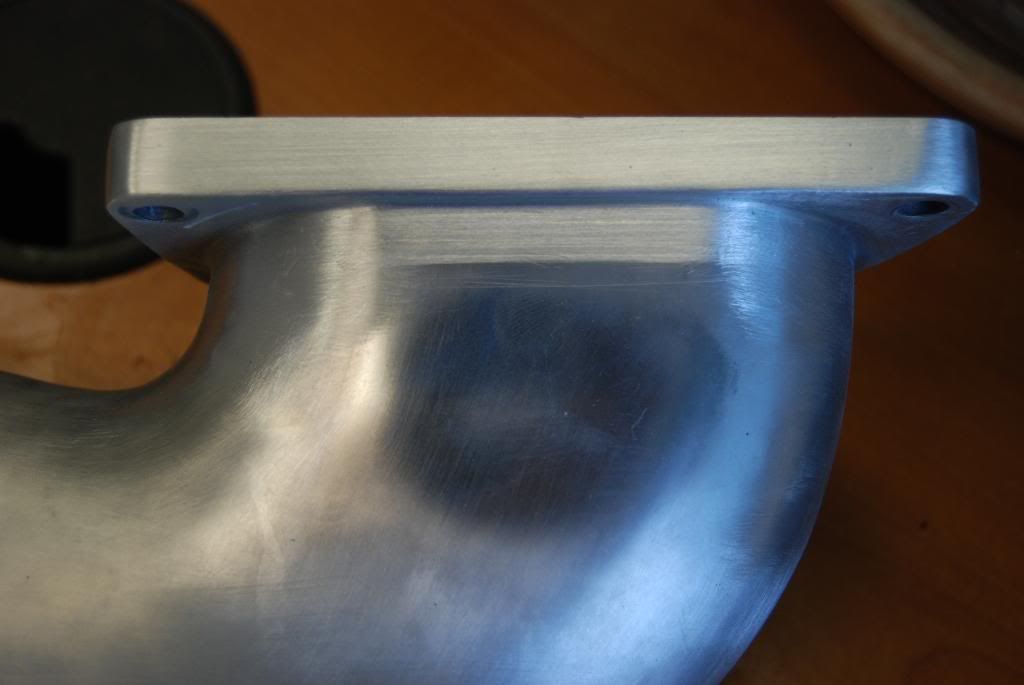
AFTER 800 GRIT!!!!!


AFTER PICTURES


Last edited by FDSeoul; 07-22-08 at 09:12 PM.
Old 07-22-08 | 09:04 PM
  #11  
TRISPEEDFD3S's Avatar
FEED me
iTrader: (26)
 
Joined: Jan 2004
Posts: 2,787
Likes: 0
From: Bay Area, CA
I would not have the patience LOL
Old 07-22-08 | 09:08 PM
  #12  
Gouki7's Avatar
Rotary Enthusiast
 
Joined: Jan 2004
Posts: 756
Likes: 0
From: CSU Long Beach
very good job there!
Old 07-22-08 | 09:17 PM
  #13  
RX7 RAGE's Avatar
Bann3d. I got OWNED!!!
iTrader: (22)
 
Joined: Feb 2001
Posts: 5,015
Likes: 66
From: San Diego, CA
Looks nice Mikey.
Old 07-22-08 | 09:18 PM
  #14  
FDSeoul's Avatar
Thread Starter
Corea FD
iTrader: (8)
 
Joined: Dec 2007
Posts: 4,378
Likes: 1
From: San Diego
Originally Posted by TRISPEEDFD3S
I would not have the patience LOL
lol I agree with you but you know what, I'm stuck at work after business hour and i have nothing to do and the parts are cheap as hell on the forum ........
Old 07-22-08 | 09:19 PM
  #15  
FDSeoul's Avatar
Thread Starter
Corea FD
iTrader: (8)
 
Joined: Dec 2007
Posts: 4,378
Likes: 1
From: San Diego
thanks RX7Rage
Old 07-22-08 | 09:24 PM
  #16  
RX7LINK's Avatar
RX7FD3S
iTrader: (3)
 
Joined: Jun 2005
Posts: 1,489
Likes: 7
From: South Bay, North Cali.
great work! gives me some motivation to polish my crossover pipe... lol. thanks
Old 07-22-08 | 09:44 PM
  #17  
ObliqueFD's Avatar
Rotary Enthusiast
iTrader: (32)
 
Joined: Nov 2002
Posts: 1,137
Likes: 2
From: Ohio
I have been trying to polish my spare UIM for the past three years. How do you get the hard to reach places?
Old 07-22-08 | 09:48 PM
  #18  
dhays's Avatar
Rotary Enthusiast
iTrader: (1)
 
Joined: Dec 2007
Posts: 1,151
Likes: 0
From: University Place, WA
Here's a stupid question...

To get that level of shine on the Y pipe, you had to remove a lot of mass. The photo looks like the pipe had a pretty deep texture to you. Is there any disadvantage (or advantage) to getting rid of the extra aluminum?
Old 07-22-08 | 10:10 PM
  #19  
FDSeoul's Avatar
Thread Starter
Corea FD
iTrader: (8)
 
Joined: Dec 2007
Posts: 4,378
Likes: 1
From: San Diego
Originally Posted by dhays
To get that level of shine on the Y pipe, you had to remove a lot of mass. The photo looks like the pipe had a pretty deep texture to you. Is there any disadvantage (or advantage) to getting rid of the extra aluminum?
Not at all, the bling factor far out weighs and performance factor. the amount of material removed is very minuet. Plus this is the cold side of the turbo system. Once the car is under load and in motion there is no intake temperature difference at all. Our FD intake temp is measured at the point (under the UIM)and there have been many discussion on how having a none shielded area around the LIM close to the hot side of the turbos is a greater contributing factor to actual intake temp when measured and before it actually enters the rotor housings.
Old 07-22-08 | 10:16 PM
  #20  
FDSeoul's Avatar
Thread Starter
Corea FD
iTrader: (8)
 
Joined: Dec 2007
Posts: 4,378
Likes: 1
From: San Diego
Originally Posted by ObliqueFD
I have been trying to polish my spare UIM for the past three years. How do you get the hard to reach places?
to get all the small hard to get to places you need use a dremel tool or you will be left with no finger prints from all of the sanding of the small areas.
Old 07-22-08 | 10:48 PM
  #21  
theorie's Avatar
AponOUT!?
iTrader: (31)
 
Joined: Nov 2002
Posts: 3,521
Likes: 13
From: Sarasota, FL
god damn that is ****ing sexy
Old 07-22-08 | 10:52 PM
  #22  
zack4173's Avatar
Rotary Enthusiast

iTrader: (3)
 
Joined: Jan 2006
Posts: 1,020
Likes: 0
From: Bonney lake Washington
Well thank you I think I found something else to take up my time. Great work
Old 07-22-08 | 11:48 PM
  #23  
tafkamb2's Avatar
Senior Member
 
Joined: Jun 2007
Posts: 484
Likes: 1
From: florida
Can you put like a wax or clear coat to protect the shine or would you just leave it like that?
Old 07-23-08 | 12:43 AM
  #24  
FDSeoul's Avatar
Thread Starter
Corea FD
iTrader: (8)
 
Joined: Dec 2007
Posts: 4,378
Likes: 1
From: San Diego
No clear coat, do to the high temp under the hood would discolor and flake in matter of days. I would recommend any aluminum polish/wax for the job. Keep in mind that having bare bling parts is nice but the down side of it is higher maintenance. Well worth it IMO
Old 07-23-08 | 01:38 AM
  #25  
FD3S2005's Avatar
SideWayZ The Only Way
iTrader: (11)
 
Joined: Jun 2005
Posts: 4,870
Likes: 10
From: Davie, Florida
how much would you charge for just the crossover pipe?


Quick Reply: 99 y-pipes before and after pictures


All times are GMT -5. The time now is 11:20 AM.