She Followed Me Home, Honest
#26
Yeah, my paint is dead.
She cleaned up OK but any shine will just be wax and I expect constant attention will be necessary to keep her a "fifty footer".
It's too bad paintwork is so expensive, the chassis is deserving but even a "standard" job (not Maaco) would far exceed the value of the car and even assuming I had the money, I'd put it in the drivetrain first, not the paint.
It's interesting to disassemble and examine a car to this extent, you kind of get a feel for the intentions of the engineers and production designers.
I had lots of time yesterday as I tapped holes to wonder about some of the things they did.
Two things struck me...
There are dozens of unused holes in the bay, presumably to accommodate all the various options and whether the car was left or right handed. Most of these are either plugged with plastic caps or simply left open. On the strut towers however, there are a couple of holes that were covered with a square of tape then painted over. WTF is that all about?
The other oddity that struck me is the two relays next to the clutch master, behind the strut tower. One relay is mounted with a 6mm bolt to a rather elaborate bracket and right next to that the second relay is just screwed to the body with a sheetmetal screw. Why not extend the bracket an inch and mount them both nicely? It's almost as if the second relay appeared late in the process and was just cobbled in but that hardly seems likely.
Oh, the things that occupy the bored mind...
#27
Moderator
iTrader: (3)
Joined: Mar 2001
Posts: 31,196
Likes: 2,825
From: https://www2.mazda.com/en/100th/
about a year ago i did a driveshaft and pedal box in my Tr3, and since non of those bolts had been touched in several decades, i actually HAD to retap all the holes, and since then i've done it to the newest race car, and the other FC, and it takes a really long time, but when you go to assemble the car its so much nicer, everything just goes together so nicely. long story short, its worth doing.
i look at stuff like the taped up holes too, its fun to think about while you're tapping stuff. once the designers finish, they hand it over to the production guys, who have to figure out how to assemble the damn thing, so this is possibly why some holes are open and some aren't.
Honda is interesting, Mazda has a clip or clamp about every 6" on the wiring harness, and its pretty obvious where it should go, the honda doesn't have either one! they just let the harness dangle
#28
I love TRs, if I was going to get another British car, that's what it would be.
I've owned three, including a 3B and they are about as crude as a car can be but handsome like a bulldog and a blast to drive.
The cool thing about older sportscars is that you get all the hair raising experiences and sensations without exceeding 50 MPH.
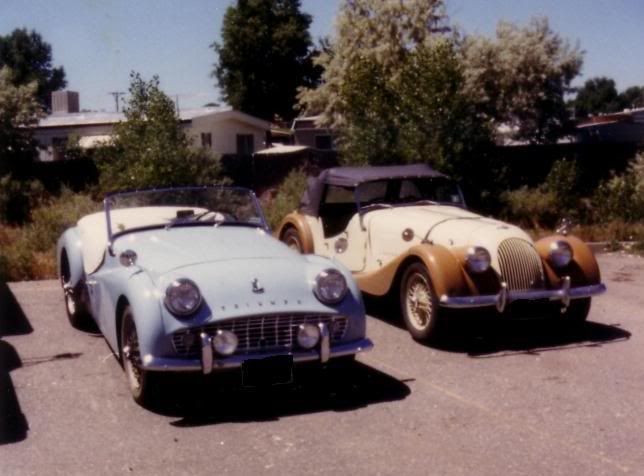
This is the 3B next to my '67 Morgan Plus 4 (they both had the same engine based off a Massey Ferguson tractor motor...you could go to farm supply shops and buy fanbelts at a considerable savings over Moss Motors):

#30
Moderator
iTrader: (3)
Joined: Mar 2001
Posts: 31,196
Likes: 2,825
From: https://www2.mazda.com/en/100th/
I love TRs, if I was going to get another British car, that's what it would be.
I've owned three, including a 3B and they are about as crude as a car can be but handsome like a bulldog and a blast to drive.
The cool thing about older sportscars is that you get all the hair raising experiences and sensations without exceeding 50 MPH.
This is the 3B next to my '67 Morgan Plus 4 (they both had the same engine based off a Massey Ferguson tractor motor...you could go to farm supply shops and buy fanbelts at a considerable savings over Moss Motors):

I've owned three, including a 3B and they are about as crude as a car can be but handsome like a bulldog and a blast to drive.
The cool thing about older sportscars is that you get all the hair raising experiences and sensations without exceeding 50 MPH.
This is the 3B next to my '67 Morgan Plus 4 (they both had the same engine based off a Massey Ferguson tractor motor...you could go to farm supply shops and buy fanbelts at a considerable savings over Moss Motors):

i just love the experience of driving that car, there are no distractions, its just you and the car, but its not uncomfortable
pic of mine is about a year ago, unfortunately the sad part is that i just sold it, cause the neighbors kept hitting it
#32
Moderator
iTrader: (3)
Joined: Mar 2001
Posts: 31,196
Likes: 2,825
From: https://www2.mazda.com/en/100th/
me too but whom? btw, i'm glad i looked, but mine being a 58 model is a Triumph, Leyland didn't buy Triumph until 1960, which i didn't know. furthermore the ownership history is confusing, even up to now, as its a BMW...
#33
Today the boss (me) said I didn't need to work a full day, so I just did some fiddly stuff.
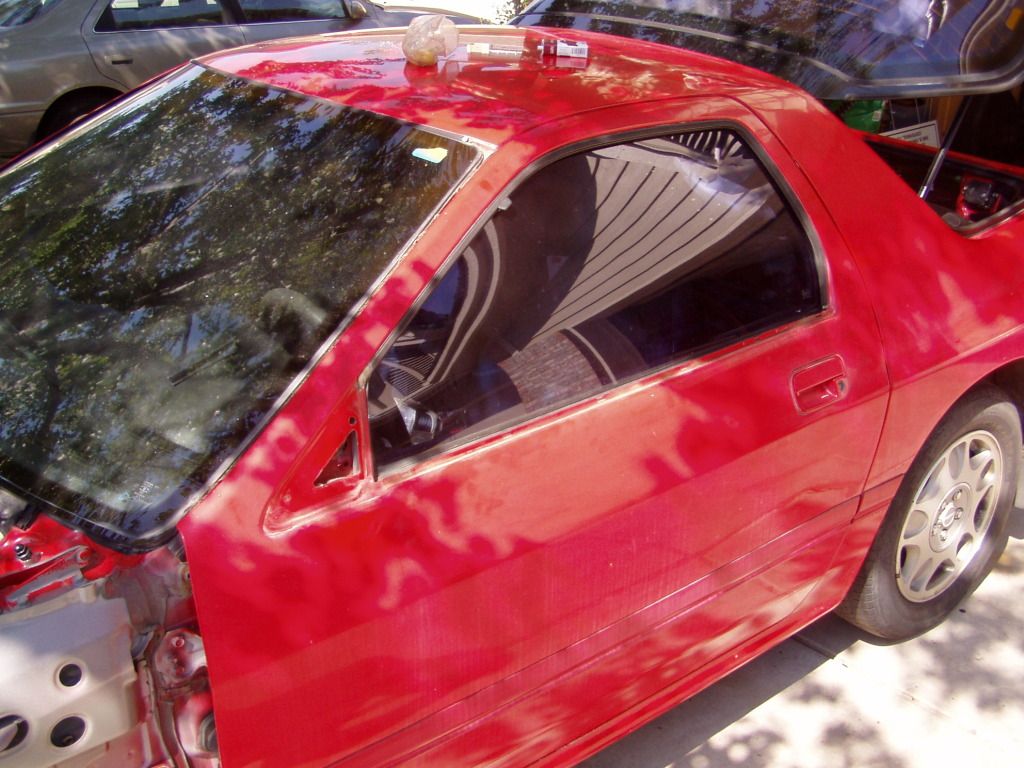
Removed the mirrors and rusty window trim...
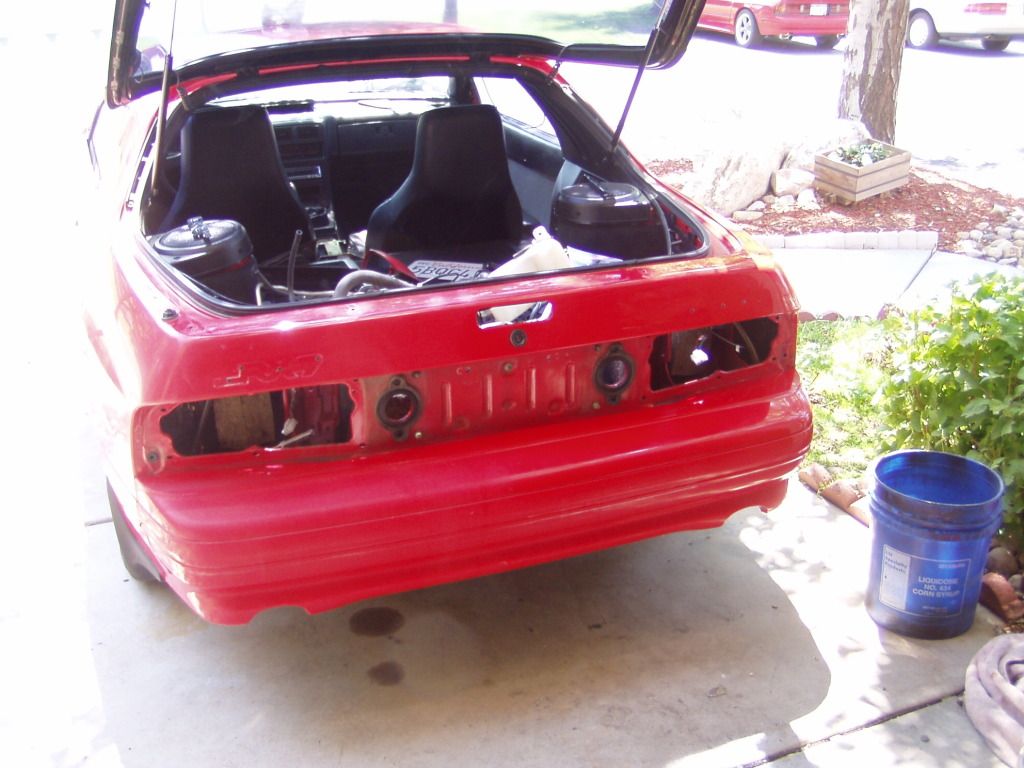
Then moved to the back and took out the tail lights and wing.
There's not much left on the exterior to be removed, side marker lights and antenna are all I can think of.
Looking down in the hole, the mast appears to be semi-screwed up and probably wont return.
Just another hole to cover somehow.
With the body stripped, I can now concentrate on the paint for a while...if I do this manually, a long while.
It's gratifying to see the paint bloom back to life but very tedious, so I figure I'll do a square foot at a time and intersperse other jobs into the schedule.
I have a set of 4-pot calipers and a rebuild kit that I've been sitting on for years, so they might help fill the time as my arm recovers from polishing.
The hood on the GTU is steel and thus considered (by me) to be useless but I found some hood vents that might be interesting and I think I'll experiment on the steel before committing to my aluminum hood.
I've been making a list of widgets and geegaws to search the junkyard for, might start making some early morning trips there to see what I can find.
Removed the mirrors and rusty window trim...

Then moved to the back and took out the tail lights and wing.

There's not much left on the exterior to be removed, side marker lights and antenna are all I can think of.
Looking down in the hole, the mast appears to be semi-screwed up and probably wont return.
Just another hole to cover somehow.
With the body stripped, I can now concentrate on the paint for a while...if I do this manually, a long while.
It's gratifying to see the paint bloom back to life but very tedious, so I figure I'll do a square foot at a time and intersperse other jobs into the schedule.
I have a set of 4-pot calipers and a rebuild kit that I've been sitting on for years, so they might help fill the time as my arm recovers from polishing.
The hood on the GTU is steel and thus considered (by me) to be useless but I found some hood vents that might be interesting and I think I'll experiment on the steel before committing to my aluminum hood.
I've been making a list of widgets and geegaws to search the junkyard for, might start making some early morning trips there to see what I can find.
#34
Moderator
iTrader: (3)
Joined: Mar 2001
Posts: 31,196
Likes: 2,825
From: https://www2.mazda.com/en/100th/
that one is easy, there is actually a part number for doing just that. since its just a rubber plug they use elsewhere on the FC and all the other Mazda's i'll assume you will just find one.
if you need the part number its in the Miata parts catalog, it seems that the radio was an option, although i've never heard of a car that didn't have one
if you need the part number its in the Miata parts catalog, it seems that the radio was an option, although i've never heard of a car that didn't have one
#35
Thanks, j9, I'll look into that.
A few more musings from the disassembly process:
Mazda mounted the wing in a completely stupid manner- the hardware is ridiculous.
I've now removed at least five wings and every one breaks the 6mm studs on the back, why not use larger studs and plastic nuts like the two middle side mounts?
Why not reinforce the metal at the mount points? The two "feet" on the back deform the body when tightened down, leaving an unsightly impression on the body.
Awful.
I was surprised when I removed the taillights and center brake light...the tail lamps are all plastic and seem quite nice but the center brake is a very elaborate and sturdy cast (pot?) metal monstrosity, seems way overkill for what it is. I was expecting a simple plastic housing with a couple of mount tabs.
Just seemed odd that such a simple part was so expensive and beefy.
While rooting around in the back I found diet Coke cans wedged in some inaccessible crevices, I pulled five.
I can't imagine how this happened in such a clean car, the cans couldn't have accidentally rolled into these spaces, I had to remove quite a bit of the interior trim to get to them...it's just weird.
I'd much prefer to have found money.
I also found a very nice vinyl bag with two wheel chocks, I guess all 7's came with them but I've not seen them before.
#36
Yeah, my paint is dead.
She cleaned up OK but any shine will just be wax and I expect constant attention will be necessary to keep her a "fifty footer".
It's too bad paintwork is so expensive, the chassis is deserving but even a "standard" job (not Maaco) would far exceed the value of the car and even assuming I had the money, I'd put it in the drivetrain first, not the paint.
my TII was almost a brown color from sitting in the LA smog for most of its life, it at least somewhat resembles a red color now.
Last edited by RotaryEvolution; 08-13-12 at 01:06 PM.
#37
Moderator
iTrader: (3)
Joined: Mar 2001
Posts: 31,196
Likes: 2,825
From: https://www2.mazda.com/en/100th/
lol, i know! i only found $0.26 in the Rx8, i know the guy had money problems, but really!
my T2 was green from sitting, once we got the mold/fungus/oxidized paint off, the white was surprisingly nice
and i clay bricked the Rx8 and the stuff that came off was red/brown too...
and i clay bricked the Rx8 and the stuff that came off was red/brown too...
#38
i found about $5 in change from the turd brown '88SE. it's nice getting a free car and getting a free lunch on top of it! the guy actually had 2 sevens he was giving away but i took the better of the 2 as well as parts from the second and saved the trip/space.
that one had a seized motor which worked loose with a little effort and long block reassembly. the only disappointment was the clutch which was worn out and the oil control seals started to go after about 6 months.
that one had a seized motor which worked loose with a little effort and long block reassembly. the only disappointment was the clutch which was worn out and the oil control seals started to go after about 6 months.
Last edited by RotaryEvolution; 08-13-12 at 01:55 PM.
#39
I'm gonna need a new barrel of elbow grease.
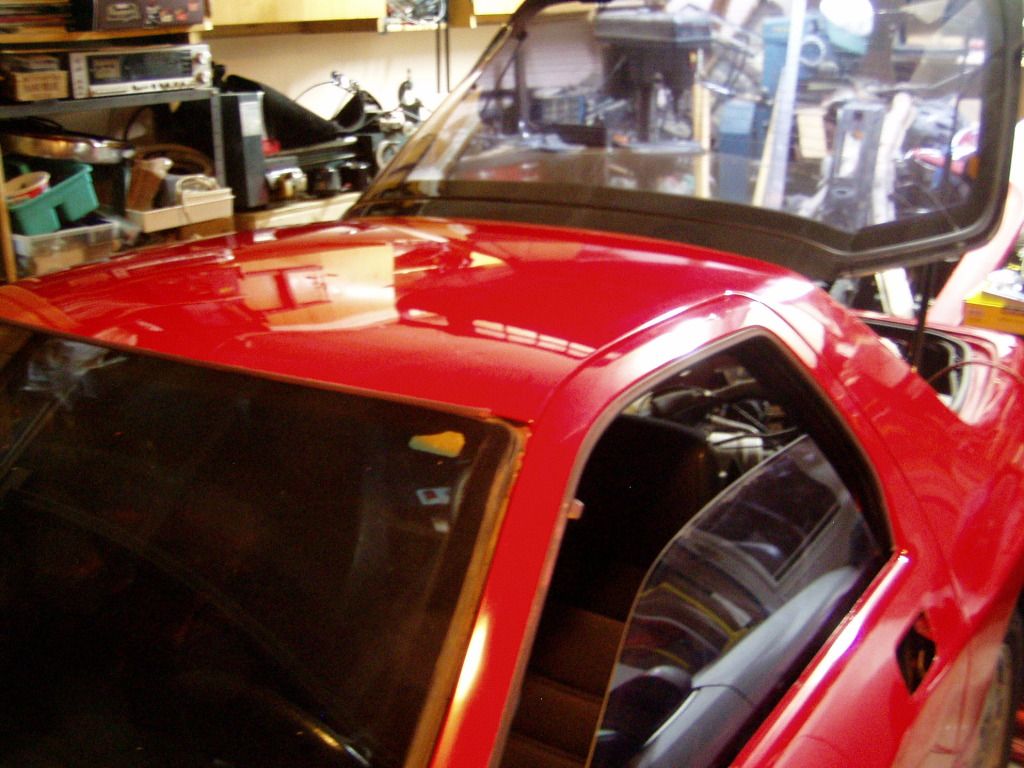
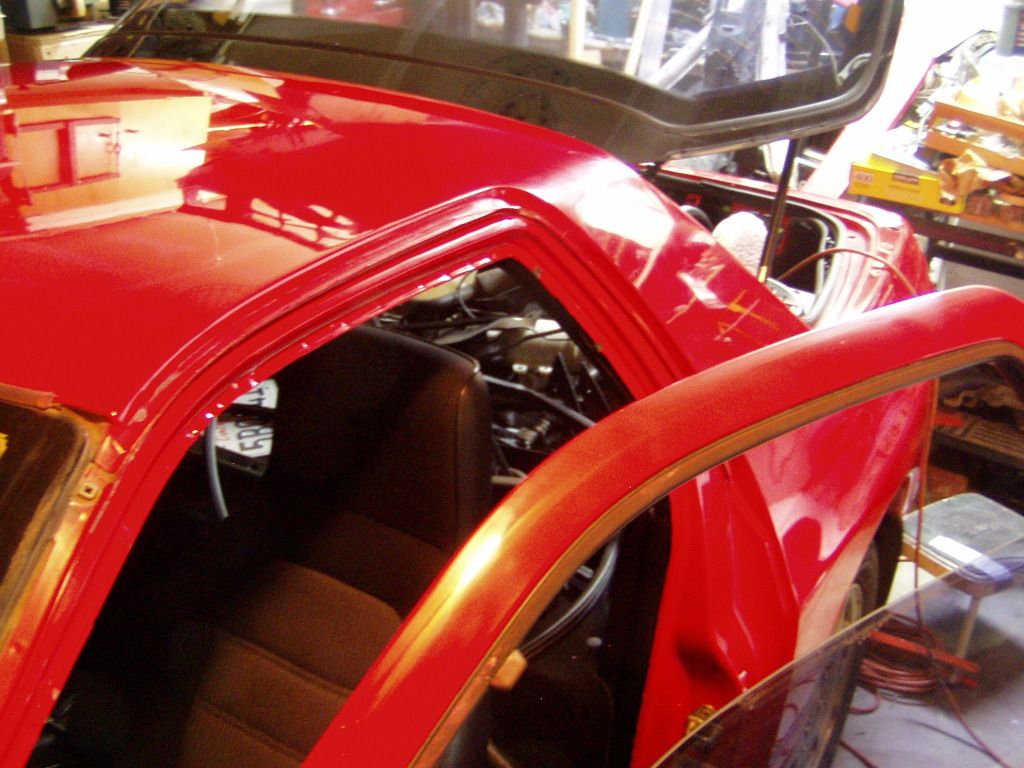
An entire day of hand compounding and I've done the roof, driver side door/jamb, rear quarter and about half of the back.
Today I'll do the passenger side, finish the back and do the hatch surround..
Then I start all over and repeat with polishing compound, followed by glaze/sealer and finally, wax.
And I haven't even started on the front fenders, the hood and the front bumper.
Oh joy.
The rubber door seals/trim were scrubbed with soapy water and a scotchbrite pad, then slathered with vaseline and put in the sun. This renews the shine and makes them pliable again.
The rubber trim along the top of the windshield and around the hatch glass is generic and easily available, so will be replaced.
The side windshield trim pieces are very FC specific (and thus absurdly expensive), I can either use the much better pieces from the other car or maybe find a suitable substitute. Fortunately, there's a great auto trim specialty store here in Denver and as I begin reassembly, I'll be visiting them for all the little fasteners and trim I'll need. They were very helpful when I restored my 240Z, I look forward to dealing with them again.
The door and hatch glass has been tinted and while it's not horrible, there are some bubbles (especially in the defrost grid area). At some point, I should have that redone but it can wait. I really have to be careful of mission creep as I have neither the cash nor storage space to keep taking things apart and many of the improvements I want to make can be done incrementally and don't require the car be in pieces.
Better pics of the paint restoration to follow.
#40
it's still cheaper than a quality $2500 paint job which still leaves paint seams. 
when you start to wonder why you're bothering, just remember you only have to do this once(if you keep it waxed periodically).

when you start to wonder why you're bothering, just remember you only have to do this once(if you keep it waxed periodically).
#41
The whole (rear) body has been polished with heavy duty compound:
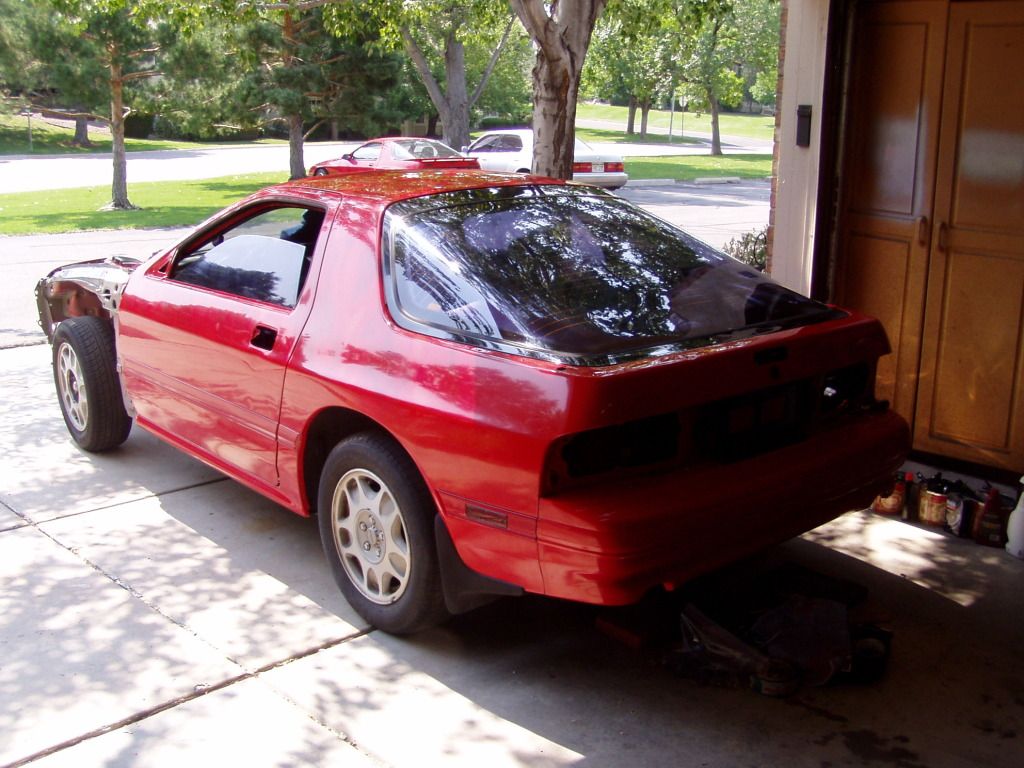
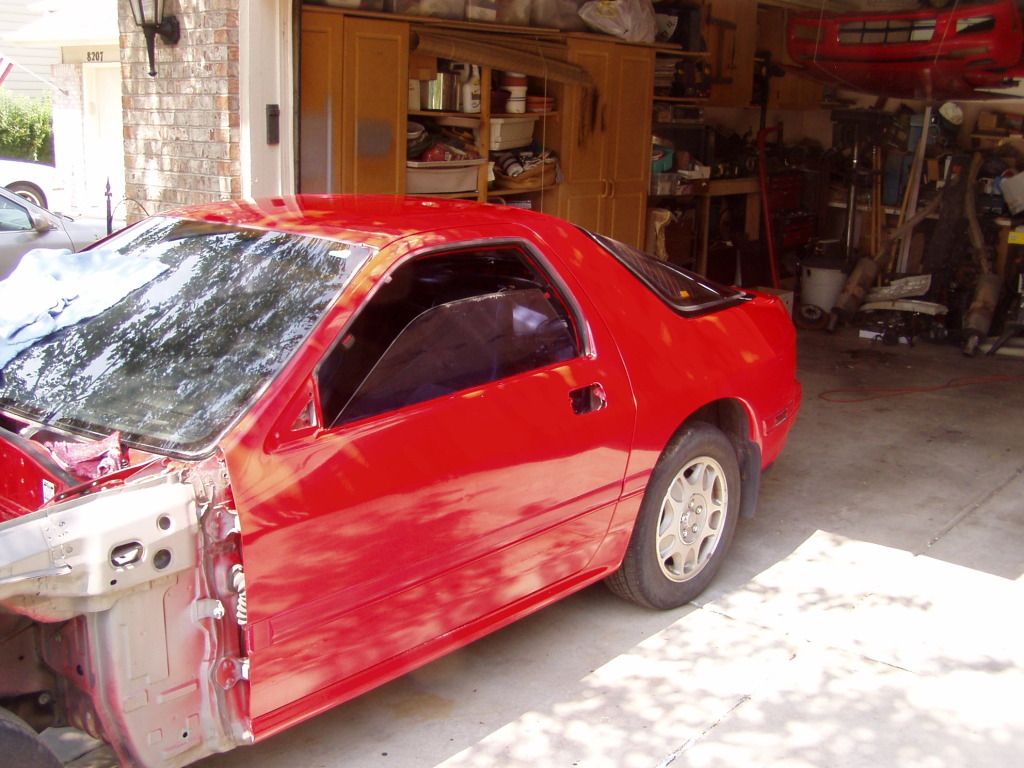
And my arm has gone on strike.
Next up is polishing compound followed by sealer/glaze, then wax.
I doubt she'll look much different, the final stages clean up and protect the work I've just done (and my camera is crap) but the transformation is quite dramatic and definitely worth the effort. I still need to do the doorhandles and clean the side marker lights (all the embossed printing is full of old wax).
Still haven't removed nor figured out how to recondition the mud guards.
They are in very good shape but somewhat faded looking and have the expected wax deposits along the edges.
I'm not even sure exactly what they're made of, so I need to be careful with chemicals.
If anyone has dealt with the flaps, please chime in.
So far, I figure I've put about 60 hours into stripping/cleaning/polishing since the car arrived last Wednesday.
#42
Man, You need it keep that thing in the garage, or covered if it's outside. The elements will reek hell on that paint and it will look like crap again in about two weeks if you leave it outside.
I'm so tired of having a red FC. If I have left over money after my build, it's getting sprayed with plasti-dip. It's about $300 for a kit w/ sprayer, if you don't like it, peel it off.
So far it looks good! I wish I could get away with putting that much time into my car.
I'm so tired of having a red FC. If I have left over money after my build, it's getting sprayed with plasti-dip. It's about $300 for a kit w/ sprayer, if you don't like it, peel it off.
So far it looks good! I wish I could get away with putting that much time into my car.
#43
Well, she will be garaged but Denver's intense UV is tough on all paint.
I'm not sure if red is any worse than other colors though.
I do try to keep up on waxing but this will be a daily driver and I'm not going to obsess over it.
I'm not sure if red is any worse than other colors though.
I do try to keep up on waxing but this will be a daily driver and I'm not going to obsess over it.
#46
My Stygian labors have continued and the car has now been compounded, polished, sealer/glazed and waxed. I really couldn't be happier with the result, she cleaned up nicely.
In a haze of optimism I decide to carry forward and hung the fenders and nose (loosely).
Problems began.
I was wrong about the bumper cap, it IS the part that was on during the accident.
The metal support across the top was fairly well bent up and there's a large shallow depression (cant't really call it a "dent" since there's no creasing) right around the embossed Mazda logo.
I'll be using the nose from the other car which is equally faded but not deformed and save this one as a spare.
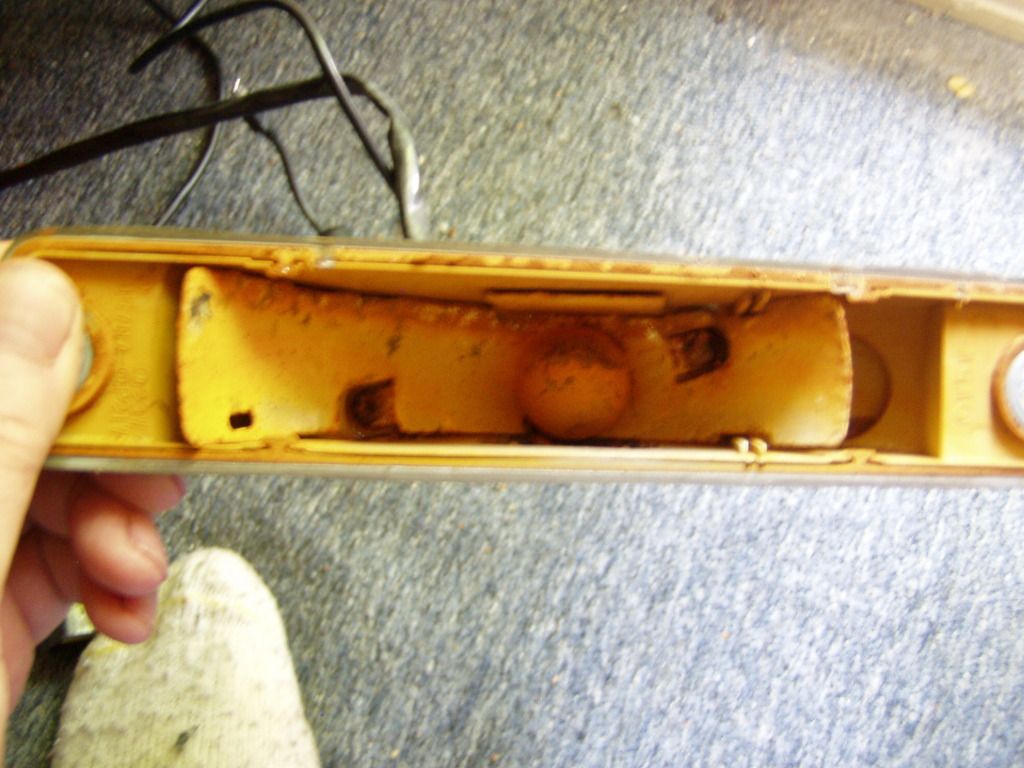
I harvested the FTP lenses and running light/TS housings and found another inexplicable weirdness. The passenger side TS looked odd, so I split it open (had to pry the lens to break the seal) and the inside is corroded all to hell, like it had been underwater or something.
There are no visible cracks or obvious ingress points but the whole reflector is rotten and the lens is yellow with residue. The other side is perfectly normal.
No clue what happened there.
The passenger fender is fine and looks like it will clean up like everything else but the driver side has peeling clearcoat.
Where did that come from?
I'm convinced that the fenders are original, they both have seam sealer overlap matching the chassis but both appear to have been cleared. For some reason, the driver side has started losing a few large swaths.
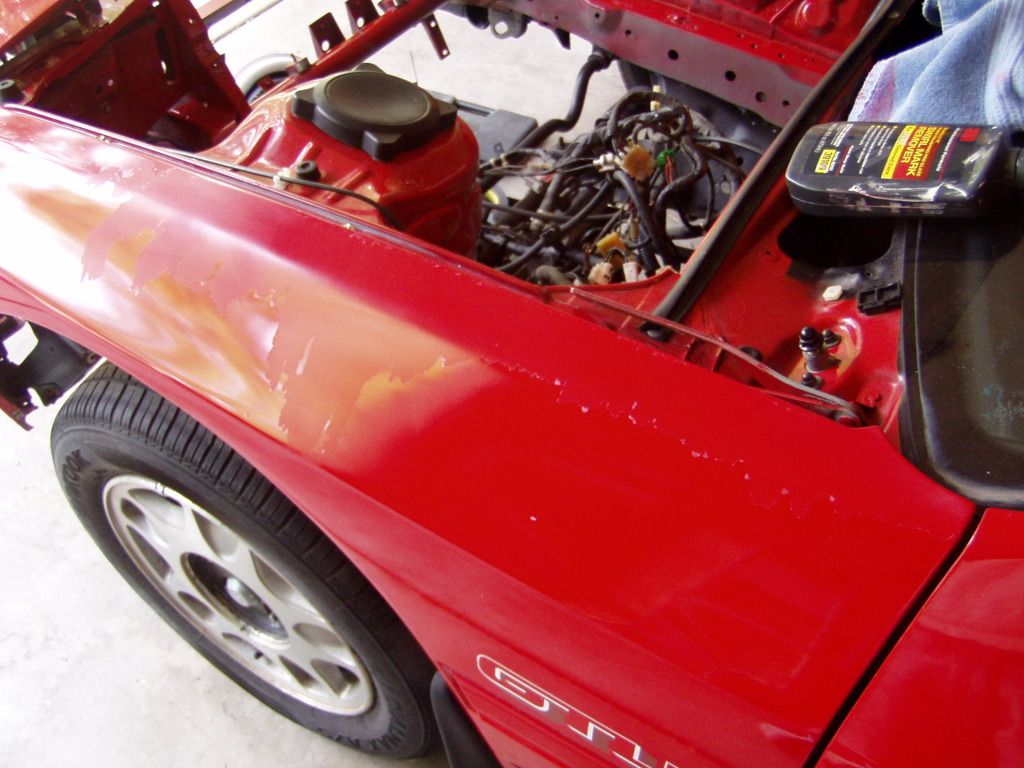
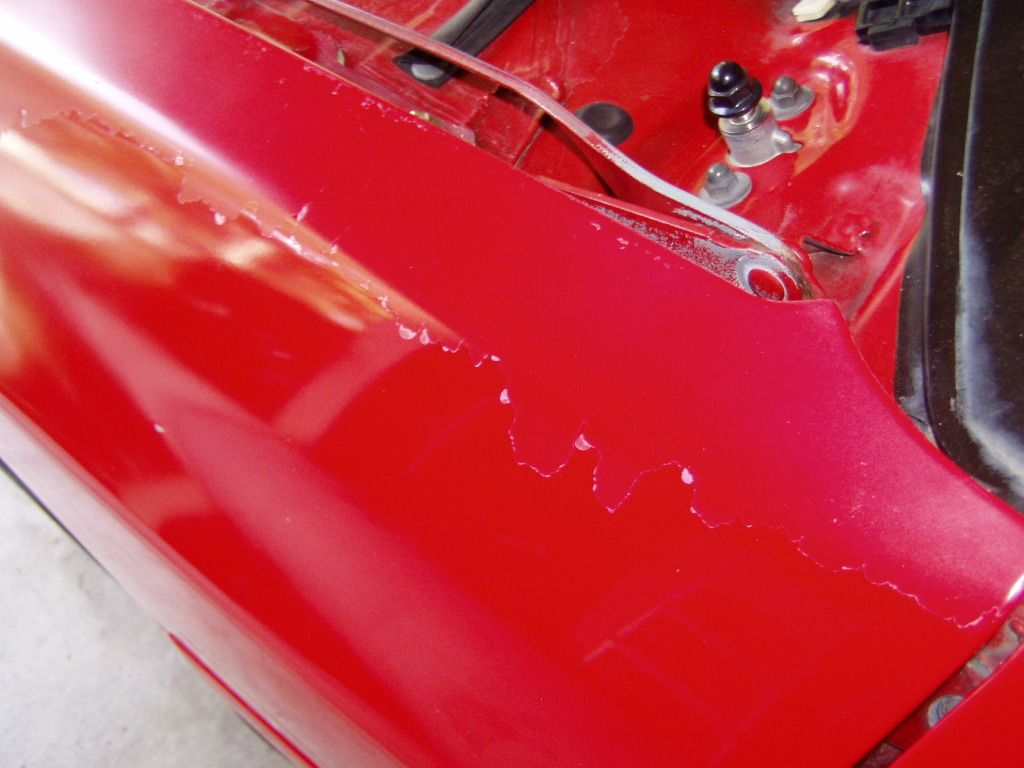
The fender is in nice shape other than this rather obvious ( and irritating) flaw, I'm going to ponder my options.
In a haze of optimism I decide to carry forward and hung the fenders and nose (loosely).
Problems began.
I was wrong about the bumper cap, it IS the part that was on during the accident.
The metal support across the top was fairly well bent up and there's a large shallow depression (cant't really call it a "dent" since there's no creasing) right around the embossed Mazda logo.
I'll be using the nose from the other car which is equally faded but not deformed and save this one as a spare.
I harvested the FTP lenses and running light/TS housings and found another inexplicable weirdness. The passenger side TS looked odd, so I split it open (had to pry the lens to break the seal) and the inside is corroded all to hell, like it had been underwater or something.
There are no visible cracks or obvious ingress points but the whole reflector is rotten and the lens is yellow with residue. The other side is perfectly normal.
No clue what happened there.

The passenger fender is fine and looks like it will clean up like everything else but the driver side has peeling clearcoat.
Where did that come from?
I'm convinced that the fenders are original, they both have seam sealer overlap matching the chassis but both appear to have been cleared. For some reason, the driver side has started losing a few large swaths.


The fender is in nice shape other than this rather obvious ( and irritating) flaw, I'm going to ponder my options.
#47
I've had experiences with the S5 Turn signals FILLING up with water. It probably filled up and sat.
The driver's fender has also been repainted. 100% sure on that, OEM single stage will never peel unless it's coming off and exposing primer.
The driver's fender has also been repainted. 100% sure on that, OEM single stage will never peel unless it's coming off and exposing primer.
#48
I get it about the paint but it really is odd.
I don't believe the fenders have ever been off and there's no sign that the clear was applied later.
For instance, the clear is under the trim strips (which don't appear to have been cleared) and wouldn't it be normal to clear over applied stickers (the "GTU" on both sides)?
Anyway, I'll have to deal with this somehow.
#49
Well if it was me I would paint, apply model sticker, then clear. Why? No matter what, you can't damage the sticker unless something goes wrong with the clear. Would this work? He'll if I know, I'm not a professional painter.


