S5 radiator in an S4

 11-05-10, 02:40 PM
#9
if you have a non-oem style radiator, then you are probably going to need custom brackets. if you have an oem style radiator, you are doing something wrong. bolt the brackets to the radiator. bolt the radiator to the front support. done. it would be helpful if you posted some pictures.
11-05-10, 03:33 PM
#10
if you have a non-oem style radiator, then you are probably going to need custom brackets. if you have an oem style radiator, you are doing something wrong. bolt the brackets to the radiator. bolt the radiator to the front support. done. it would be helpful if you posted some pictures.
11-10-10, 03:55 PM
#12
I just ordered a S5 God speed radiator for my S4 and I figure you could easily modify the S4 mounts to get the S5 after market rad on. The godspeed rad has side mount type holes and the S4 oe rad has that weird 45 degree bent tipped rail/bracket. So i though I could just straighten out the rails and maybe drill some holes in the rails/brackets and thats it. Ill post pictures of the install. The reason im getting the Godspeed rad is cuz my oe rad just crapped out on me and this rad looked decent enough. For the same or similar price of a OE might as well try it! I cant physically see the cracks on the old rad but when under pressure it seems to spray and gush coolant everywhere at the joining point of the core and bottom end tank, but who cares its busted anyway. Durring this install Ill post some pictures of a Nissan quest E-fan conversion that im in the process of completing. Complete with two speed settings
Last edited by masa_3100; 11-10-10 at 03:57 PM.
11-16-10, 11:03 PM
#15
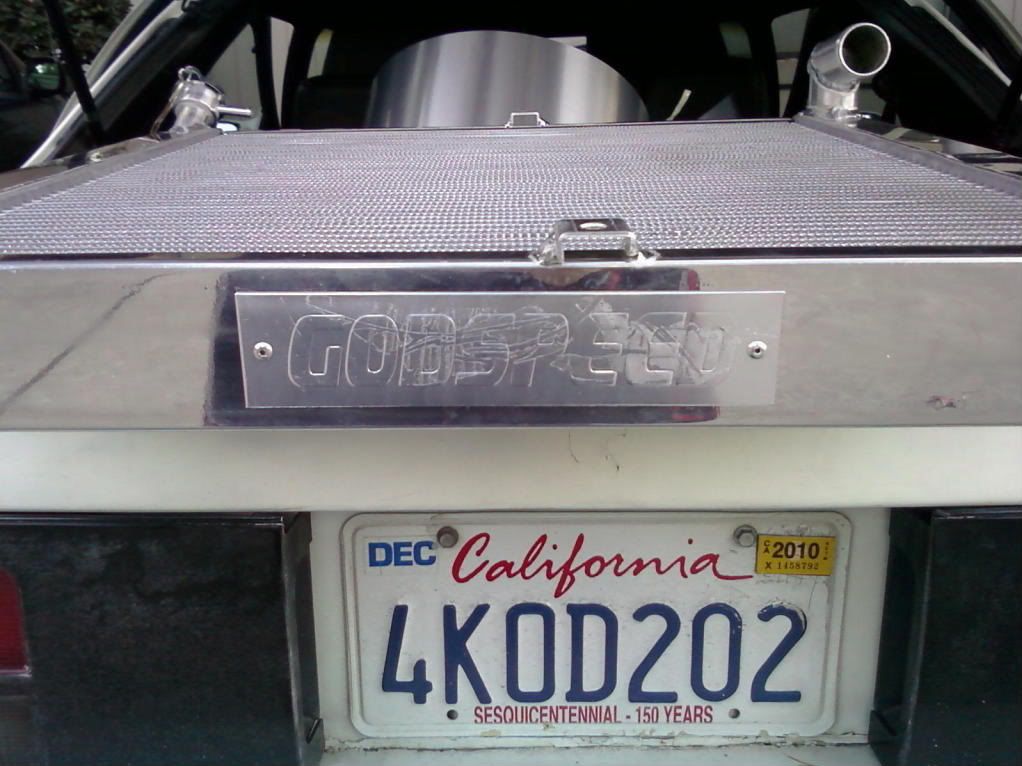
So as I suspected if you have a S4 and want to install a S5 rad, its not that hard at all. Basically you take the OE S4 rad mounts, straighten out the ends, Drill holes for the side mounting S5 rad bolts put it together and put it all back in. I did this with the Godspeed Radiator because they said it would be a Direct Bolt-on application for S5 so the dimensions are just about the same as OE. I imagine it to be pretty much the same for other side bolting S5 radiators.
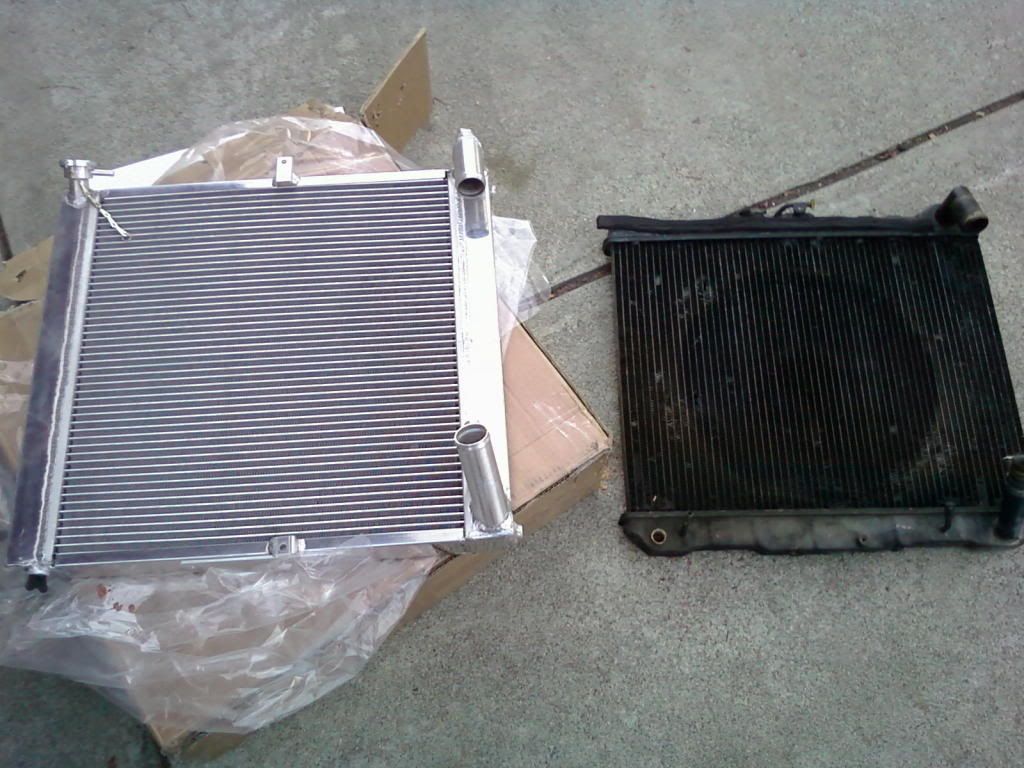
The only thing that might be a problem is, if you are using a belt driven fan you are gonna have to come up with a fancy way of trimming and mounting the fan shroud cuz the Godspeed rad is about TWICE as thick as the OE radiator. I have an Electric fan conversion so Im covered.
The fan is from a mid 90's Nissan quest.
Tools
Vice grip to bend the rails (table vice or C Clamp would be better)
Hand drill with 5/16 bit
Some thinking and man handling
Procedure
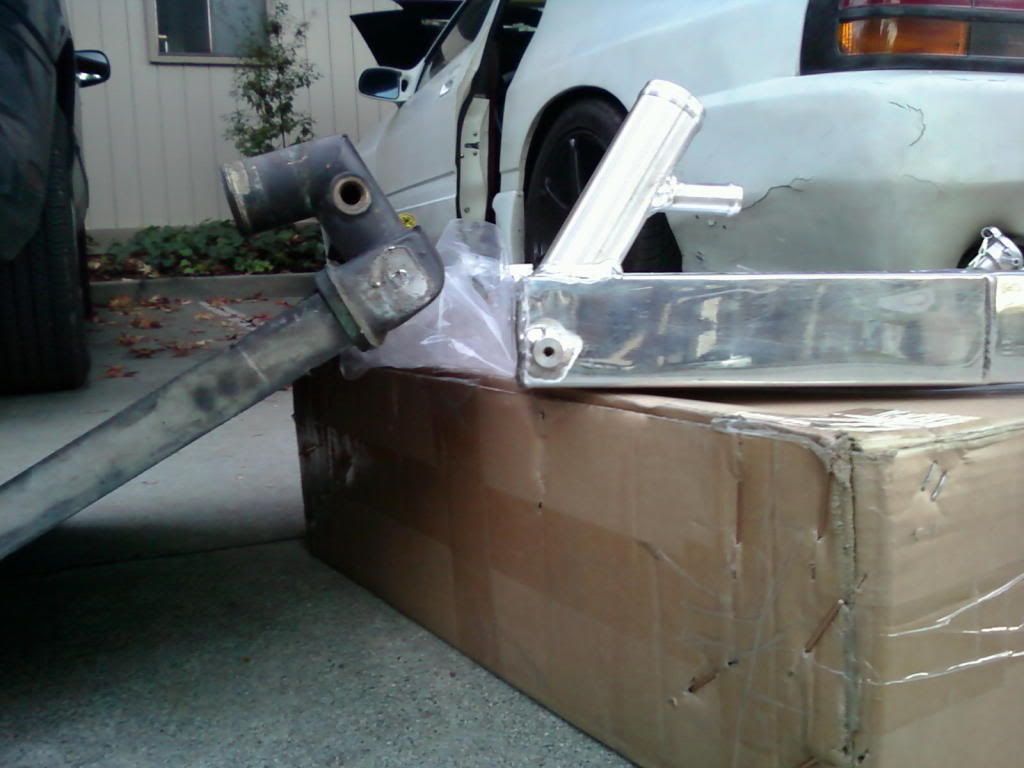
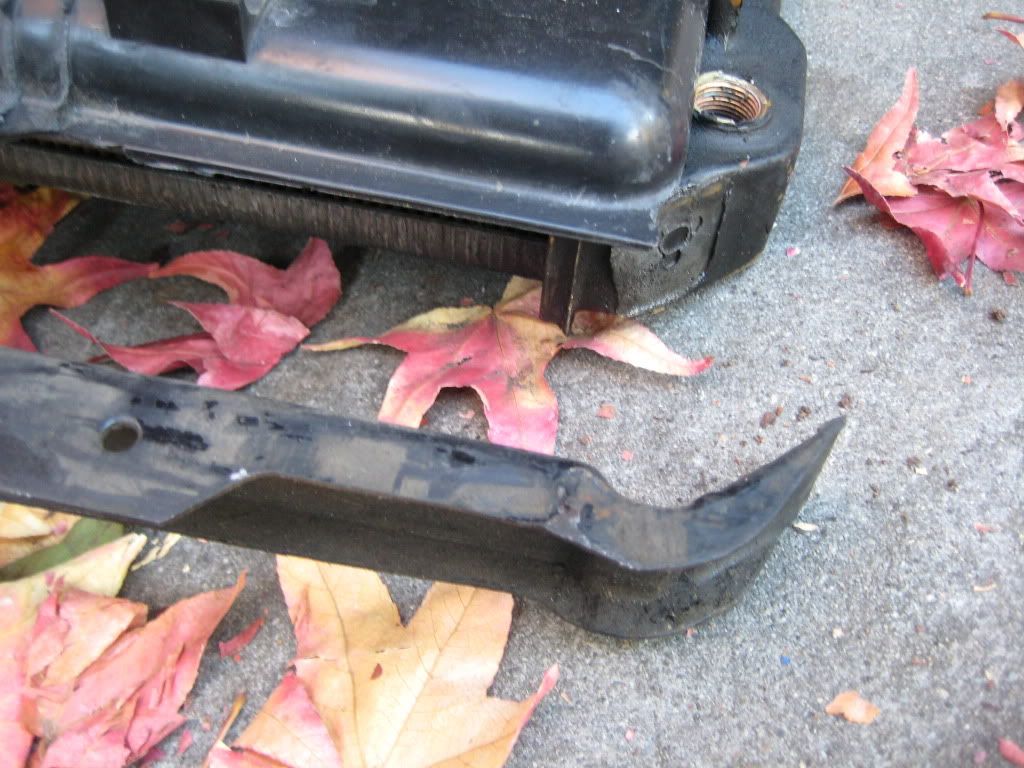
First take out the clutch fan and shroud then undo all rad hoses. Take the rad out by undoing the four bolts holding the rails to the car, you will have to take out the battery and battery mount to get to the lower drivers side bolt, then detach the rails/mounts from the rad. Im not sure how hard that would be because my radiator was already knocked loose from the rails and I can see that some type of Glue/cement? maybe welding? was used to attach the rails to the radiator.
As you can see in this picture the rails were some how magically attached to the rad.
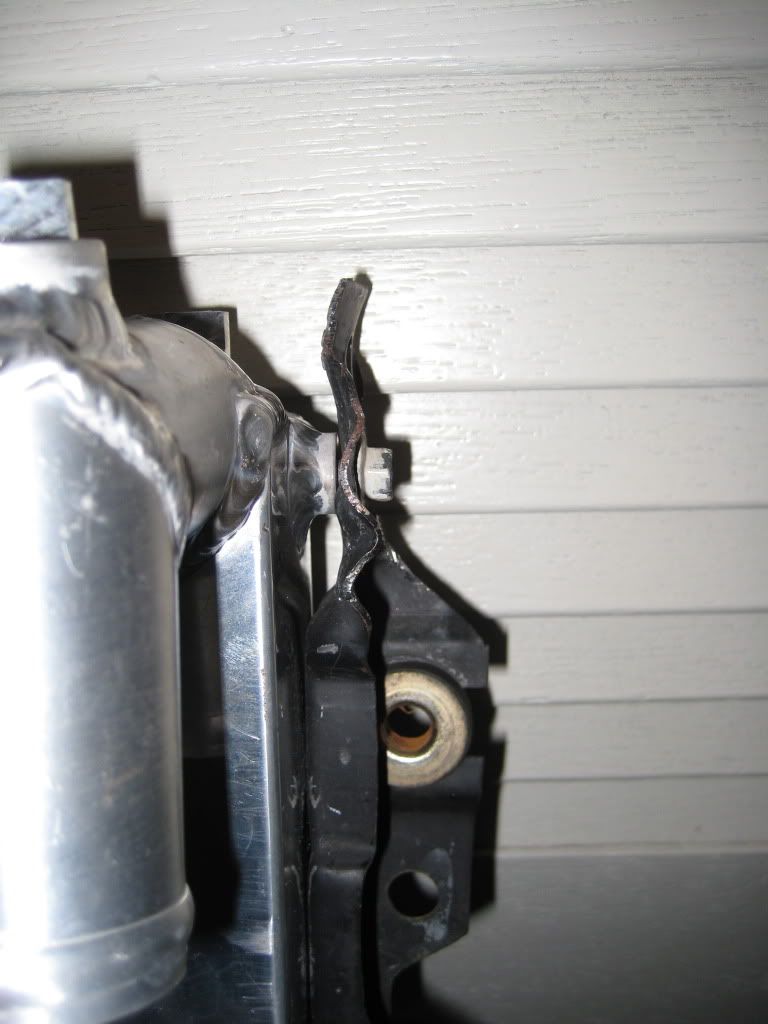
Bend the rail edges flat so it will be easier to even out the tips. When I say edges I mean the sides that are standing up perpendicular to the surface you are gonna drill. the sideways W shape is the result of my flattening because I used my handy vice grip.
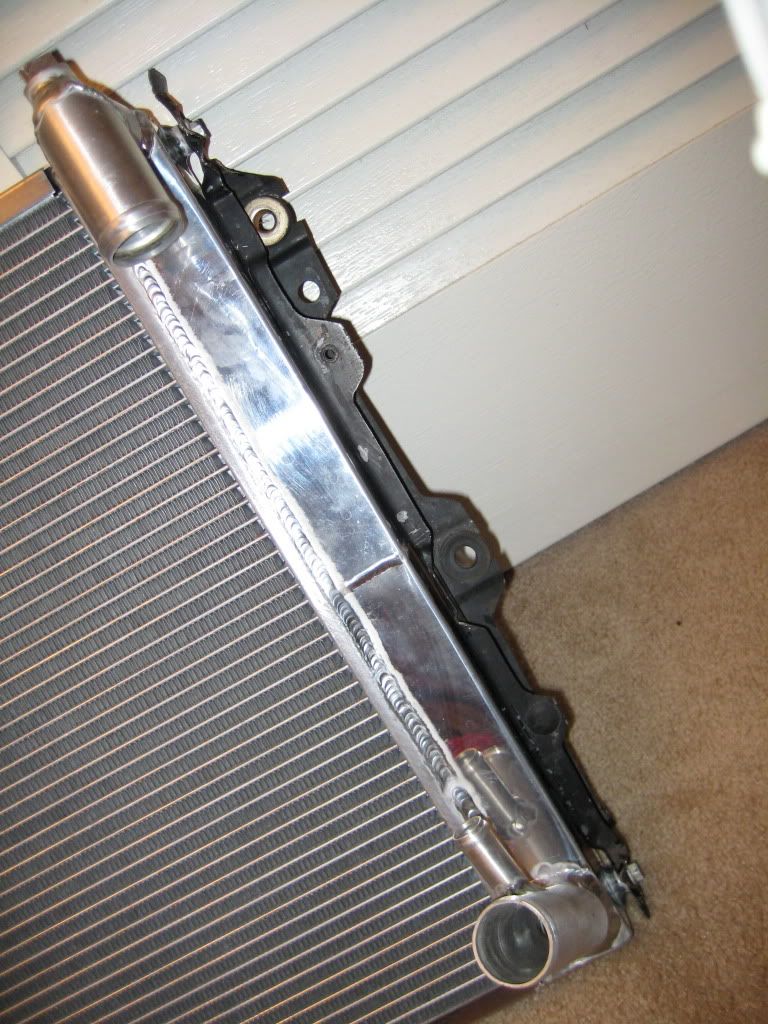
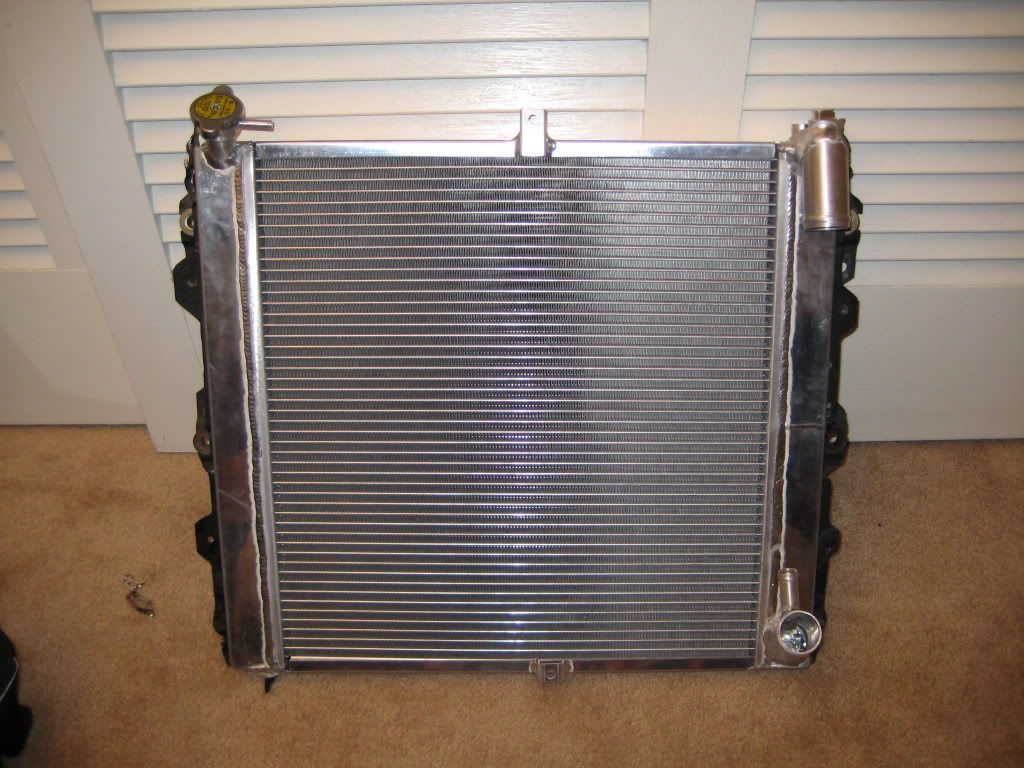
Rebolt the rails to the car and test fit your new rad. Figure out how much clearance you want from the AC condenser and anything else you may have crammed in there.
Mark off where the new rad's mounting holes are onto the rails so you can drill the holes accordingly and then bolt the rails to the rad.
Im finished for now, because its dark outside and I don't have good lighting to safely work. Ill get on it first thing in the morning though. Im sure I forgot something so just let me know and ill go get more pics/clear up anything confusing tomorrow.
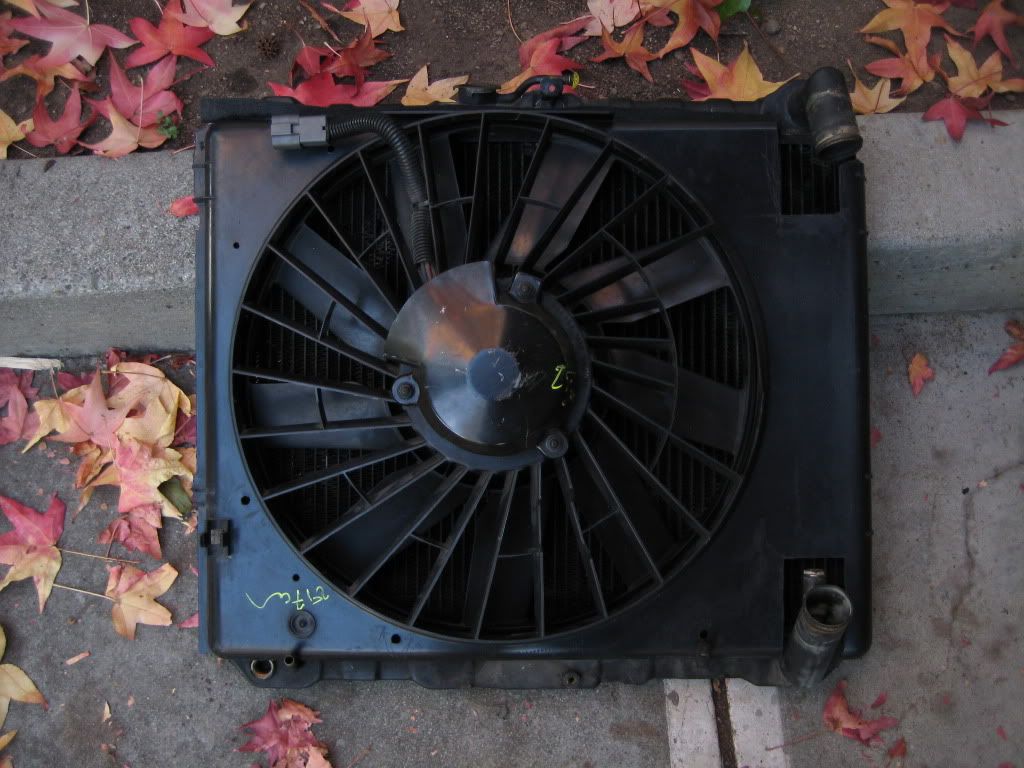
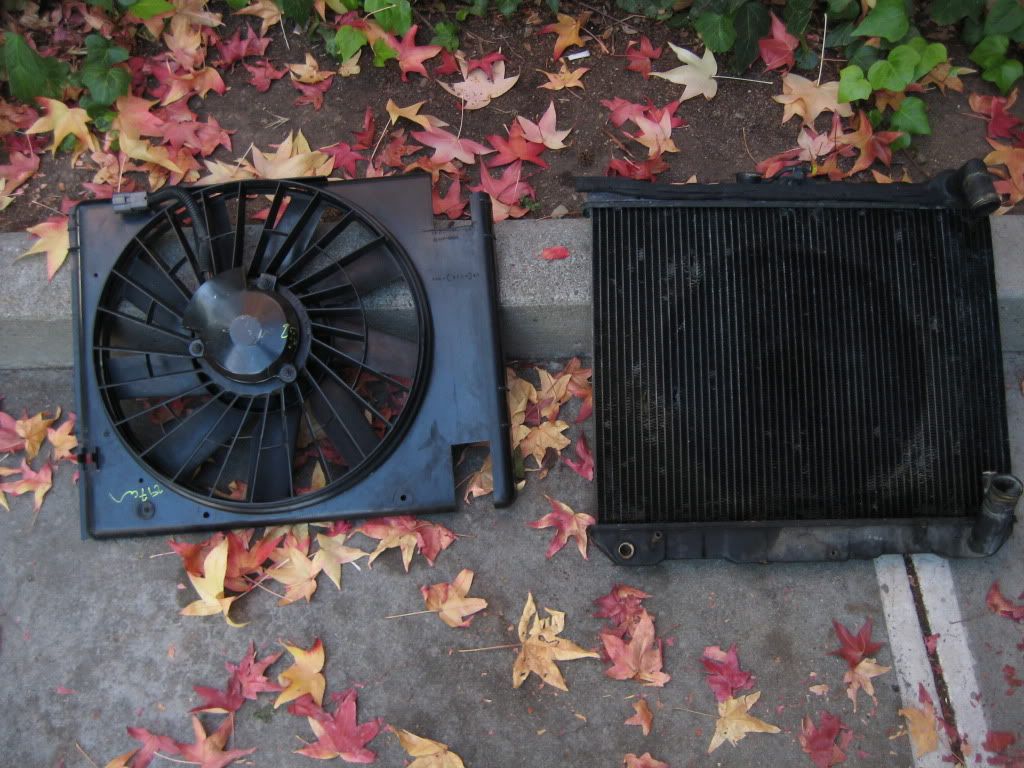
Here are a picture of my old rad and new electric fan. After some slight trimming is done the fan fits like a glove over the ENTIRE RAD from end tank to tank.
-Masahiro
The only thing that might be a problem is, if you are using a belt driven fan you are gonna have to come up with a fancy way of trimming and mounting the fan shroud cuz the Godspeed rad is about TWICE as thick as the OE radiator. I have an Electric fan conversion so Im covered.
The fan is from a mid 90's Nissan quest.
Tools
Vice grip to bend the rails (table vice or C Clamp would be better)
Hand drill with 5/16 bit
Some thinking and man handling
Procedure
First take out the clutch fan and shroud then undo all rad hoses. Take the rad out by undoing the four bolts holding the rails to the car, you will have to take out the battery and battery mount to get to the lower drivers side bolt, then detach the rails/mounts from the rad. Im not sure how hard that would be because my radiator was already knocked loose from the rails and I can see that some type of Glue/cement? maybe welding? was used to attach the rails to the radiator.
As you can see in this picture the rails were some how magically attached to the rad.
Bend the rail edges flat so it will be easier to even out the tips. When I say edges I mean the sides that are standing up perpendicular to the surface you are gonna drill. the sideways W shape is the result of my flattening because I used my handy vice grip.
Rebolt the rails to the car and test fit your new rad. Figure out how much clearance you want from the AC condenser and anything else you may have crammed in there.
Mark off where the new rad's mounting holes are onto the rails so you can drill the holes accordingly and then bolt the rails to the rad.
Im finished for now, because its dark outside and I don't have good lighting to safely work. Ill get on it first thing in the morning though. Im sure I forgot something so just let me know and ill go get more pics/clear up anything confusing tomorrow.
Here are a picture of my old rad and new electric fan. After some slight trimming is done the fan fits like a glove over the ENTIRE RAD from end tank to tank.
-Masahiro
