
re-do my 100 mile rebuild
 12-10-11, 11:55 AM
#26
yeah, good god my ports look better than that and it was my first time
http://imageshack.us/g/804/p4090028f.jpg/
IIRC I was running short on time and I think my sandpaper mandrel was still being shipped so I assembled as is. Motor pulls hard after 20k miles and doesn't smoke.
http://imageshack.us/g/804/p4090028f.jpg/
IIRC I was running short on time and I think my sandpaper mandrel was still being shipped so I assembled as is. Motor pulls hard after 20k miles and doesn't smoke.

 12-10-11, 03:50 PM
#29
I pressure test the coolant system on EVERY rebuild I do.
This is done right after I torque down the tension bolts.
This way if there is a problem, as there was in your case. It can be fixed right away. Not after the engine is installed.
Atkins Rotary sells them for $60. A good investment for any rebuild.
Here is a link to Atkins; http://atkinsrotary.com/store/catalo...t-p-16858.html
Good luck,
-Robert.
12-10-11, 06:13 PM
#31
I pressure test the coolant system on EVERY rebuild I do.
This is done right after I torque down the tension bolts.
This way if there is a problem, as there was in your case. It can be fixed right away. Not after the engine is installed.
Atkins Rotary sells them for $60. A good investment for any rebuild.
Here is a link to Atkins; http://atkinsrotary.com/store/catalo...t-p-16858.html
Good luck,
-Robert.
This is done right after I torque down the tension bolts.
This way if there is a problem, as there was in your case. It can be fixed right away. Not after the engine is installed.
Atkins Rotary sells them for $60. A good investment for any rebuild.
Here is a link to Atkins; http://atkinsrotary.com/store/catalo...t-p-16858.html
Good luck,
-Robert.
12-10-11, 09:24 PM
#32
Just cruising
Thread Starter

Join Date: Oct 2004
Location: Weirton, WV
Posts: 602
Likes: 0
Received 0 Likes
on
0 Posts
I agree that some people should not be doing their own porting, the primary porting was actually unusable. Whoever worked on this engine was truely an amateur. Many mistakes were made. I have an extra front iron, I'll try to match the other secondary port.
12-10-11, 09:41 PM
#33
Just cruising
Thread Starter
Join Date: Oct 2004
Location: Weirton, WV
Posts: 602
Likes: 0
Received 0 Likes
on
0 Posts
I pressure test the coolant system on EVERY rebuild I do.
This is done right after I torque down the tension bolts.
This way if there is a problem, as there was in your case. It can be fixed right away. Not after the engine is installed.
Atkins Rotary sells them for $60. A good investment for any rebuild.
Here is a link to Atkins; http://atkinsrotary.com/store/catalo...t-p-16858.html
Good luck,
-Robert.
This is done right after I torque down the tension bolts.
This way if there is a problem, as there was in your case. It can be fixed right away. Not after the engine is installed.
Atkins Rotary sells them for $60. A good investment for any rebuild.
Here is a link to Atkins; http://atkinsrotary.com/store/catalo...t-p-16858.html
Good luck,
-Robert.
The problem on this rebuild started after about two hours and one hundred miles.
12-11-11, 12:47 PM
#35
Just cruising
Thread Starter
Join Date: Oct 2004
Location: Weirton, WV
Posts: 602
Likes: 0
Received 0 Likes
on
0 Posts
I won't be using a patched iron. I didn't see the patch the first time. Was told that the engine had been ported by a rotary shop in FL. Just another lie.
12-11-11, 12:53 PM
#36
Just cruising
Thread Starter
Join Date: Oct 2004
Location: Weirton, WV
Posts: 602
Likes: 0
Received 0 Likes
on
0 Posts
 12-12-11, 09:40 AM
#38
Just cruising
Thread Starter
Join Date: Oct 2004
Location: Weirton, WV
Posts: 602
Likes: 0
Received 0 Likes
on
0 Posts
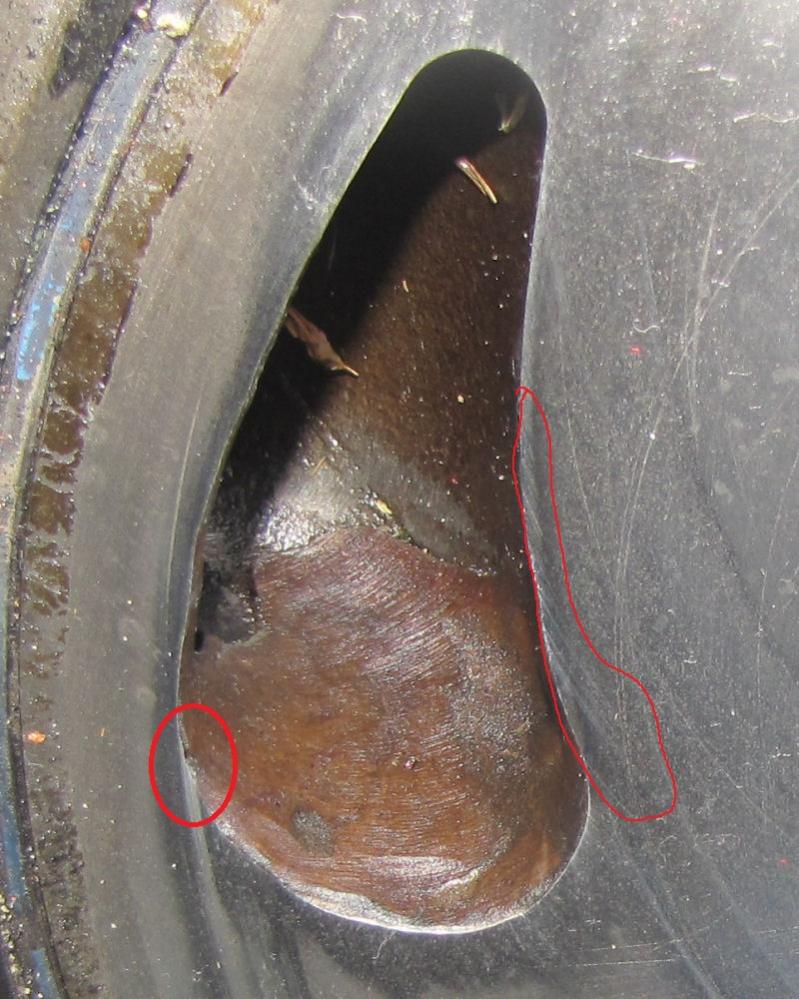
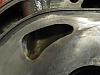
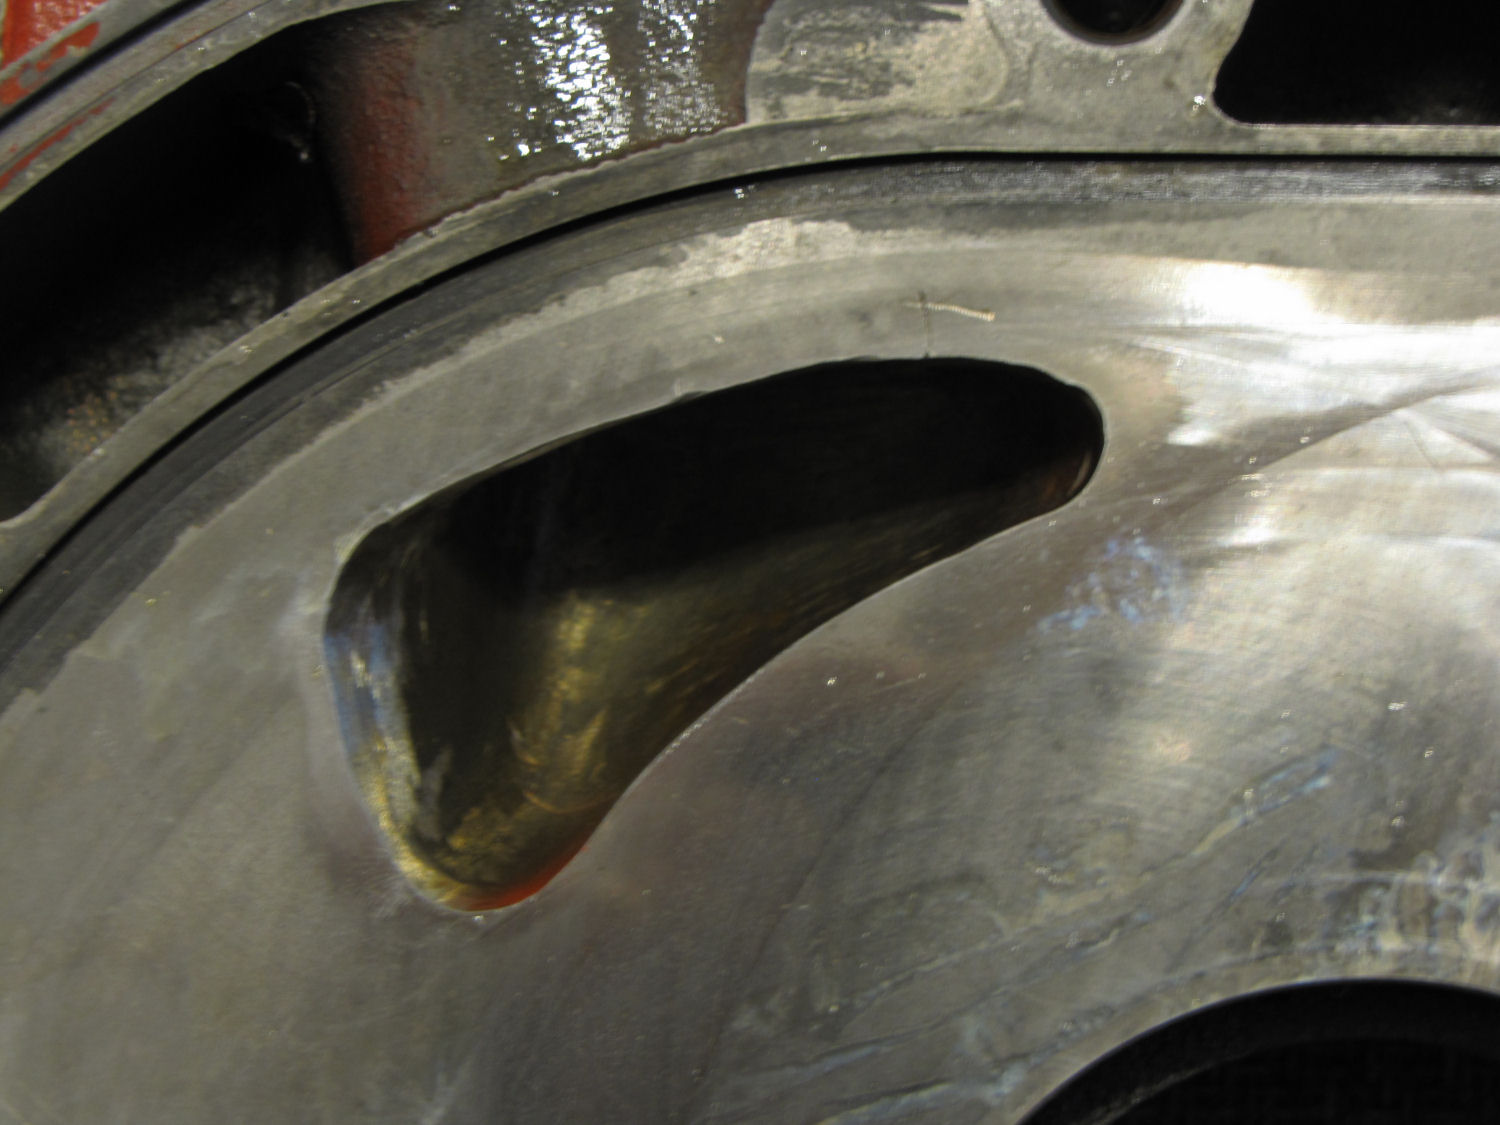
I traced the port on the rear iron and copied it to the front iron. This is what it turned out like. This is my first attempt at porting so I'm sure that it is not perfect.
Is the general shape OK? What does it need done to it?
Is the general shape OK? What does it need done to it?
 12-12-11, 02:06 PM
#39
The side seal paths restrict how early the port can open. Does the opening edge of this port violate the side seal path? Does the port closing edge violate the oil control ring path? Does the apex seal move across the top of the port in a scissor path? Did you change the inside of the runner to match the new port face? Did you back-cut the port opening?
12-12-11, 04:34 PM
#40
Just cruising
Thread Starter
Join Date: Oct 2004
Location: Weirton, WV
Posts: 602
Likes: 0
Received 0 Likes
on
0 Posts
The side seal paths restrict how early the port can open. Does the opening edge of this port violate the side seal path? Does the port closing edge violate the oil control ring path? Does the apex seal move across the top of the port in a scissor path? Did you change the inside of the runner to match the new port face? Did you back-cut the port opening?
12-12-11, 10:28 PM
#42
On a new engine always check hoses make sure they are tight. and do a shake down test in the driveway Intill warm. and make sure all systems are running right. Because i forgot to tighten a few things down myself. so i always make sure things are good to go. Because you never know. Maybe a heater hose came loose. and the water came out? The water came out fast where ever it came out at. So something gave way.
I dont know what parts can or cant be used after it overheats like that. because now they could be warped. and not be usable. You would have to have them all checked with a micrometer or something to that effect. But On a new Engine i would not let anyone drive it Untill I did a shake down test.
I overly look at my gauges. I mean My eyes are on my gauges when not on the road. because these cars get old. and they just need more attention. Depending how much use it has got. Just hope all those parts are old parts and not brand new housings and irons, That could get spendy. If they were used housings and irons. Then at least the cost should not be to high. I rebuilt my engine for around 550. Oil in water means Bad **** has gone on in that engine, They are not like piston engines. When a rotary overheats its all over. They just cant overheat
12-13-11, 12:06 PM
#44
Just cruising
Thread Starter
Join Date: Oct 2004
Location: Weirton, WV
Posts: 602
Likes: 0
Received 0 Likes
on
0 Posts
I am thinking about rebuilding an engine but I see that the rebuild kits are over a $1000. I am assuming you reused some of the old parts. Which parts are usually reusable? My plan is to get a engine fromt he junkyard and start rebuilding it, maybe even port it, while I drive my rx. After I finish I can swap it.
after I had already purchased all of these parts new, just out of curiosity, I checked the seals and they were hardly worn.
The corner seals were not reusable and the springs were the OEM wire type.

Thread
Thread Starter
Forum
Replies
Last Post
rxmiles
3rd Generation Specific (1993-2002)
9
08-24-15 02:07 PM