That Nasty Window Trim...
#1
That Nasty Window Trim...
We've all suffered from it- or known someone who has-, the heartbreak of peeling, rusty exterior door trim.
You know the part- it's the piece that goes along the bottom of the door glass and seals the window (in theory, at least).
By now our cars approach, or have surpassed, 20 years old and that part has definitely seen better days.
Typically, the rubber is dried and cracked, the coating over the metal is peeling and visible rust has set in.
Not good.
Here is mine, and this is the good side...
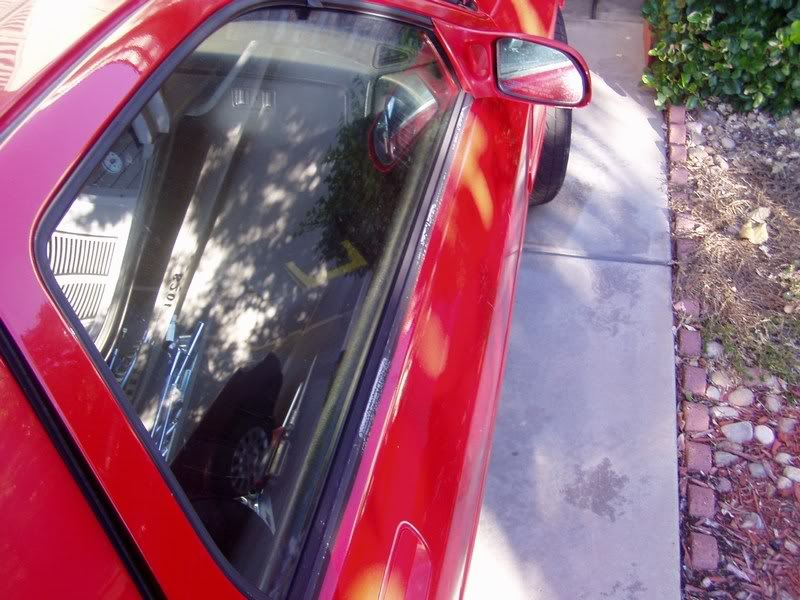
I had done a half-assed repair/repaint a few months ago but trying to prep the metal properly without destroying the rubber that was left was a goal that completely eluded me.
Now, it is possible to buy new pieces from Mazda- I believe they are @ $50 apiece- but that seemed like a silly expense until the car gets repainted, kinda like putting lipstick on a pig, as it were.
Having failed to repair the part and being unwilling to purchase them new, I resorted to my favorite alternative- the junkyard.
Well, no real surprise...all the potential donor cars were in worse shape than mine.
So I started looking at non-RXs as possible donors.
Not as easy as I first thought.
First of all, we have very long doors- much longer than most.
Second, the trim is dead straight...many of the cars that seemed likely at first have (sometimes) subtle curves and the trim just won't bend straight.
Damn.
Third, it's amazing how many different ways manufacturers affix this trim to the car.
Many likely pieces had to be discarded because I just couldn't remove them without damage.
Again, damn.
Finally though, a suitable piece presented itself in the form of a Integra DX.
It clipped on like the stock Mazda piece and was actually longer than needed, so there was room to fiddle.
Here's a (poorly shot) comparison...
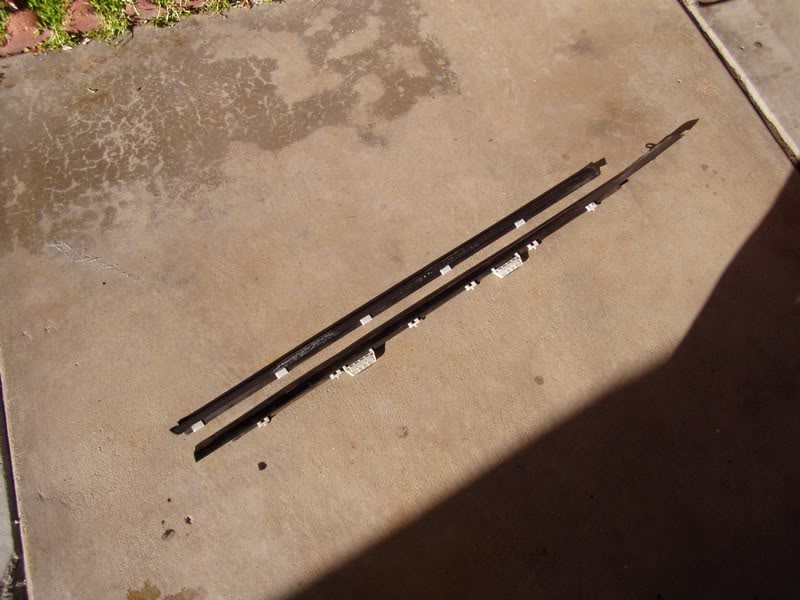
The Honda piece is about 1/4" taller than the RX's but beggars can't be choosers and I decided to see what would happen.
I was charged $1 apiece BTW, so really, what did I have to lose?
After trimming to approximate length (hand hacksaw) and a bit of Dremel magic, I popped the new trimpiece on.
Amazingly, it fit...pretty damn well if I do say so myself.
This shot shows the trim as it meets the mirror...
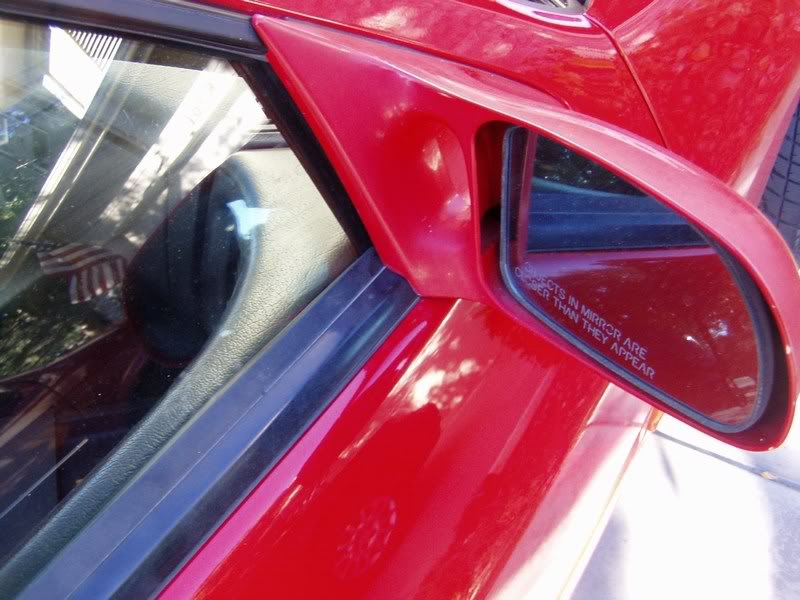
No modification to the mirror relief at all.
Here is a full shot...
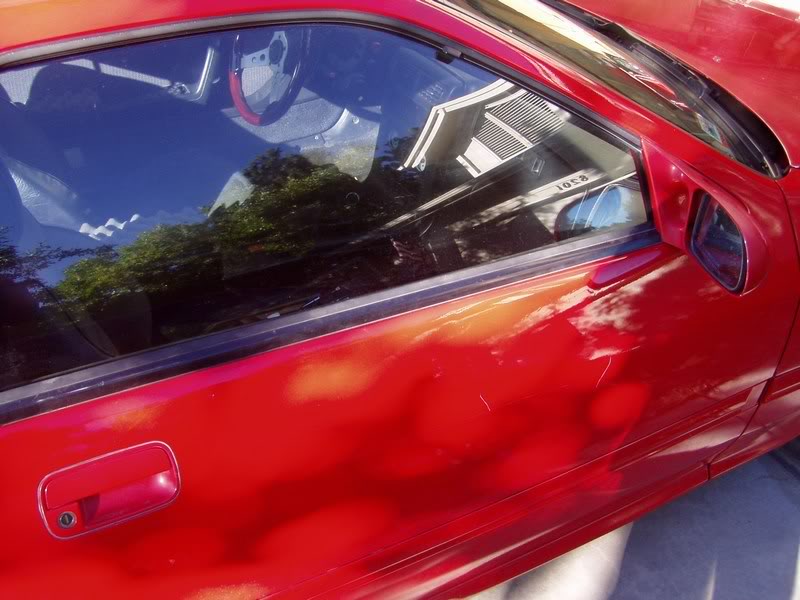
Yes, it is visually a bit bulkier than the original but for $2 and 15 minutes of effort it's miles better than the crappy original.
At least now every time I open the door I won't cringe seeing the deteriorating stock piece and can concentrate on more important matters.
Like lunch.
OK, you can all get back to your Turbo swaps now.
You know the part- it's the piece that goes along the bottom of the door glass and seals the window (in theory, at least).
By now our cars approach, or have surpassed, 20 years old and that part has definitely seen better days.
Typically, the rubber is dried and cracked, the coating over the metal is peeling and visible rust has set in.
Not good.
Here is mine, and this is the good side...

I had done a half-assed repair/repaint a few months ago but trying to prep the metal properly without destroying the rubber that was left was a goal that completely eluded me.
Now, it is possible to buy new pieces from Mazda- I believe they are @ $50 apiece- but that seemed like a silly expense until the car gets repainted, kinda like putting lipstick on a pig, as it were.
Having failed to repair the part and being unwilling to purchase them new, I resorted to my favorite alternative- the junkyard.
Well, no real surprise...all the potential donor cars were in worse shape than mine.
So I started looking at non-RXs as possible donors.
Not as easy as I first thought.
First of all, we have very long doors- much longer than most.
Second, the trim is dead straight...many of the cars that seemed likely at first have (sometimes) subtle curves and the trim just won't bend straight.
Damn.
Third, it's amazing how many different ways manufacturers affix this trim to the car.
Many likely pieces had to be discarded because I just couldn't remove them without damage.
Again, damn.
Finally though, a suitable piece presented itself in the form of a Integra DX.
It clipped on like the stock Mazda piece and was actually longer than needed, so there was room to fiddle.
Here's a (poorly shot) comparison...

The Honda piece is about 1/4" taller than the RX's but beggars can't be choosers and I decided to see what would happen.
I was charged $1 apiece BTW, so really, what did I have to lose?
After trimming to approximate length (hand hacksaw) and a bit of Dremel magic, I popped the new trimpiece on.
Amazingly, it fit...pretty damn well if I do say so myself.
This shot shows the trim as it meets the mirror...

No modification to the mirror relief at all.
Here is a full shot...

Yes, it is visually a bit bulkier than the original but for $2 and 15 minutes of effort it's miles better than the crappy original.
At least now every time I open the door I won't cringe seeing the deteriorating stock piece and can concentrate on more important matters.
Like lunch.
OK, you can all get back to your Turbo swaps now.
#3
How astute of you to ask about the difficult end.
I thought my pic would show that but it didn't.
Lemme try again...
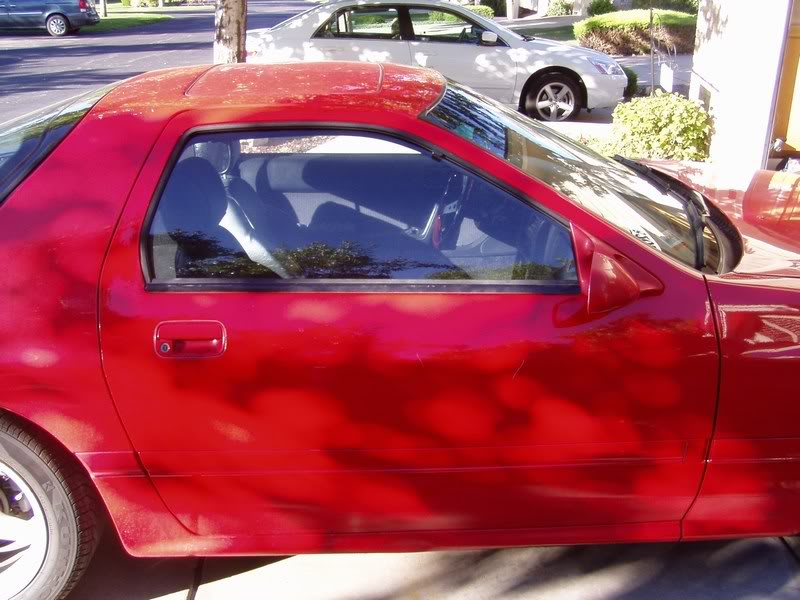
It could use some work to precisely match the curve of the original but I decided to procure a second backup set before I went any further.
This looks OK from a few feet (pretty much like the whole car actually) and I didn't want to go too far without a spare to fall back on if necessary.
Wait till you see my Volvo clock.
I thought my pic would show that but it didn't.
Lemme try again...

It could use some work to precisely match the curve of the original but I decided to procure a second backup set before I went any further.
This looks OK from a few feet (pretty much like the whole car actually) and I didn't want to go too far without a spare to fall back on if necessary.
Originally Posted by rd turbo
Oh but the thought of an Acura part on a Mazda!!!! That would just about kill me....

Last edited by clokker; 09-21-07 at 10:54 AM.
#6
The plastic **** is a coating to a metal piece underneath (where it rusts).
Scrape the plastic off - its easy after 20 years of sun baking.
Carefully sand the rust off, mask and rattle ball it black.
Looks better than new.
Scrape the plastic off - its easy after 20 years of sun baking.
Carefully sand the rust off, mask and rattle ball it black.
Looks better than new.
Trending Topics
#8

#12
great work!!
i sanded mine and re-painted them 2 years ago and guess what....RUSTED again!
i think this is a great alternative to buying new ones or trying to restore a rusted old piece of metal!
AND BTW: do you visit the yards daily!?!?!?
i sanded mine and re-painted them 2 years ago and guess what....RUSTED again!
i think this is a great alternative to buying new ones or trying to restore a rusted old piece of metal!
AND BTW: do you visit the yards daily!?!?!?

#14
Lately, yes.
Typically, once or twice a week depending on the weather, but I'm trying to get stuff done before winter sets in....
Please do.
I think you'll find the hard part is deciding just where to stop stripping.
The plastic coating extends beyond the metal frame- for instance, it also forms a small lip on the bottom edge and also extends over the top as well as forming the trim edge at the back corner.
Once you start peeling away the plastic it seems like everything wants to come off.
Typically, once or twice a week depending on the weather, but I'm trying to get stuff done before winter sets in....
Originally Posted by micaheli
That was my plan for my build-up.... Its gonna get a perty sheen of paint/clear. Maybe I'll do an official write-up.
I think you'll find the hard part is deciding just where to stop stripping.
The plastic coating extends beyond the metal frame- for instance, it also forms a small lip on the bottom edge and also extends over the top as well as forming the trim edge at the back corner.
Once you start peeling away the plastic it seems like everything wants to come off.
Last edited by clokker; 09-21-07 at 04:30 PM.
#17
The trim extends underneath the mirror so you'll have to loosen it as well (but it need not be entirely removed or, in the case of electric mirrors, unplugged).
It is basically just a friction fit- by means of plastic clips- on a metal lip.
Just pry/lift on one end and it should pop right off.
If your car has been repainted with the trim in place you may have more difficulty.
#19
I used a wire wheel on a bench grinder. If you hold the trim at a certain angle, the plastic and rust come right off....then brake cleaner on the fresh metal, mask the rubber seal, then Krylon Semi-flat Black......flat black is too flat and gloss black is....well.....you get it. I have used this paint for several years on wiper arms too, and it doesn't attack or etch plastic so it works perfectly on ash trays, shifter bezels, cluster surrounds, etc. I have pics if anyone should be interested.
#21
Very creative solution! I bought all new window rubber/trim 4 years ago from my brother when he was a parts mgr for mazda dealership. Got the parts at cost, but still was very pricey.
#22
Obviously the option of choice and exactly what I plan on doing when (IF?) the body ever gets redone.
I consider this solution to be a temporary stopgap till that time.
For all those who have suggested ways to restore the original pieces-
I appreciate the effort (and the thinking behind it) but...on my strips not only was the decorative plastic peeling but the sealing rubber was dried and stiff, so simply restoring the part's look would have left it's function, well, dysfunctional.
Painting seemed like a lot of work to make a poorly performing part just look good.
#23
looks good. I myself just pulled the piece off, sanded it down with a die grinder stone and sand paper and primered and painted it.. It looks quite nice and was next to free...
as for taking the window scrapers off all u do is get a flat blade screw driver. and in the corner next to the door handle just lightly pry up and it will pop up with no hard pushing and/or pulling.. no scrapes in the paint and you DONT have to loosen the mirror atleast I did not
Dave
as for taking the window scrapers off all u do is get a flat blade screw driver. and in the corner next to the door handle just lightly pry up and it will pop up with no hard pushing and/or pulling.. no scrapes in the paint and you DONT have to loosen the mirror atleast I did not
Dave


