3D part designs - screw covers and sun visor bushings
The following users liked this post:
bravebluerx (01-26-23)
#27
Rotary Enthusiast
iTrader: (10)
center console plate in the armrest. Has a few variations including one with a cup holder!
https://www.thingiverse.com/thing:5627934
https://www.thingiverse.com/thing:5627934
The following users liked this post:
bravebluerx (01-26-23)
#28
Rotary Enthusiast
Thread Starter
This is a part that I've wanted to replace for a long while. Due to age, the tangs become brittle and easily break off. It also means that I won't feel so guilty about drilling holes for things like ***** and LEDs.
I'm literally printing the panel with switches as of this writing. Thanks.
I'm literally printing the panel with switches as of this writing. Thanks.
Last edited by cluosborne; 11-13-22 at 03:11 PM.
#29
Rotary Enthusiast
iTrader: (10)
This is a part that I've wanted to replace for a long while. Due to age, the tangs become brittle and easily break off. It also means that I won't feel so guilty about drilling holes for things like ***** and LEDs.
I'm literally printing the panel with switches as of this writing. Thanks.
I'm literally printing the panel with switches as of this writing. Thanks.
#30
Rotary Enthusiast
Thread Starter
I'm printing in Atomic PETG Pro black filament with 100% in-fill. The question mark is still going to be the tangs themselves. They are small and notoriously easy to break. It'll ultimately depend on how well the layers are bonded together and how careful I am installing the panel.
I might end up re-printing it since I decided to print it face-down. It may be better to paint it on its side and use support material to make the tangs stronger. But PETG has some flexibility. So we'll see.
I might end up re-printing it since I decided to print it face-down. It may be better to paint it on its side and use support material to make the tangs stronger. But PETG has some flexibility. So we'll see.
Last edited by cluosborne; 11-13-22 at 05:18 PM.
#31
Rotary Enthusiast
Thread Starter
Okay, printed it out. I need to specify that the center console in the car is an S5 but the one I'm test-fitting the panel to is an S4.
Like any 3D-printed part, it needs finishing work since I did print it face-down with support material.
The version I printed was the one with all the switch holes. The switches fit.
About the only problem I've run into so far are the mounting tangs. If you're not careful, you will break one of them clean off. They're also a hair too thick--but that might be down to the support material and can be filed down.
I'm hoping to reattach and strengthen them with superglue. But maybe providing a base between the tangs to give them more surface area might help.
Again, printing them face-down didn't help with strength. More likely the layers simply separated.
Last edited by cluosborne; 11-13-22 at 07:39 PM.
#32
Rotary Enthusiast
Thread Starter
Might there be a better way of fitting the center console panel? What about making one end with hooks or change the tangs so instead of a pair per point, it would be just one strong tang per point? Or maybe put in channels in the tangs so you could put in a piece of metal like a bent piece of paperclip or a staple?
#33
Automotive peanut gallery
mine is in great shape but the tangs broke off, carpet is out so I might just glue a nut to the body and paint a bolt black and run it through a hole, undecided yet
#34
Rotary Enthusiast
Thread Starter
That gave me an idea. What about some kind of a fir-tree-type fastening instead of tangs? There's still a question of if the printed material would withstand that sort of use.
Actually, I still think a hook on one end and a strengthened tang on the other end (one hook on each side at one end and one tang on each side on the other end) might work better. Because even if it's printed with the layers along a different axis, you may still risk breaking the tangs off.
Last edited by cluosborne; 11-13-22 at 08:27 PM.
#35
Automotive peanut gallery
You could use some type of slider on the tang so you slide it in and let it spring out when you install it and slide them all in if you want to remove it.
am I over engineering again?
am I over engineering again?
#36
Rotary Enthusiast
iTrader: (10)
yeah, I was wondering if the tangs would break. They are modeled just like the OEM part so I didn't change anything to aid in 3d printing. I think regaurdless of what you do if your layers are running parallel to the flat face of the panel they will always be prone to breaking. I could thin them up to make them a bit more flexable, but then they don't grip the center armrest piece as well. I could probably come up with a little nut plate type insert that you snap into the armrest piece and then screw the plate into that.
#37
Rotary Enthusiast
Thread Starter
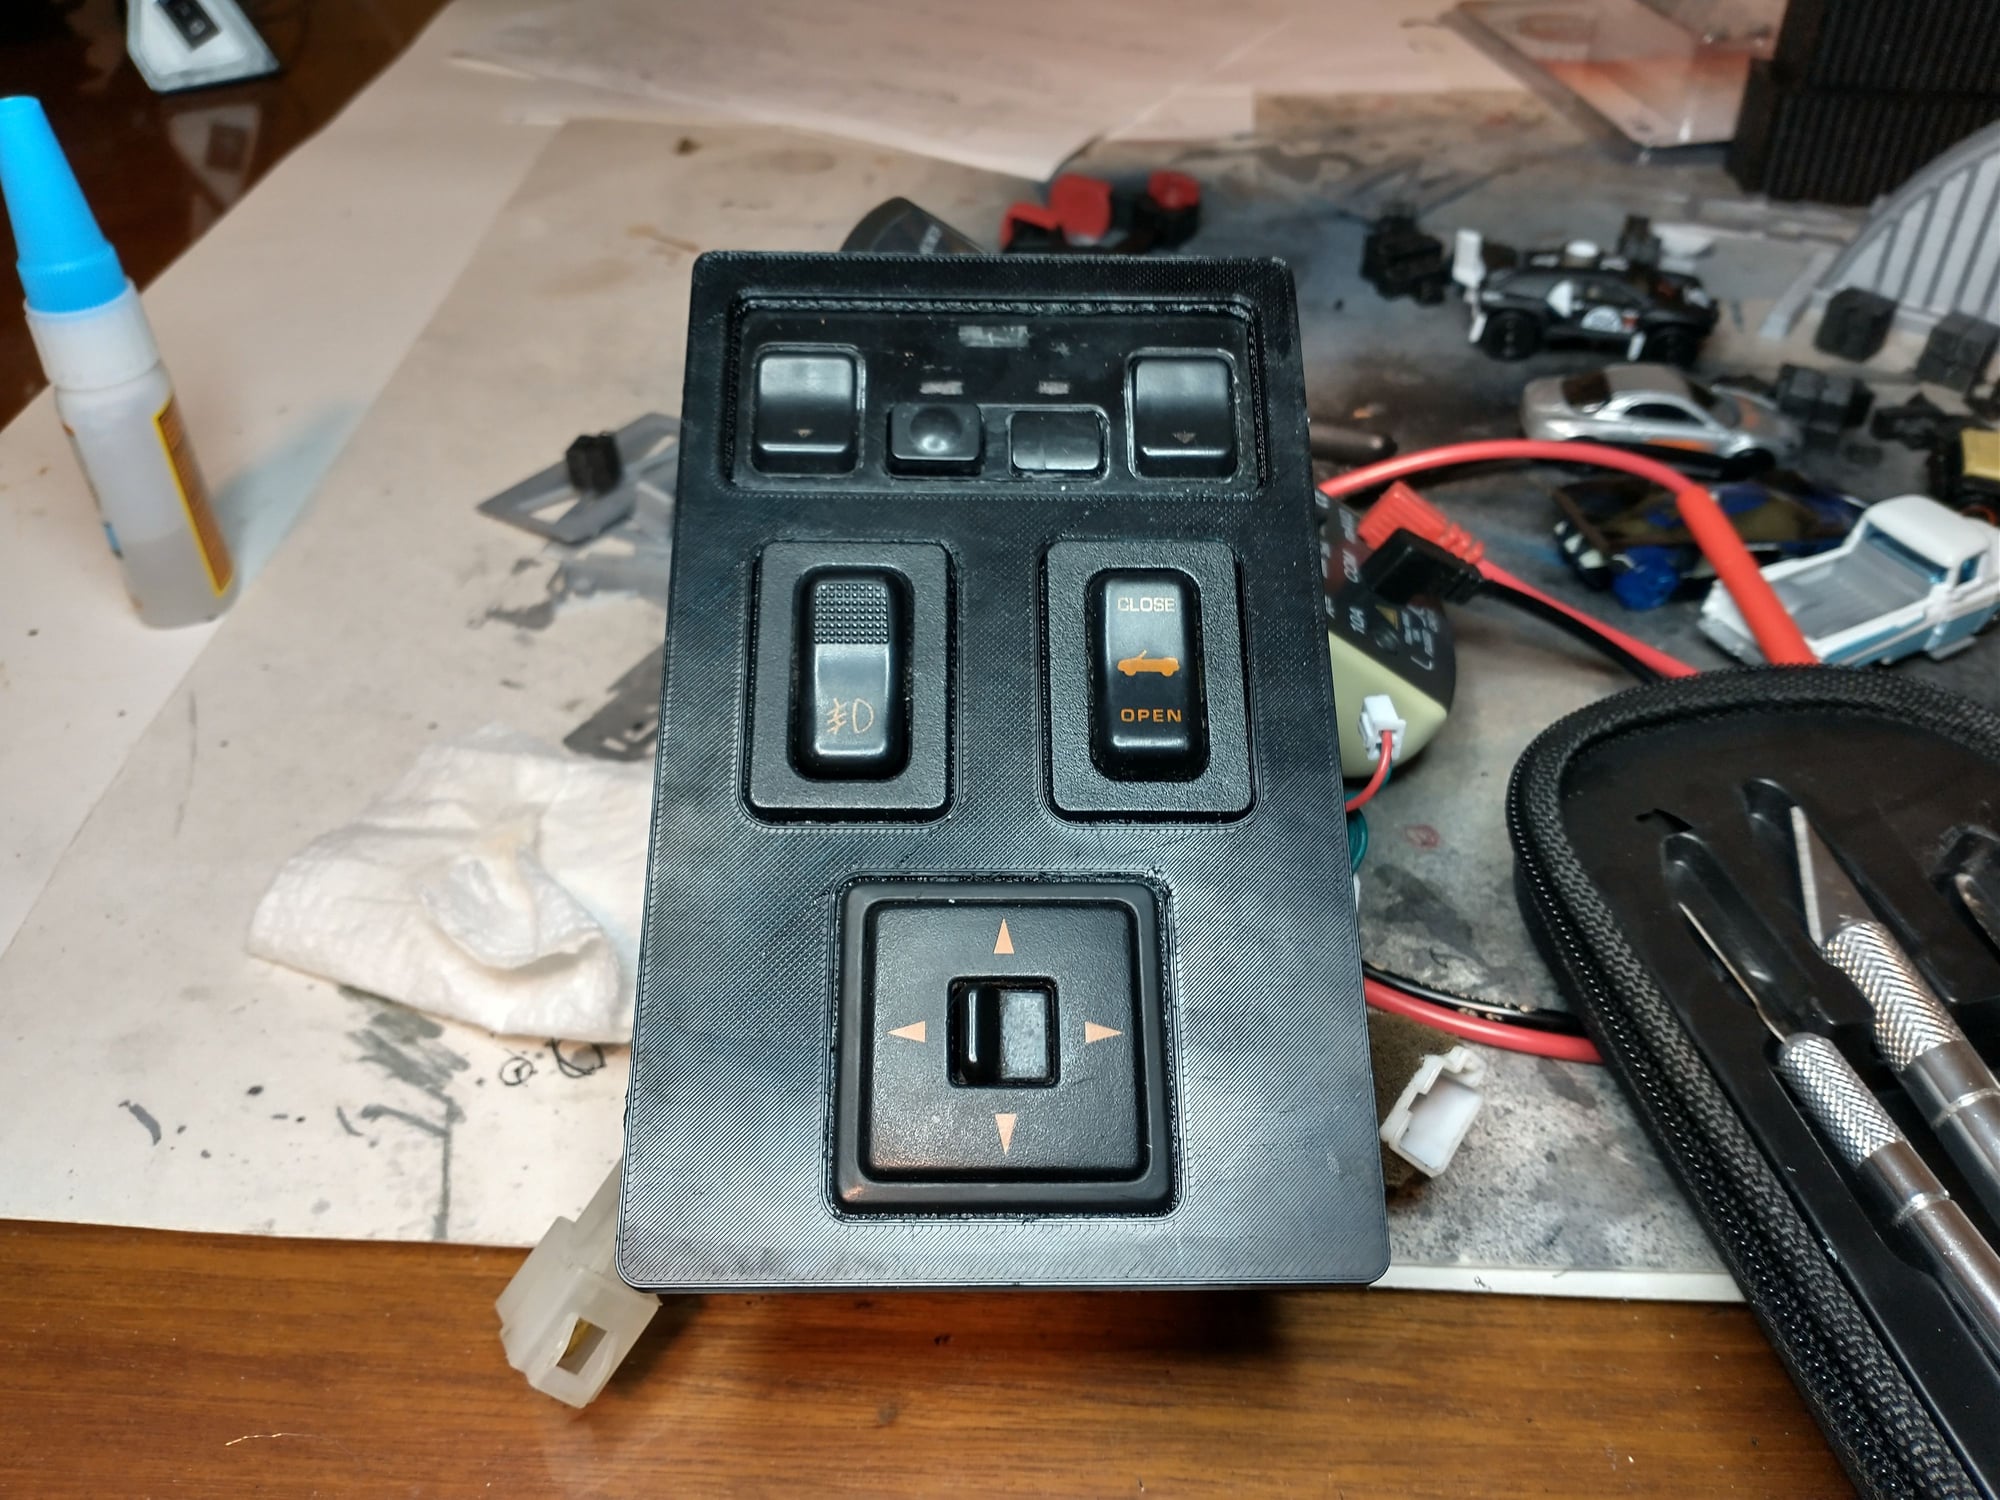
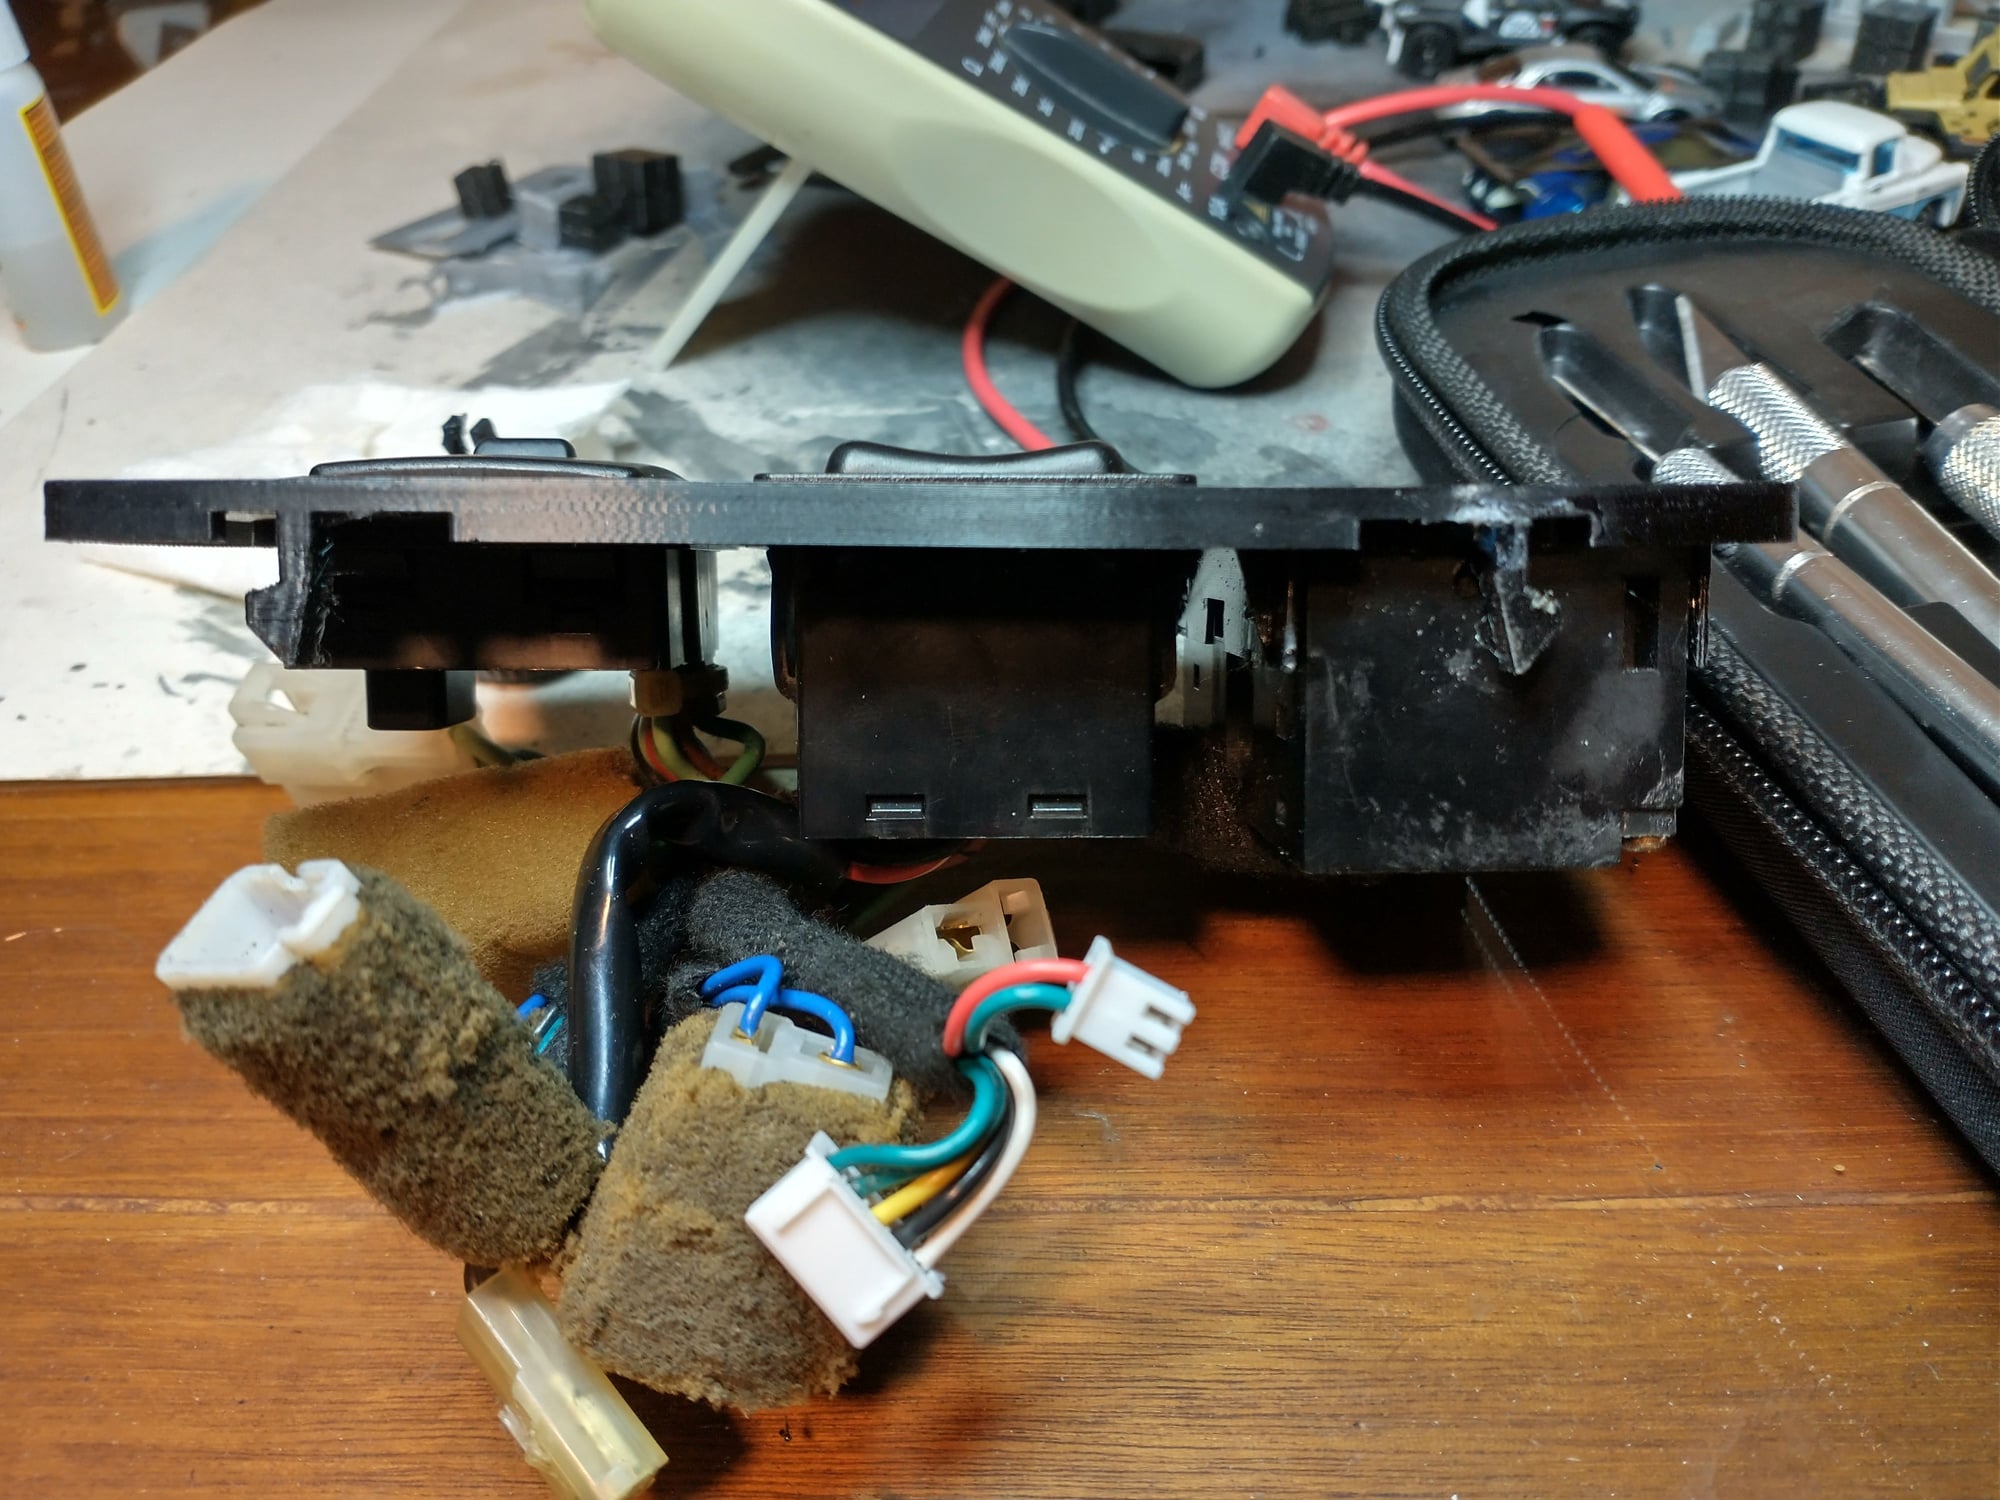
I did try breaking off the inner tangs and only using the outer ones. Then using the set of tangs on one end as hooks, I was able to insert and fasten the panel down to the center console. It seems to stay there, I think turning two of the tangs into hooks and giving the remaining two tangs more surface area might work.
Last edited by cluosborne; 11-14-22 at 08:33 AM.
#39
Rotary Enthusiast
Thread Starter
#40
Rotary Enthusiast
Thread Starter

This is what I had in mind. The clip on the left serves as a reinforced snap-in and snap-out clip while the one on the right is simply a hook that holds panel in place at the other end. The hook shape might need some tweaking to make it easier to insert the panel into place.
Last edited by cluosborne; 11-14-22 at 05:46 PM.
#41
Rotary Enthusiast
Thread Starter
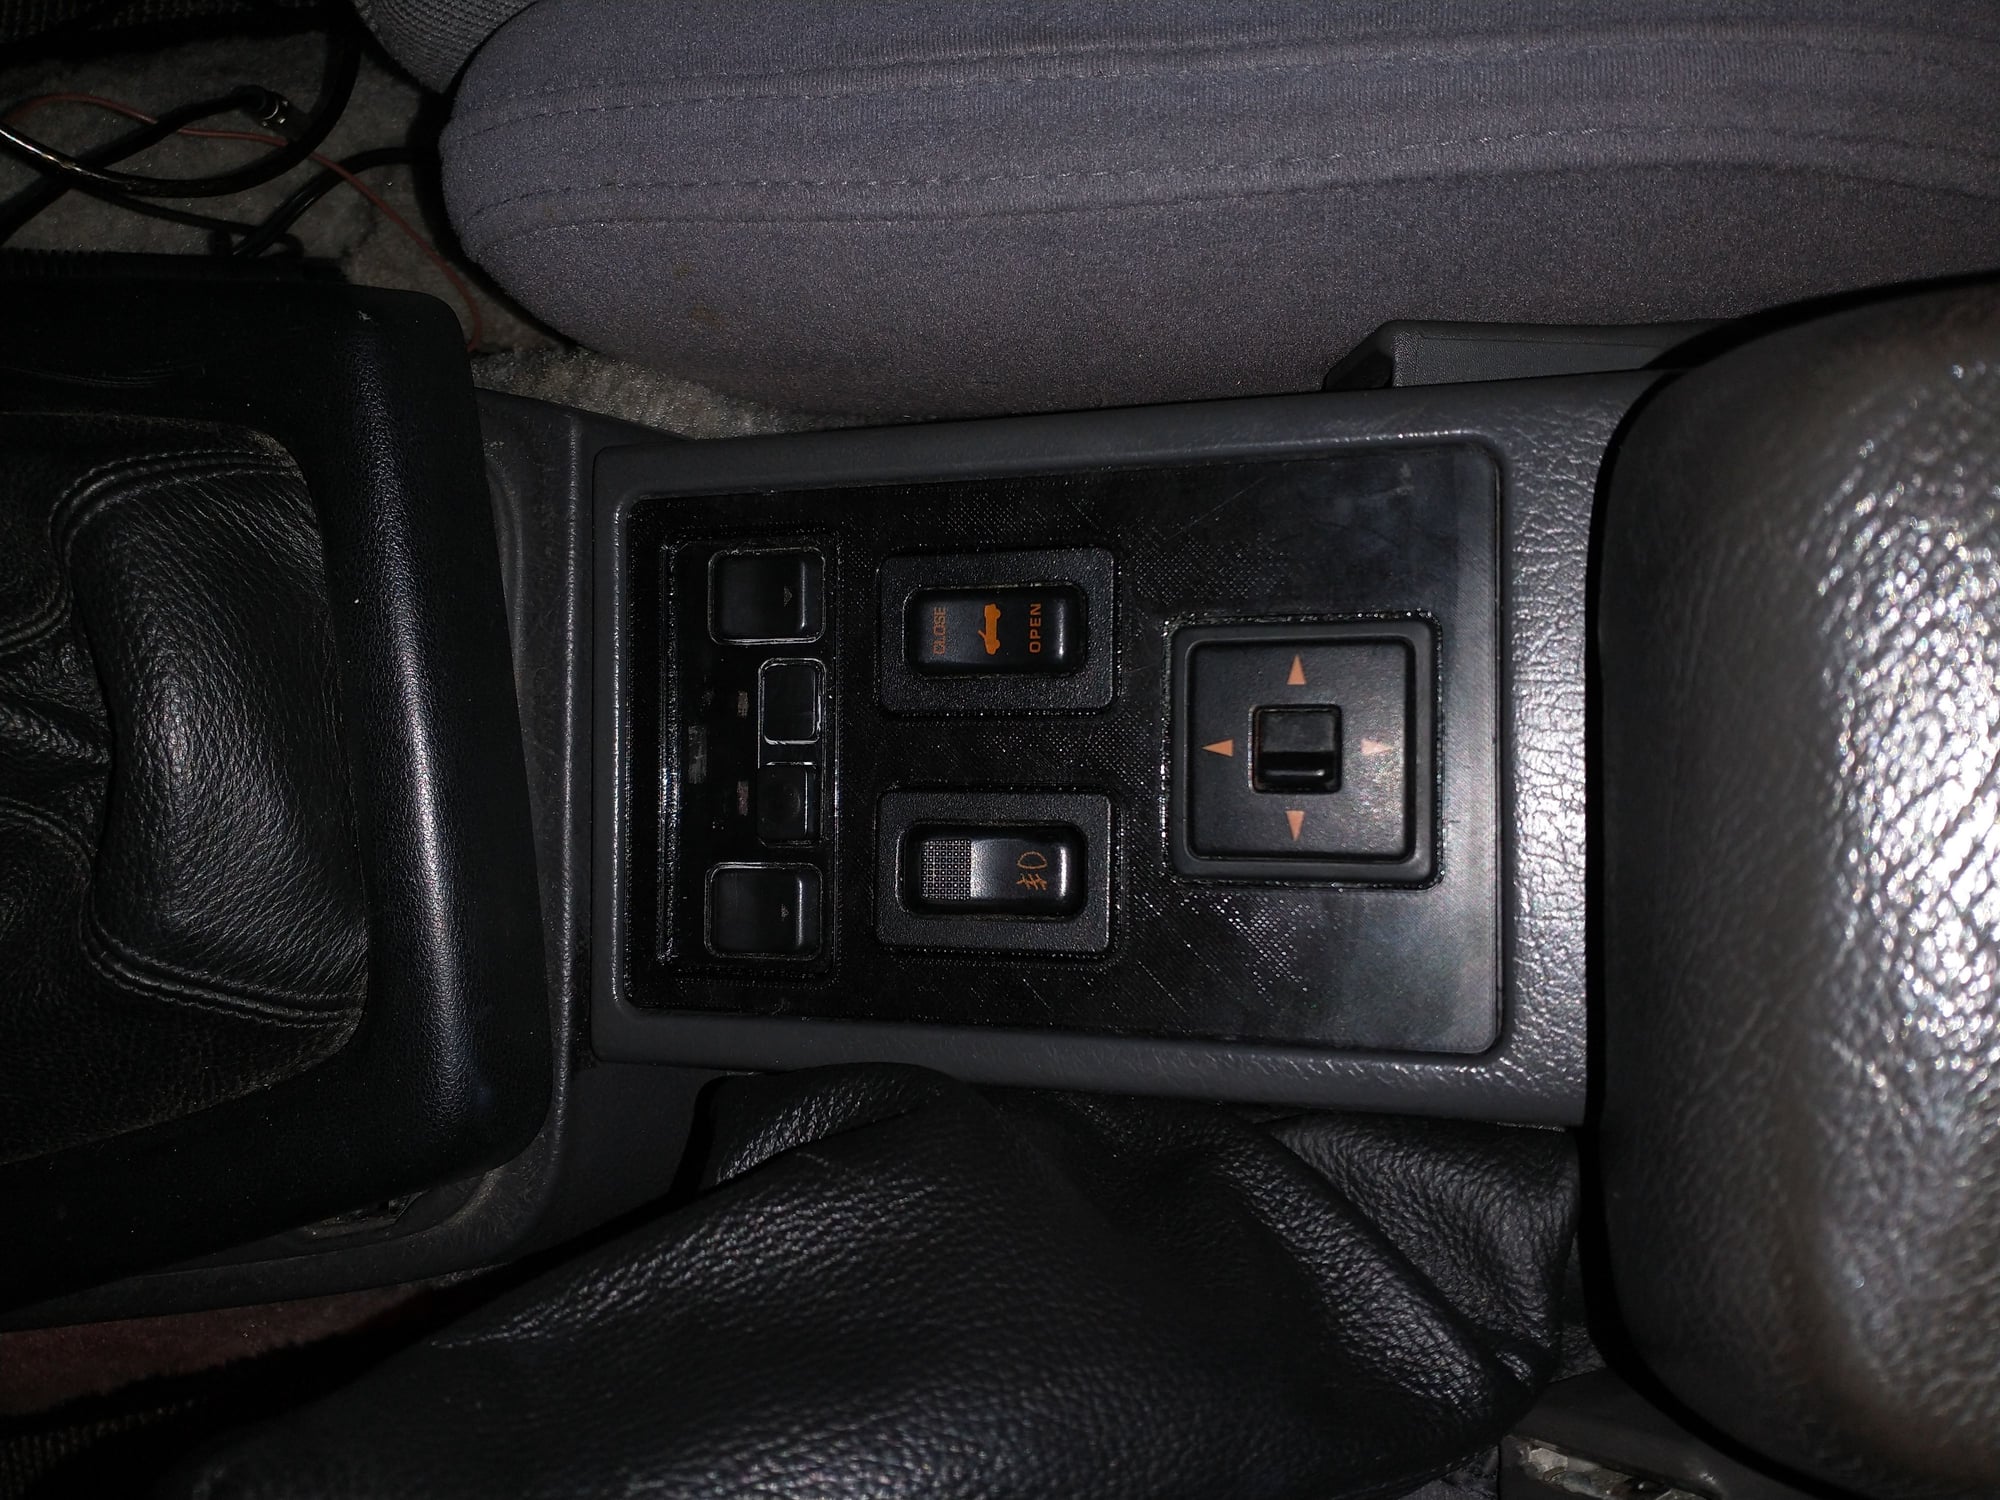
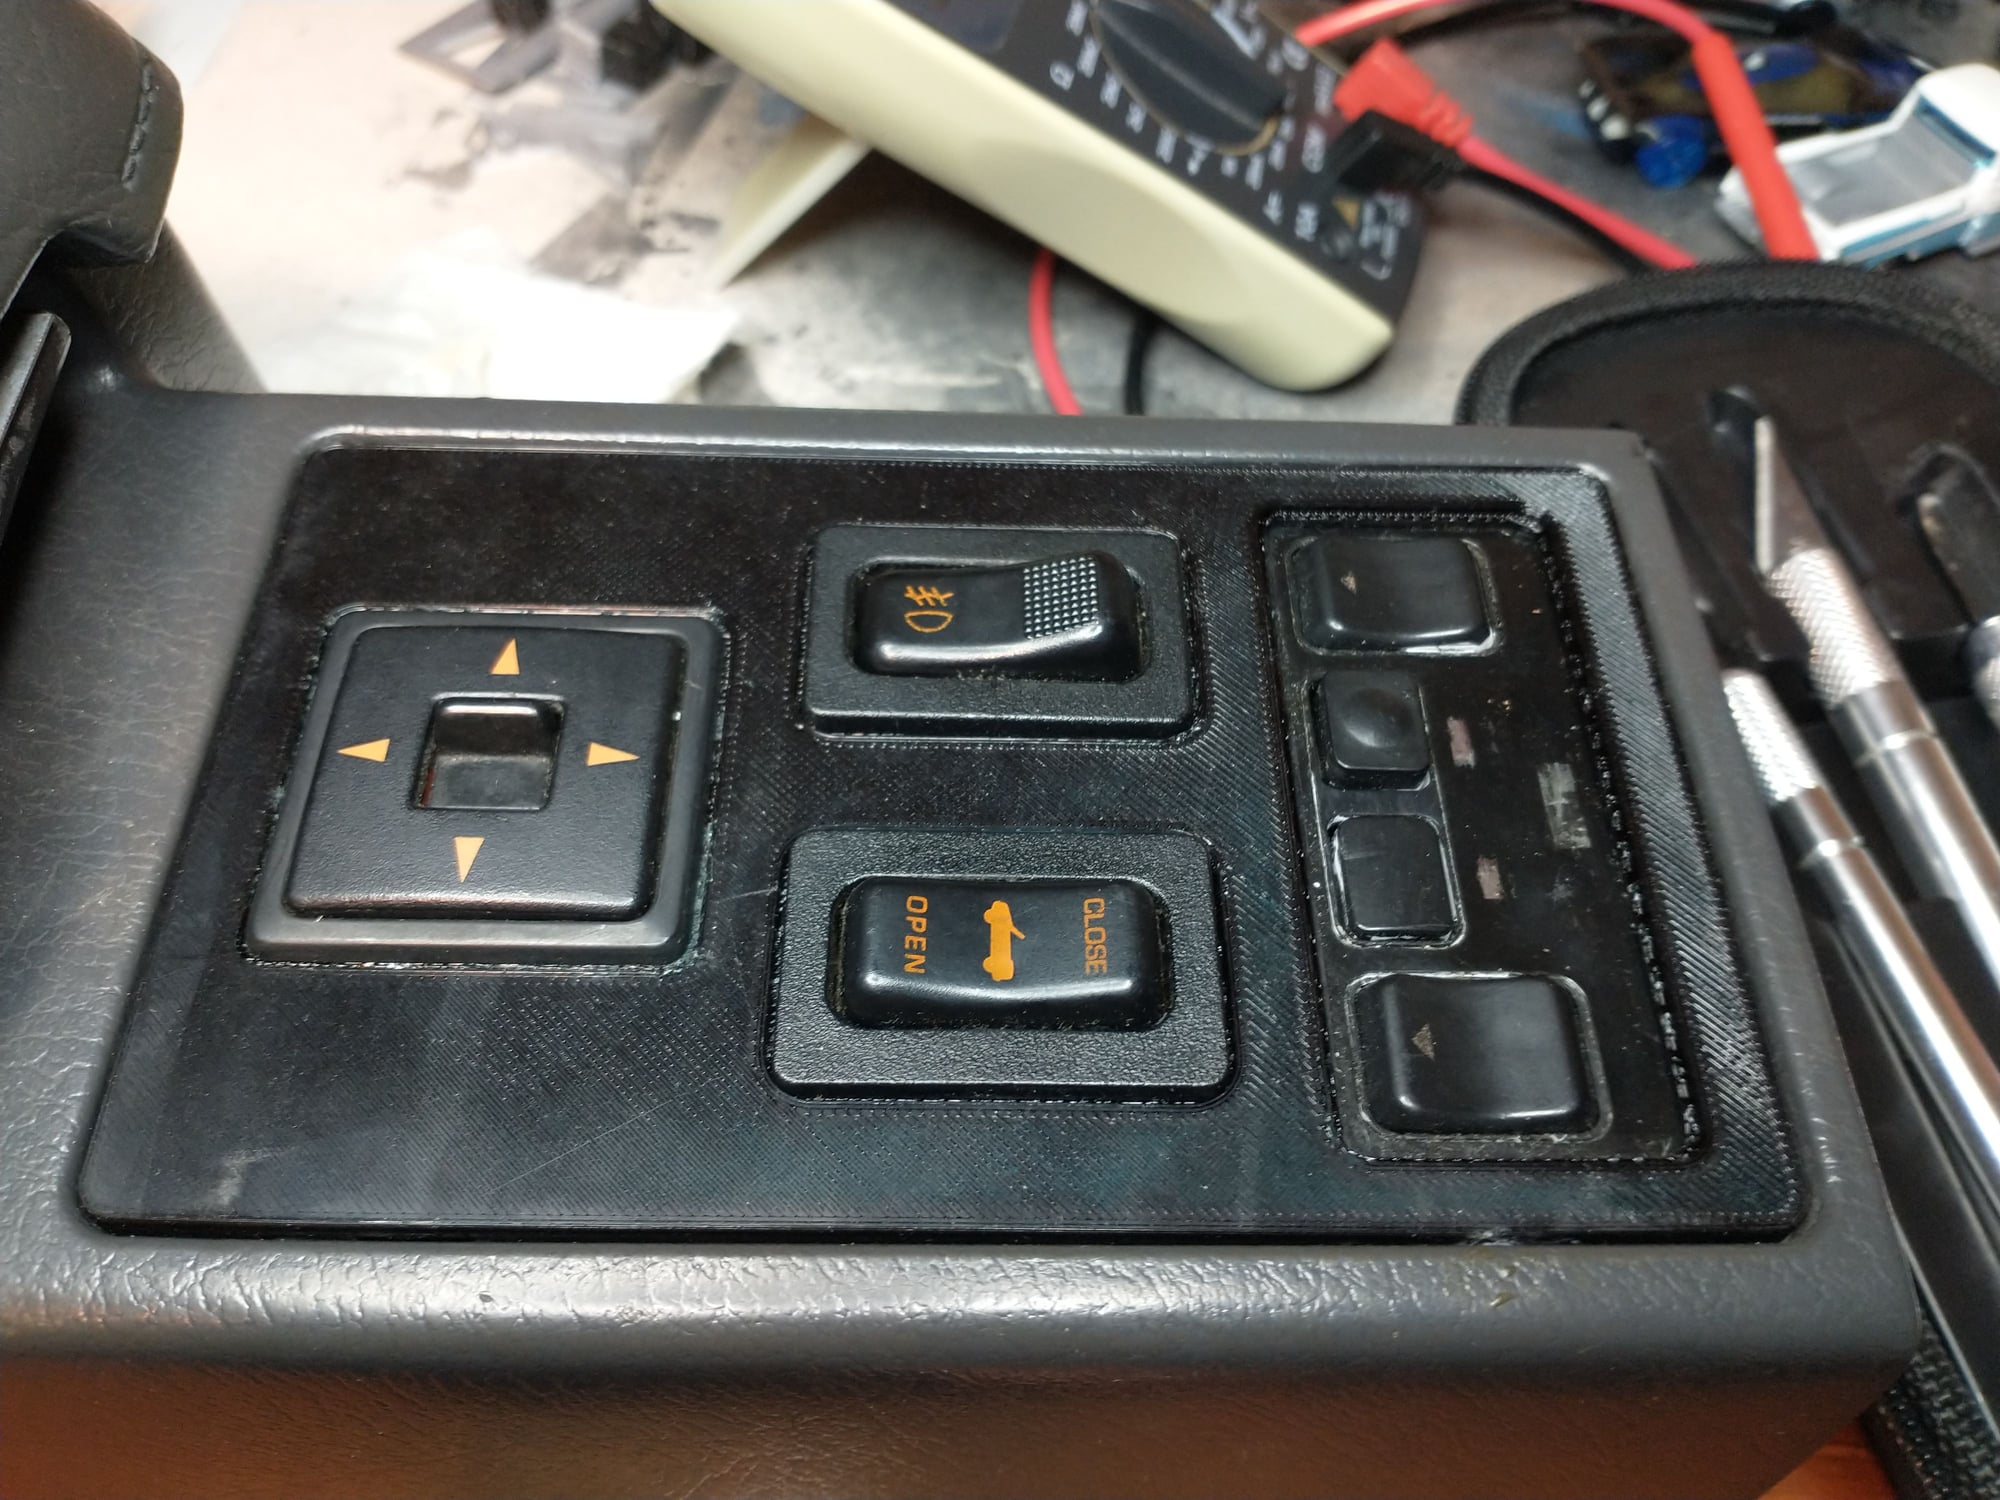
And mounted in the car. The 3D PETG finish is not as out of place as I would've thought, but sanding it and painting in a matte or satin finish paint or a subtle textured black paint might spiffy it up a bit more. I don't have everything connected in this picture. I've had to tuck a few wires and connectors around (I have more than the factory intended and need to invest in more compact connectors). But it does fit and none of the other outer tangs broke.
Before I forget, the panel mounted inside a center console.
Last edited by cluosborne; 11-14-22 at 07:38 PM.
The following users liked this post:
need-a-t2 (11-15-22)
#43
Automotive peanut gallery
Here's a radio bracket, fits my Sony Mex-n4000BT radio, yea it's old but it came with the car. holds the radio on the bottom and is supposed to hold a piece of wood on the top so I can add and get rid of things easy.
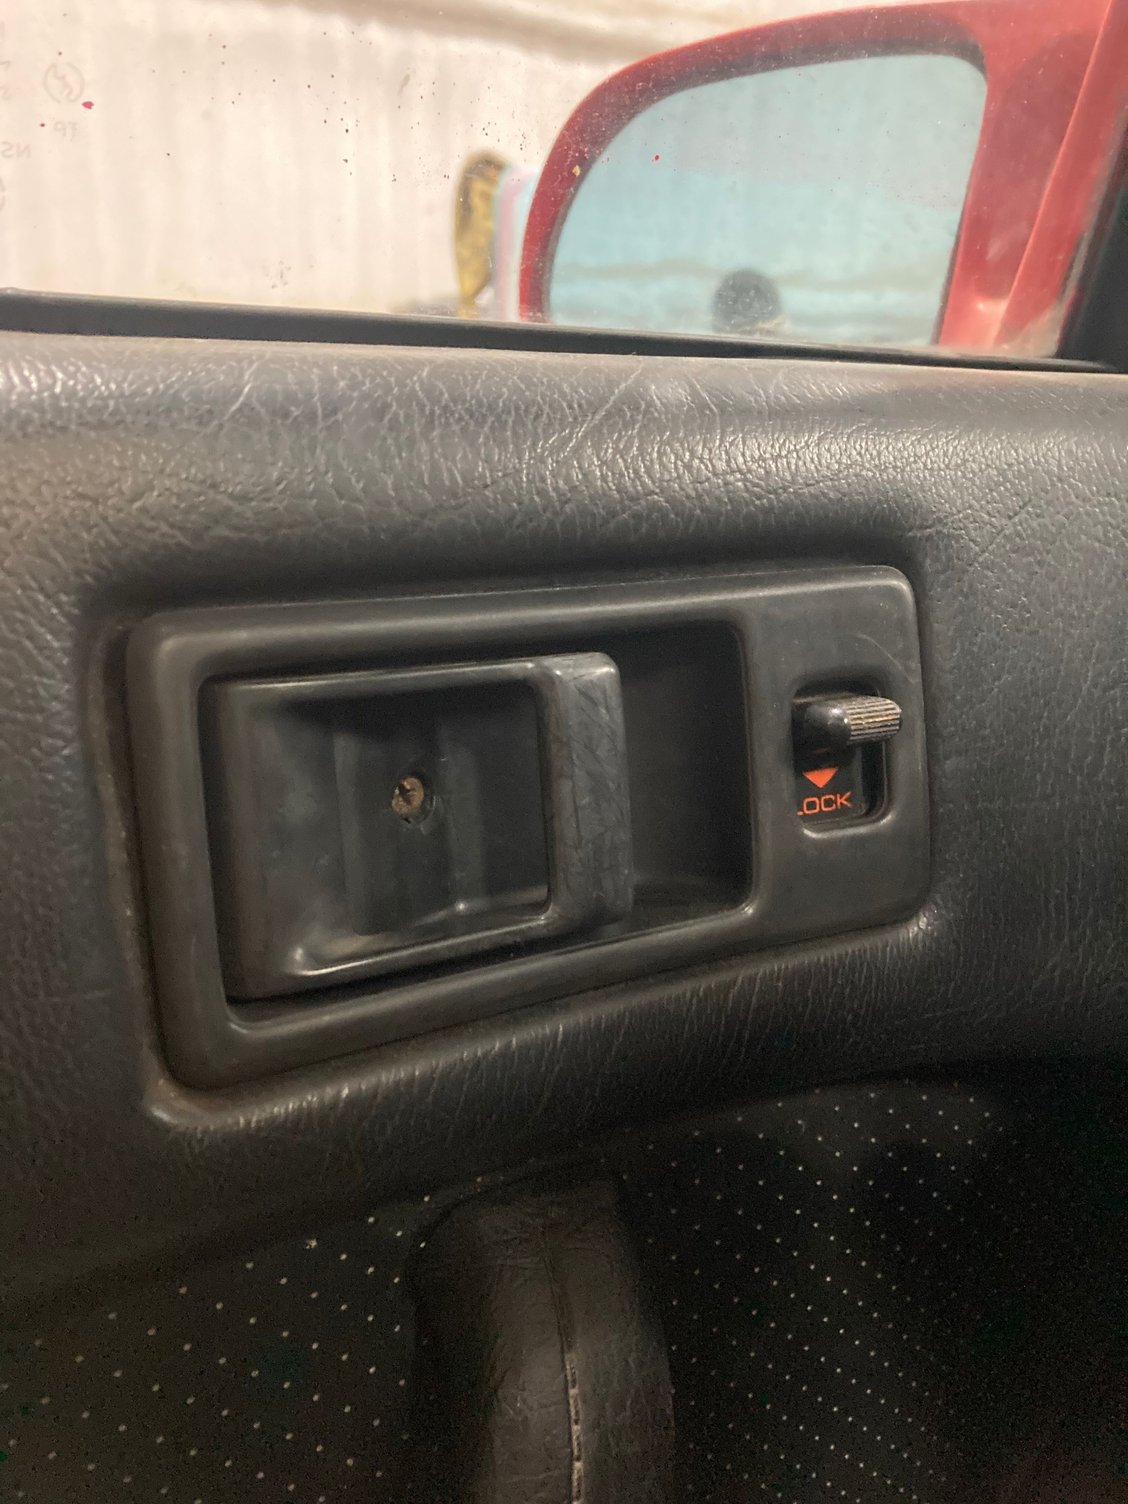
If someone has a 3d scanner and could scan those little trim pieces behind the door handles that would be really helpful.
If someone has a 3d scanner and could scan those little trim pieces behind the door handles that would be really helpful.
The following users liked this post:
adrictt (11-18-22)
#44
Rotary Enthusiast
Thread Starter
Regarding the radio bracket (looks nice by the way). You will want to make sure that the radio's weight is not being supported by the dash trim. Original S4 center/radio trim plastic gets brittle and will break. S5 holds up better and will fit an S4 dash, but you still want to mount any headunit to the dashboard using the four internal dashboard screw mounts using either the factory metal side brackets or side ones made of plastic.
#47
Automotive peanut gallery
#48
Rotary Enthusiast
Thread Starter
#49
Automotive peanut gallery
Thanks!
Hey has anyone tried to print these, the view looks good, but the print preview it tries to cover the indent where the handle goes.
Hey has anyone tried to print these, the view looks good, but the print preview it tries to cover the indent where the handle goes.
Last edited by Brrraaap; 11-19-22 at 07:36 PM.


