
Post Some Pics of your FC! :D <- Pics of your car go in this thread!!


 01-18-13, 04:08 PM
#9003
Senior Member
iTrader: (1)

Join Date: Jan 2009
Location: Florida
Posts: 309
Likes: 0
Received 0 Likes
on
0 Posts
I'd also like to say that I do like your car.. I just wish you were closer so I could help you SLAM THAT BITCH!!! hahaha
My vote goes to improper pre-load settings from the factory. when I first got mine, they were all adjusted differently, I made sure everything was equalized before I threw them on..
these are the steps I took.
1: jack the car up, and remove rear wheels(obiously)
2: use the spanner wrenches to loosen the spring until it moves freely(this step is only to ensure equal pre-load on both corners, on a competitive car do NOT leave it like this, unless you like snapping the shock)
3: HAND tighten spring up until it is no longer captive, but not enough to compress the spring AT ALL.
4: hand tighten the smaller "locking collar" up until it it pressed firmly against the bigger spring perching collar thing(??)
5: NOW you use the spanner wrench to tighten the bigger spring perching collar thing(??) until you can fit the handle of the spanner in between the two collars.
6: again, tighten the smaller "locking" collar against the larger one and lock them together. this is the MAX preload you'll want.
Although Megan Racing say to leave the springs JUST tight enough to where they don't unseat themselves, but are still able to be spun by hand (I found this to be a more bouncy, and uncomfortable setting which is why I did the above^^^ 1-6)
Thanks for the input ill have to give it a try. When i researched it awhile ago trying to find out how to properly adjust the preload and never found much. I agree with every statement it needs to be slammed!
To the other post asking about the dash setup its just a thin sheet of black aluminum cut and riveted on. Also went along it with a roller and try to make it look a little more 3d and look more like a dash. Its a track only car so just needed something simple. Glad i replaced the stock one when i did the cage. Ill post some pictures but with a link so it doesnt clog up the page since its pretty irrelavent.
http://i864.photobucket.com/albums/a...12/photo-3.jpg
http://i864.photobucket.com/albums/a...12/photo-2.jpg
http://i864.photobucket.com/albums/a...12/photo-1.jpg
http://i864.photobucket.com/albums/a...b12/photo1.jpg
http://i864.photobucket.com/albums/a...b12/photo3.jpg
http://i864.photobucket.com/albums/a.../photo-2-2.jpg
Last edited by TheGoldenSB; 01-18-13 at 04:10 PM.


 01-20-13, 12:16 AM
#9015
Senior Member
Join Date: Nov 2012
Location: LA
Posts: 455
Likes: 0
Received 0 Likes
on
0 Posts
01-20-13, 12:26 AM
#9017
Senior Member
Join Date: Nov 2012
Location: LA
Posts: 455
Likes: 0
Received 0 Likes
on
0 Posts


 01-20-13, 02:57 PM
#9019
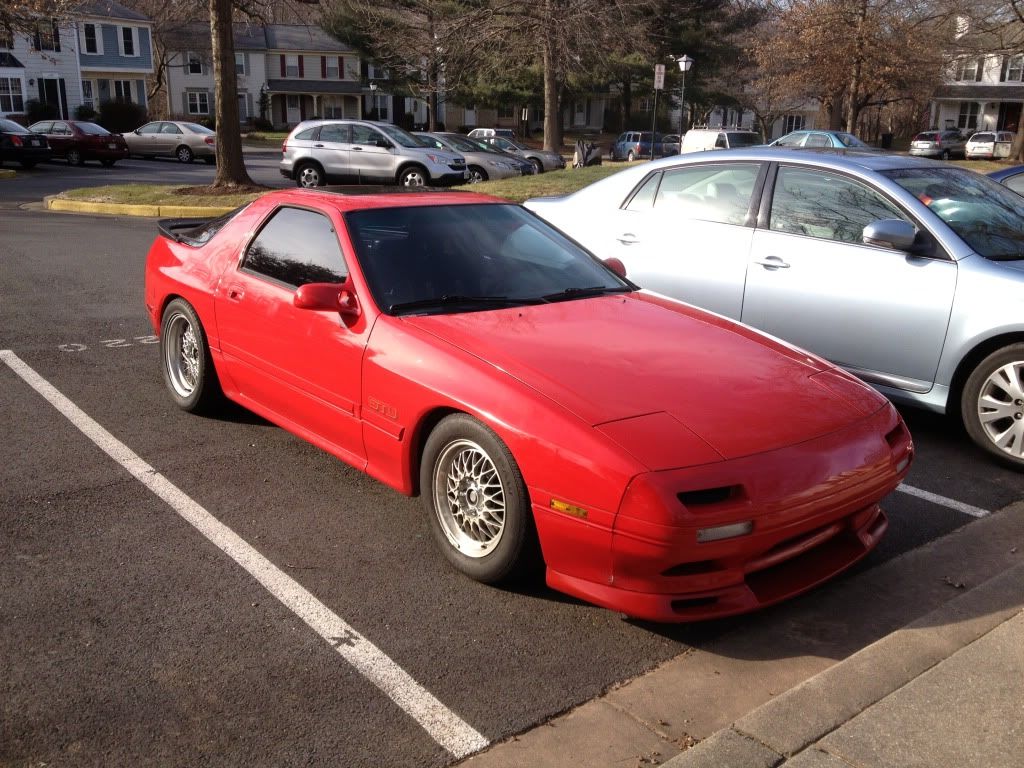
TheGoldenSB, The spring perches aren't the ones to adjust ride height, its the bottom mount bracket that you adjust for ride height. This is what makes complete coilovers soo much better than shock/spring combos, when you lift the car , the wheels stay at a static height, its pretty cool, makes it alot easier to change wheels/tires too
https://sphotos-a.xx.fbcdn.net/hphot...6_388090_n.jpg Sorry this picture isnt an rx7, just my old car .
https://sphotos-a.xx.fbcdn.net/hphot...6_388090_n.jpg Sorry this picture isnt an rx7, just my old car .
01-20-13, 07:24 PM
#9020
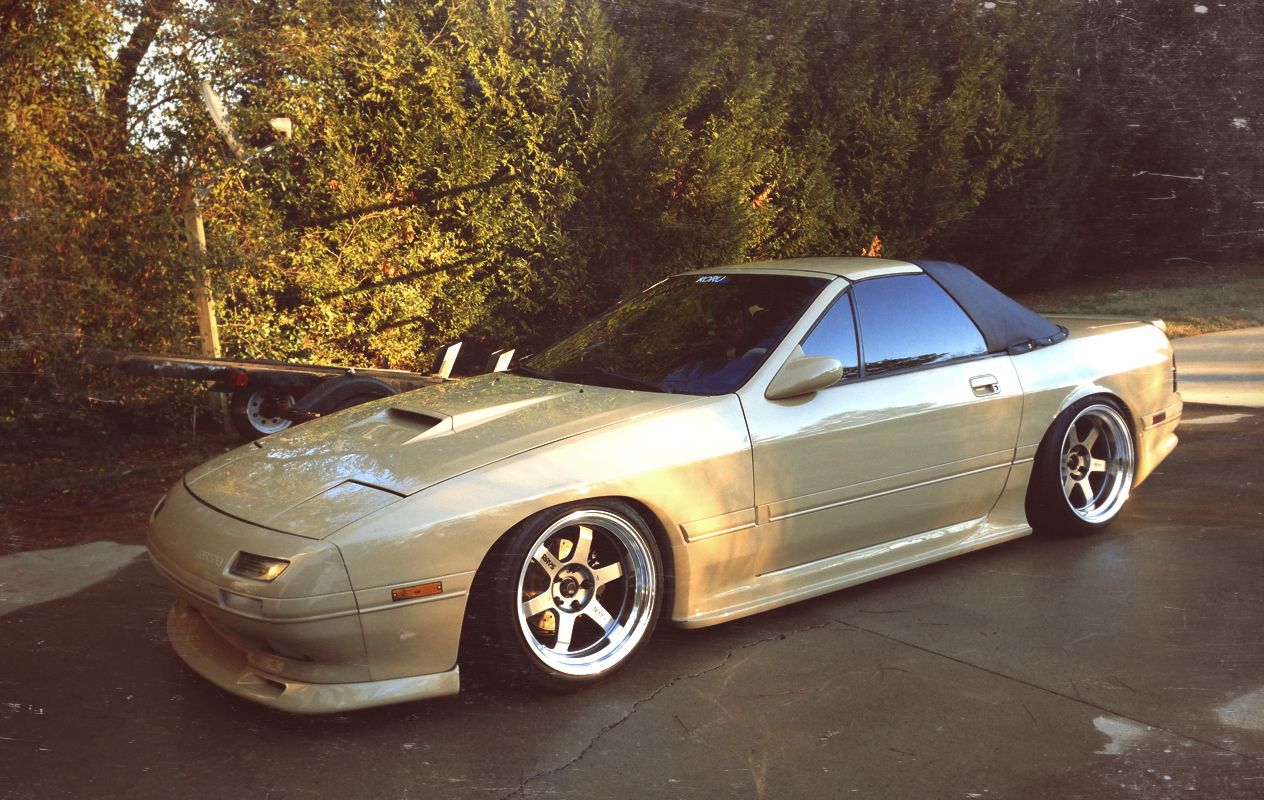
http://www.flickr.com/photos/samshizzle/8397764993/http://www.flickr.com/photos/samshizzle/8397764993/ by http://www.flickr.com/people/samshizzle/, on Flickr
http://www.flickr.com/photos/samshizzle/8397776529/http://www.flickr.com/photos/samshizzle/8397776529/ by http://www.flickr.com/people/samshizzle/, on Flickr

http://www.flickr.com/photos/samshizzle/8397776529/http://www.flickr.com/photos/samshizzle/8397776529/ by http://www.flickr.com/people/samshizzle/, on Flickr
 !!, i got a build thread check it out
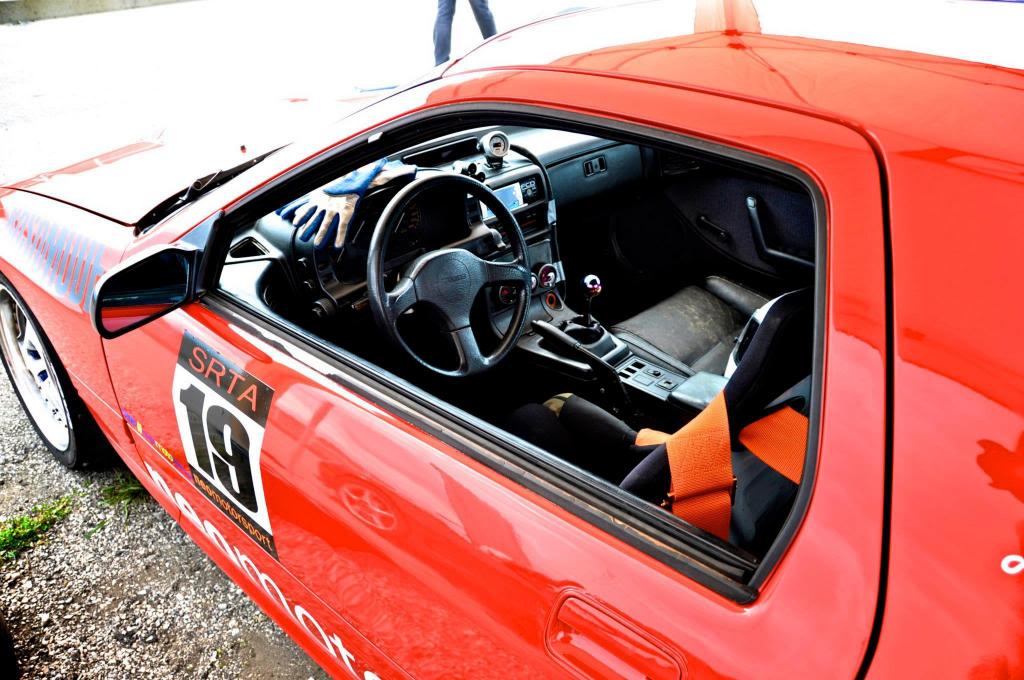
 01-20-13, 09:45 PM
#9022
TheGoldenSB, The spring perches aren't the ones to adjust ride height, its the bottom mount bracket that you adjust for ride height. This is what makes complete coilovers soo much better than shock/spring combos, when you lift the car , the wheels stay at a static height, its pretty cool, makes it alot easier to change wheels/tires too
https://sphotos-a.xx.fbcdn.net/hphot...6_388090_n.jpg Sorry this picture isnt an rx7, just my old car .
https://sphotos-a.xx.fbcdn.net/hphot...6_388090_n.jpg Sorry this picture isnt an rx7, just my old car .

 01-20-13, 11:38 PM
#9025
Rotary Enthusiast
@trueimport
Those are some damn sweet photos/locations/car. Did you make the rear vents for your good or is it an aftermarket fibreglass bonnet? Looks awesome because it's almost stock.
Those are some damn sweet photos/locations/car. Did you make the rear vents for your good or is it an aftermarket fibreglass bonnet? Looks awesome because it's almost stock.