
HIRISK's 1988 S4.5 FC3S RX7 - Build Thread


 your FC is really a dream
  keep it up!!
 09-11-10, 12:56 AM
#153
Full Member
Thread Starter

OK,
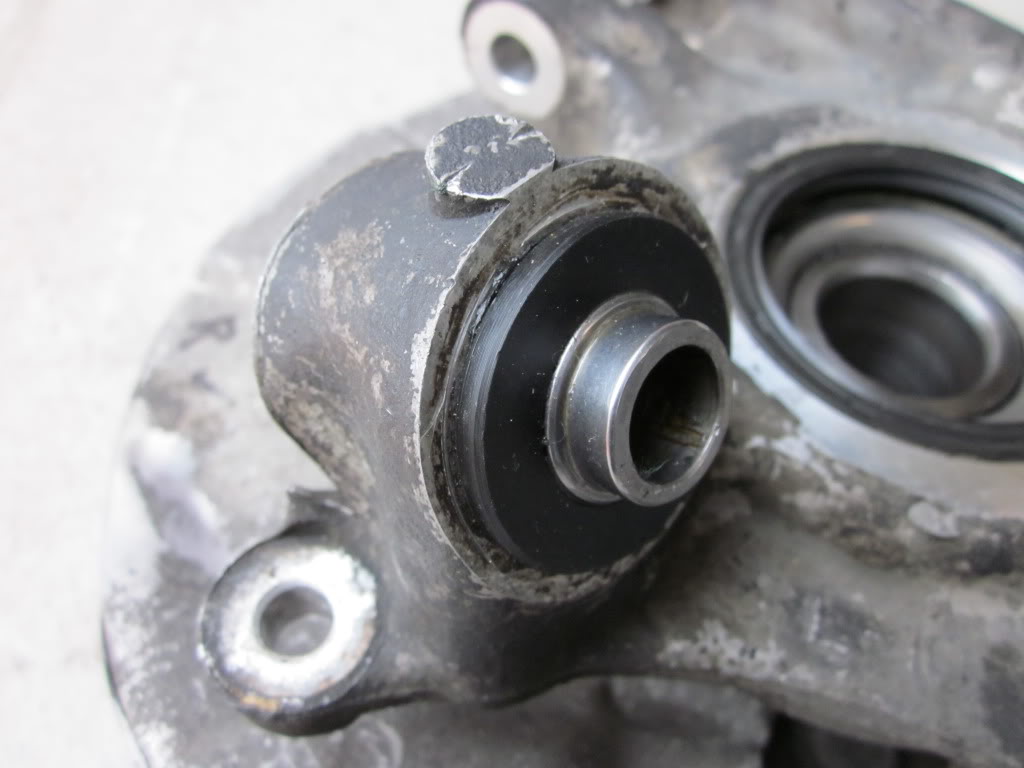
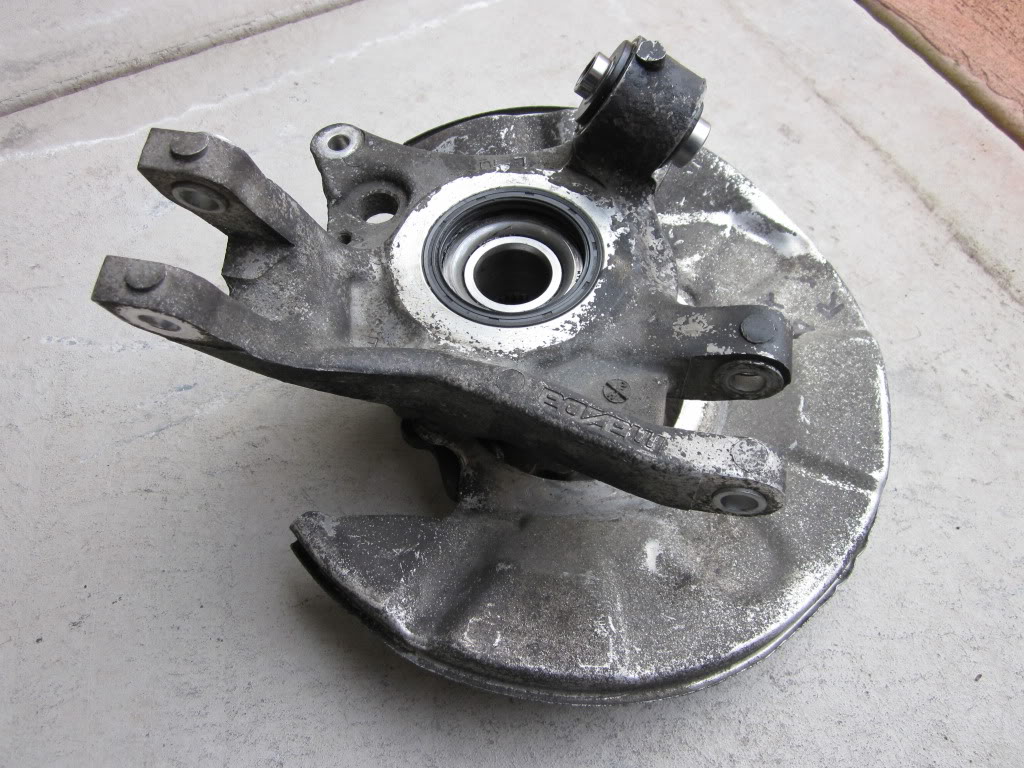
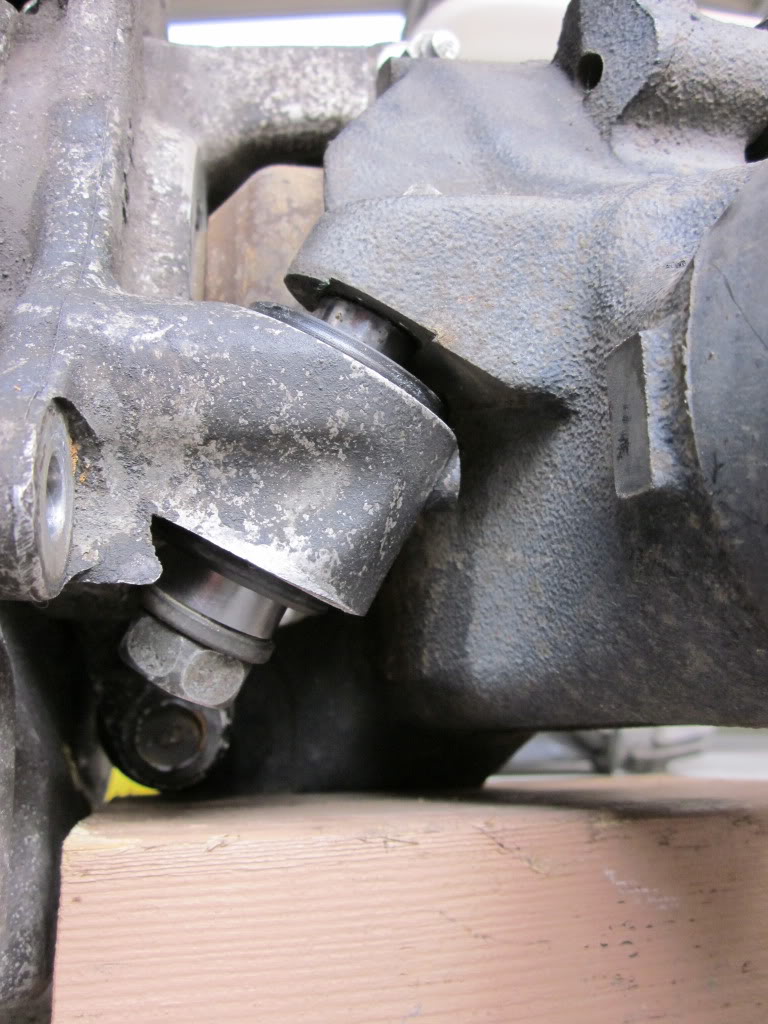
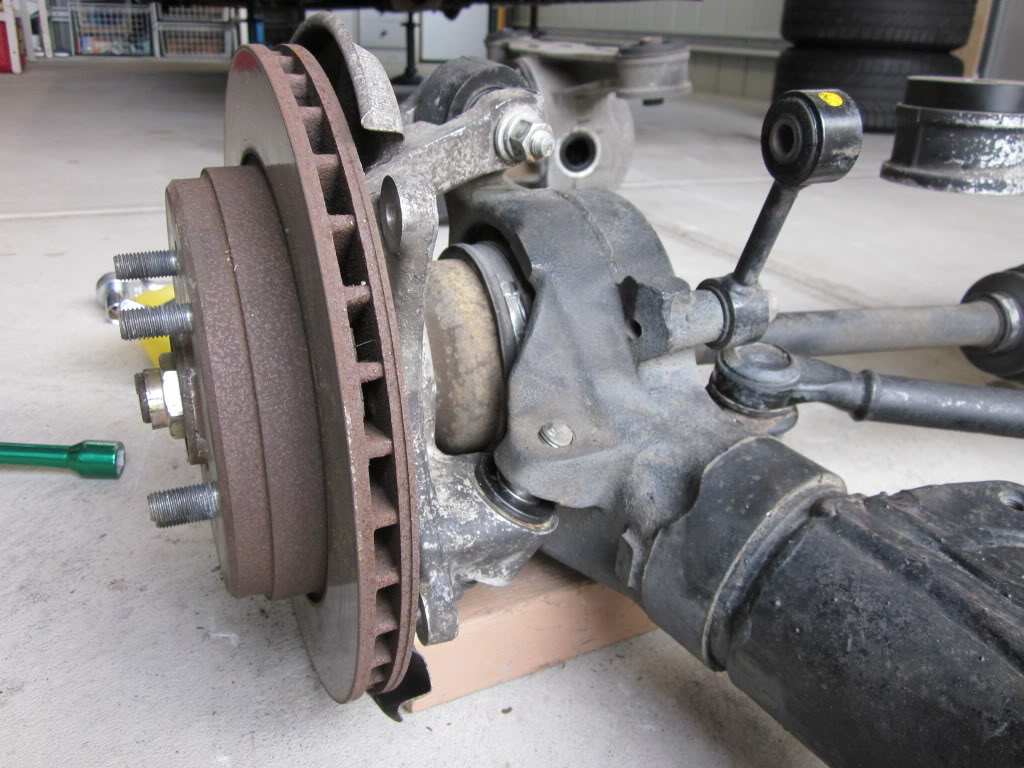
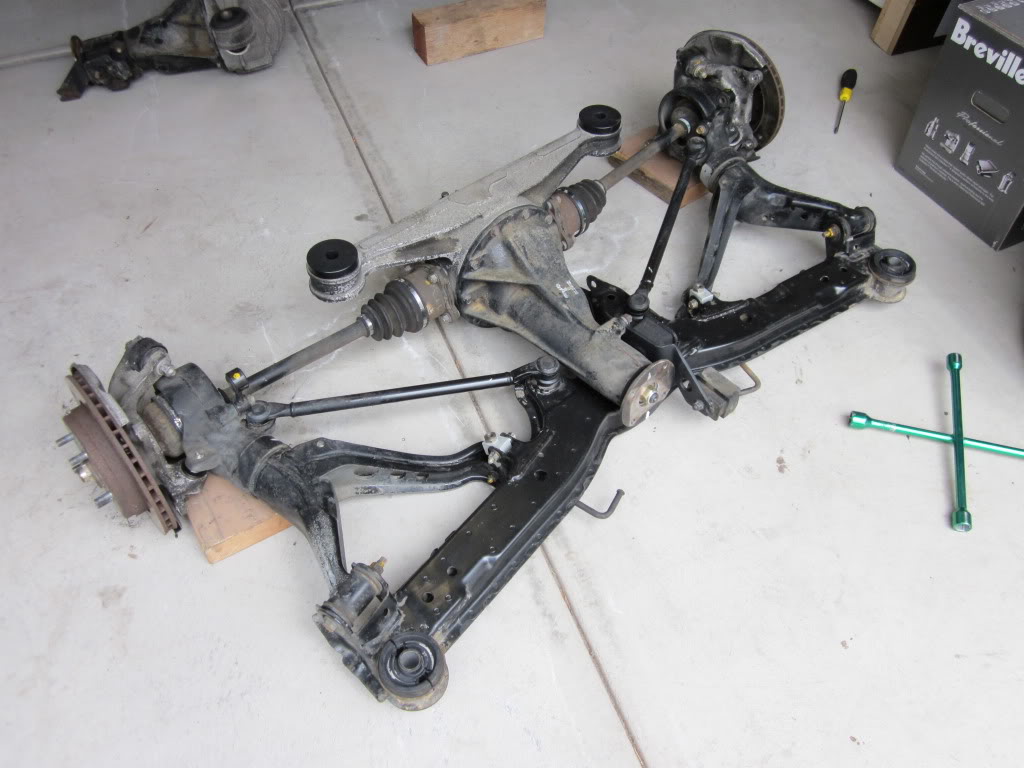
So I have picked up the axle carriers with the DTSS Eliminator Bushes installed and have installed them back on the rear subframe.
Here are some photos of the bushes installed and the axles carriers back on the car.
So I have picked up the axle carriers with the DTSS Eliminator Bushes installed and have installed them back on the rear subframe.
Here are some photos of the bushes installed and the axles carriers back on the car.
09-12-10, 02:47 AM
#154
Full Member
Thread Starter
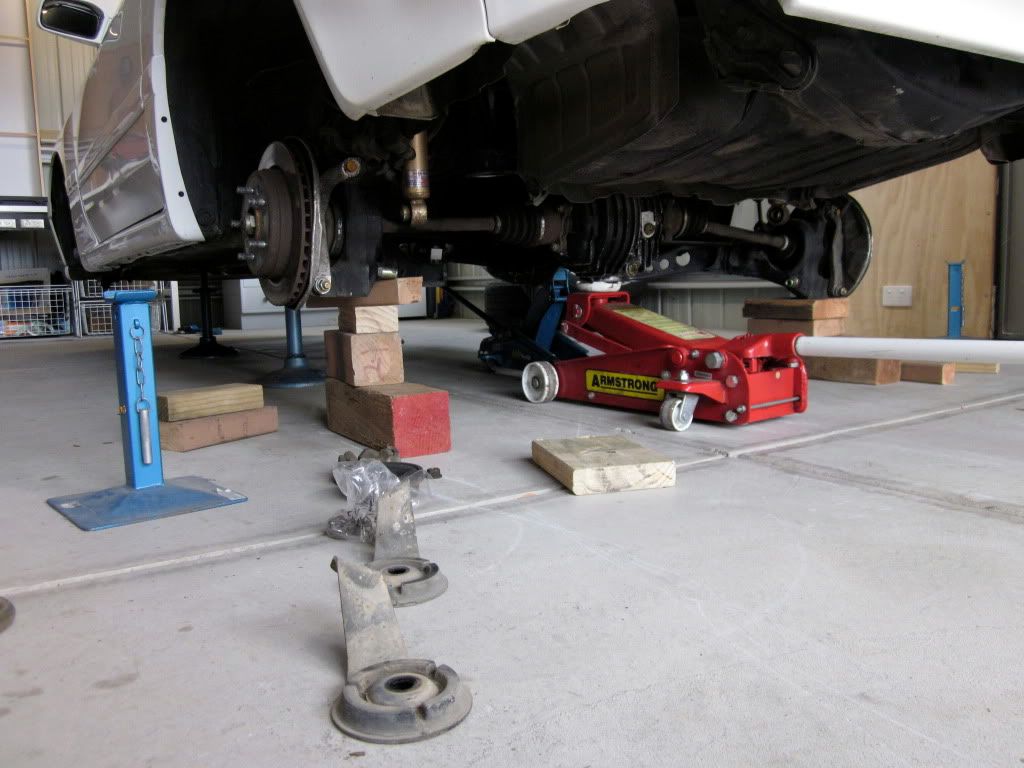
I finally got the rear end all back together today, although I have come across to small challenges.
1) When I installed my Sparco pedals a few weeks ago I forgot the calipers were off the car, now the bloody piston is compressed and I have to try and push it back to get the calipers back on the discs.
2) When I went to install the tailshaft the bloody bolt pattern on the S5 LSD is different to the S4 Auto diff. So I now have to try and get the nut off the end while it is up and in the car and swap the round tailshaft plate from the auto diff on my garage floor into the LSD installed in the car.
Other than that, it all went well.
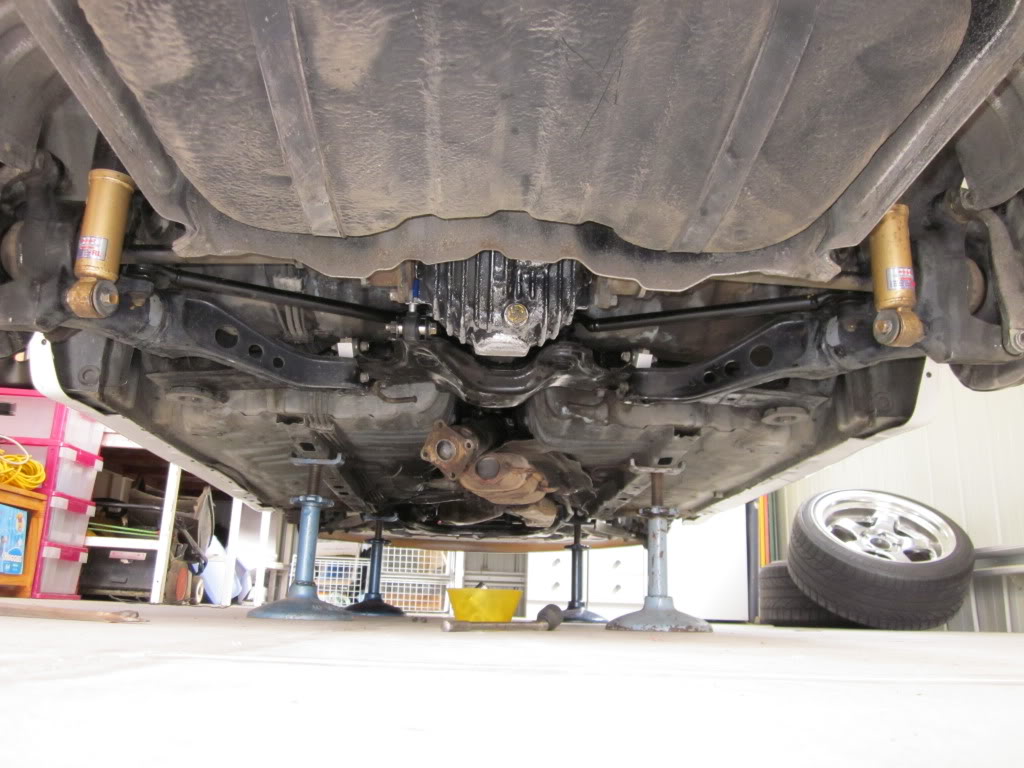
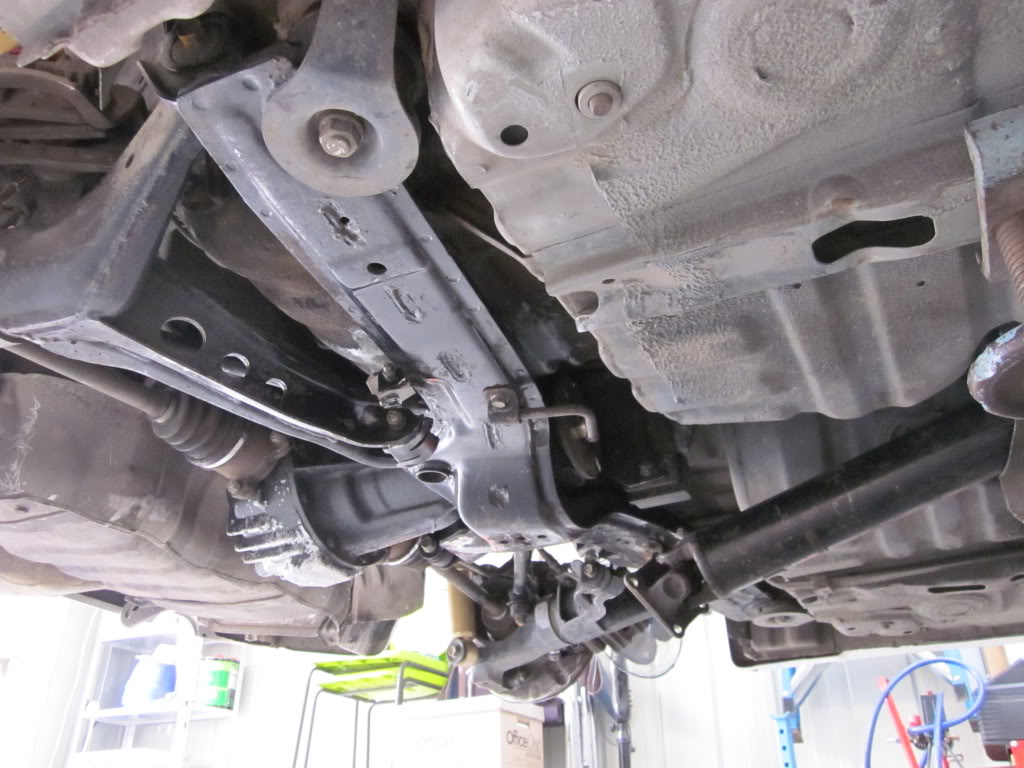
ALL ASSEMBLED AND READY FOR INSTALL
HALF WAY THERE!!
ALL INSTALLED
1) When I installed my Sparco pedals a few weeks ago I forgot the calipers were off the car, now the bloody piston is compressed and I have to try and push it back to get the calipers back on the discs.
2) When I went to install the tailshaft the bloody bolt pattern on the S5 LSD is different to the S4 Auto diff. So I now have to try and get the nut off the end while it is up and in the car and swap the round tailshaft plate from the auto diff on my garage floor into the LSD installed in the car.
Other than that, it all went well.
ALL ASSEMBLED AND READY FOR INSTALL
HALF WAY THERE!!
ALL INSTALLED
 almost there!
 09-26-10, 06:14 PM
#157
Full Member
Thread Starter
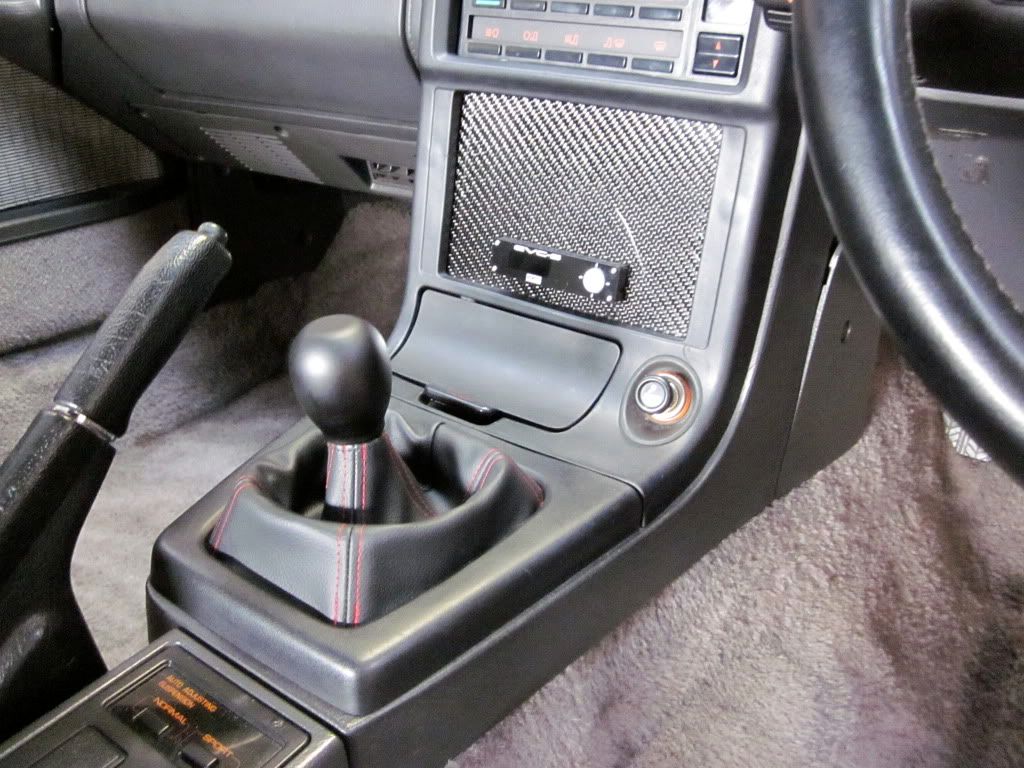
- Left factory radio brackets in place
- made some custom alloy brackets to mount carbon panel to radio bracket
- drilled small hole in carbon panel for wiring from evc to fit through
- screwed carbon panel to mounts which are hidden behind centre console
- double sided taped EVC to carbon panel
- done :-)
09-26-10, 07:34 PM
#158
Dustin Becktold
iTrader: (17)
Join Date: Oct 2007
Location: Salem Or
Posts: 674
Likes: 0
Received 0 Likes
on
0 Posts
i love this build, keep up the good work. i can't believe know one mentioned this to you sooner but those MMR camber adjusters are garbage. do a search on them and you'll find a ton of people with broken links. i suppose if all you do is drive spirit'd on the streets you MIGHT be ok. but i've seen a ton of track, drift and autox guys break them like twigs with only a couple of events on them and few with just one event even. AWR seems to have the best but you'll be paying a lot more too. other then that you've done a great job and your choice in wheels and fitment is right on.
09-26-10, 08:42 PM
#159
HKS obsessed
iTrader: (7)
Join Date: Mar 2008
Location: OP, KS
Posts: 1,529
Likes: 0
Received 0 Likes
on
0 Posts
- Removed factory radio
- Left factory radio brackets in place
- made some custom alloy brackets to mount carbon panel to radio bracket
- drilled small hole in carbon panel for wiring from evc to fit through
- screwed carbon panel to mounts which are hidden behind centre console
- double sided taped EVC to carbon panel
- done :-)
09-28-10, 03:17 AM
#160
Full Member
Thread Starter
Hi Guys,
It has been a long haul, but it is finally back on the road.
Things are going fairly well, other than the LSD I installed is fucken noisy so I will have to pull it back out and get it rebuilt or buy a replacement.
Also, for some reason my 15amp engine fuse keeps blowing, which sucks. I will have to hunt around to source the cause of this issue and that won't be fun.
But anyway, here are some pics of it back on the road.
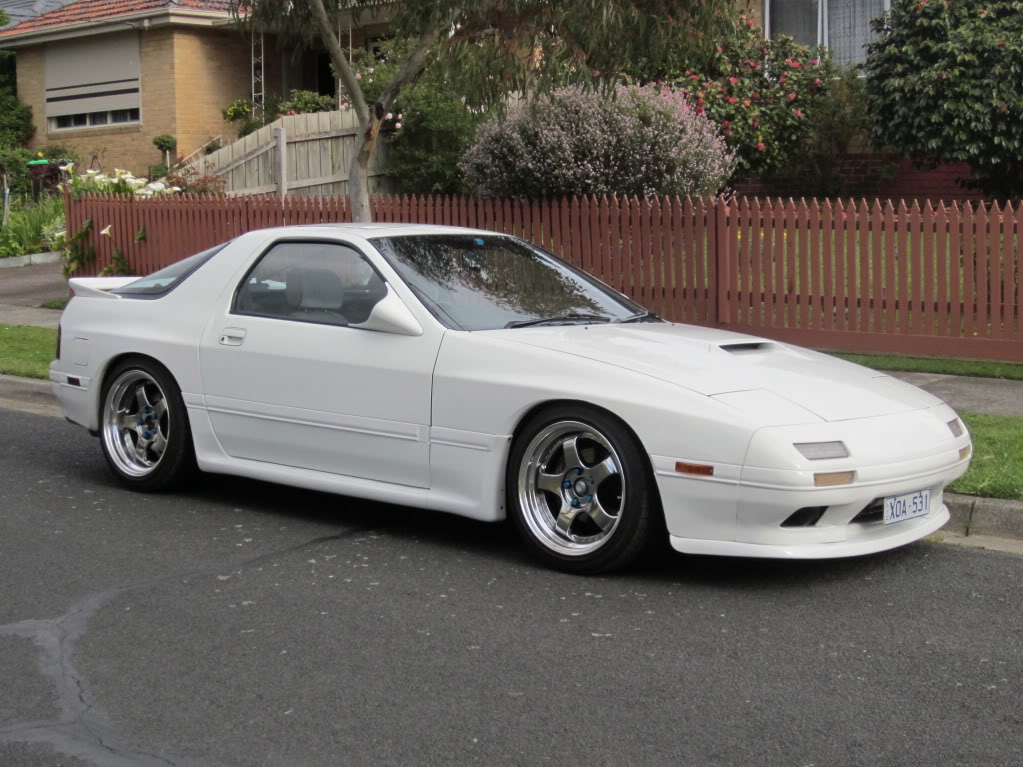
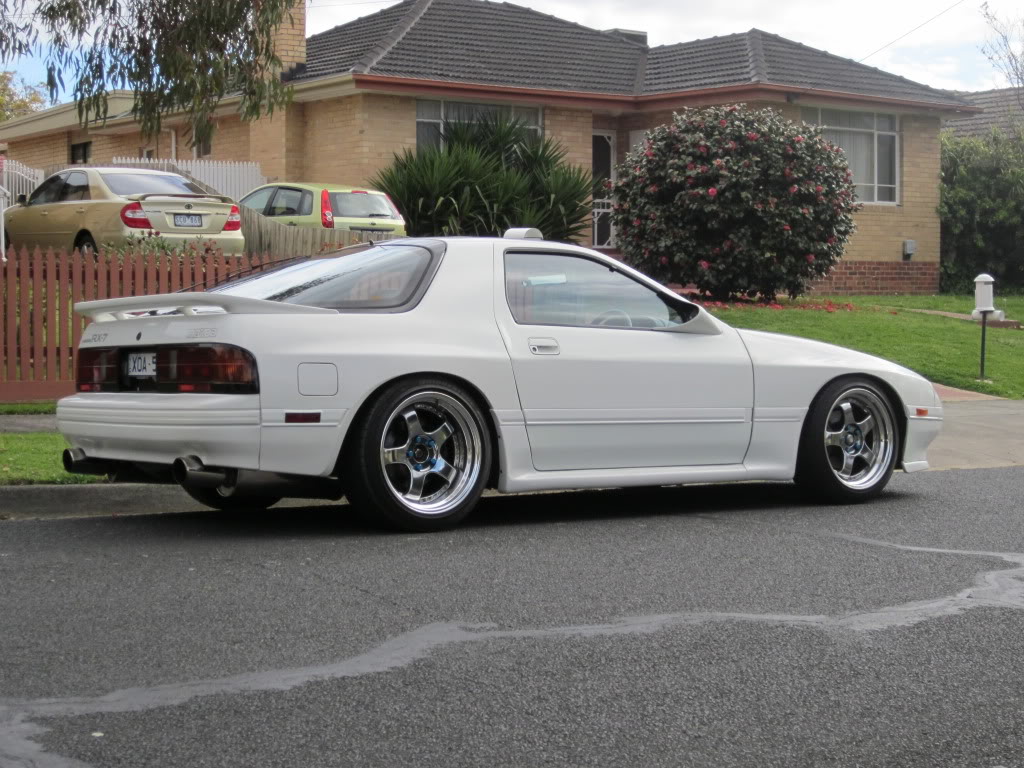
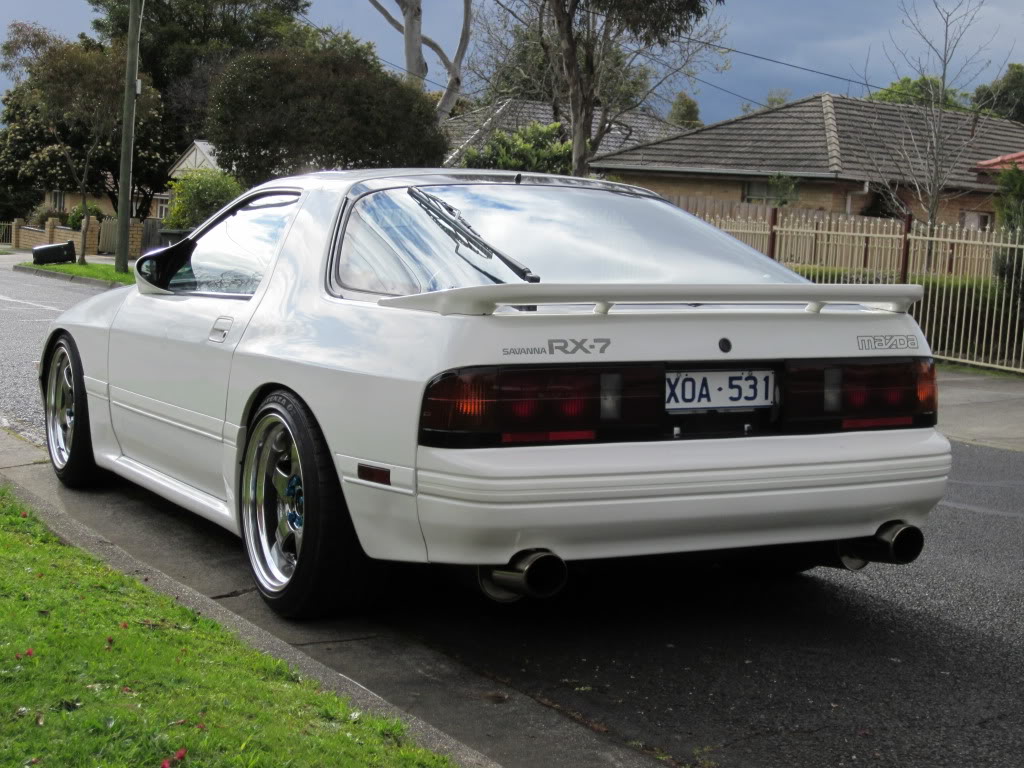
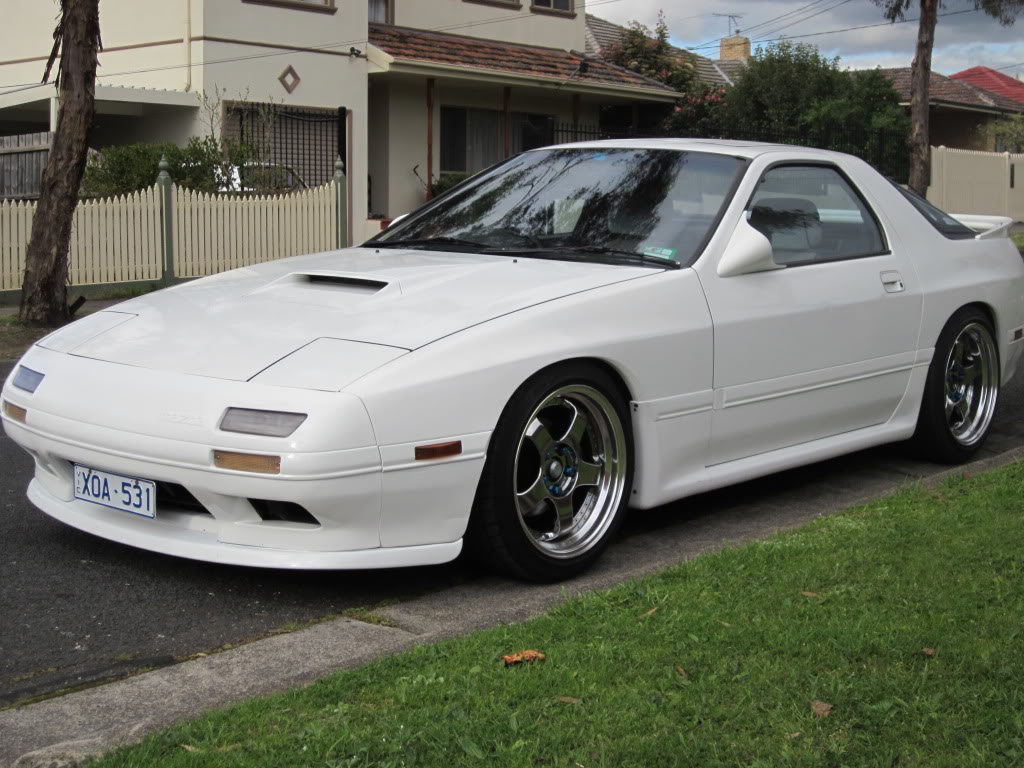
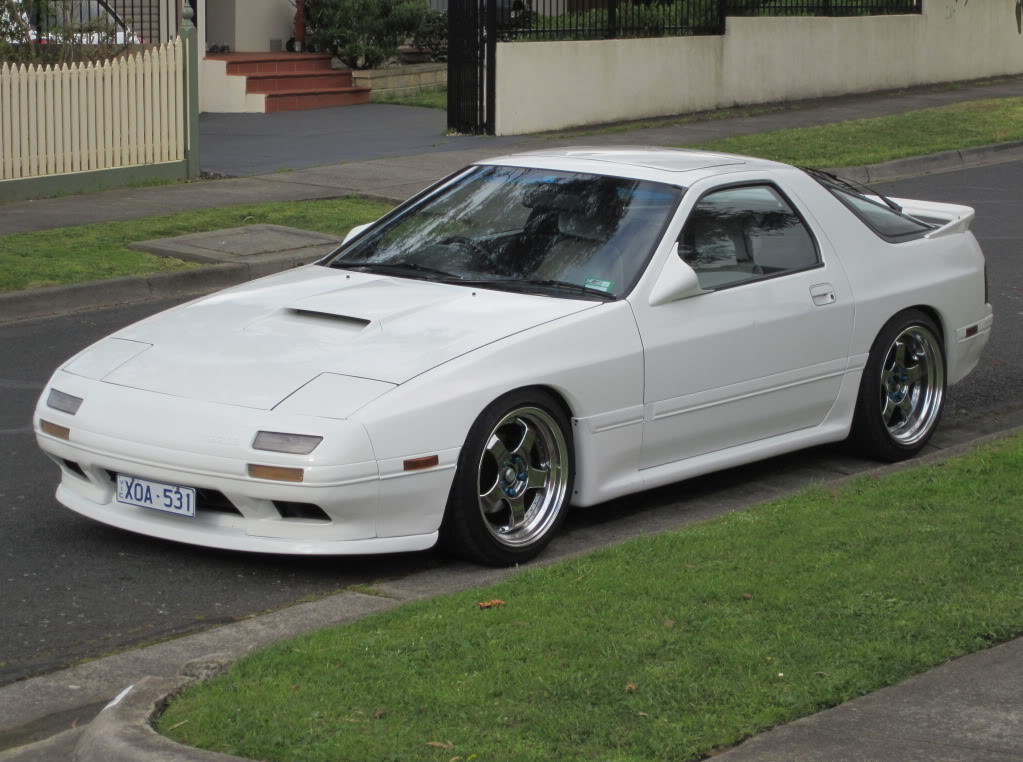
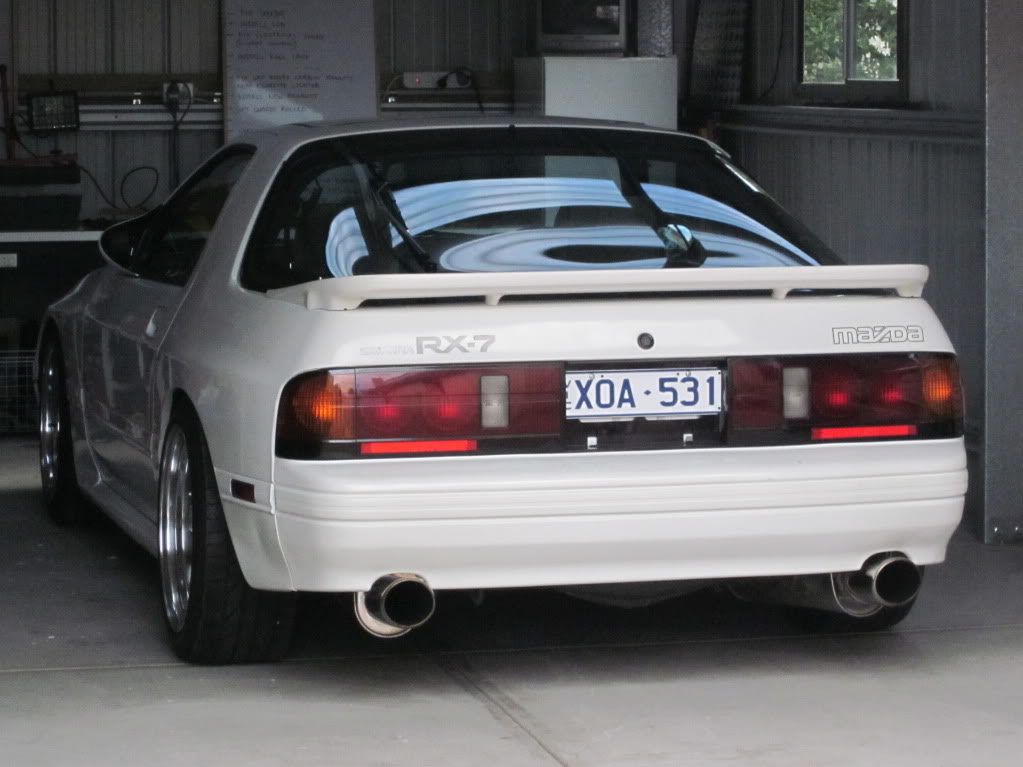
EXTERNAL CHANGES: New Volk wheel nuts, RE Amemyia Mirrors and a 10mm lower ride height being the main external differences.
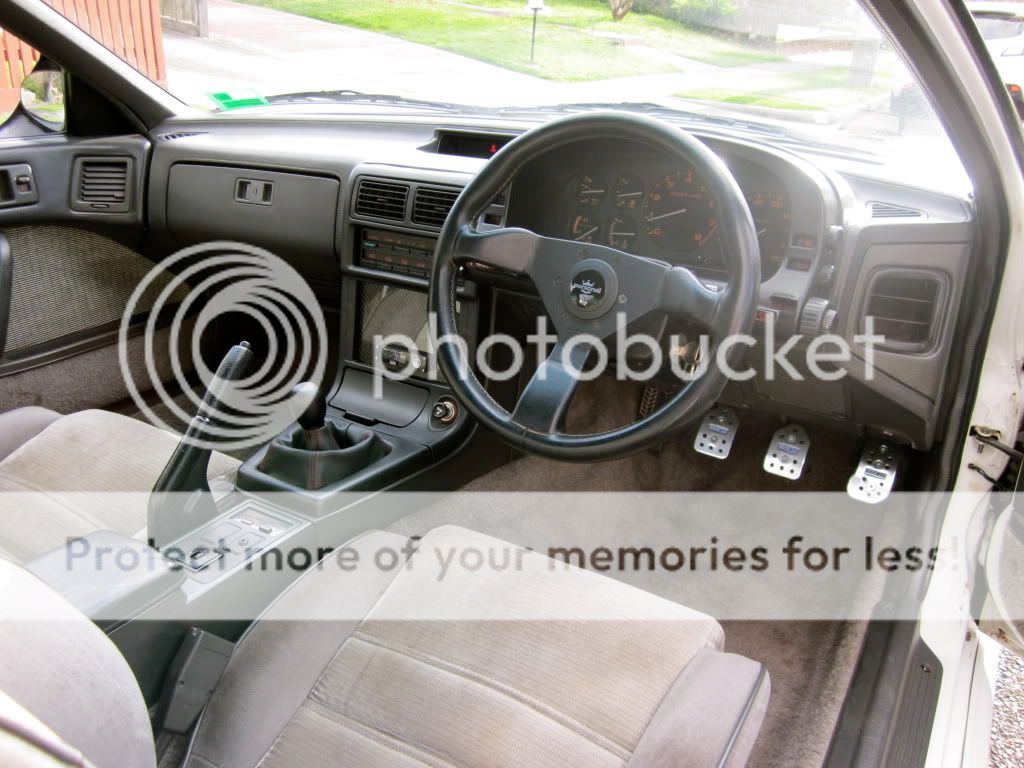
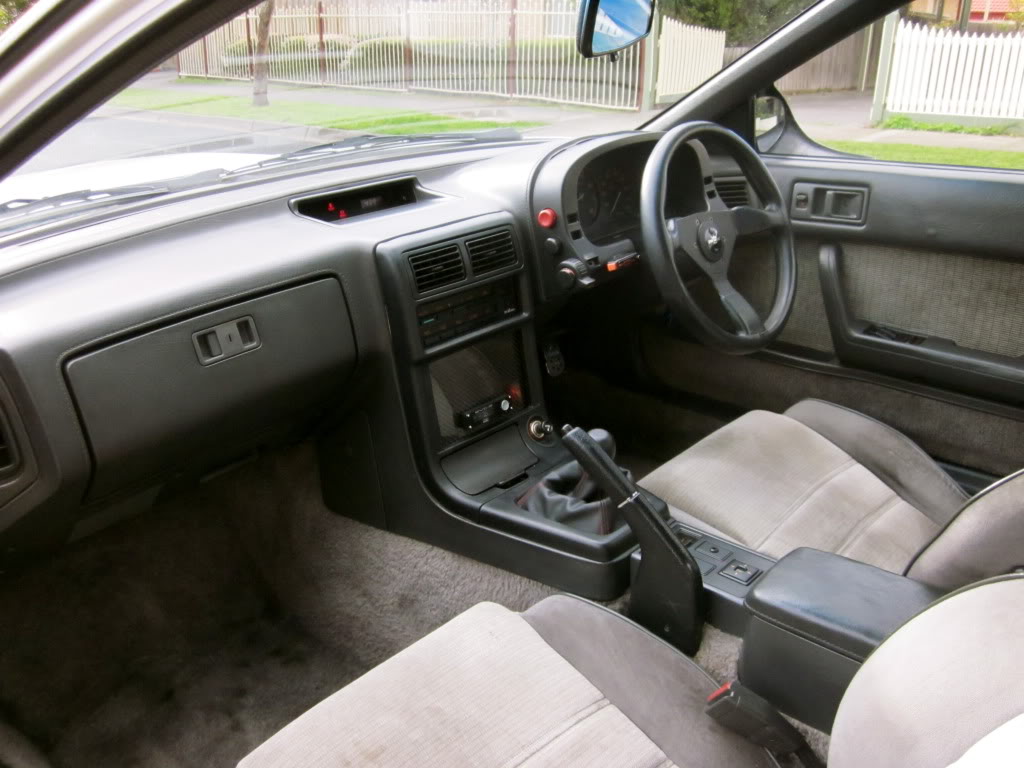
INTERNAL CHANGES: Sparco pedals and red stitched leather shifter boot.
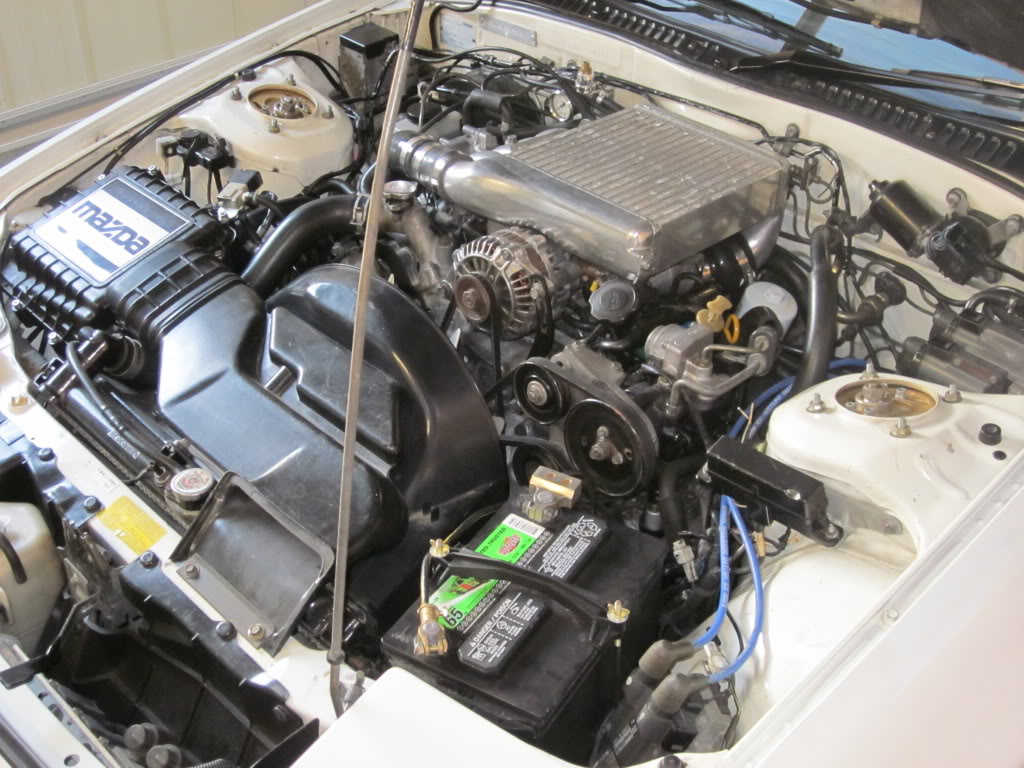
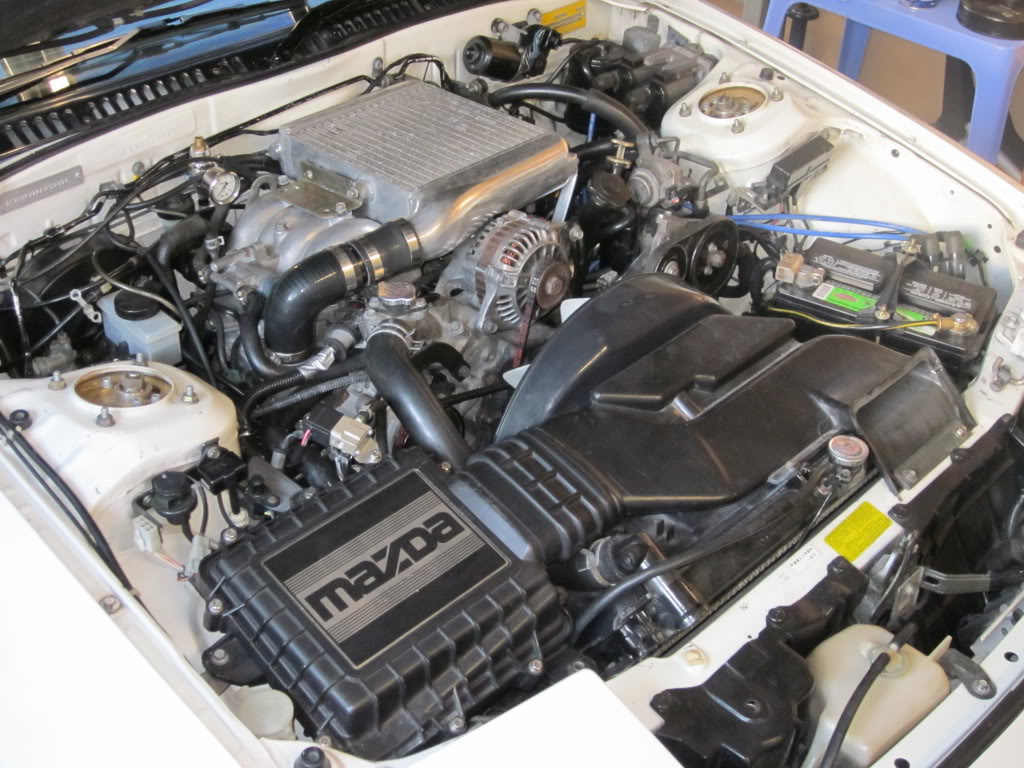
MECHANICAL CHANGES: Apexi Dual Megaphone Exhaust and HKS Top Mount Intercooler
It has been a long haul, but it is finally back on the road.
Things are going fairly well, other than the LSD I installed is fucken noisy so I will have to pull it back out and get it rebuilt or buy a replacement.
Also, for some reason my 15amp engine fuse keeps blowing, which sucks. I will have to hunt around to source the cause of this issue and that won't be fun.
But anyway, here are some pics of it back on the road.
EXTERNAL CHANGES: New Volk wheel nuts, RE Amemyia Mirrors and a 10mm lower ride height being the main external differences.
INTERNAL CHANGES: Sparco pedals and red stitched leather shifter boot.
MECHANICAL CHANGES: Apexi Dual Megaphone Exhaust and HKS Top Mount Intercooler


 10-02-10, 10:09 PM
#166
Full Member
Thread Starter
OK,
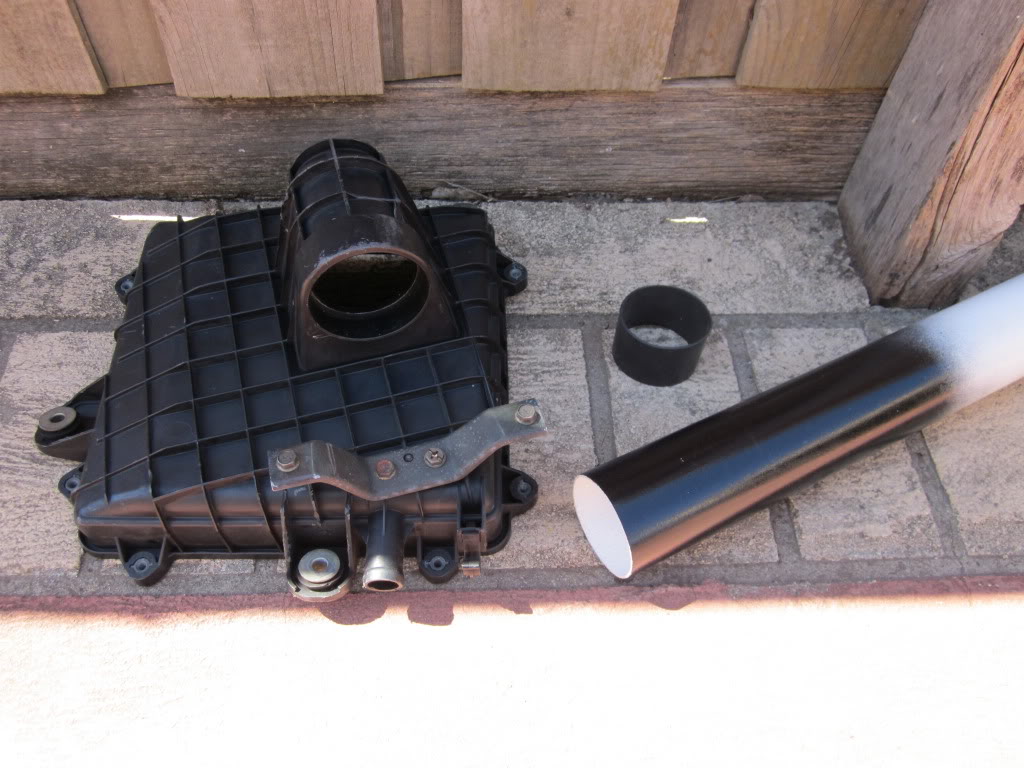
So I have finally got around to starting some intake modifications.
My main goal is to still utilise the factory air box in order to keep the engine bay looking as stock/factory as possible.
I have always had concerns over the S4 air box as it looks awfully restrictive and also is difficult to remove the airflow meter as it has a square outlet that makes it hard to replace the AFM with some pipe.
So after some contemplating and looking around I decided to stick with factory Mazda items and just upgrade to a S5 air box.
The big advantages for me using the S5 air box are:
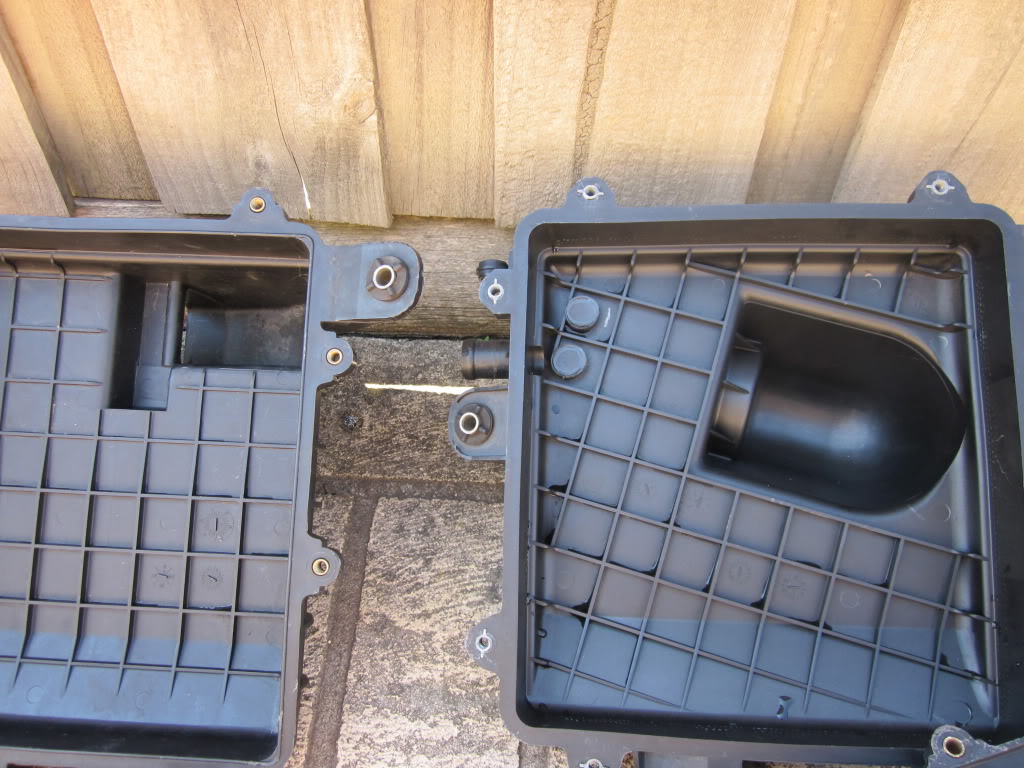
- S5 has a 71mm round outlet vs the S4 square outlet
- The round outlet makes removing my AFM and replacing with straight through pipe much easier
- S5 has much larger internal opening to this outlet
- S5 has much smoother contoured flow to this outlet
So the plan is for me to run the S5 air box with no AFM (i am running Microtech).
I have got a piece of 2.75" (69.85mm) PVC pipe which I will use.
This pipe is 1.15mm to small in its external diameter as the outlet on the S5 air box is 71mm, so I have found a piece of rubber hose that I had lying around and stretched this over the PVC to make up the slack and act as a seal.
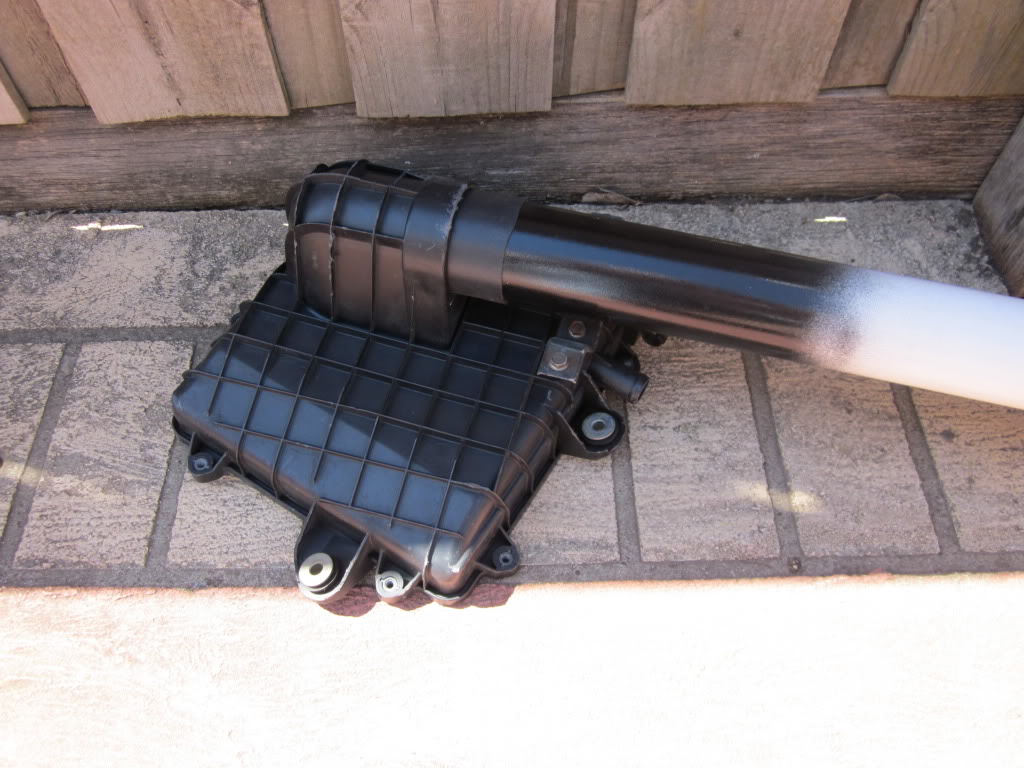
This allowed the PVC pipe to fit perfectly into the S5 air box and also acted as a seal ads it is soft rubber and has caused a very tight, secure fit.
I will then get another piece of PVC that flares out to 80mm which will connect to the existing factory pipe work.
Here are some photos...
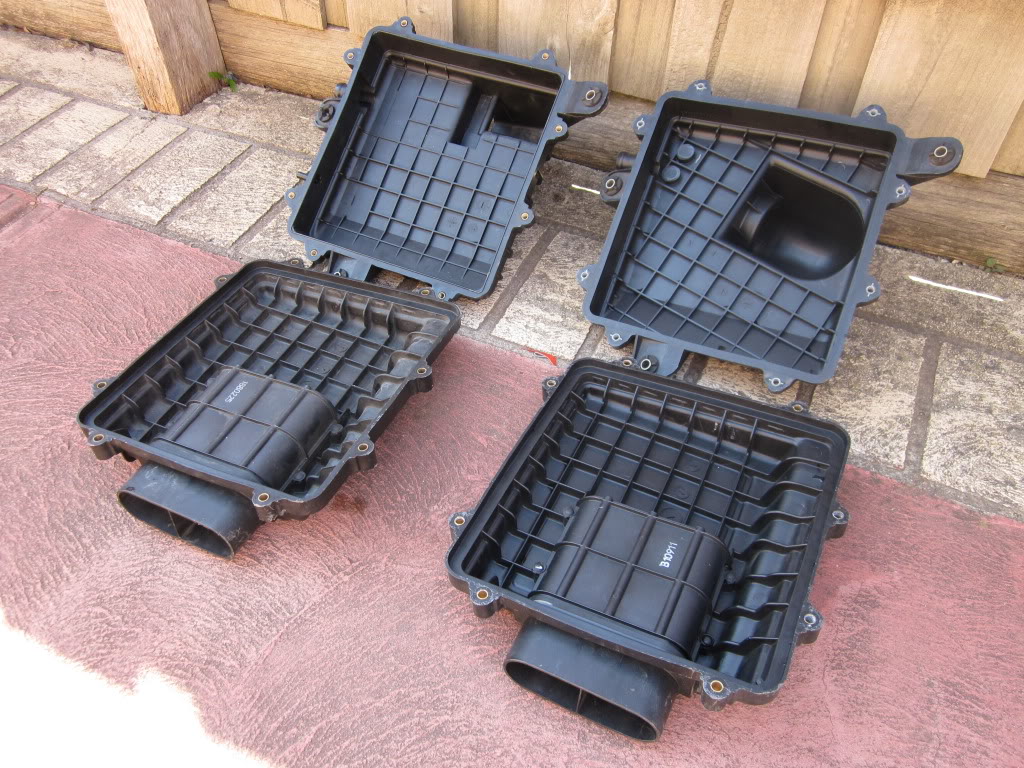
S4 AIR BOX (top) vs S5 AIR BOX (bottom)
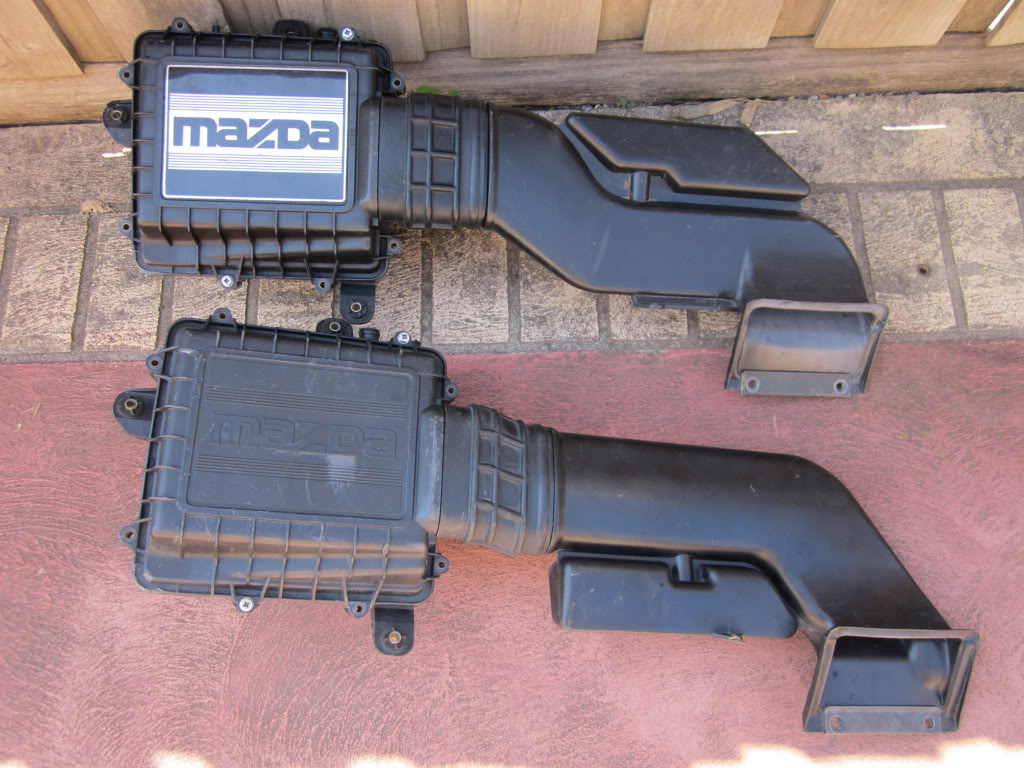
CHECK OUTR HOW MUCH NICER THE FLOW IS ON THE S5:
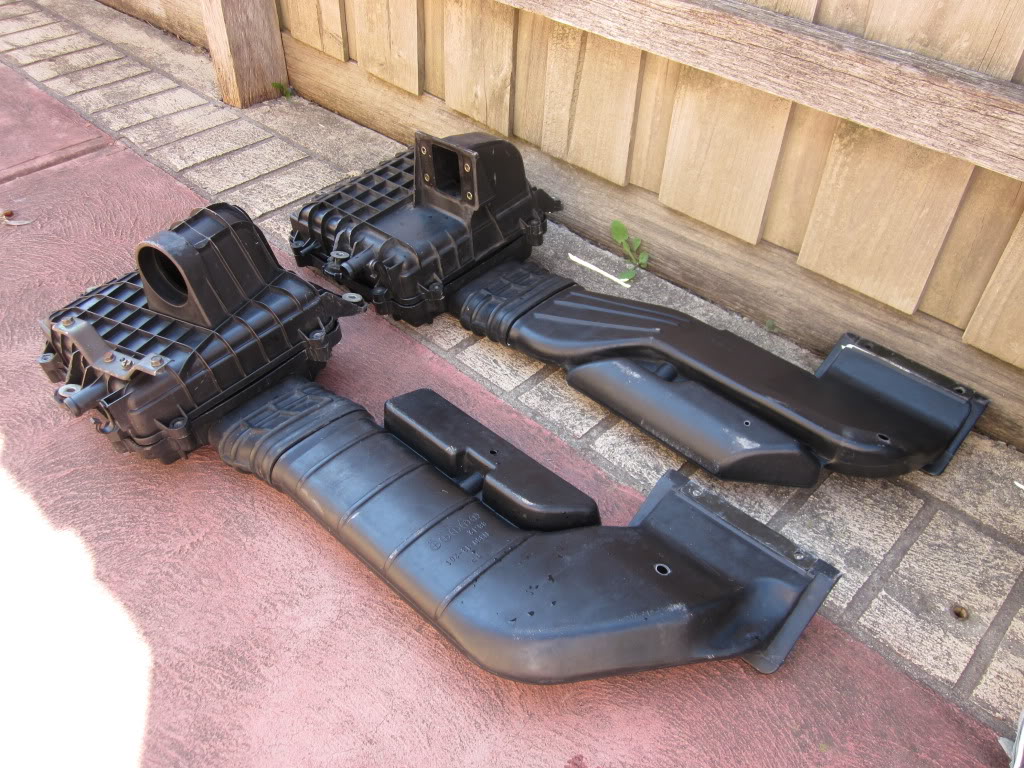
PVC PAINTED BLACK AND RUBBER SEAL READY FOR INSTALL:
THIS IS HOW IT WILL FIT:
So I have finally got around to starting some intake modifications.
My main goal is to still utilise the factory air box in order to keep the engine bay looking as stock/factory as possible.
I have always had concerns over the S4 air box as it looks awfully restrictive and also is difficult to remove the airflow meter as it has a square outlet that makes it hard to replace the AFM with some pipe.
So after some contemplating and looking around I decided to stick with factory Mazda items and just upgrade to a S5 air box.
The big advantages for me using the S5 air box are:
- S5 has a 71mm round outlet vs the S4 square outlet
- The round outlet makes removing my AFM and replacing with straight through pipe much easier
- S5 has much larger internal opening to this outlet
- S5 has much smoother contoured flow to this outlet
So the plan is for me to run the S5 air box with no AFM (i am running Microtech).
I have got a piece of 2.75" (69.85mm) PVC pipe which I will use.
This pipe is 1.15mm to small in its external diameter as the outlet on the S5 air box is 71mm, so I have found a piece of rubber hose that I had lying around and stretched this over the PVC to make up the slack and act as a seal.
This allowed the PVC pipe to fit perfectly into the S5 air box and also acted as a seal ads it is soft rubber and has caused a very tight, secure fit.
I will then get another piece of PVC that flares out to 80mm which will connect to the existing factory pipe work.
Here are some photos...
S4 AIR BOX (top) vs S5 AIR BOX (bottom)
CHECK OUTR HOW MUCH NICER THE FLOW IS ON THE S5:
PVC PAINTED BLACK AND RUBBER SEAL READY FOR INSTALL:
THIS IS HOW IT WILL FIT:
 10-18-10, 03:05 AM
#172
Full Member
Thread Starter
Not a major update,
But I have finished the S5 air box conversion and AFM removal and it has all bolted it nice and snug. No photos, but once I take it all out again to paint the pipe work I will get some photos at that point.
I have also bought a HKS Filter for the stock S5 box to free up a little more flow.


But I have finished the S5 air box conversion and AFM removal and it has all bolted it nice and snug. No photos, but once I take it all out again to paint the pipe work I will get some photos at that point.
I have also bought a HKS Filter for the stock S5 box to free up a little more flow.
10-21-10, 07:15 PM
#174
Senior Member

Join Date: Jan 2008
Location: Virginia
Posts: 506
Likes: 0
Received 0 Likes
on
0 Posts
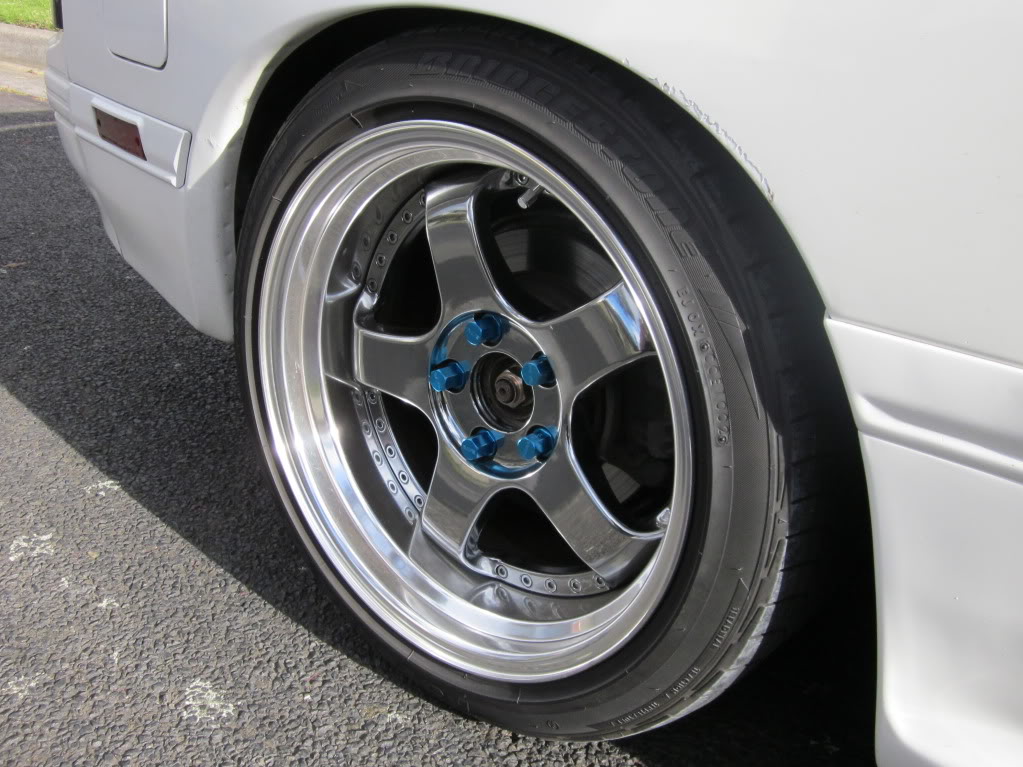
If you don't mind me asking I'd like to know how much you paid per wheel for the SSR's and where you got them? They are pretty expensive, I was just wondering if you found a killer deal somewhere on them by any chance.
10-22-10, 12:36 AM
#175
Full Member
Thread Starter
I actually bought these 2nd hand from Japan, so was lucky enough to not pay the expensive cost of buying them new.