
Racing Beat Seat Covers: Install pics
 05-23-14, 12:42 AM
#1
My wife bought me 2 RX-7s
Thread Starter
Join Date: Aug 2001
Location: Saskatoon, Saskatchewan, Canada
Posts: 2,328
Likes: 0
Received 2 Likes
on
2 Posts
Racing Beat Seat Covers: Install pics
I know I'm not the only one who has installed the RB vinyl seat covers, but I am the only one on the forum that has provided some pics. 
These are of the passenger seat, which was fairly easy compared to the drivers, which is missing a bolster due to age/wear. Anyhow, here we go.

New seat covers
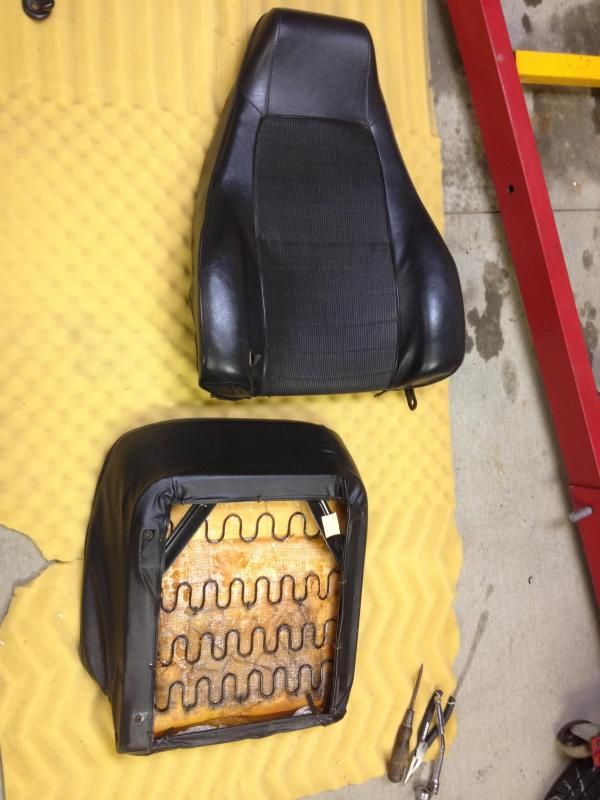
Old seat covers. The passenger seat wasn't so bad, but the kit comes with two covers and I wanted them to match, so off it comes!
The seat covers themselves are quite nice, heavy-duty vinyl with quite a bit of padding. The covers do not come with any RX-7 specific-instructions but once you take the old covers off, it's pretty clear how the new ones go on. Another thing the new covers don't come with are the metal rods that provide tie-down points for the hog-rings. You'll have to either harvest the old rods from the original seat covers or provide new ones. The kit includes more than enough hog rings to do both seats and a (fairly chintzy) hog-ring tool. Luckily, I have a friend who has a much better tool.
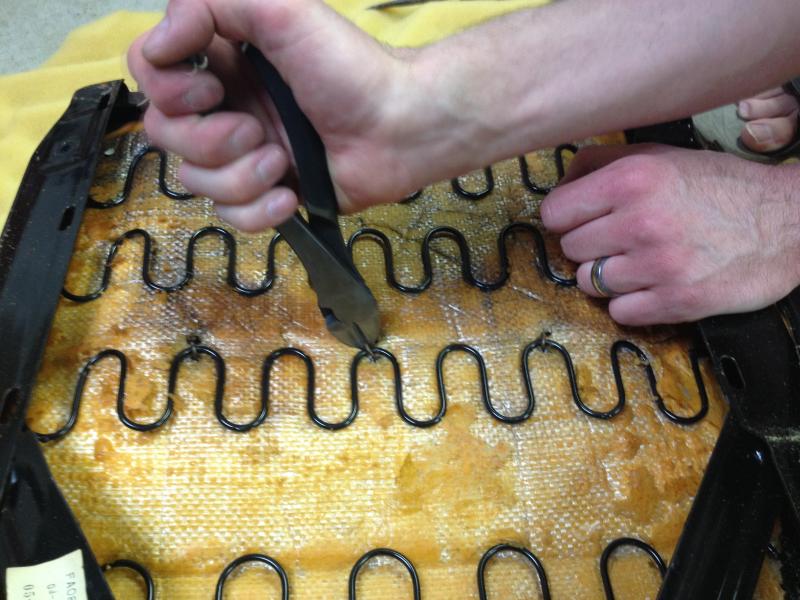
Removing the hog rings
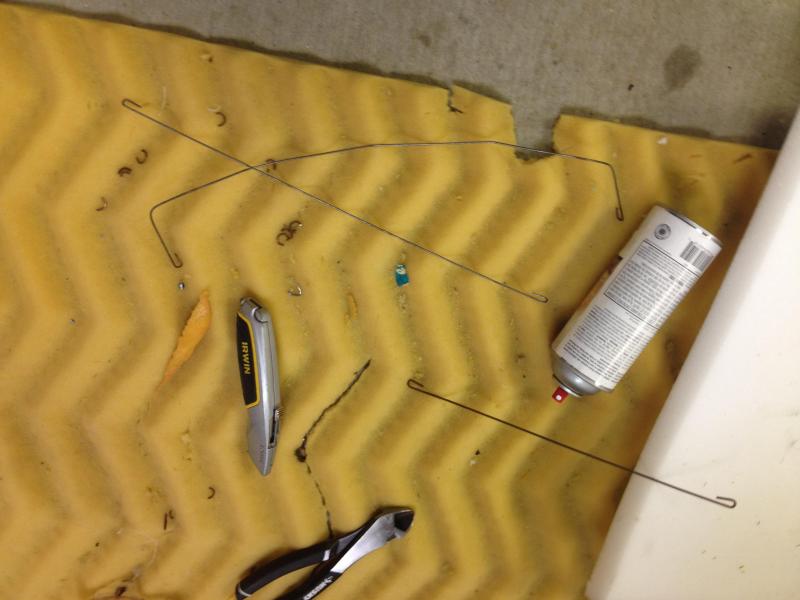
Metal rods
Once you've got the old covers off and have transferred the metal rods to the new RB covers, install is the reverse of the removal. The foam in my passenger seat was still pretty good after all these years and didn't require much in the way of repair. The RB seat covers don't have cutouts for the mounting hardware, so you'll have to cut those once the covers are installed. I used an awl to make a 'pilot hole' and then used a utility knife to make an X so the flaps of the vinyl would fold back when the screws/bolts were inserted. It seemed to work well.
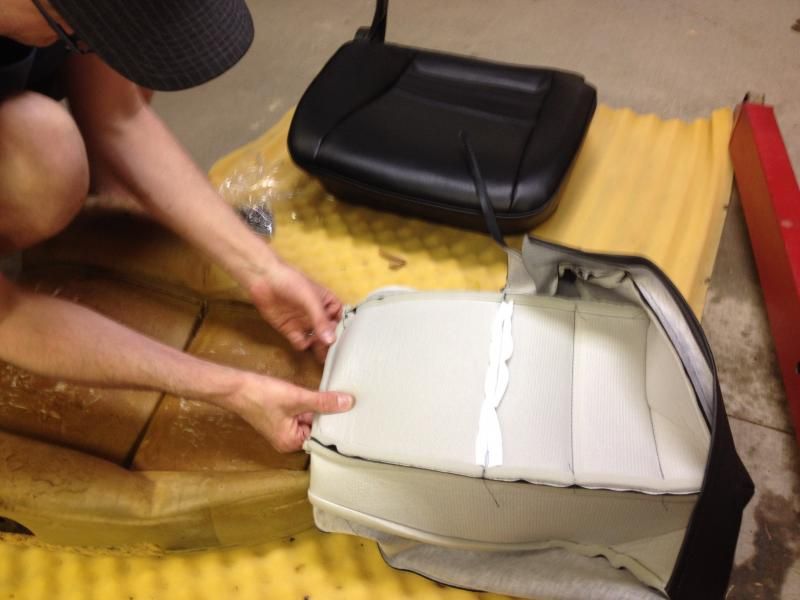
The bottom cover install is fairly straightforward, but to get access to the rods, the upper cover must be turned inside out and pulled over the seat in sections.

All hog-ringed-up. All of the fabric channels that held the rods had rotted away on the old seat covers, leaving the rods attached to the seats when I pulled the covers off.
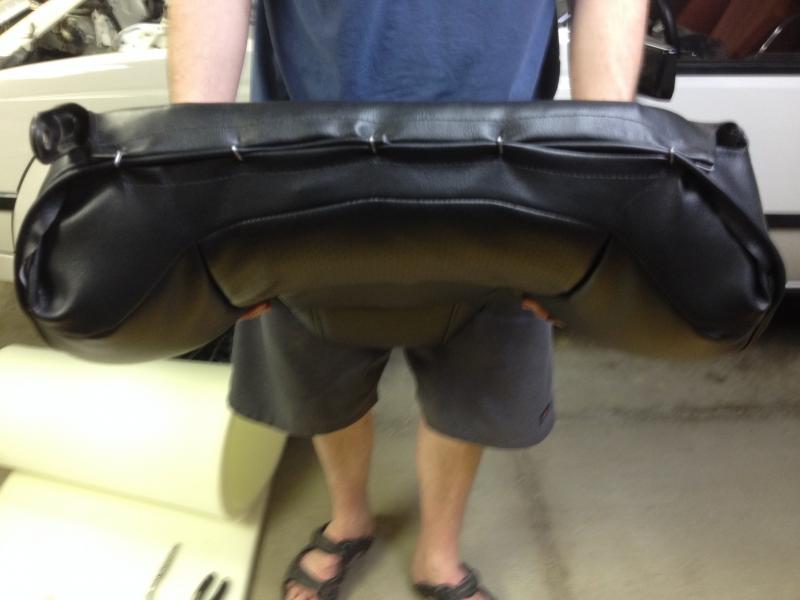
The bottom seam of of the top seat section.
The covers themselves fit fairly nicely over the original foam and looked fairly taut once everything was said and done. Once I've got the driver's-side seat apart, I'll post pics of the foam damage and the repairs needed to build up the worn/missing bolster.
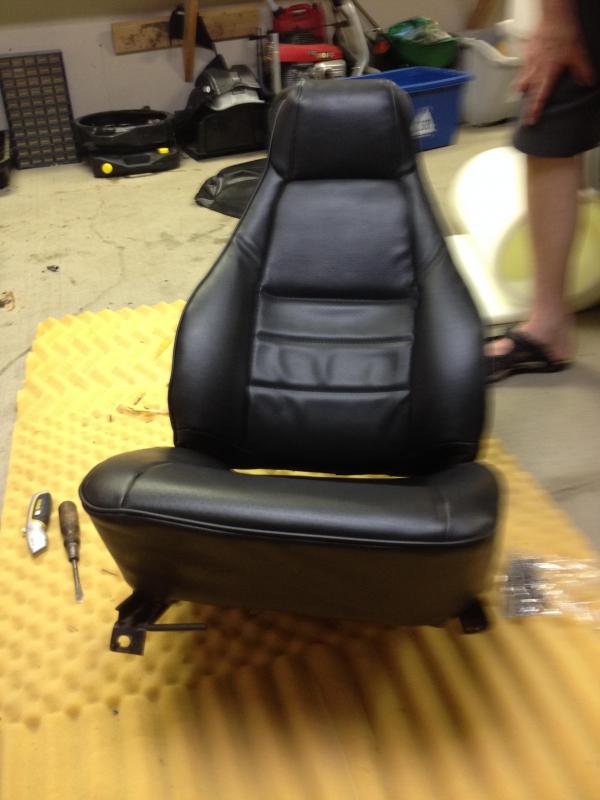
Overall I'm pretty happy with the kit.
It took the two of us about an hour and a half to do the install, including removal and reinstall of the seat from the car. The driver's seat will take longer due to the necessary foam repairs.
 05-23-14, 09:58 PM
#3
Moderator
iTrader: (3)
Join Date: Mar 2001
Location: https://www2.mazda.com/en/100th/
Posts: 31,130
Received 2,792 Likes
on
1,977 Posts
yeah that looks good
05-25-14, 11:55 PM
#6
My wife bought me 2 RX-7s
Thread Starter
Join Date: Aug 2001
Location: Saskatoon, Saskatchewan, Canada
Posts: 2,328
Likes: 0
Received 2 Likes
on
2 Posts
The kit was $300 from Racing Beat plus shipping. It'll be a bit until I do the driver's side. The foam is pretty badly torn so I'm hunting for donor bolsters first before I try and build my own.

Trending Topics

 05-27-14, 02:37 PM
#13
Racing Beat did a great job on the cloth covers they made for me; they even sold me some extra yardage of cloth so I could match my door panels.
Nice job on the pix, Moses; I have install pics to but have been too busy to organize and post them in a pictorial. Some are in the "What did you do... today" thread in the non-technical area.
Nice job on the pix, Moses; I have install pics to but have been too busy to organize and post them in a pictorial. Some are in the "What did you do... today" thread in the non-technical area.
 05-28-14, 07:47 PM
#16
They smooth out even better after you've sat on them a bit, too; at first, they feel quite tight but once they fit themselves to the cushions they feel very nice.
Looky where my car's pix ended up...
http://www.racingbeat.com/RX7-1975-1...ts/37040C.html
Looky where my car's pix ended up...
http://www.racingbeat.com/RX7-1975-1...ts/37040C.html
05-28-14, 08:22 PM
#17
Rotary Enthusiast
iTrader: (4)
Join Date: Jan 2003
Location: Bryan, TX
Posts: 766
Likes: 0
Received 0 Likes
on
0 Posts
This is awesome! I have been looking at those for over a year now. The drivers seat in my car is split all the way across, and I have been debating on my options for a bit now. I may have to start putting aside for this.
06-13-14, 09:50 AM
#18
My wife bought me 2 RX-7s
Thread Starter
Join Date: Aug 2001
Location: Saskatoon, Saskatchewan, Canada
Posts: 2,328
Likes: 0
Received 2 Likes
on
2 Posts
Bumpity!
So we embarked on doing the driver's seat last night. My goal of sourcing some replacement bolsters was unsuccessful, so we improvised. Using some high-density foam roll, we cut pieces to fit the worn areas of the bolster and secured them with foam glue and ... duct tape! This may seem ghetto, but it helps the foam stay in place and is undetectable when the cover is installed. We also added padding to the bottom cushion to compensate for 34 years of butts crushing the foam into submission.
The end results were pretty good (though I don't have any in-progress pics this time.) The bolsters feel nice and supportive and the bottom cushion is super-plush (but still supportive) with the extra padding.
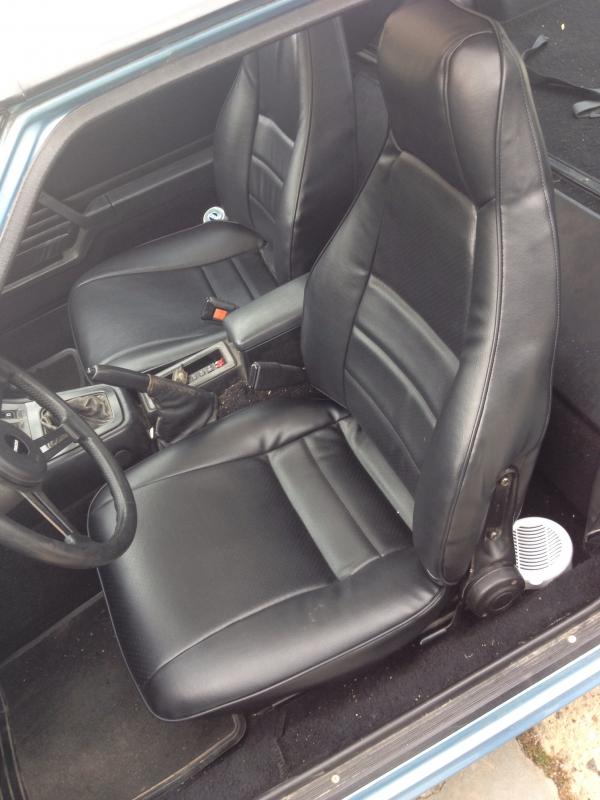
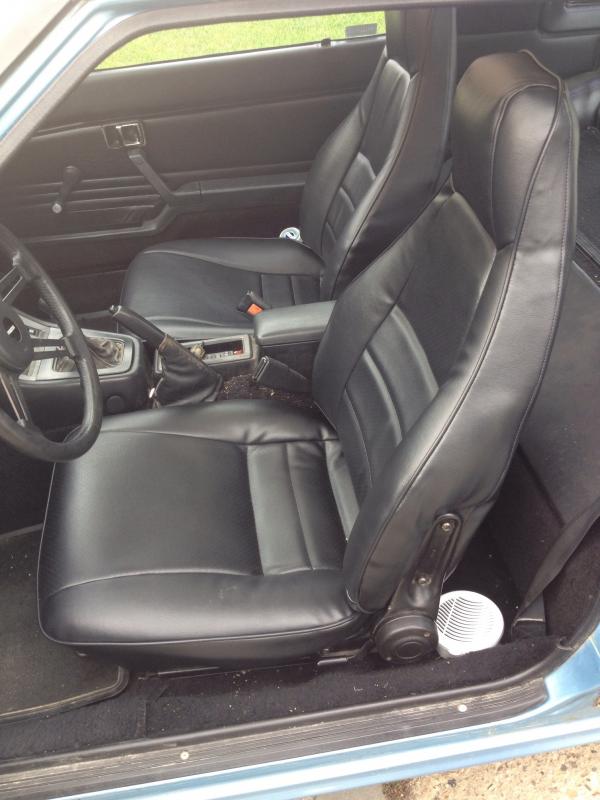
Please excuse the rest of my interior, I have to give it a good vacuum. When we pulled the drivers seat, quite a bit of flaked foam went everywhere from the decayed seat bottom.
Total install-time was about five hours for both seats, spread across two nights.
06-13-14, 11:49 AM
#20
My wife bought me 2 RX-7s
Thread Starter
Join Date: Aug 2001
Location: Saskatoon, Saskatchewan, Canada
Posts: 2,328
Likes: 0
Received 2 Likes
on
2 Posts
Sure does. It's nice to have some bolster support and not get jammed in the side by the metal seat frame when I reach over to the glove box. 
07-09-14, 02:05 PM
#25
An upholstery shop could re-do the whole seat for you (new foam, etc), save you time and trouble, definitely, and might even come out nicer depending on the shop, but I think straight bang-for-buck the RB covers are a pretty good value. Especially for people who like to DIY.
I've made my own seat skins before, twice, both times with good results. I just didn't want to go through the ordeal again, this time - pattern-making and assembling upholstery is very time-consuming.