Purchasing first SA tomorrow


 03-28-16, 04:19 PM
#52
Full Member
Thread Starter

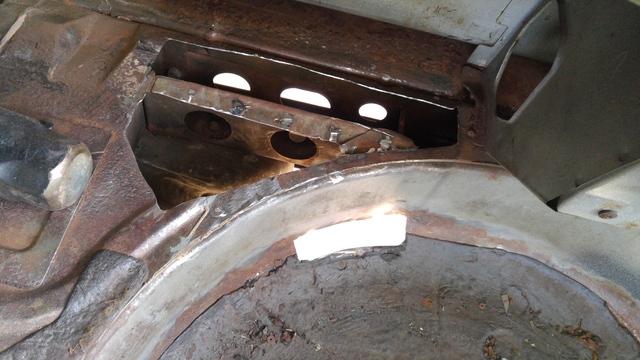
Well update on my rusty tub..... After a couple weeks fabricating multiple patch panels, practicing with the stick welder I owned, then with the flux core I purchased, (I know not ideal but I bought a mig and didn't have the proper outlet for it at the rental house I live in) I am deciding to move on with what I have.
Mind you I have VERY minimal experience welding at all let alone butt welding patch panels in. The ones I've now done are still too porous for my own liking along some section of the welds but the more I try to correct that, the more I blow through the factory metal. (I ended up using 16 gauge metal which was a bit thick but made everything easier for me in the end).
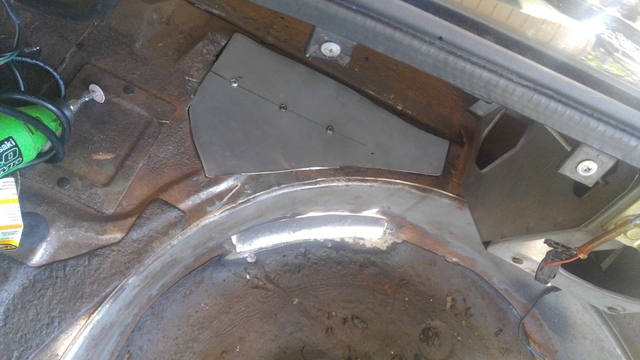
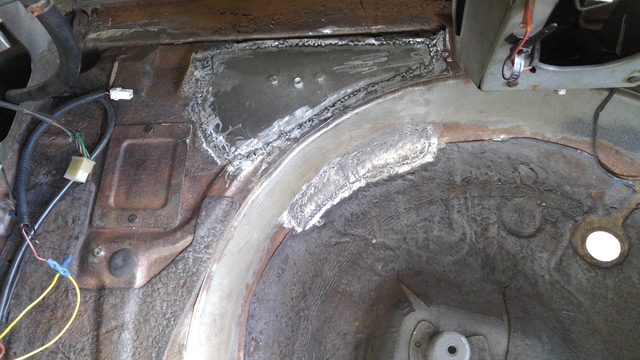
My next step is to POR-15 the ever living $#!t out of this tub. Maybe one day I will replace the whole thing anyway or make friends with someone that is more experienced and can help me do it right. (The panels are as strong as they can be, they just aren't air tight everywhere which I believe is the fault of the poor condition of factory metal I'm trying to weld them to). Either way, the only way to learn is to practice so I ended up giving it the best go I had.
After POR-15 I am also going to seam seal the patches in to hopefully make it even more water/air tight and to correct the areas that I am unhappy with, unless someone has a better idea? (Bondo, liquid weld, putty of some sort?)
Also I know POR-15 works best on rusted metal but if the clean metal has to be prepped anyway (for those with experience using this stuff) is it better to just try to sand as much rust off as possible before application or am I opening the door to creating even more pits/holes in those areas?
Mind you I have VERY minimal experience welding at all let alone butt welding patch panels in. The ones I've now done are still too porous for my own liking along some section of the welds but the more I try to correct that, the more I blow through the factory metal. (I ended up using 16 gauge metal which was a bit thick but made everything easier for me in the end).
My next step is to POR-15 the ever living $#!t out of this tub. Maybe one day I will replace the whole thing anyway or make friends with someone that is more experienced and can help me do it right. (The panels are as strong as they can be, they just aren't air tight everywhere which I believe is the fault of the poor condition of factory metal I'm trying to weld them to). Either way, the only way to learn is to practice so I ended up giving it the best go I had.
After POR-15 I am also going to seam seal the patches in to hopefully make it even more water/air tight and to correct the areas that I am unhappy with, unless someone has a better idea? (Bondo, liquid weld, putty of some sort?)
Also I know POR-15 works best on rusted metal but if the clean metal has to be prepped anyway (for those with experience using this stuff) is it better to just try to sand as much rust off as possible before application or am I opening the door to creating even more pits/holes in those areas?


 03-28-16, 05:01 PM
#54

I'm amazed you can find them, the tail light seals for the FBs are very hard to find in good shape. I don't know if Atkins has them but if so I'm sure they're no cheaper.
At $80 it's a good investment I'd say, one more thing you don't need to think about with the rebuild, which is going very nicely by the way. Nice work!
At $80 it's a good investment I'd say, one more thing you don't need to think about with the rebuild, which is going very nicely by the way. Nice work!
03-29-16, 04:05 AM
#55
You have an _SA_ right? Mazdatrix: $31 each for rear light seals. They will ship by Post too...
Or your local dealer and then shipping is free (have PN for them - the counter guys sometimes are a bit lost with anything over 10 yrs old...)
8871-51-153 & 8871-51-163
And: POR makes a seam-filler putty too. Brave man on the welds!! Kudos!
Thanks for updates...
Stu Aull
80GS
Alaska
Or your local dealer and then shipping is free (have PN for them - the counter guys sometimes are a bit lost with anything over 10 yrs old...)
8871-51-153 & 8871-51-163
And: POR makes a seam-filler putty too. Brave man on the welds!! Kudos!
Thanks for updates...
Stu Aull
80GS
Alaska
04-03-16, 07:23 PM
#56
Full Member
Thread Starter
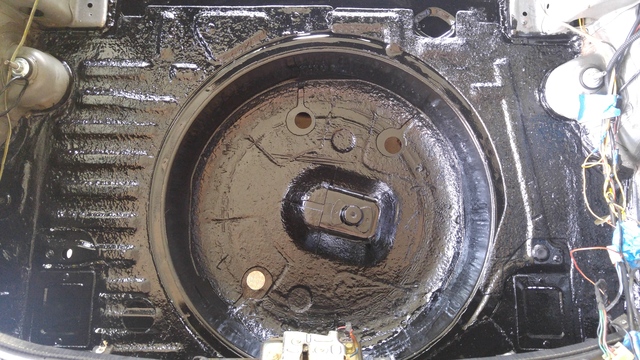
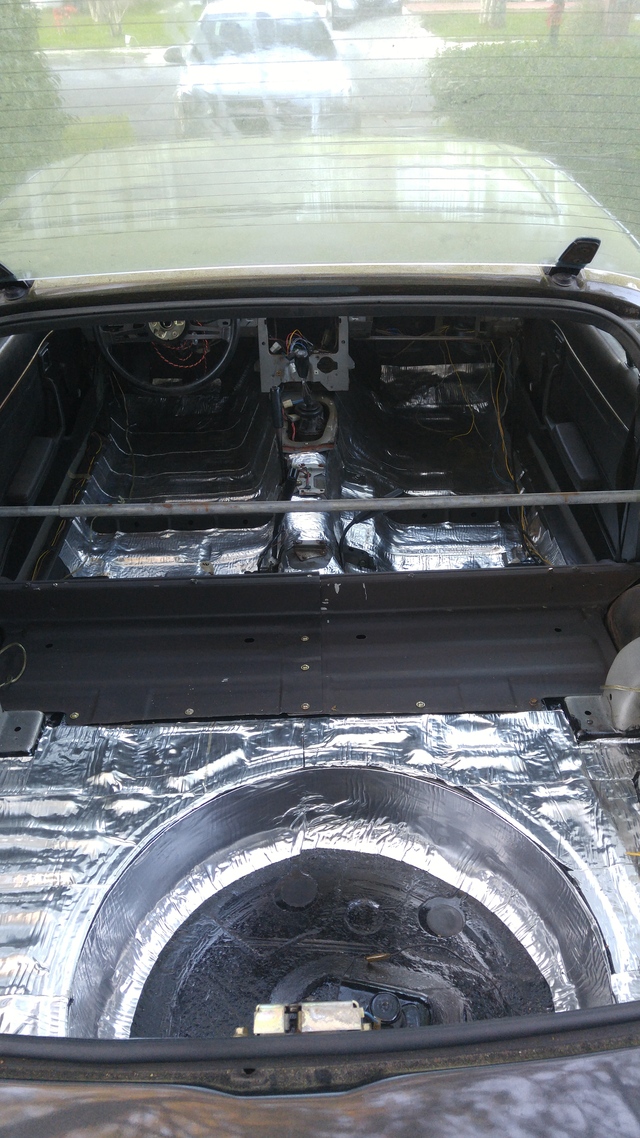
Thanks 7aull! I got a lot done today and can finally say the rust repair work is complete!!!! (thank God) I have an antenna hole filler in route as we speak as well as new rear tail light seals  . The whole interior is now POR-15, seam sealed, and dynamatted as well as the underside POR-15/seam sealed. After having first hand experience with this stuff I would definitely recommend it to anyone that has thought about using it. Though I can't speak about how well it holds up at this point, the application and final appearance is great!
(If the absolute zero chance of getting the drips off my clothes and hands has any indication of the toughness of POR-15 then it should be good until the car is scrapped a few hundred years from now )
)
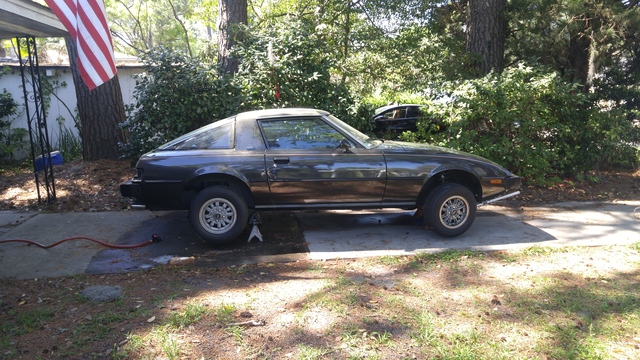
And because I felt bad you keep seeing the exact same spot of the car over and over and over and over and........again I figured I would take one of her on stands as well Hopefully I will be able to get the gas tank back in tomorrow and even move on to replacing the oil pan gasket/changing the oil. Once that is complete she will be more or less driveable........that is if I can figure out what the heck is making that rear-end noise that existed when I first purchased her. (still need to check ujoints and diff)
. The whole interior is now POR-15, seam sealed, and dynamatted as well as the underside POR-15/seam sealed. After having first hand experience with this stuff I would definitely recommend it to anyone that has thought about using it. Though I can't speak about how well it holds up at this point, the application and final appearance is great! (If the absolute zero chance of getting the drips off my clothes and hands has any indication of the toughness of POR-15 then it should be good until the car is scrapped a few hundred years from now


And because I felt bad you keep seeing the exact same spot of the car over and over and over and over and........again I figured I would take one of her on stands as well
Hopefully I will be able to get the gas tank back in tomorrow and even move on to replacing the oil pan gasket/changing the oil. Once that is complete she will be more or less driveable........that is if I can figure out what the heck is making that rear-end noise that existed when I first purchased her. (still need to check ujoints and diff) 04-07-16, 05:13 AM
#57

Looks like its coming along nicely! Job well done on the rust repair! Rear end noise can sometimes be one one of many things. Most commonly are the bearings on the axle shafts. Check the u-joints for play, but if you find none, I would suggest pulling one of the axles out of the rear end housing and checking the bearing.
04-08-16, 03:53 AM
#58
Hey - another Limited resurrected! Excellent work. I have POR on several bits of my car for some years now and if you prepped correctly, I think you will find it nuke-proof. But, yeah, on clothes? they are Done! hands? has to WEAR off! tough stuff...
Trick: store extra POR in fridge in a glass bottle for next-time use. Last for years...
Stu Aull
80GS
Alaska
Trick: store extra POR in fridge in a glass bottle for next-time use. Last for years...
Stu Aull
80GS
Alaska
04-09-16, 02:27 PM
#59
Full Member
Thread Starter
I got a lot done on her this weekend! Consider the rear end rust project complete. I also got some gasket material and cut new gaskets for all of the rear glass trim pieces (lock mechanism, and strut mounts). The rear tail seals have been replaced and I siliconed in an antenna delete plug to prevent that area from leaking as well. With all that said and done she should be pretty leak proof!
I tested her out last night and when I was finished I found a little water in the rear hatch area. After looking around I realized I was blasting water directly at the license plate mounting holes (which were open) and two pin holes from the mazda badge that was missing. I have since put in a new mazda badge and will soon have a plate on her so I believe, fingers crossed, that should be it. No other leaks were found.
I also, again fingers crossed, fixed the leak on the oil pan with a deep clean and grey RTV. Two of the bolts were stripped out and unfortunately they were directly next to each other. The pan seemed to be sitting firm though so I ended up siliconing those bolts in as well as lock tighting them up. Hopefully that will hold enough and maybe one day I will put studs in to replace the bolts.
Thanks for the tip Mazdaverx! I believe it is only the drive shaft because, last but not least, I pulled the drive shaft and found the rear ujoint to be a bit notchy compared to the front which was perfectly smooth. Im thinking that was most definitely the cause of the horrible grinding/vibration I was experiencing driving her home from the purchase. If not the axle bearing will be the next place I look!
Two new ujoints are currently in the mail as we speak and once that is said and done the interior will begin going back in as well. (still need to order some carpet but Im thinking I will wait until after the wedding.)
Last edited by NISxMO; 04-09-16 at 02:34 PM.
04-09-16, 02:32 PM
#60
Full Member
Thread Starter
Hey - another Limited resurrected! Excellent work. I have POR on several bits of my car for some years now and if you prepped correctly, I think you will find it nuke-proof. But, yeah, on clothes? they are Done! hands? has to WEAR off! tough stuff...
Trick: store extra POR in fridge in a glass bottle for next-time use. Last for years...
Stu Aull
80GS
Alaska
Trick: store extra POR in fridge in a glass bottle for next-time use. Last for years...
Stu Aull
80GS
Alaska
Yea the POR wasnt too bad until I did the underside and even after scraping the extra liquid off the brush it is so thin it still dripped in some areas. I was more or less wearing a burka....God forbid that stuff gets on my face 21 days before my wedding....

Thanks for the fridge tip! Putting the rest in there now!
08-05-16, 07:10 AM
#61
Full Member
Thread Starter
Well haven't updated this in awhile. A few things I've gotten done over the past couple months.....
- New carpet
- Crack free dash installed
- New rotors/pads all around
- Braided lines all around
- GSL rear end swap
- Painted Calipers
- New proportional valve
- Por 15'ed subframe and rockers.
My pray to God plan is that I get to drive this car this weekend. I have some other parts on the way like coilovers and various little bits that will require me to pull a lot of this back off but I'd rather drive her now and do the work again later.
2 big questions that I also posted on FB.
1. My oil pan was still leaking. I purchased a stud kit, removed the front subframe and am about to install the studs but I do not understand the theory on studs. I assumed they would be longer than the bolts and get more threads thus allowing more leverage or torque on the nut.....however, it goes in almost the exact distance as the old bolts so how are these any different? (I did chase the threads to make sure they are straight and clean before the install. I thought two were stripped but after chasing them they seems fine)
2. Are the bolts for the drive shaft to the pinion flange on the GSL rear end a different size or thread than the factory 79 bolts? I did not receieve the bolts with the rear end but when I was installing the driveshaft back they seem to just spin freely...Any ideas? Is it bad to get a longer bolt and throw nuts on the back? (from a balance point of view)
Thanks for the input!
*edit* After swapping out old ujoints etc. on previous rearend I still had a lot of noise. Figured it was the differential and found a GSL rear locally which was the reason for the swap. (my brakes also sucked so an overhaul in this department will be huge too)
Last edited by NISxMO; 08-05-16 at 07:14 AM.
08-05-16, 10:17 AM
#62
1. The simple answer on studs vs bolts is this. I got the information from this website but the theory is the same. Engine studs: Understanding the advantages of using studs vs. bolts, and tips on achieving proper clamping loads - Automotive Service Professional
"Studs provide the ability to obtain much more accurate torque values because the studs don’t twist during tightening as do bolts. Because the studs remain stationary during nut tightening, the studs stretch in one axis alone, providing much more even and accurate clamping forces."
2. Depending on what year the new rearend is from, some driveshafts are threaded and other not. Keep in mind, the driveshaft bolts are grade 8 and have a non-threaded collar that is beefy. The flag can also be different between years.
Last edited by KansasCityREPU; 08-05-16 at 10:22 AM.
08-08-16, 05:30 AM
#63
Full Member
Thread Starter
Thanks Kansas! I believe you were right on this pinion flange being non threaded. I just threw in longer variations of my previous bolts and put a lock washer and nut on the rear. I think that should be enough to do the trick!
As far as the oil pan in concerned I did indeed have two stripped out bolts even after chasing them. I got to drilling and inserting a helicoil. (The drilling process was a bit nerve racking I have to admit) One came out slightly crooked but with a little red loctite on all the studs and the nuts set in place everything feels much firmer than before.
I never was a fan of the original bolts but I am glad I took everyone's advice because that stud kit truly did feel better when it was finished. I also used both a gasket and grey RTV. If this thing leaks after this I will be surely surprised and disappointed. Will try to upload some new pics of everything soon.

Thread
Thread Starter
Forum
Replies
Last Post
Felion
3rd Generation Specific (1993-2002)
17
01-18-16 12:10 PM