
projector HID flush mount project
 02-25-15, 11:45 AM
#1
Full Member
Thread Starter
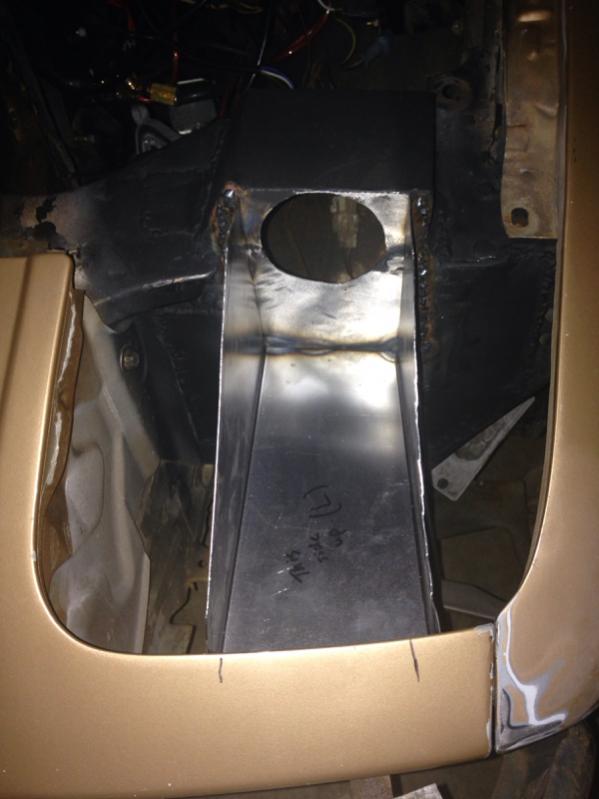
I thought I would use this to get me motivated and moving faster on my one-off time vampire. navigator HID's taken from their housings and using the spines they mount with so I can fine tune the adjustments once they are permanently on the car and everything is buttoned up. YES I had to cut into the front support, the only way to get the best angle and geometry on the lights. going for a bare minimal amount of lexan needed to let the light come out. still have yet to decide how to mount the original doors on the front end - they wont need to come off for light purposes, just to make it easier to take the front metal nose section off of the car from up top. currently fabbing the top sections and the "tunnel" from the light to the front end. will all be flat black most likely.
ok ok. pics!!
ok ok. pics!!
 02-25-15, 11:50 AM
#2
Full Member
Thread Starter
wiring duties were made simple with the use of a spare bi-xenon H13 HID kit wiring that used to be plug and play. input wiring from headlight on one side, the relay network did the rest to energize the solenoid that moves the shield to let the high beam light arc out from the housing ( 1 light on all the time) and it also works as a "flash to pass" mod without the diode in the column.
02-25-15, 06:30 PM
#4
Full Member
Join Date: Aug 2013
Location: Trinidad & Tobago
Posts: 178
Likes: 0
Received 0 Likes
on
0 Posts
I have been thinking the of this as well and must say I cringed when I saw you cut the car I wanted to use g37 hid projectors, along with a eBay 2" light (so would be 3" and 2" light on either side) for the park lights, didn't want to cut the car like that though. was going to at worst, drill holes in the body on the car for the back of the lights of needed.
The beam pattern etc is great on your setup. Any thoughts on using reflective plastics on the bottom/sides of the light housings?
The beam pattern etc is great on your setup. Any thoughts on using reflective plastics on the bottom/sides of the light housings?
02-25-15, 07:33 PM
#5
Full Member
Thread Starter
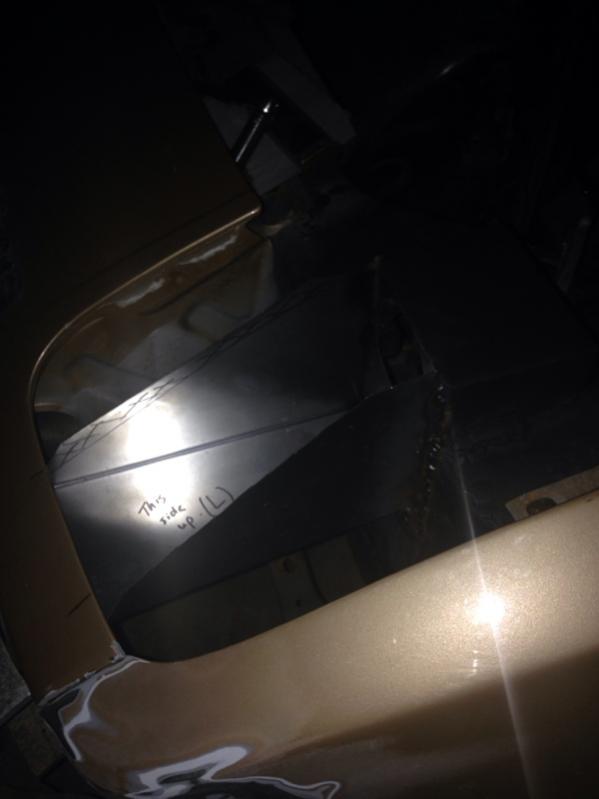
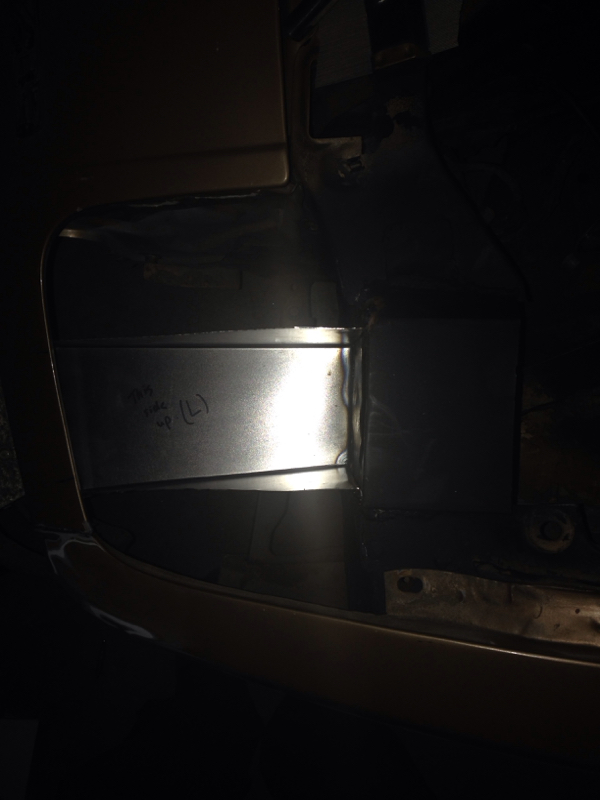
I was thinking about polishing up the metal before final welding, but it might turn color from heat of the welds. I could try it, and if it blows, just scuff again and paint it. the light reflects great with no added "tunnel" and I experimented with the pattern by using black tape on the lexan and covering up more and more of it. since the door is so close to the projector, a very small width is all that is needed. if there are any dark spots, a pair of 18w 6 led cree fogs in the bodykit will shine way past them.
Original reason of just blacking out the insides is because I will have to make a gasket out of silicone or something to truly waterproof the lens at the edges of the housing , keeping road gunk from killing the HID bulbs. half of this challenge is making it bulletproof, the other half is making it pretty in the process.
Original reason of just blacking out the insides is because I will have to make a gasket out of silicone or something to truly waterproof the lens at the edges of the housing , keeping road gunk from killing the HID bulbs. half of this challenge is making it bulletproof, the other half is making it pretty in the process.
Trending Topics
 03-21-15, 09:44 AM
#9
Full Member
Join Date: Aug 2013
Location: Trinidad & Tobago
Posts: 178
Likes: 0
Received 0 Likes
on
0 Posts
Your beam pattern and spread may be every narrow in that tunnel. May not be a good idea as seeing curbs and objects outside of the "light tunnels spread" etc at night may be an issue
03-21-15, 11:19 AM
#10
Full Member
Thread Starter
it is narrow. it's a projector beam, not reflector. very little of the main beam pattern is interrupted by the front apron , but that was mostly overlap into either side. negligible. note pic two and three, the width is much better even up close @ under 8 ft ahead, plus the fact that the light coming through in pic 2 is a focal cone and not a flat wide spread pattern as a reflector lens would need. trust me 


Thread
Thread Starter
Forum
Replies
Last Post

