Project: 'Vent my Hood!'
#28
Thread Starter
Wrkn Toyota, Rootn Wankel
Joined: Sep 2007
Posts: 1,642
Likes: 1
From: "Haystack" Hayward, CA
 Wow someone was acctually watching my thread?!
Anyways, yeah there will be an update on the hood in about a month or less... I have to wait for my new college semester to start before I can borrow the metal shop gear again... I am getting closer though. I need to finish attaching the frame for the fins on one vent and then tack and position the fins before finishing it off...
Sorry for the long time without an update... had no access to any tools for it.

#29
 Wow someone was acctually watching my thread?!
Anyways, yeah there will be an update on the hood in about a month or less... I have to wait for my new college semester to start before I can borrow the metal shop gear again... I am getting closer though. I need to finish attaching the frame for the fins on one vent and then tack and position the fins before finishing it off...
Sorry for the long time without an update... had no access to any tools for it.

can't remember if anyone suggested this or not but incase they have not, once you get it all done you should make a few more of the vents themselves to sell, if nothing else as a kit

#31
Thread Starter
Wrkn Toyota, Rootn Wankel
Joined: Sep 2007
Posts: 1,642
Likes: 1
From: "Haystack" Hayward, CA
hey no problem man, wasnt sure if it was that situation or you lost interest in it.. but its got me really curious on what it will look like when its all said and done..
can't remember if anyone suggested this or not but incase they have not, once you get it all done you should make a few more of the vents themselves to sell, if nothing else as a kit
can't remember if anyone suggested this or not but incase they have not, once you get it all done you should make a few more of the vents themselves to sell, if nothing else as a kit

#33
Thread Starter
Wrkn Toyota, Rootn Wankel
Joined: Sep 2007
Posts: 1,642
Likes: 1
From: "Haystack" Hayward, CA
I figured since a couple guys have been asking when I am going to finish my hood I'd give a little update.
This is what I got done before the semester ended:
The blades for the hood and as I said in the other post I need to finish welding the support frame on and then I can finally tack these babies in and adjust them to where I want them!
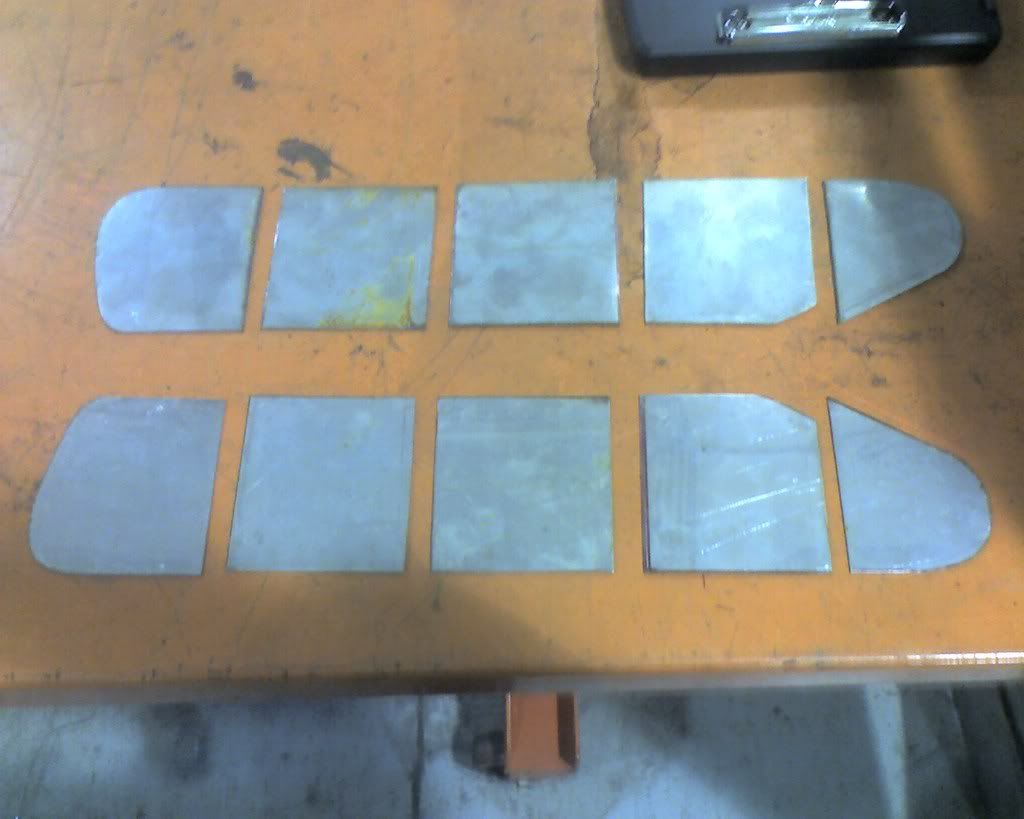
Expect an update within two weeks, depending on whether or not the teacher will let me weld this saturday.
This is what I got done before the semester ended:
The blades for the hood and as I said in the other post I need to finish welding the support frame on and then I can finally tack these babies in and adjust them to where I want them!

Expect an update within two weeks, depending on whether or not the teacher will let me weld this saturday.
#34
well when i stripped a fender down on my last 7 i went to i think it was either shucks or autozone and picked up some "aircraft paint remover" it looks like snot when you put it on the part but it does a great job and was not really all that expensive.. just spread it on and let it set for the recommended time and then wipe/rinse it off

#35
Thread Starter
Wrkn Toyota, Rootn Wankel
Joined: Sep 2007
Posts: 1,642
Likes: 1
From: "Haystack" Hayward, CA
#38
Thread Starter
Wrkn Toyota, Rootn Wankel
Joined: Sep 2007
Posts: 1,642
Likes: 1
From: "Haystack" Hayward, CA
 Yeah... about that update. This Saturday the welding shop isn't going to be available for me to use (The new class needs to do their safety test and overview, lucky me) so pretty much the most I can do with the hood is crunch some numbers on the blade angles and strip the rest of the paint off now that I have the jumbo jug of Tail-Strip II.
Well... come to think of it... maybe I can try and see if I can find some wire or tape to mock up what the vents should look like when welded for you guys. Most of this work depends on the weather because I don't have an enclosed garage to work in
 .
.I will be back on track with this project next Saturday though, thanks for being patient and sorry for the delays.
 I hate not having money to buy all the tools and stuffs I need...
#39
Can't to see how this works out. I'm wanting to do a similar modification, was thinking of cutting out the right side much like you did DemonSpawn and stick in a vent from a Datsun and make a surround to vent straight to the carb.
Keep it up man.
Keep it up man.

#40
Thread Starter
Wrkn Toyota, Rootn Wankel
Joined: Sep 2007
Posts: 1,642
Likes: 1
From: "Haystack" Hayward, CA
Okay guys, sorry for the long *** wait. So I ran down to the metal shop on Saturday to put the reinforcing pieces along the hole for the fins.
I will say right now, if you plan on doing this project, use TIGl it will be 100X much easier to do a lot of this stuff. Sadly I have yet to learn TIG so I am doing all this with a low set MIG welder.
Anyways, the damned thing rusted some because I don't have anywhere to put it but against my house and its been freaking raining non stop for a week or so now...
Oh, right... Anyways so i figure for my benefit and you guys I tacked a couple of the blades in place to get a general idea of how it will look when done. Now I know they look crooked and poorly spaced... and that's because they are. I haven't come up with a spacing/angling template I like so I need to work on that before the blades go in permenently. So for now, enjoy these teasers.
The Top of the Hood:
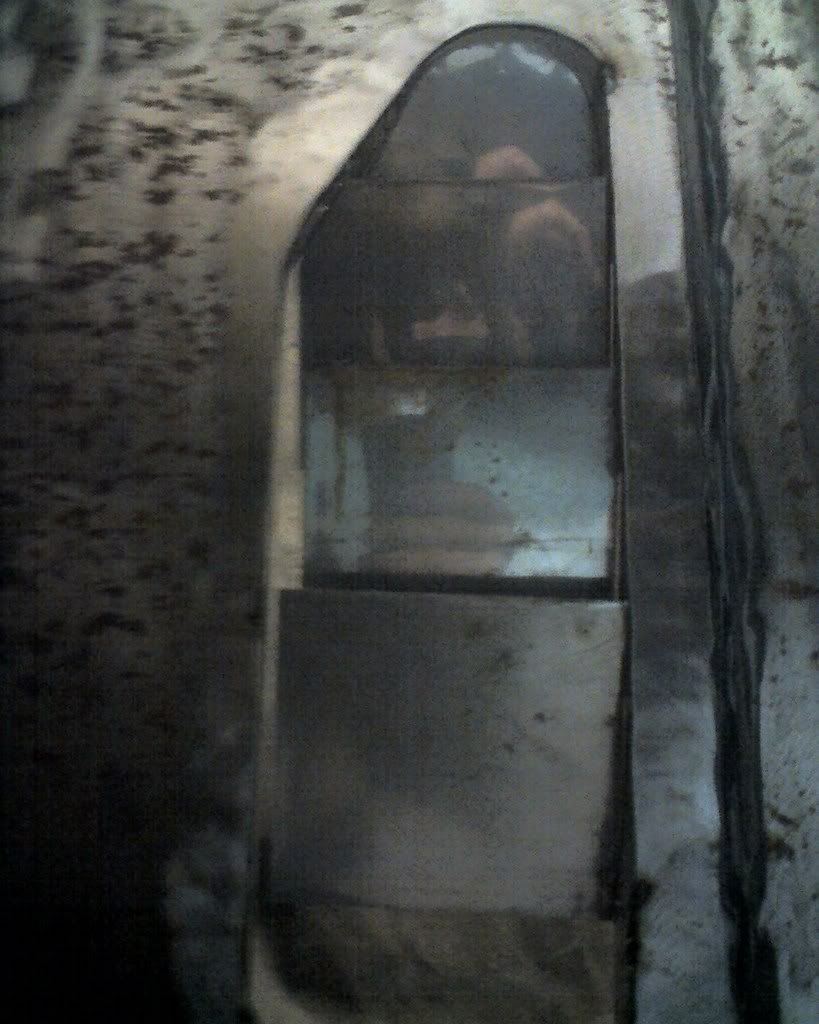
The Bottom End:
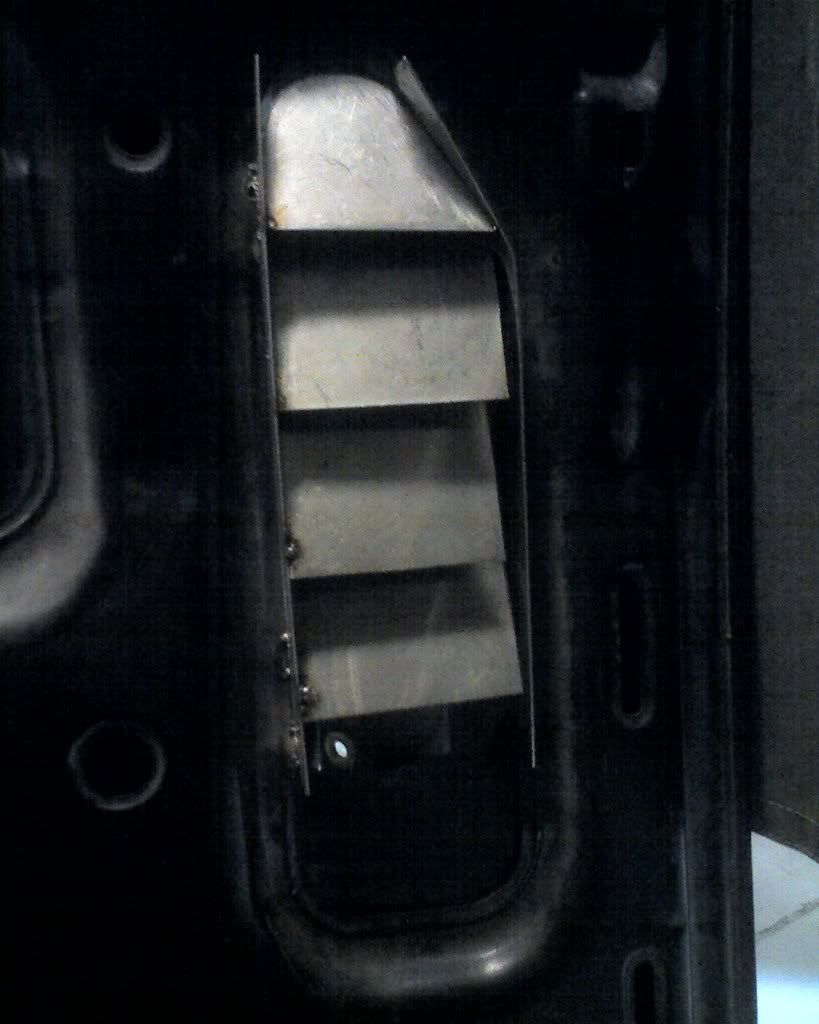
Small note- The way the blades are set up is backwards from how I want them set up... The bottom picture is how it should look fron the top of teh hood and vice versa... I just noticed that I had mocked it up backwards.
I will say right now, if you plan on doing this project, use TIGl it will be 100X much easier to do a lot of this stuff. Sadly I have yet to learn TIG so I am doing all this with a low set MIG welder.

Anyways, the damned thing rusted some because I don't have anywhere to put it but against my house and its been freaking raining non stop for a week or so now...
Oh, right... Anyways so i figure for my benefit and you guys I tacked a couple of the blades in place to get a general idea of how it will look when done. Now I know they look crooked and poorly spaced... and that's because they are. I haven't come up with a spacing/angling template I like so I need to work on that before the blades go in permenently. So for now, enjoy these teasers.
The Top of the Hood:

The Bottom End:

Small note- The way the blades are set up is backwards from how I want them set up... The bottom picture is how it should look fron the top of teh hood and vice versa... I just noticed that I had mocked it up backwards.

#43
i for get the name of the product ,they said the name of it on the power block this week end. it will stop flash rust ect for life(or they say) they used it when the where cutting up a truck bed to shorten it. the truck sat for 4 months i think the said and there was no rust.
side note just hand sand the hood and spray the whole hood with weld thru primer it will pervent it from rusting and liek the name says you can weld right on it. when your down just sand it with a block sander ect. iam not a painter so i dont know how well the paint job would come out if you just sanded alittle and started painting over it ect ect.
iam a welder by trade, if you want to learn to tig weld with out getting your own welder, go buy a small set for oxy-acetylene welding. the gas bottles are small enough a 14 year old girl could carry both at the same time. its not the same thing as tig welding ie you control the heat by pulling the flame away vs letting up on the pedal. but it will teach you to use both hands at the same time. pluse you not wasting a but load of tungstein(never can spell that right.)
if you need tips ect hit me up. i am a precision welder and tube pipe bender/ metal fab. i have to hold every thing within +/- .01 to .06
Last edited by warwickben; 02-04-08 at 05:24 PM.
#45
Thread Starter
Wrkn Toyota, Rootn Wankel
Joined: Sep 2007
Posts: 1,642
Likes: 1
From: "Haystack" Hayward, CA
i for get the name of the product ,they said the name of it on the power block this week end. it will stop flash rust ect for life(or they say) they used it when the where cutting up a truck bed to shorten it. the truck sat for 4 months i think the said and there was no rust.
side note just hand sand the hood and spray the whole hood with weld thru primer it will pervent it from rusting and liek the name says you can weld right on it. when your down just sand it with a block sander ect. iam not a painter so i dont know how well the paint job would come out if you just sanded alittle and started painting over it ect ect.
iam a welder by trade, if you want to learn to tig weld with out getting your own welder, go buy a small set for oxy-acetylene welding. the gas bottles are small enough a 14 year old girl could carry both at the same time. its not the same thing as tig welding ie you control the heat by pulling the flame away vs letting up on the pedal. but it will teach you to use both hands at the same time. pluse you not wasting a but load of tungstein(never can spell that right.)
if you need tips ect hit me up. i am a precision welder and tube pipe bender/ metal fab. i have to hold every thing within +/- .01 to .06
side note just hand sand the hood and spray the whole hood with weld thru primer it will pervent it from rusting and liek the name says you can weld right on it. when your down just sand it with a block sander ect. iam not a painter so i dont know how well the paint job would come out if you just sanded alittle and started painting over it ect ect.
iam a welder by trade, if you want to learn to tig weld with out getting your own welder, go buy a small set for oxy-acetylene welding. the gas bottles are small enough a 14 year old girl could carry both at the same time. its not the same thing as tig welding ie you control the heat by pulling the flame away vs letting up on the pedal. but it will teach you to use both hands at the same time. pluse you not wasting a but load of tungstein(never can spell that right.)
if you need tips ect hit me up. i am a precision welder and tube pipe bender/ metal fab. i have to hold every thing within +/- .01 to .06
Well i am going to sand it down because the places where I tightened up the frame to the actual sheetmetal bowed the hood in just slightly, nbot a big noticable difference, but enough to warrant Bondo.
As for the Brazing (that's the method you're describing right?) I never thought of that... we have a few Acetylene torches for that at the shop no one uses, maybe I should practice with that... or just get some tungsten rods from the school store and practice on the weekends in the welding shop.... I will definetly keep your offer in mind though!
#46
not brazing. brazing in simple terms is like soldering (sp? its early 4 me) just little hotter. if i remember right solder 400f to 800f , brazing 800 pluse.
in both your heating up the base metal enough to melt the bazing rod or solder. the pours of the metal open up and the filler metal flows in the little spaces . simple terms its like roughing up wood to get a better glue bond.
i was talking about oxy-acetylene welding you use a filler rod of the same metal. for steel the rod looks copper but is just a coating on the rod to pervent rust.
you heat the base metal till it starts to melt then dab the filler rod in the puddle and move along the seam ect
brazing is when you heat the metal up just enough to melt the brazeing rod(brass ,stainless steel ect ect.)
when i was in high school, i went to a tech. i had one week school then one week of shop. (metal fab to be right) they had you do oxy-acetylene welding befor tig because your hands are doing more or less the same thing and its cheaper.
sorry about spelling grammar errors ect.
#48
Thread Starter
Wrkn Toyota, Rootn Wankel
Joined: Sep 2007
Posts: 1,642
Likes: 1
From: "Haystack" Hayward, CA
Okay Update time! 
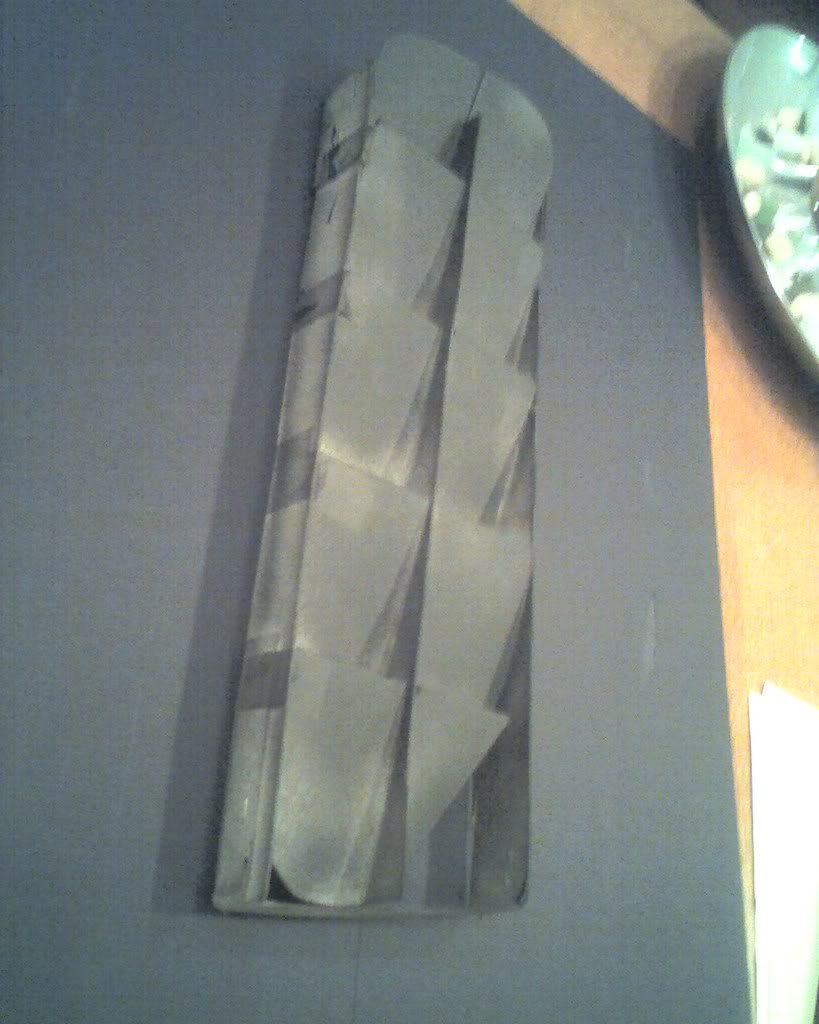
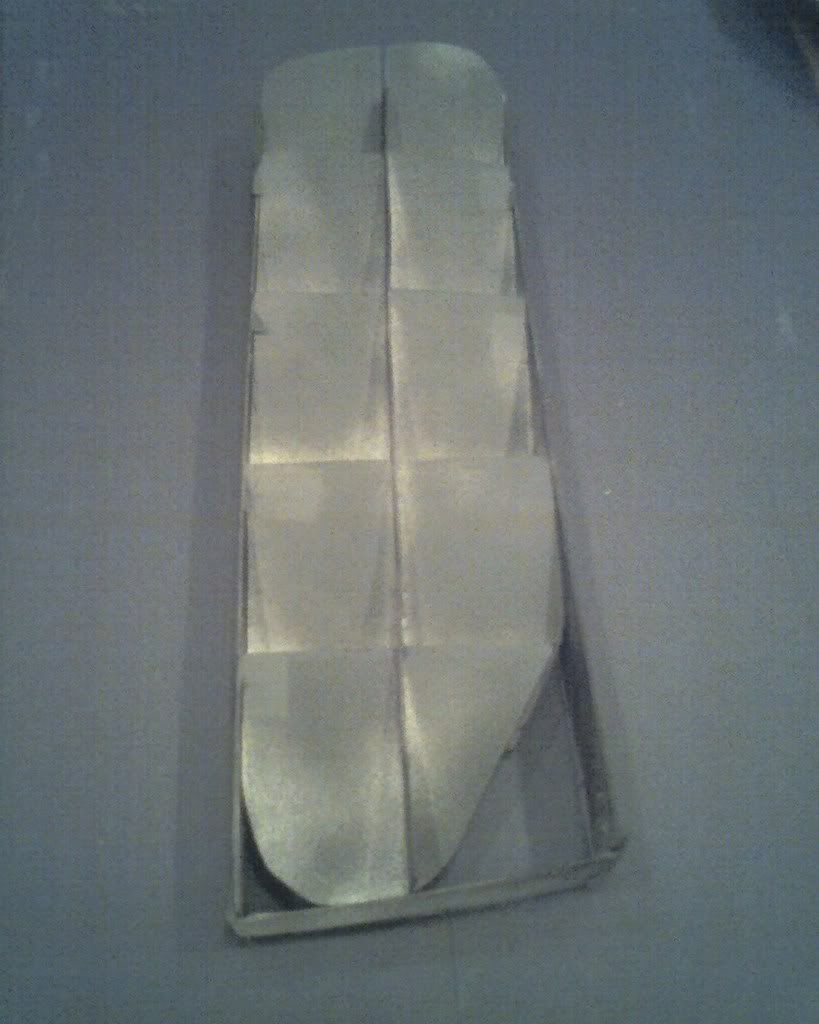
These are some pics of a mock-up of the blades at the angles I want them. They angle is roughly 16 degrees.
Please ignore the supporting frame in between the blades that is running down the middle, that will not be in the final production piece; its just I don't have any foamboard to use to make my mock-ups.
Well enough blabbering, here's the pics.
I had some flat black paint from when I painted some Airsoft Parts so I hit the mock-up with it to show up better.


#49
lawl I have no welding skill, or the tools to cut up my hood, so I'll be getting my vented hood from Fibermaz if he finishes them, and I have the money. I respect you sir for doing all this work yourself!


