Project: 'Vent my Hood!'
#1
Thread Starter
Wrkn Toyota, Rootn Wankel
Joined: Sep 2007
Posts: 1,642
Likes: 1
From: "Haystack" Hayward, CA
Project: 'Vent my Hood!'
Hey guys, I finally combed through a couple of Pick 'N' Pulls and found a few nice GSL's to tear through for parts. One of the parts was a hood to experiment on! 
Now begins the fun part of trying to install custom build vents into my newly aquired hood.
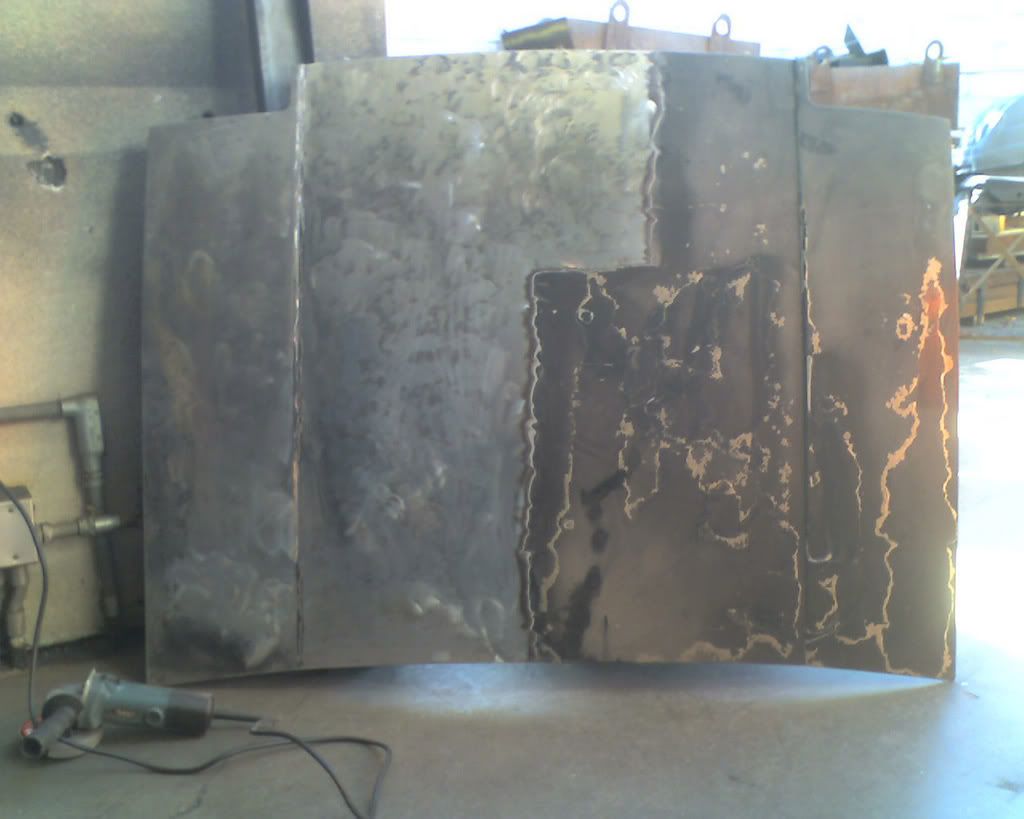
Hood meet grinder... grinder meet hood
I have the top of the hood completely sanded down to the bare metal now. (2 hours later X.x)
But I ran outta time in the class, so the hood's laying in the back of the minivan waiting for me to take her out and make measurements on where I need to cut and fit the vent assembly.
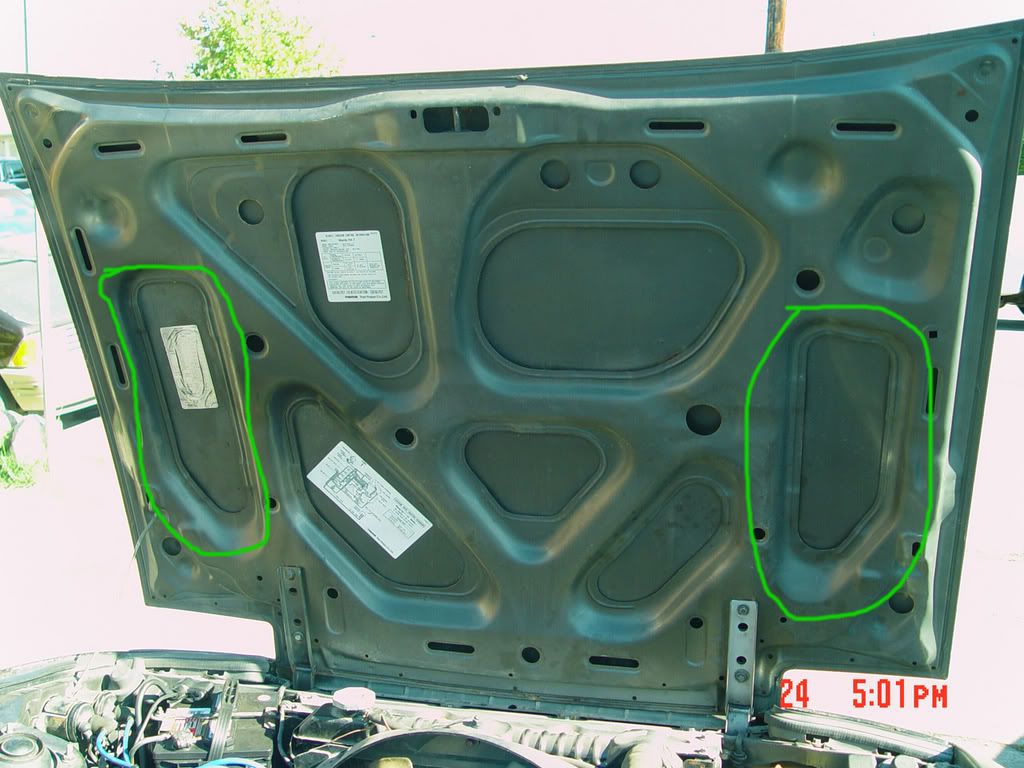
These are the areas I am planning on cutting out to fit the vents in:
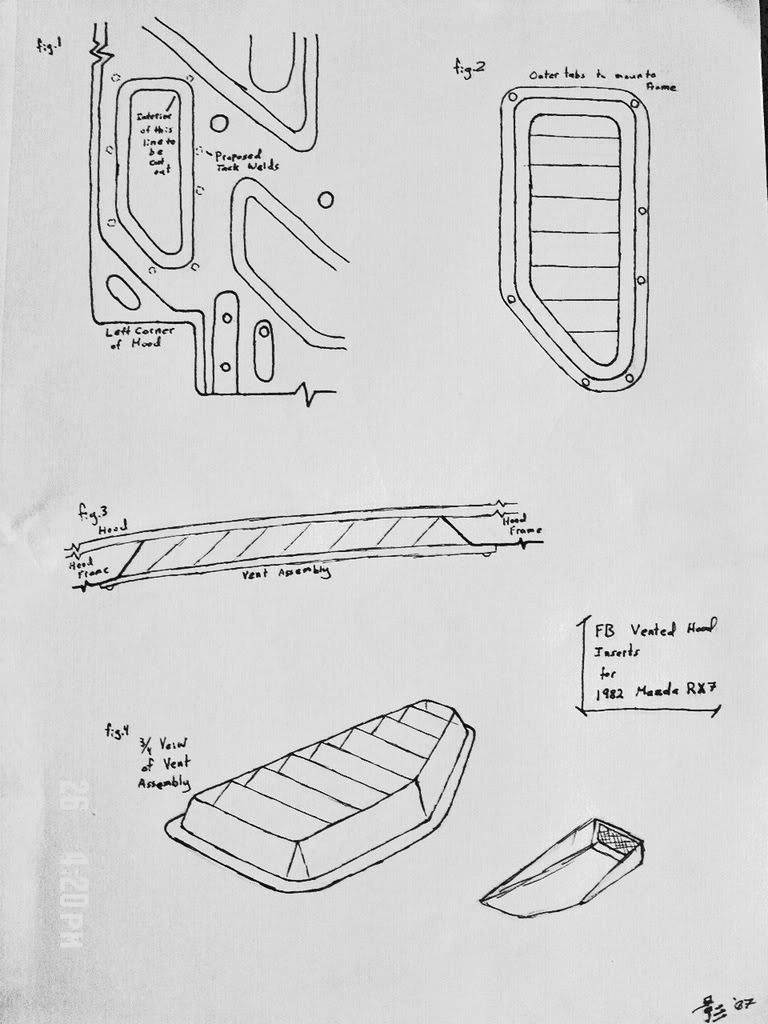
This is the roughly drawn diagram for the vent assembly that will fit into those cut outs:
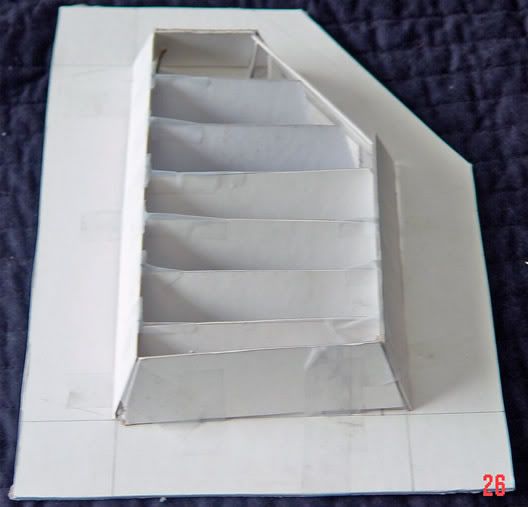
This is a very poorly made mock-up of the vent assembly: (I only realized after I started cutting that I had no hot glue gun... -.- so its held together by tape, my next one will be of better quality...)
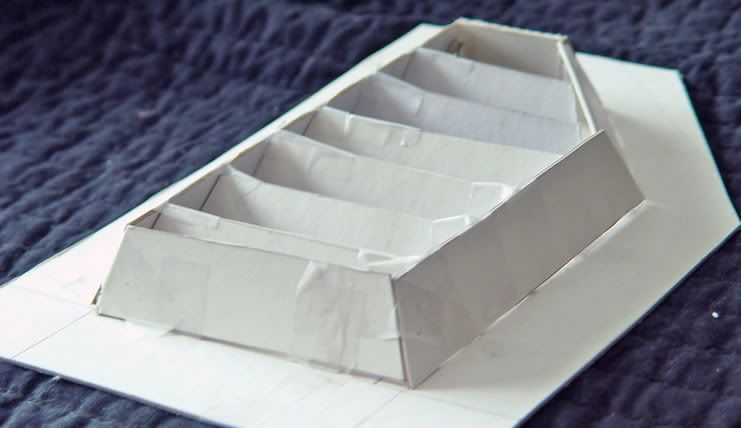
I will keep you guys updated on the progress of this project in case any of you guys want to make custom hoods, or if you may be interested in getting the assembly I plan on installing. (I am making the vents seperately and then welding them on to the hood to reduce the amount of actual welding done on the hood, that and my Pro TIG welding friend is gonna touch it up when I'm done XD)

Now begins the fun part of trying to install custom build vents into my newly aquired hood.

Hood meet grinder... grinder meet hood
I have the top of the hood completely sanded down to the bare metal now. (2 hours later X.x)
But I ran outta time in the class, so the hood's laying in the back of the minivan waiting for me to take her out and make measurements on where I need to cut and fit the vent assembly.

These are the areas I am planning on cutting out to fit the vents in:

This is the roughly drawn diagram for the vent assembly that will fit into those cut outs:

This is a very poorly made mock-up of the vent assembly: (I only realized after I started cutting that I had no hot glue gun... -.- so its held together by tape, my next one will be of better quality...)


I will keep you guys updated on the progress of this project in case any of you guys want to make custom hoods, or if you may be interested in getting the assembly I plan on installing. (I am making the vents seperately and then welding them on to the hood to reduce the amount of actual welding done on the hood, that and my Pro TIG welding friend is gonna touch it up when I'm done XD)

Last edited by BlackWorksInc; 10-13-07 at 12:05 AM.
#3
#5
Thread Starter
Wrkn Toyota, Rootn Wankel
Joined: Sep 2007
Posts: 1,642
Likes: 1
From: "Haystack" Hayward, CA
I wish I knew how to work with CF/FG... we don't have a class for it at chabot.
I don't like rivets, they're okay in some places... but I just don't like them.
I also found some interesting ways to use spot welds in a way that shouldn't warp the hood.
But right now I am still getting around to measuring stuffs. XD
I don't like rivets, they're okay in some places... but I just don't like them.
I also found some interesting ways to use spot welds in a way that shouldn't warp the hood.
But right now I am still getting around to measuring stuffs. XD
Trending Topics
#8
if you get access to a air hammer you can get some countersunk rivets and buck them on it would be be flush. if they will hold on an aircraft they will hold on a car providing its done right.
heres a link i pulled up on countersunk, you could also use flat head rivets.
http://www.rjleahy.com/Store/rivets/trvc.htm
heres a link i pulled up on countersunk, you could also use flat head rivets.
http://www.rjleahy.com/Store/rivets/trvc.htm
#9
Thread Starter
Wrkn Toyota, Rootn Wankel
Joined: Sep 2007
Posts: 1,642
Likes: 1
From: "Haystack" Hayward, CA
Sorry about not posting for a while, I've been doing some other stuff in the class so the prgress has been fairly slow. It also doesn't help that I only have two classes a week...
Anyways, I got the hood sanded down to the metal, used a plasma cutter to slice open the hole, and cleaned the edges and made them flush with the frame. I'm going to measure up the template I cut out & make some templates for the fins and assembly. Will try and get them posted this weekend.
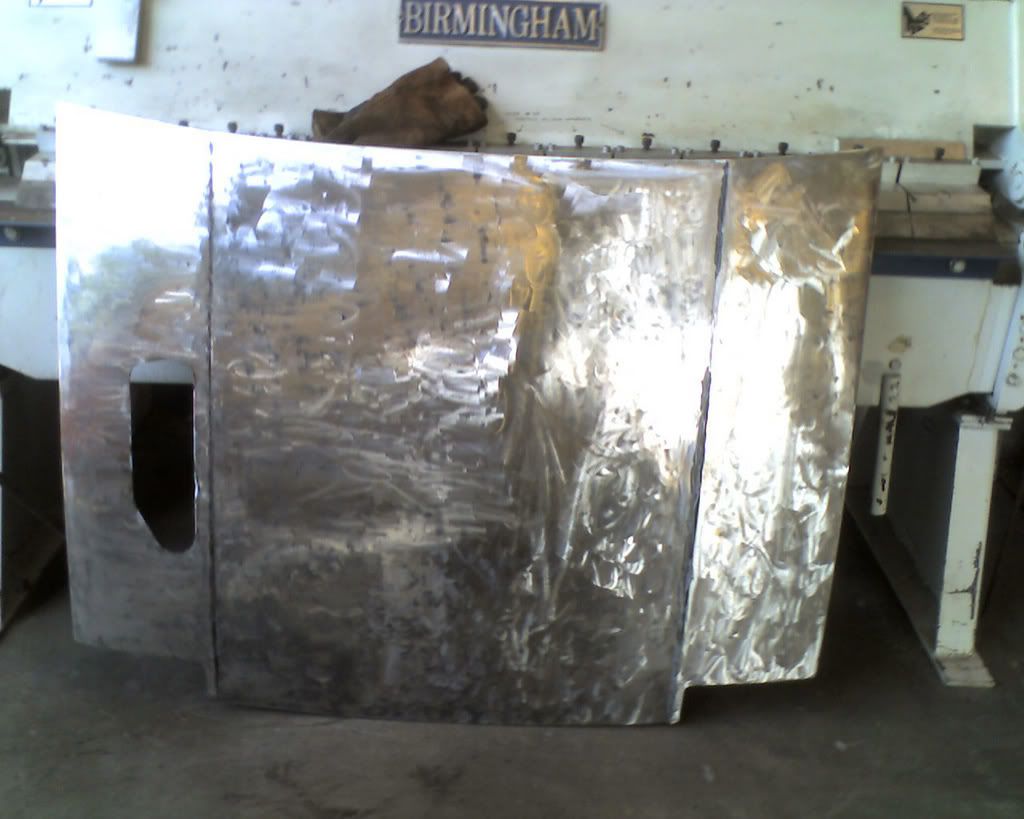
I have a Holy Hood! Okay corner I know, but true!
Anyways, I got the hood sanded down to the metal, used a plasma cutter to slice open the hole, and cleaned the edges and made them flush with the frame. I'm going to measure up the template I cut out & make some templates for the fins and assembly. Will try and get them posted this weekend.

I have a Holy Hood! Okay corner I know, but true!
#11
Sorry about not posting for a while, I've been doing some other stuff in the class so the prgress has been fairly slow. It also doesn't help that I only have two classes a week...
Anyways, I got the hood sanded down to the metal, used a plasma cutter to slice open the hole, and cleaned the edges and made them flush with the frame. I'm going to measure up the template I cut out & make some templates for the fins and assembly. Will try and get them posted this weekend.

I have a Holy Hood! Okay corner I know, but true!
Anyways, I got the hood sanded down to the metal, used a plasma cutter to slice open the hole, and cleaned the edges and made them flush with the frame. I'm going to measure up the template I cut out & make some templates for the fins and assembly. Will try and get them posted this weekend.

I have a Holy Hood! Okay corner I know, but true!
#13
Thread Starter
Wrkn Toyota, Rootn Wankel
Joined: Sep 2007
Posts: 1,642
Likes: 1
From: "Haystack" Hayward, CA
Okay guys, I've hit a small snag in trying to make these vents and I need your opinions badly.
I don't know how I want the actual blades on the vent assembly to look, I've been looking through some examples and these are the most interesting of all the designs I have looked at.
a.) Thin blades stacked on each other at a wide angle (50-70 degrees?)

b.) Wide blades with shallow angle (about 15-25 degrees?)

Any opinions you guys have I would love to hear.
I don't know how I want the actual blades on the vent assembly to look, I've been looking through some examples and these are the most interesting of all the designs I have looked at.
a.) Thin blades stacked on each other at a wide angle (50-70 degrees?)

b.) Wide blades with shallow angle (about 15-25 degrees?)

Any opinions you guys have I would love to hear.
#17
Thread Starter
Wrkn Toyota, Rootn Wankel
Joined: Sep 2007
Posts: 1,642
Likes: 1
From: "Haystack" Hayward, CA
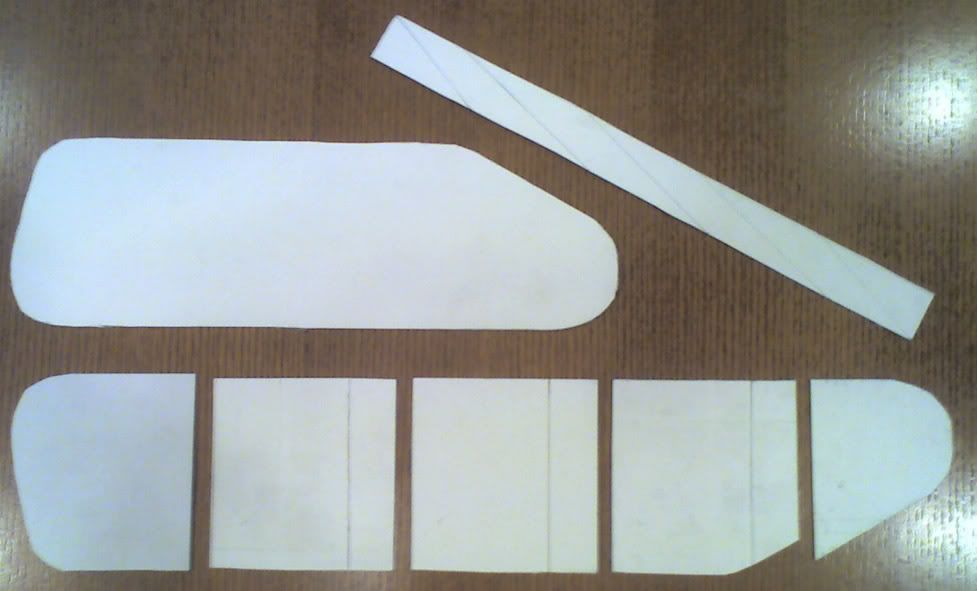
The only problem I am having right now is the fact that the blades I made are 4" long, with the exception of the beginning piece being 3" due to the irregular length of the frame cut out. So the angles I am seeing are from front to rear;
23, 18,18,18, and 24
I am not liking those two end measurements, its not that noticable, but it bugs me to all hell... I may adjust the length of the front and rear blades to accomodate an even angle of 18~20 degrees.
These are the templates I am working with:
Hopefully by my next Class (Tuesday) I will have cut the second hole and have started working on the assembly by Thursday.
Stay Tuned?
 Please?
#18
Thread Starter
Wrkn Toyota, Rootn Wankel
Joined: Sep 2007
Posts: 1,642
Likes: 1
From: "Haystack" Hayward, CA
Okay, progress is slow... Mostly because of the fact that I have access and time to take the hood to the shop twice a week & the fact that these damned vents are starting to get to me.
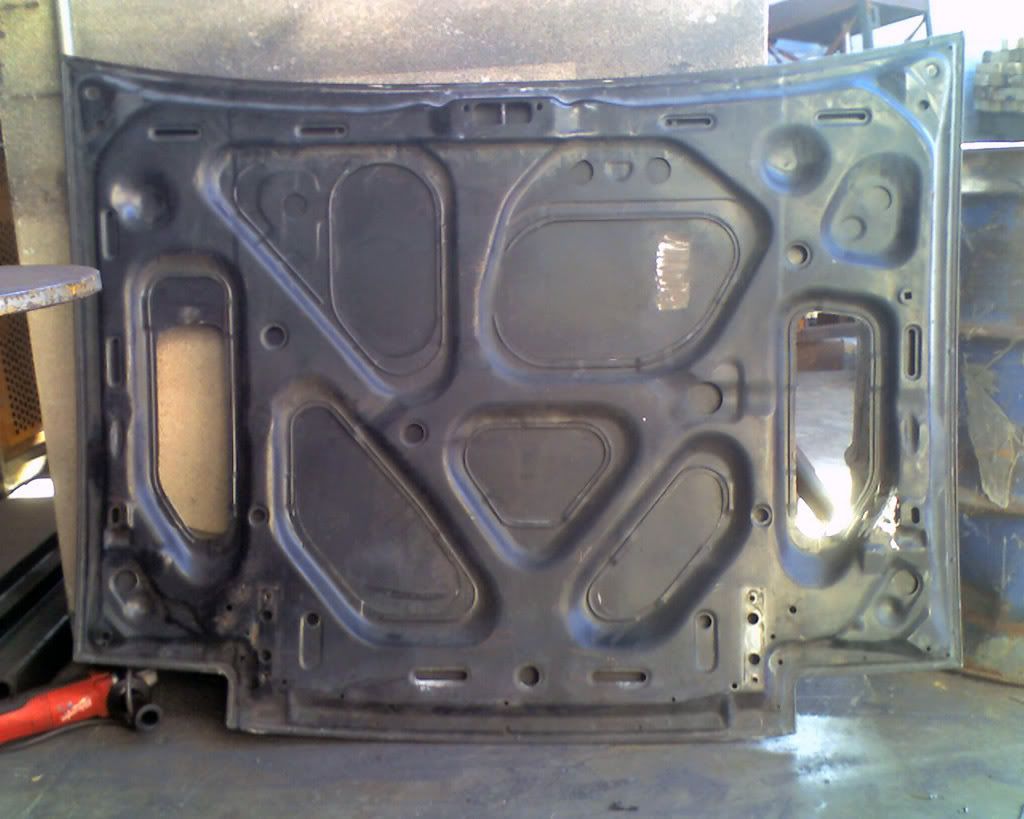
But here is the cut and ground holes for the vents, next class I am going to start bracing the back of the newly cut vent and tacking a few of the edges of the sheet metal to the frame to stiffen that area up in preperation for the actual vents.
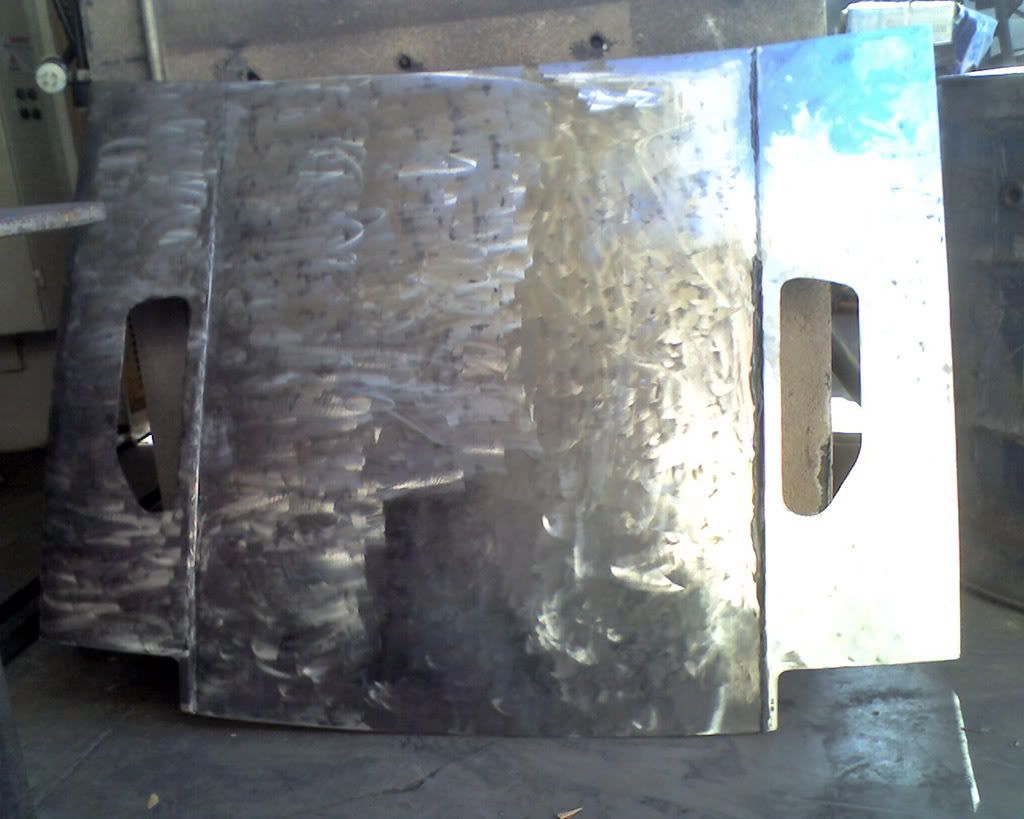
Now there's two holes!
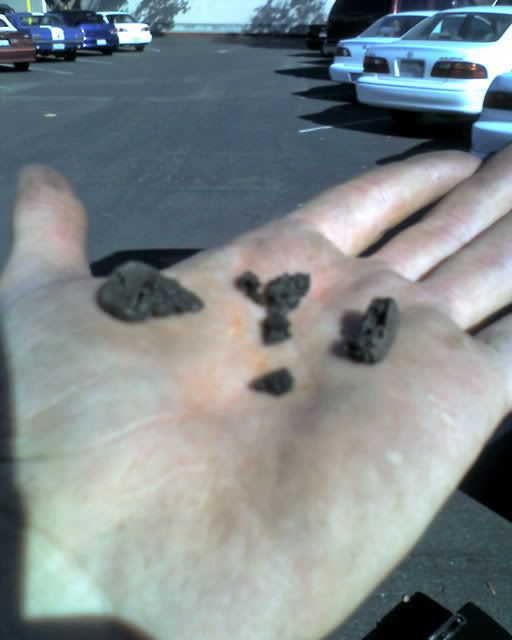
Also, I forgot to mention, but I keep getting this black pumice like crap falling out of the hood every so often. My suspicion is that it's just carbon that came from the engine, friend of mine scared me for a sec when he said I might have burned the insulation in the hood. Then I was like, "wait, I have no insulation in my hood, its just paint and steel.
And last but not least, I am not going to sand the back side down! Just getting this weird little bracket off the area where I am gonna attach the assemblies was a PITA. Does anyone know where I can get some nice, cheap, effective liquid stripper (hmm... not a bad sounding product...) to just soak this hood in?
Hopefully by Thursday I will have worked out the overlapping angle issue and started on the blades and the actual vent assembly...
Until next time...
But here is the cut and ground holes for the vents, next class I am going to start bracing the back of the newly cut vent and tacking a few of the edges of the sheet metal to the frame to stiffen that area up in preperation for the actual vents.

Now there's two holes!

Also, I forgot to mention, but I keep getting this black pumice like crap falling out of the hood every so often. My suspicion is that it's just carbon that came from the engine, friend of mine scared me for a sec when he said I might have burned the insulation in the hood. Then I was like, "wait, I have no insulation in my hood, its just paint and steel.

And last but not least, I am not going to sand the back side down! Just getting this weird little bracket off the area where I am gonna attach the assemblies was a PITA. Does anyone know where I can get some nice, cheap, effective liquid stripper (hmm... not a bad sounding product...) to just soak this hood in?
Hopefully by Thursday I will have worked out the overlapping angle issue and started on the blades and the actual vent assembly...
Until next time...
#19
Okay, progress is slow... Mostly because of the fact that I have access and time to take the hood to the shop twice a week & the fact that these damned vents are starting to get to me.
But here is the cut and ground holes for the vents, next class I am going to start bracing the back of the newly cut vent and tacking a few of the edges of the sheet metal to the frame to stiffen that area up in preperation for the actual vents.

Now there's two holes!

Also, I forgot to mention, but I keep getting this black pumice like crap falling out of the hood every so often. My suspicion is that it's just carbon that came from the engine, friend of mine scared me for a sec when he said I might have burned the insulation in the hood. Then I was like, "wait, I have no insulation in my hood, its just paint and steel.

And last but not least, I am not going to sand the back side down! Just getting this weird little bracket off the area where I am gonna attach the assemblies was a PITA. Does anyone know where I can get some nice, cheap, effective liquid stripper (hmm... not a bad sounding product...) to just soak this hood in?
Hopefully by Thursday I will have worked out the overlapping angle issue and started on the blades and the actual vent assembly...
Until next time...
But here is the cut and ground holes for the vents, next class I am going to start bracing the back of the newly cut vent and tacking a few of the edges of the sheet metal to the frame to stiffen that area up in preperation for the actual vents.

Now there's two holes!

Also, I forgot to mention, but I keep getting this black pumice like crap falling out of the hood every so often. My suspicion is that it's just carbon that came from the engine, friend of mine scared me for a sec when he said I might have burned the insulation in the hood. Then I was like, "wait, I have no insulation in my hood, its just paint and steel.

And last but not least, I am not going to sand the back side down! Just getting this weird little bracket off the area where I am gonna attach the assemblies was a PITA. Does anyone know where I can get some nice, cheap, effective liquid stripper (hmm... not a bad sounding product...) to just soak this hood in?
Hopefully by Thursday I will have worked out the overlapping angle issue and started on the blades and the actual vent assembly...
Until next time...
#20
cant wait to see what it looks like man i like what you have done so far. if i like it enough you think you could make the inserts so i can weld them on to my hood. or heck make me a set of you templates and ill make them ect.
#21
Thread Starter
Wrkn Toyota, Rootn Wankel
Joined: Sep 2007
Posts: 1,642
Likes: 1
From: "Haystack" Hayward, CA
If not I'll just make a copy of the templates and you can use the thread as a reference point...
Which reminds me... I am going to start taking pictures of the actual parts as I am making them to help you guys get an idea if you wanna make your own...
Still tweaking that angle issue, but should have it done by tomorrow.
BTW thanks for the tip on the Liquid stripper.... gonna have to find some cash and look for it.
#22
Okay, progress is slow... Mostly because of the fact that I have access and time to take the hood to the shop twice a week & the fact that these damned vents are starting to get to me.
But here is the cut and ground holes for the vents, next class I am going to start bracing the back of the newly cut vent and tacking a few of the edges of the sheet metal to the frame to stiffen that area up in preperation for the actual vents.

Now there's two holes!

Also, I forgot to mention, but I keep getting this black pumice like crap falling out of the hood every so often. My suspicion is that it's just carbon that came from the engine, friend of mine scared me for a sec when he said I might have burned the insulation in the hood. Then I was like, "wait, I have no insulation in my hood, its just paint and steel.

And last but not least, I am not going to sand the back side down! Just getting this weird little bracket off the area where I am gonna attach the assemblies was a PITA. Does anyone know where I can get some nice, cheap, effective liquid stripper (hmm... not a bad sounding product...) to just soak this hood in?
Hopefully by Thursday I will have worked out the overlapping angle issue and started on the blades and the actual vent assembly...
Until next time...
But here is the cut and ground holes for the vents, next class I am going to start bracing the back of the newly cut vent and tacking a few of the edges of the sheet metal to the frame to stiffen that area up in preperation for the actual vents.

Now there's two holes!

Also, I forgot to mention, but I keep getting this black pumice like crap falling out of the hood every so often. My suspicion is that it's just carbon that came from the engine, friend of mine scared me for a sec when he said I might have burned the insulation in the hood. Then I was like, "wait, I have no insulation in my hood, its just paint and steel.

And last but not least, I am not going to sand the back side down! Just getting this weird little bracket off the area where I am gonna attach the assemblies was a PITA. Does anyone know where I can get some nice, cheap, effective liquid stripper (hmm... not a bad sounding product...) to just soak this hood in?
Hopefully by Thursday I will have worked out the overlapping angle issue and started on the blades and the actual vent assembly...
Until next time...
#23
Thread Starter
Wrkn Toyota, Rootn Wankel
Joined: Sep 2007
Posts: 1,642
Likes: 1
From: "Haystack" Hayward, CA
Huh so that's what that **** is... oh well... anyways, I am not going to be able to work on my hood tomorrow, gotta catch up on some welding assignments... basically doing welds and having the teach mark them off.. maybe Thursday if I am lucky or next week.. so close yet so far.
T.T
T.T
#24
Thread Starter
Wrkn Toyota, Rootn Wankel
Joined: Sep 2007
Posts: 1,642
Likes: 1
From: "Haystack" Hayward, CA
Alright, finally got caught up in the book some, I'm going to see if I can make some room to at least mock up the frame for the fins and adjust them before tacking. I also spent sometime and made a new set of master templates for the fins, my other ones were a little on the small side.
Well I wil try and update tomorrow, hopefully I can get this project done before December...
Well I wil try and update tomorrow, hopefully I can get this project done before December...


