
Powder Coating the FB Battery Tray
 01-17-11, 09:31 PM
#1
Powder Coating the FB Battery Tray
There isn't much I can do to my rx this winter without a garage, and without the risk of freezing all of my appendages off. Luckily, Mazda brilliantly made my the fb battery tray a bolt in part, rather than spot welded on. After the removal of the 5 10mm bolts holding it on, I had myself a rusty project! Here are the pictures.. Powder coating is a very simple process that anyone can do.. so pick up a coating gun and get to it! Enjoy.
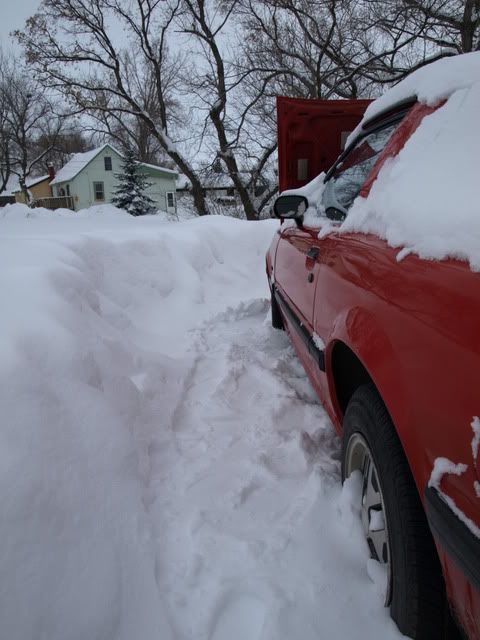
Luckily I have been keeping the snow off/around it, making it accessible haha.

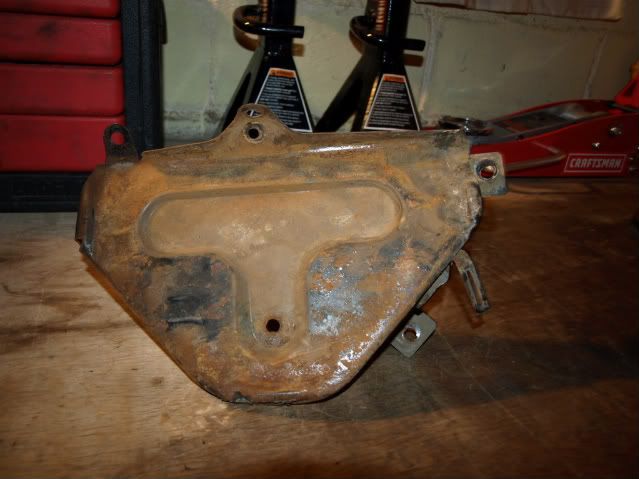
Here is the battery tray removed.. pretty rough! Until I invest in a blast cabinet, I usually just wire brush the part to be coated. This tray however, would take more than that.
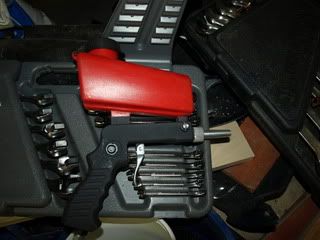
A friend of mine recently ordered this 'spot blaster', with a small 2lb hopper. Blast media at the local tsc is $7.99, so this would definately be a great investment for small parts such as pulleys, but it does get a little tedious refilling the hopper every 60 seconds. Works great at 90 psi, but if the compressor cant keep up, the sand just doesn't hit hard enough.
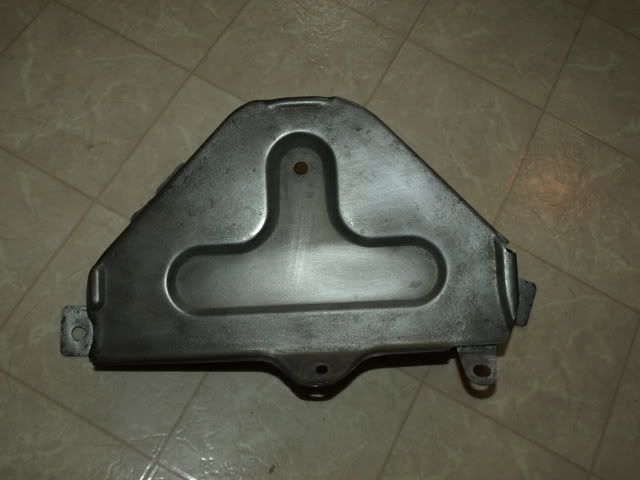
Results of the blasting; I blasted the entire top, and spot blasted some rust spots on the bottom.

Whatever the sand missed, I hit with a wire brush. The surface was dimpled from the rust, but I removed all I could, and the powder would seal the rest. I then baked it at 400 degrees for around 20 mins first to remove any oil that might cause bubbling later.
All prepped and ready to go.. Started bottom side first. As you can see, I coated right over the in tact paint, only removing the loose paint and rust with the wire brush.

All powdered up and ready to go! Hyper flat black from caswell plating.

Fresh out of the oven, 15 minutes after the powder glossed and started to flow out. You can see it's still a little rough because of the surface rust, but awesome compared to what it was. I could always go back and add another coat or two, and this would help smooth out the surface.
Back down the tunnel for the re-install....
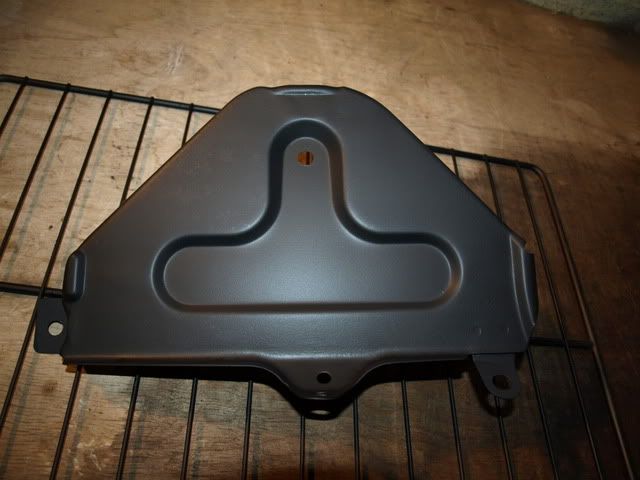
Fin! The blemishes you see on the tray are large snowflakes that fell on it, melted and then froze instantly. Also, my frozen saliva which resulted from trying to remove the snowflakes to get the 'perfect' picture.

Luckily I have been keeping the snow off/around it, making it accessible haha.
Here is the battery tray removed.. pretty rough! Until I invest in a blast cabinet, I usually just wire brush the part to be coated. This tray however, would take more than that.
A friend of mine recently ordered this 'spot blaster', with a small 2lb hopper. Blast media at the local tsc is $7.99, so this would definately be a great investment for small parts such as pulleys, but it does get a little tedious refilling the hopper every 60 seconds. Works great at 90 psi, but if the compressor cant keep up, the sand just doesn't hit hard enough.
Results of the blasting; I blasted the entire top, and spot blasted some rust spots on the bottom.
Whatever the sand missed, I hit with a wire brush. The surface was dimpled from the rust, but I removed all I could, and the powder would seal the rest. I then baked it at 400 degrees for around 20 mins first to remove any oil that might cause bubbling later.
All prepped and ready to go.. Started bottom side first. As you can see, I coated right over the in tact paint, only removing the loose paint and rust with the wire brush.
All powdered up and ready to go! Hyper flat black from caswell plating.
Fresh out of the oven, 15 minutes after the powder glossed and started to flow out. You can see it's still a little rough because of the surface rust, but awesome compared to what it was. I could always go back and add another coat or two, and this would help smooth out the surface.
Back down the tunnel for the re-install....
Fin! The blemishes you see on the tray are large snowflakes that fell on it, melted and then froze instantly. Also, my frozen saliva which resulted from trying to remove the snowflakes to get the 'perfect' picture.


 02-03-11, 09:38 PM
#7
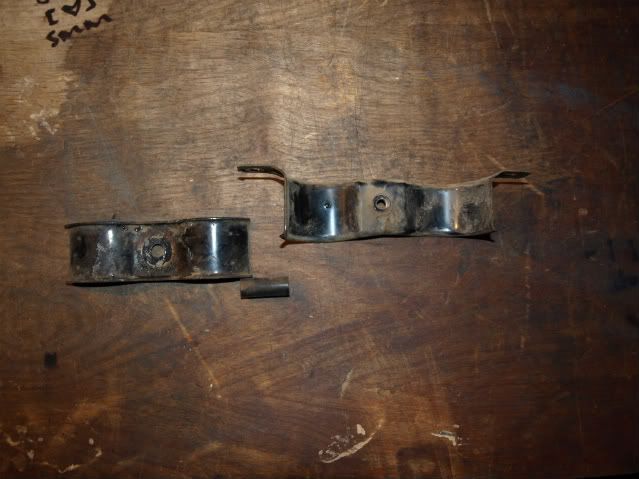
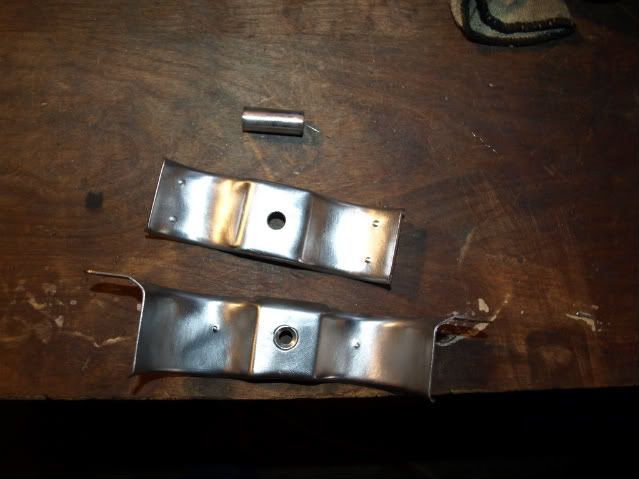
Here's another idea.. I pulled the rusty coil bracket today and coated that as well. Also, I took off the upper piece of the rad. shroud, and polished it up. I didn't use any sand blasting for the bracket, only an electric drill with a wire wheel attachment. Enjoy!


Trending Topics
02-04-11, 12:35 PM
#9
Looks good, if you have stuff with a lot of rust pits you can get a powder primer that you can put on thick and then sand smooth. Look for "KL primer". Little hint, only cure the primer half way so it sands easy. It will finish curing with the top coat.
02-04-11, 06:01 PM
#11
Its also better to put it on in one thick coat instead of a few light coats. After sanding you may need to heat the part up to about 150 or so to disperse any static charge from the friction from sanding. Another option is to preheat the part and put the top coat on. Second coats can be tough with a gun that you can't adjust the KV's. I usually turn mine way down to about 10K on second coats(yes, lower voltage for multiple coats) Most hobby guns only put out about 15K so you might not have a problem. The most important thing a a good, no GREAT, ground. I pounded an 10' ground rod for a house into the ground and clamped a wire to it.
 02-12-11, 04:40 PM
#16
It stinks for a little bit, but as long as you crack a window it'll be ok..As far as guns go, the Eastwood guns like k.c.repu said are probably the best out there for the price, if you have an air compressor. I believe you can get just the gun for less than 100, but there is a 200 dollar kit they sell which also includes your choice of 5 or so 8oz powders, a starting guide as well as a moisture separator. I saw this kit for 50% off recently, it'd be the best 100 you'd spend to get started on coating. I bought my gun long before I had a compressor, and I think it works pretty well for small things like these. It uses a fan at the black to blow the powder out of the container.. and when I am spraying it on thick it sounds like an angry hair dryer.
02-12-11, 10:07 PM
#18
I got crazy right away and built an oven with inside dimensions of 8'x4'x4'.
The best way to start with little things is find an oven on craig's list and get a good temp controller for it for about $40. I've seen guys use two house ovens cut up and stacked but by that time you will want the biggest oven you can fit in your life and you are doomed to powder coating everything that you used to paint.
edit: here is a link to my oven https://www.rx7club.com/fabrication-250/big-oven-powder-coating-ceramics-888237/
Last edited by jgrewe; 02-12-11 at 10:11 PM.
02-13-11, 11:14 PM
#19
@kansascityrepu
I know, but desperate times called for desperate measures..! and rest assured i cleaned the crap out of the oven with sysco oven cleaner (as seen in my pics above haha).. It is really easy to find an oven.. many appliance places offer to take your oven for free when people have new ones delivered, and they usually let them go for dirt cheap.
For anyone reading this, do as he said, and don't use your kitchen oven
@jgrewe
Oh what it would be like to have an oven like that...! I find myself longing to find stuff that still fits in my conventional oven. I know what you mean by powdercoating EVERYTHING you'd normally paint, and I say why not! Its SO EASY, no runs, drips, or mess, and I've found that prepping the part is 90% of the whole process. Thanks for the link to your oven, it looks great, especially towering over that 8' ladder haha.

Thread
Thread Starter
Forum
Replies
Last Post
tiger18
3rd Generation Specific (1993-2002)
9
09-03-15 08:27 PM