Pilot Bearing removal -
 01-29-06, 05:32 AM
#1
A Work In Progress
Thread Starter
Join Date: Dec 2005
Location: Oregon
Posts: 43
Likes: 0
Received 0 Likes
on
0 Posts
Pilot Bearing removal -
Ok, so this time it really is the pilot bearing I'm pulling out. I've never done this before, but have read all about it. Take a look at the picture, and please tell me if that is the bearing casing, or if the new bearing fits inside it.
I used a puller and a slide hammer, and got what appears to be the guts out (rollers and a flimsy metal casing) but I don't know if I should pull this out too. I have tried, but it wont budge. When I stick my pinky inside the hole, there is a lip on the backside of what could be the bearing casing. However, there is no lip on the front. Seems to me that there should be a lip on the front and the back if it is the casing .
Anyway, take a close look at the picture and let me know what you think.
Thanks,
Tazz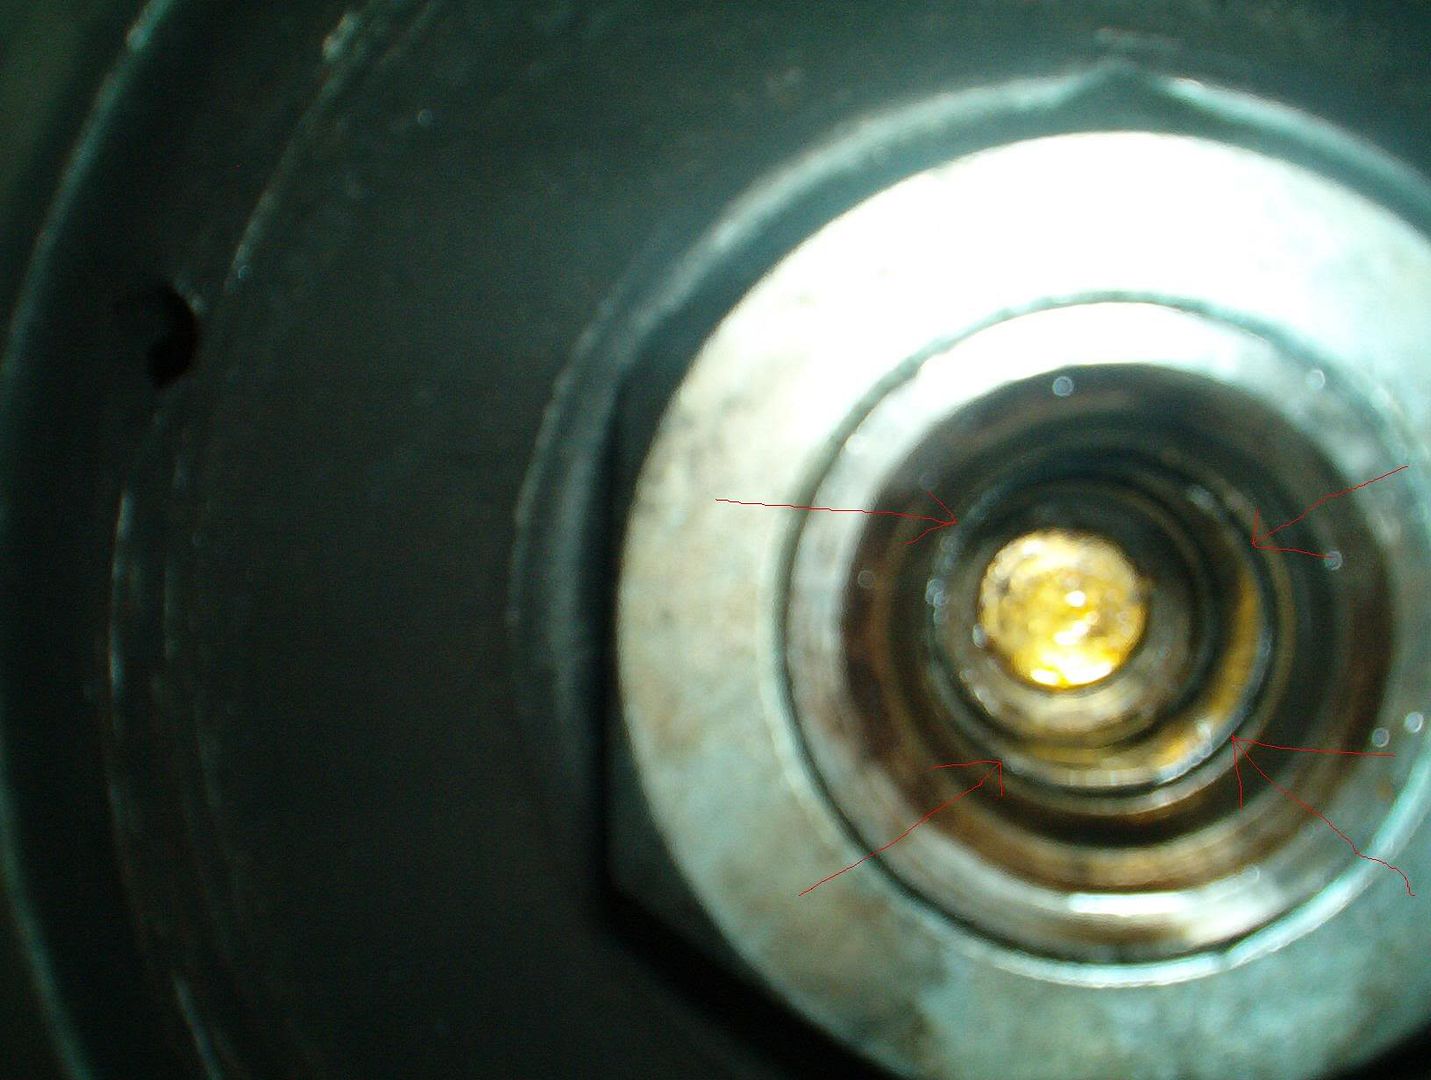
 01-29-06, 06:10 AM
#2
Hunting Skylines
Join Date: Apr 2001
Location: Brisbane, Queensland, Australia.
Posts: 3,431
Likes: 0
Received 3 Likes
on
3 Posts
Yep, the race needs to come out as well.
You've knocked the needles out so you're half way there. I made a puller by grinding a bolt down so the head just fits inside the lip. Then you just thread a nut on and with aid of some spacers and washers crank it down against the end of the shaft thereby forcing the bearing out.
You've knocked the needles out so you're half way there. I made a puller by grinding a bolt down so the head just fits inside the lip. Then you just thread a nut on and with aid of some spacers and washers crank it down against the end of the shaft thereby forcing the bearing out.
01-29-06, 08:07 AM
#3

Try to get it out in one piece. If you start to break it up by chiseling or dremmeling, you are pretty much committed to taking it out that way, bit by bit - it can take hours. Revhead's bolt idea sounds like a good one, if your puller can no longer get behind the casing and grab hold.
Good Luck (I spent about 6 hours, which seemed like days, on my last one).
Ray
Good Luck (I spent about 6 hours, which seemed like days, on my last one).
Ray
01-30-06, 01:22 AM
#4
A Work In Progress
Thread Starter
Join Date: Dec 2005
Location: Oregon
Posts: 43
Likes: 0
Received 0 Likes
on
0 Posts
Well, I tried to pull it out using the slide hammer and bearing tool remover tool. Unfortunately, The tool snapped in half, and the bearing casing didn't budge. I have tried the hydrolic fliud method, the TP method, the soak with wd-40 method, and the heat and Ice method. I was going to try the washer-behind-the-bearing method, but I can't seem to find a way to get a washer and nut to keep from turning inside the flywheel once inserted. The bolt just turns the nut, getting me no where.
So, now it's down to my final option - The dremel. I have a pretty good selection of bits to choose from, but I'm just dreading doing it this way when I really don't know what I'm doing. I guess I'll give it a try... So what happens if I screw up and damage the E-shaft?
Thanks,
Tazz
So, now it's down to my final option - The dremel. I have a pretty good selection of bits to choose from, but I'm just dreading doing it this way when I really don't know what I'm doing. I guess I'll give it a try... So what happens if I screw up and damage the E-shaft?
Thanks,
Tazz
 01-30-06, 07:02 AM
#6
I dremelled just enough to cut through the casing, then used a cold chisel to push it away from the e-shaft casing. If you have the new pilot bearing it will give you an idea of how thin the bearing casing is, to help you guess how deep to go. Take your time, have lots of patience and be careful, it should be OK.
01-31-06, 05:39 AM
#7
A Work In Progress
Thread Starter
Join Date: Dec 2005
Location: Oregon
Posts: 43
Likes: 0
Received 0 Likes
on
0 Posts
Yep, the dremel did it. Cut a nice fine line down the bottom of the casing, Then sharpend a small flathead screwdriver. Once I got the screwdrive under the casing (hammer involved), I just pulled up, tweaked it a few times and it came out in three peices. Yeah!
Now the bad news - The clutch I bought is not the right clutch... And so it goes...
Now the bad news - The clutch I bought is not the right clutch... And so it goes...
Trending Topics
 02-08-06, 12:33 AM
#10
Originally Posted by ray green
Congratulations and ... Uhgg. Hope they take it back for the right one, putting it all back together is the easy part (except stabbing the transmission, unless you are one big dude I'd use jacks rather than the bench press method).
Nice work!
ray
Nice work!
ray
Benchpressing aint that hard IF you rope the tailshaft - as close to the shifter hole as possible). If I can do it, you can also. Im only 140 lbs but solid (10 years ago).

Thread
Thread Starter
Forum
Replies
Last Post
Jeff20B
1st Generation Specific (1979-1985)
73
09-16-18 07:16 PM