Omg! Omp!

 03-04-06, 08:05 PM
#28
thanks a lot everyone and especially for those pictures jon! pictures help a lot! hah now i gotta go out and find some viton orings and take apart my omp to get it fixed! ill update when i get a little furth on this project of rebuilding my omp. thanks again!
03-09-06, 07:10 PM
#29
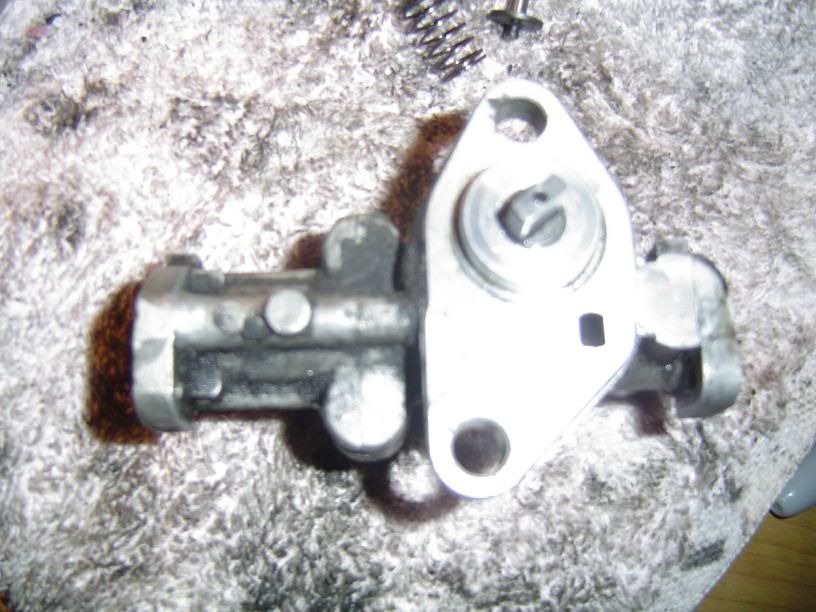
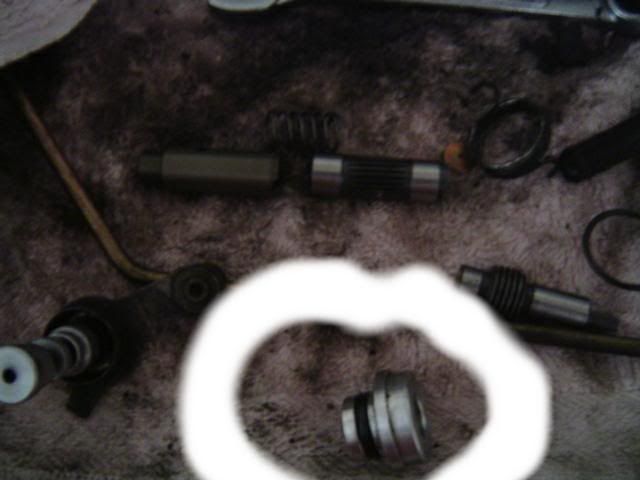
sweet! got the omp out not much trouble except since i didnt have a mirror to see the bottom bolt i felt my way around with a 10mm wrench and unscrewed it little by little. here are the pictures:

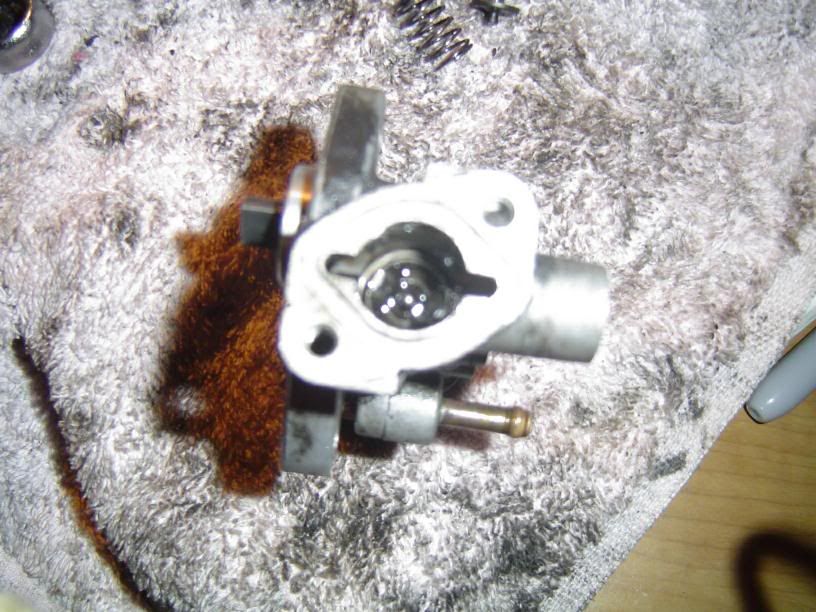
closeup
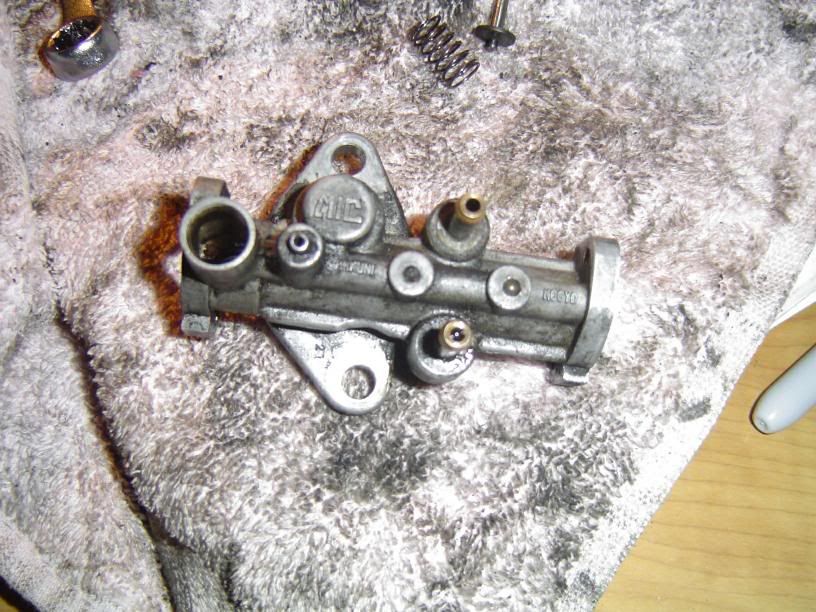
linkage rod
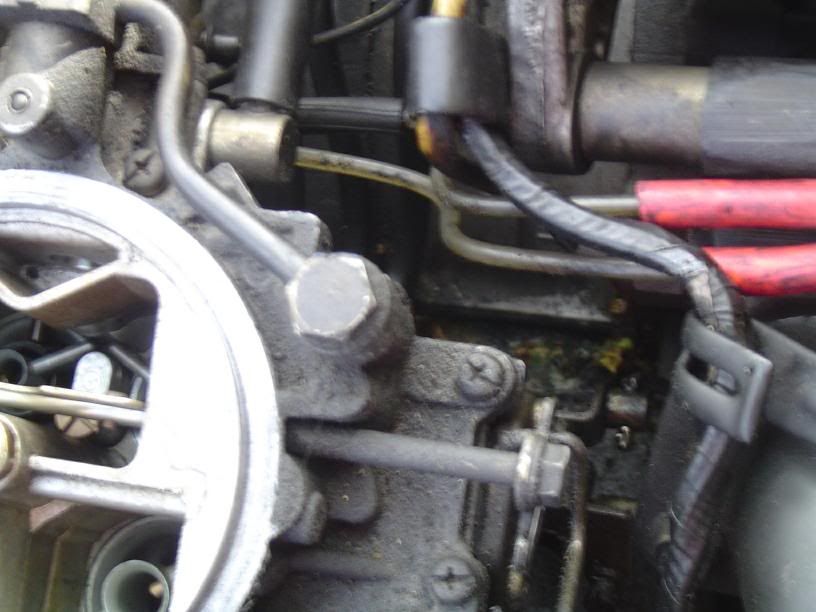
peek a boo stock nikki, omp lines, and misc?
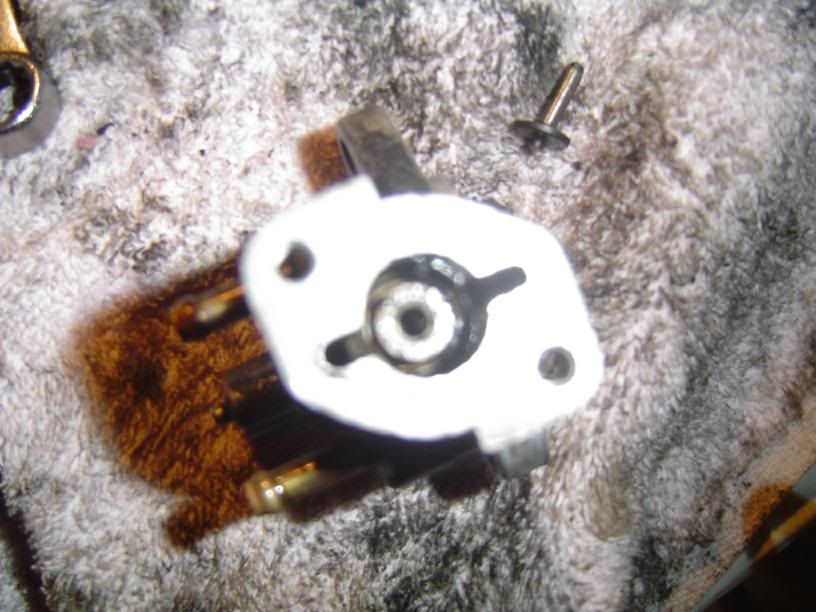
closer...
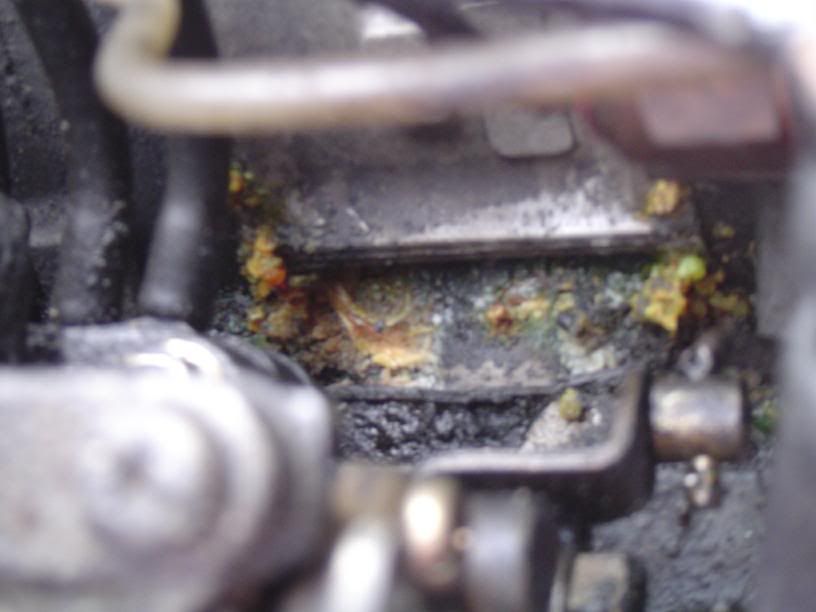
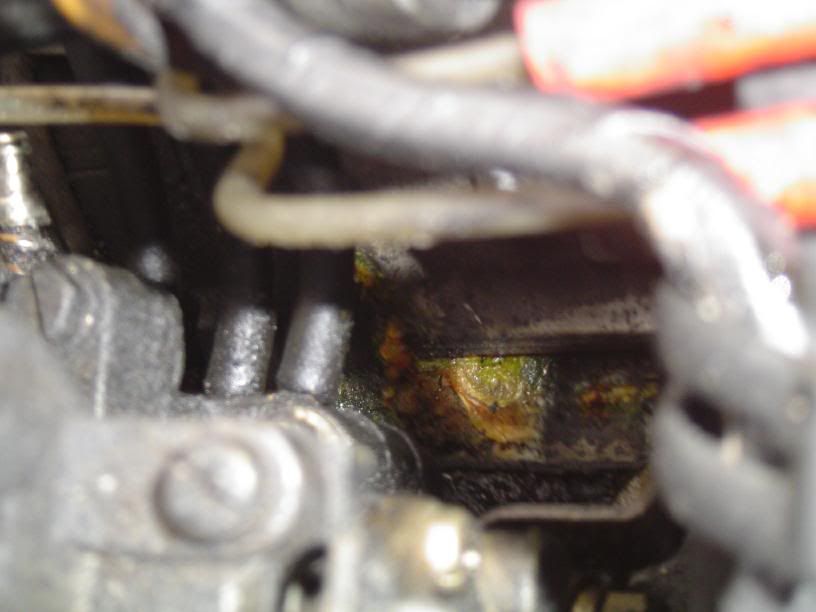
cloer! ok what the heck?? i think i have a coolant leak with... some crap sittin on top of the manifold.. oh well thats next in line of my proj. i guess..
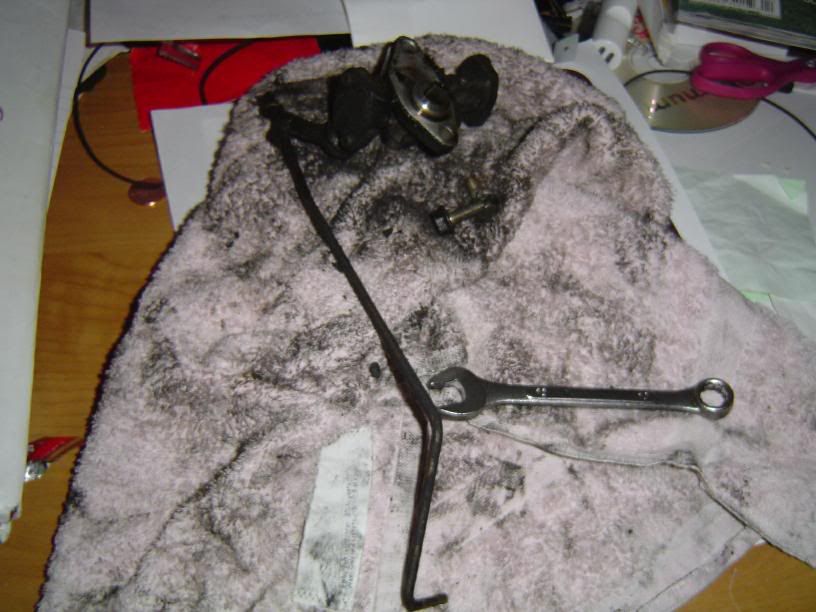
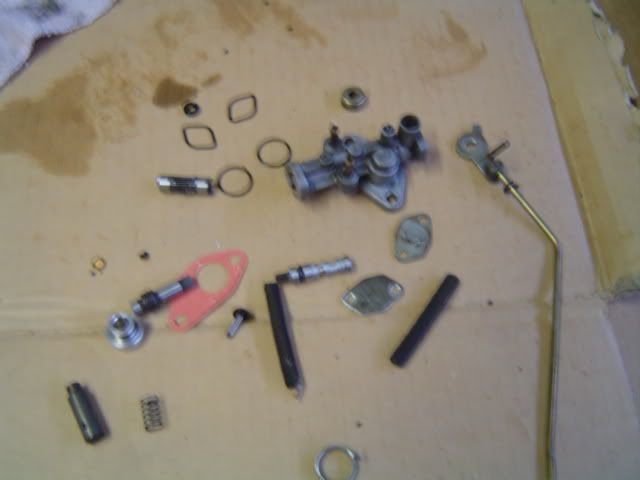
behold..my omp mop... omg hah
clean clean take apart and buy viton o rings and put back together and install and no leaks for a long time will come shortly i hope. thanks again for all your info and help! gotta love the first gen forum!!!!
closeup
linkage rod
peek a boo stock nikki, omp lines, and misc?
closer...
cloer! ok what the heck?? i think i have a coolant leak with... some crap sittin on top of the manifold.. oh well thats next in line of my proj. i guess..
behold..my omp mop... omg hah
clean clean take apart and buy viton o rings and put back together and install and no leaks for a long time will come shortly i hope. thanks again for all your info and help! gotta love the first gen forum!!!!
03-09-06, 10:14 PM
#30
one question because i dont want to destroy my omp... how do i access the oring inside my cam. it seems that its the one all the way in the back of the cam and i tried pulling it apart but no luck...what do i do? thanks! btw im typing with my 2 pinky
03-09-06, 11:16 PM
#31
Rotary Freak

Join Date: Mar 2003
Location: Calgary, Alberta, Canada
Posts: 1,711
Likes: 0
Received 0 Likes
on
0 Posts
Remove the nut holding the actuator arm assembly onto the body of the omp and then pull off the arm and spring. (the spring will want to come unsprung when you do this).
Remove the end plates and also the drive pinion that is located under the cap on the drive unit, ie: where the slot in the drive shaft from the front cover mates to the key on the pump. This cap should pry out. The drive pinion will follow.
Now remove the two "barrels" (for lack of a better term) from their bore located under the front plate. The cam shaft should now pull right out of it's bore. That's all there is to tearing down an omp.
03-09-06, 11:31 PM
#32
Nigga stole my bike!
Join Date: Oct 2002
Location: Des Allemands, Louisiana
Posts: 1,154
Likes: 0
Received 0 Likes
on
0 Posts
Hey now that you guys are taking off your OMPs, would any of you happen to have one for an -SE?
I need an -SE OMP, but can't find one on any sites. Do you guys know if I can get one through Mazdaspeed? I just got my new -SE housings from Mazdaspeed, and I figured I'd actually use the oil injection ports on the housings this time; instead of blocking them off like on my old housings. I'm running a 12A OMP, though. I need 4 lines! Haha.
I need an -SE OMP, but can't find one on any sites. Do you guys know if I can get one through Mazdaspeed? I just got my new -SE housings from Mazdaspeed, and I figured I'd actually use the oil injection ports on the housings this time; instead of blocking them off like on my old housings. I'm running a 12A OMP, though. I need 4 lines! Haha.
03-10-06, 01:35 AM
#33
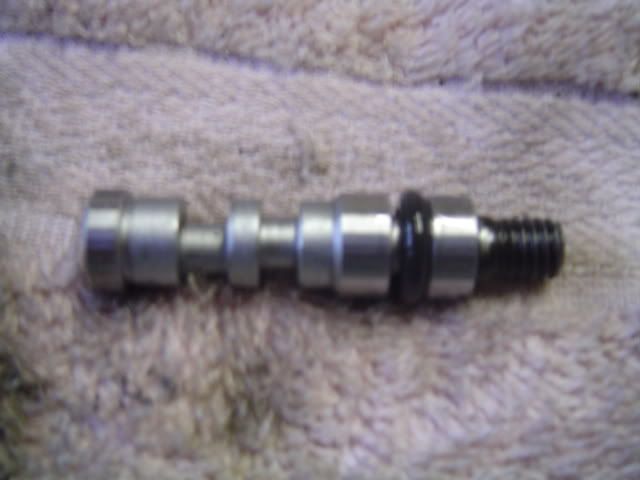
uhh ok so ive got to the arm and spring taken off i dont understand the cap being pried off... and the pinion taken out.. and the barrels... i dont know how to further disassemble it. all i see are 2 o-rings now which are the diamond shape and maybe one which i cant seem to take out of the eccentric shaft looking thingy.. i need pics to explain:
do these pictures help? im guessing the key is the rectangle thing that turns also the round thing below the key turns also but i tried prying them both out but they wont come out.. this is my first time dealing with omp and willing to learn how to rebuild and what proper names are. haha well anyways thanks for all your help so far and i hope i can understand more clearly how to take apart the omp to rebuild it
do these pictures help? im guessing the key is the rectangle thing that turns also the round thing below the key turns also but i tried prying them both out but they wont come out.. this is my first time dealing with omp and willing to learn how to rebuild and what proper names are. haha well anyways thanks for all your help so far and i hope i can understand more clearly how to take apart the omp to rebuild it
03-10-06, 09:56 AM
#34
Senior Member
Thread Starter

Join Date: Mar 2005
Location: Amarillo, Texas
Posts: 425
Likes: 0
Received 0 Likes
on
0 Posts
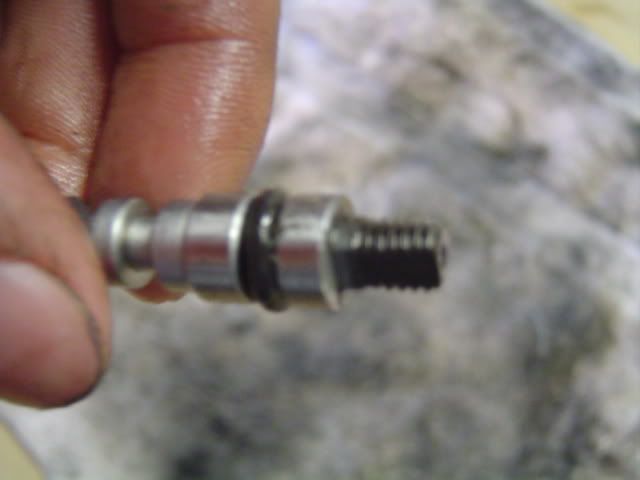
huh...that's odd, I remeber mine jsut falling apart basically.
grab the part that sticks into teh engine, the third pic, with a pair of pliers and it should pop right out.
grab the part that sticks into teh engine, the third pic, with a pair of pliers and it should pop right out.
03-10-06, 07:31 PM
#35
Rotary Freak
Join Date: Mar 2003
Location: Calgary, Alberta, Canada
Posts: 1,711
Likes: 0
Received 0 Likes
on
0 Posts
^^^
What she said. The shiny part that surrounds the key should pop right out. The pliers idea works. Once you've done that the pinion will follow. It's a cylinderical piece of metal with serrations than mesh with one of the barrels inside at an angle of 90 degrees. In this way, the pinion spins the barrels, which are keyed together. Both barrels can be pulled out through the hole under the front end cap that you already removed.
BTW, those diamond-shaped o-rings were round when new, but they take on the shape of the groove in which they live and then become brittle with age.
03-11-06, 10:22 AM
#36
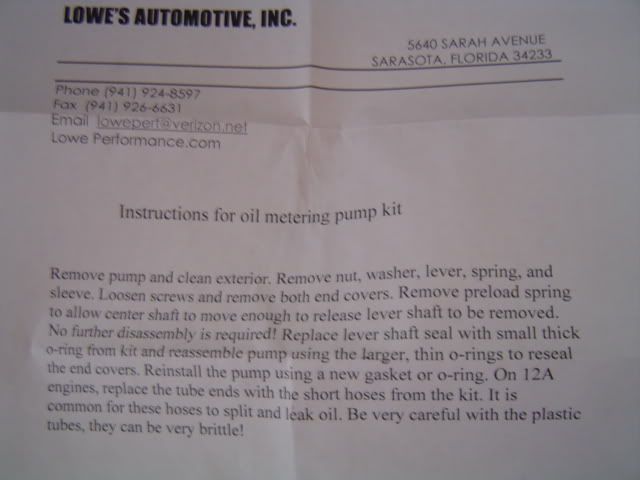
suh-weet! hah did the pliers trick. pulled it out! i was usuing a towel and my hands but it wouldnt come out. dam im weak hah. i just ordered the 12a omp rebuild kit from lowe performance and should be ariving within 7 days. once i put it back together and put it back in i hope theres no more leaks!
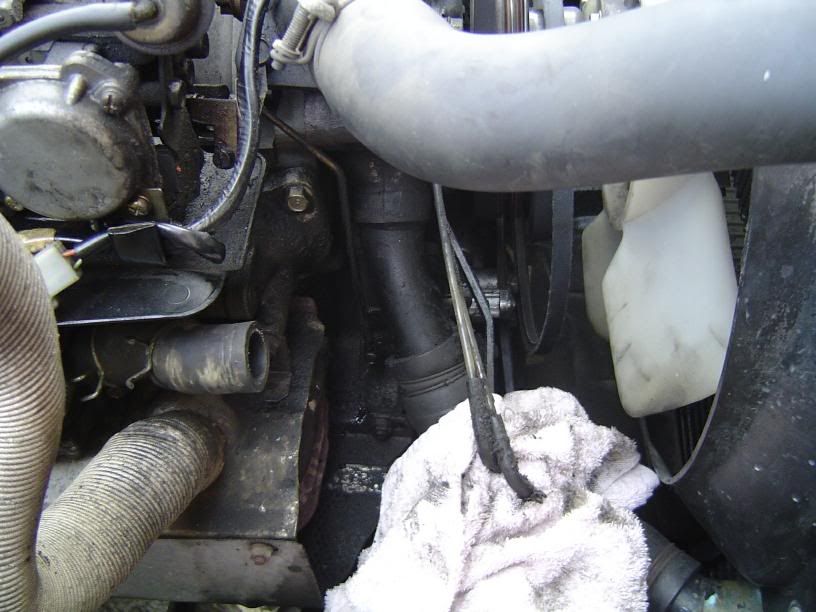
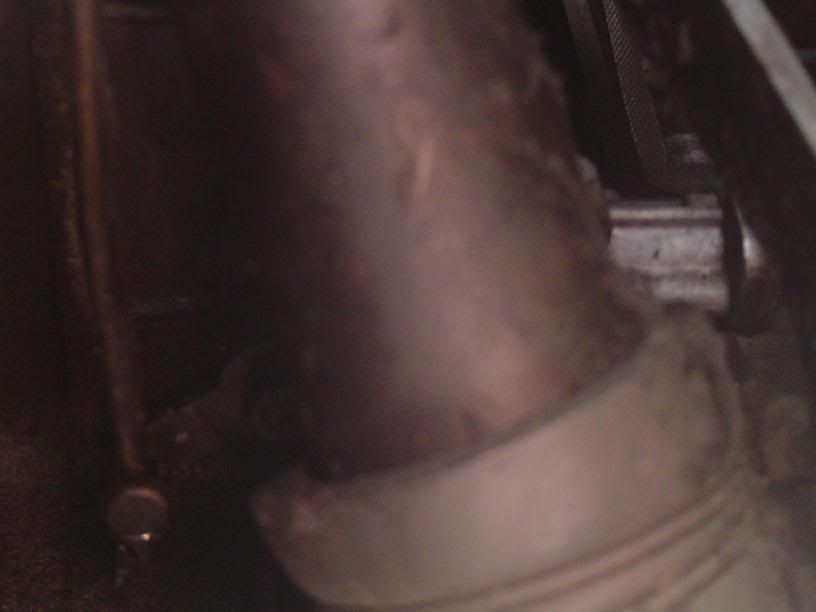
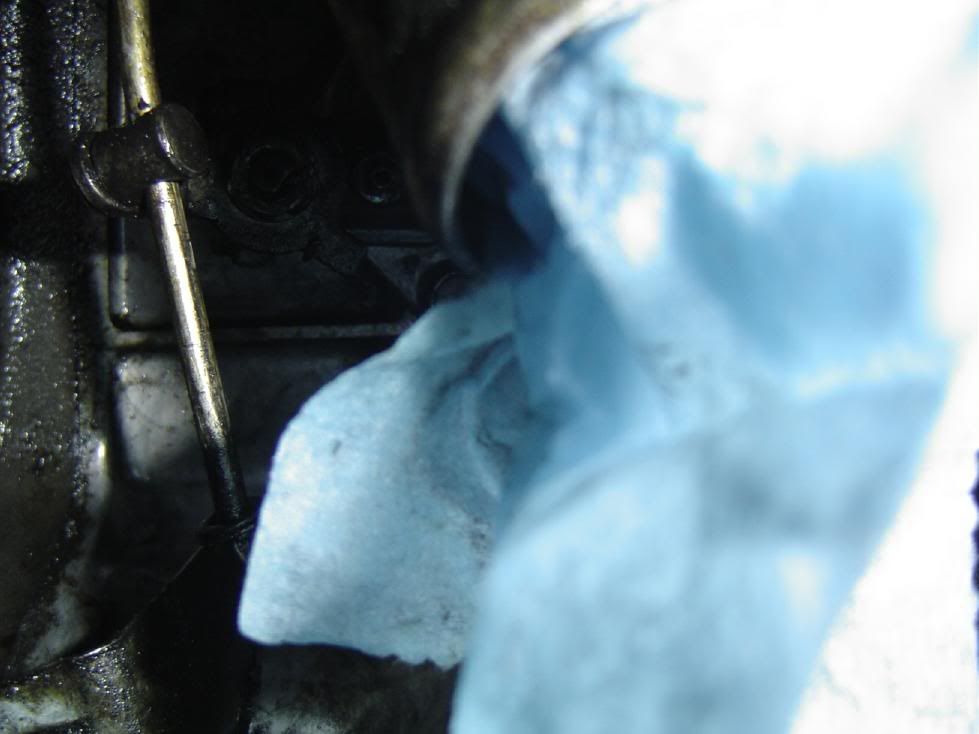
btw i think i should clean off all that grese (exhaust manifold, radiator tube, surroundings) because it will just continue to smoke. what should i use? simple green? i think i gotta buy a new radiator hose becuase its bulgy because the omp dripped oil on it as well as the exhaust manifold.
btw i think i should clean off all that grese (exhaust manifold, radiator tube, surroundings) because it will just continue to smoke. what should i use? simple green? i think i gotta buy a new radiator hose becuase its bulgy because the omp dripped oil on it as well as the exhaust manifold.
03-11-06, 01:02 PM
#37
Don't use simple green on the engine. Take it from me, Simple Green isn't friendly with aluminum and will leave a white powder all over your rotor housings that's a PITA to get off (and in serious cases can cause pitting)
Don't know what you *would* use though?
Jon
Don't know what you *would* use though?
Jon
03-11-06, 01:53 PM
#38
Senior Member
Thread Starter
Join Date: Mar 2005
Location: Amarillo, Texas
Posts: 425
Likes: 0
Received 0 Likes
on
0 Posts
"get in the Zone" and get some of that "Gunk : Engine Degreaser" that should do the trick - just bag up the air filter if you have a cone filter or something - should be fine with stock air box. Let the stuff soak for a bit on a cold engine, then just spray/powerwash the water off. Works good. Even just a powerwash(a cheap harbor freight or something) should work if you are afraid of putting chemicals on it. Or! you can take it to a place and have it steam cleaned! w00t!
 03-14-06, 08:53 PM
#41
Rotary Freak
Join Date: Mar 2003
Location: Calgary, Alberta, Canada
Posts: 1,711
Likes: 0
Received 0 Likes
on
0 Posts
The groove for the small-diameter o-ring is wider than the o-ring itself, but the seal should still work fine. As for the other seal on the inside of that shiny cap, I've never replaced it--- there is no way for oil to leak outside the engine if it were to ever fail so why bother?
One thing you need to inspect though is the cam on the actuating shaft, specifically on the surface where it makes contact with the first "barrel" in order to push it end-wise when the actuating arm is moved to its full-travel position.
These cams are usually ok but if worn (as was the case with one of my pumps recently) the pump will not deliver oil to the intakes. If you look under the hood to find that both lines have run dry this could be the reason.
A replacement omp can be picked up at a wrecking yard for $10 or so if you need any parts, or if you want a better omp to rebuild than the one you have. Of course, it's a crap-shoot--- you may have to pick up a couple of wrecking yard pumps to get one good one, but that would be a worst-case scenario.
03-14-06, 09:16 PM
#42
Rotary Freak
Join Date: Mar 2003
Location: Calgary, Alberta, Canada
Posts: 1,711
Likes: 0
Received 0 Likes
on
0 Posts
In that pic you posted of the completely sis-assembled omp it looks like you have removed the neoprene hose sections (ie: the ones that attach to the omp via spring clamps) from the lower ends of the nylon feeder tubes.
If so, you probably shouldn't have done that. Mazda strongly advises against this as they are glued onto the feeder tubes using an impervious-to-oil sealant. A replacement set of tubes can be scored at a wrecking yard, but a set of new feeder tubes (probably not a bad idea since the old ones are likely over 20 years old) are available from Mazda for around $30.
If so, you probably shouldn't have done that. Mazda strongly advises against this as they are glued onto the feeder tubes using an impervious-to-oil sealant. A replacement set of tubes can be scored at a wrecking yard, but a set of new feeder tubes (probably not a bad idea since the old ones are likely over 20 years old) are available from Mazda for around $30.
03-14-06, 09:24 PM
#43
hey thanks for your help Aviator 902S! ill make sure to watch for the cams to align properly! i hope in the end my oil leak problem will be resolved and no more smoking! i gotta of course clean the grease and oil thats left over but now i hope the omp wont leak for a while. until my engine craps out thus calling for a complete rebuild and then fixing the dowel pin leak and on and on for these 20+ yr old cars. sounds fun to me! thanks again!
03-14-06, 10:44 PM
#44
Originally Posted by Aviator 902S
In that pic you posted of the completely sis-assembled omp it looks like you have removed the neoprene hose sections (ie: the ones that attach to the omp via spring clamps) from the lower ends of the nylon feeder tubes.
If so, you probably shouldn't have done that. Mazda strongly advises against this as they are glued onto the feeder tubes using an impervious-to-oil sealant. A replacement set of tubes can be scored at a wrecking yard, but a set of new feeder tubes (probably not a bad idea since the old ones are likely over 20 years old) are available from Mazda for around $30.
If so, you probably shouldn't have done that. Mazda strongly advises against this as they are glued onto the feeder tubes using an impervious-to-oil sealant. A replacement set of tubes can be scored at a wrecking yard, but a set of new feeder tubes (probably not a bad idea since the old ones are likely over 20 years old) are available from Mazda for around $30.
03-14-06, 11:41 PM
#46
totally! i am so very appreciative and everybody who have helped me out during my rebuild of my omp/mop! now its archived for everone else rebuilding their omp if they need help they can review this archived thread (with pictures)! thanks again everone! ill be back soon to update how it holds up!
03-17-06, 09:13 PM
#47
uh oh... when i bolted back on my omp the linkage rod was flipped the wrong side up. and since there is no room to turn and reverse flip it... getting darker and i getting more anxious.. decided to force it.. and i bent it...
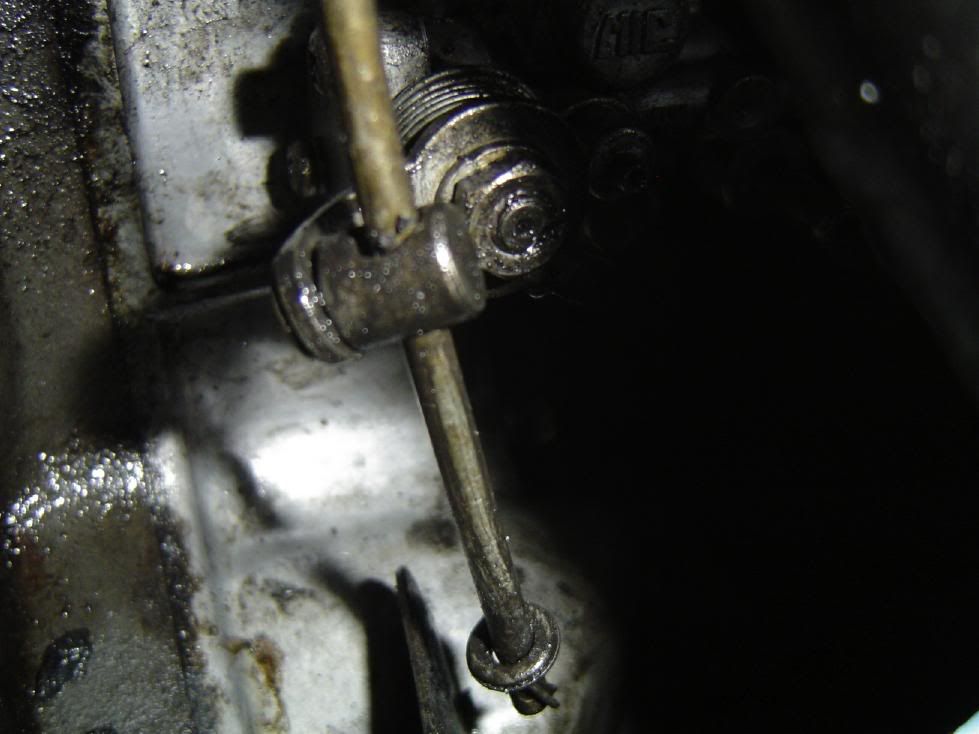
close up
i figure when i have daylight tomorrow i will re-bend it back straight so the linkage rod will have more can lift than what it does now.
omg i learned another lesson. i hate learning lessons because i have to fix them but i always benifit by learning but dammit im effin stupid as a ****.. be careful when putting back on your omp that you have the linkage rod on the right side up..
03-17-06, 11:28 PM
#49
uhhh i dont think so... you can see the spring in the background is that what you are referring to? and i dont know about a second washer because i never took out the linkage rod off (both cotter pins) because i only took out one which connects the rod to the carb. i believe everything is there i just gotta bend it back.. i dont mean to disagree with trochoid so if anybody else finds out that i am missing what he said please let me know before i put on my new lower radiator hose, air pump, exhaust manifold heat shield (which was a bitch to get out btw), and connect everything back up to find that my omp/mop isnt working/complete yet. that would totally ruin my day haha
oh btw i bought engine brite heavy duty engine degreaser. seems to work good so far. i got much much more to cover... because the omp/mop leaked out and dripped down onto my lower radiator hose and into the passage of my heat shields and undercarrige and engine bay and engine mounts... i took out the first heat shield to clean because i dont want the grease to smoke up and better clean the exhaust manifold pre-cat
oh btw i bought engine brite heavy duty engine degreaser. seems to work good so far. i got much much more to cover... because the omp/mop leaked out and dripped down onto my lower radiator hose and into the passage of my heat shields and undercarrige and engine bay and engine mounts... i took out the first heat shield to clean because i dont want the grease to smoke up and better clean the exhaust manifold pre-cat
Last edited by boyee; 03-17-06 at 11:31 PM.
03-17-06, 11:51 PM
#50
There is a spring that slides on the mop rod, with a waher at each end of it. The way you have it set up, you will be lucky if the mop even opens up to allow oil to flow to the engine. there isn't enough movement in the lever arm on the carb/tb, to be able to engage the mop arm and open it up without the spring in place. The spring you are refering to returns the mop to a closed position.
If you don't believe me, rotate the lever on the carb/tb and see if the lever on the mop moves. Then rotate the mop lever and check how much rotation it is supposed to have.
If you don't believe me, rotate the lever on the carb/tb and see if the lever on the mop moves. Then rotate the mop lever and check how much rotation it is supposed to have.