
mmmmmmm, intake!!!!
 12-28-06, 08:48 PM
#1
mmmmmmm, intake!!!!
Sooooo, I am getting the new 7 ready to hit the streets next summer, and finally one of my many projects is done....
My custom intake!! Here are some before and after pictures
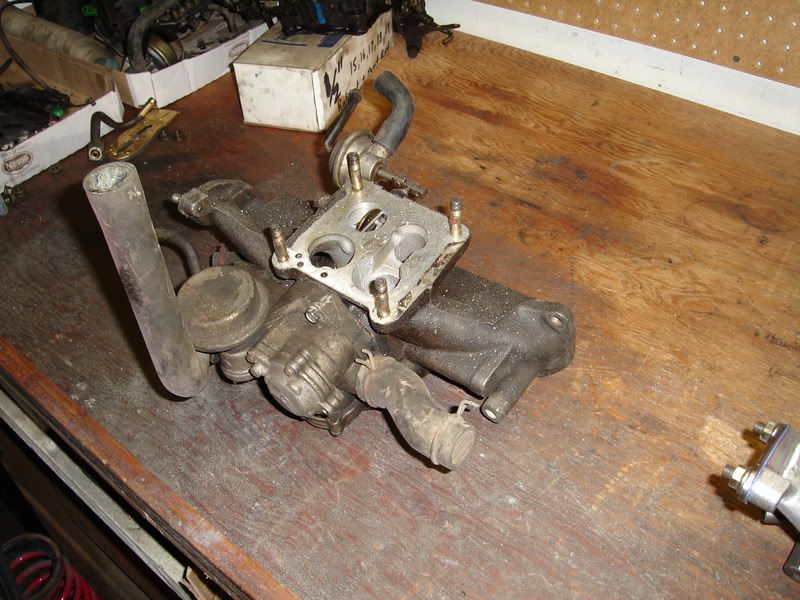
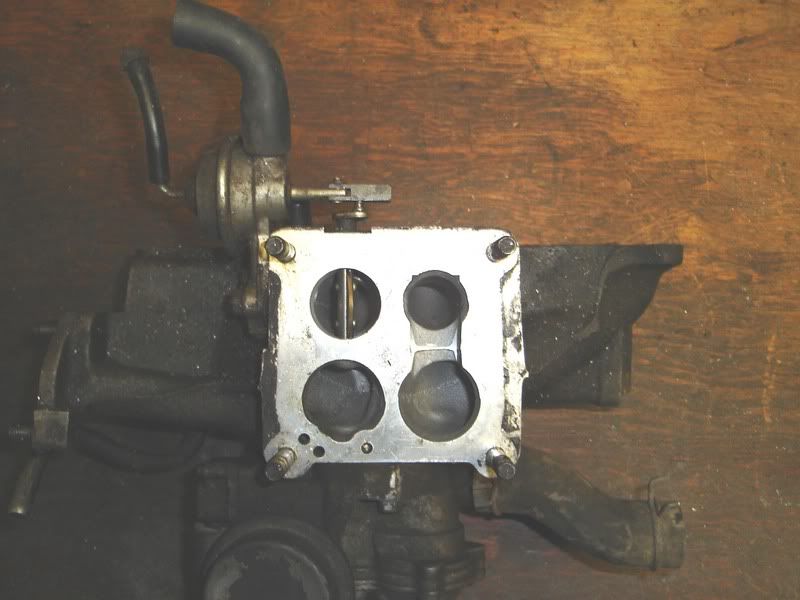
The beast that came off the car:
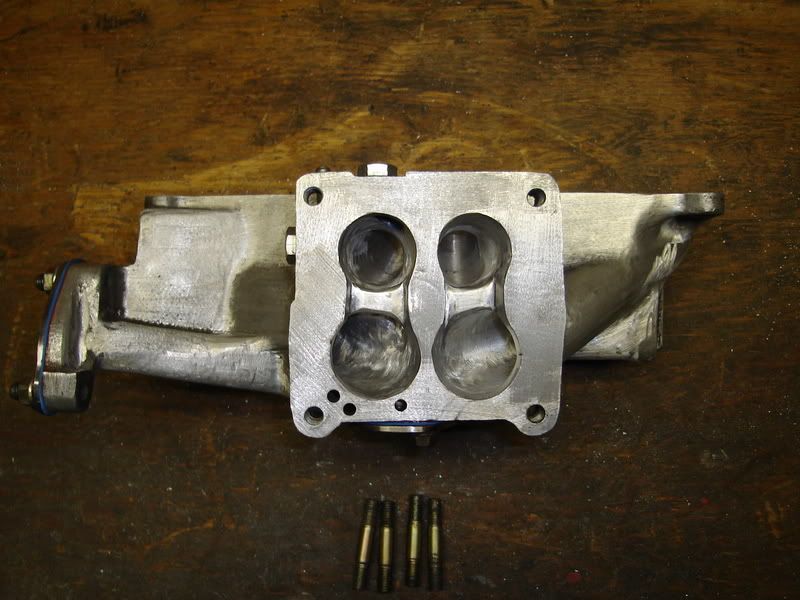
Custom work done:
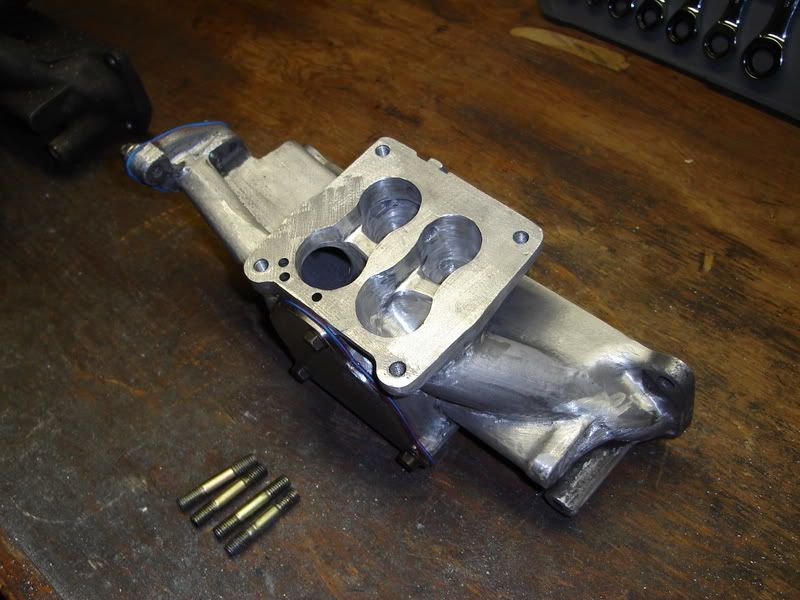
Holes tapped and bolts inserted as block offs, no JB weld here!
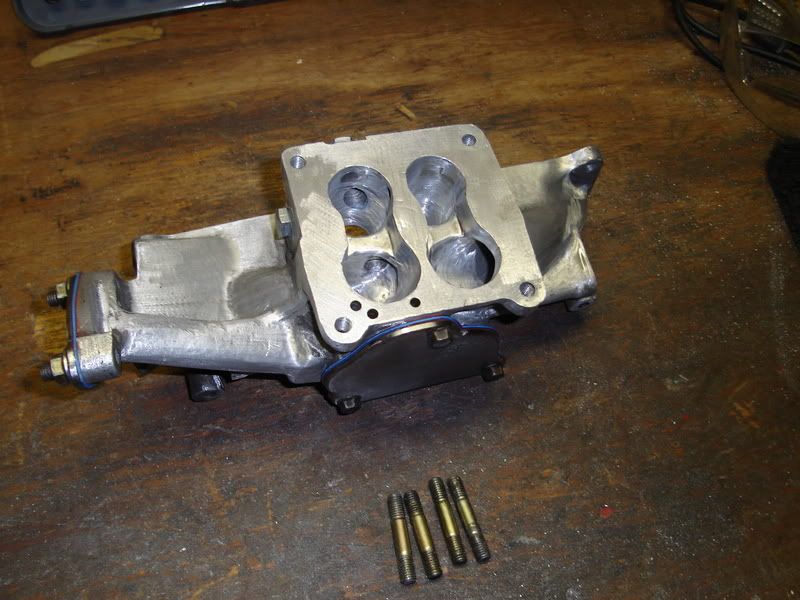
The top end was ported out a small bit, I moreso just wanted to smooth out all the bumps and even everything out. I know the notch between the primary and the secondary on the rear rotor side isnt really needed since theres the hole there lower, but since I was in there I just did it for the heck of it.
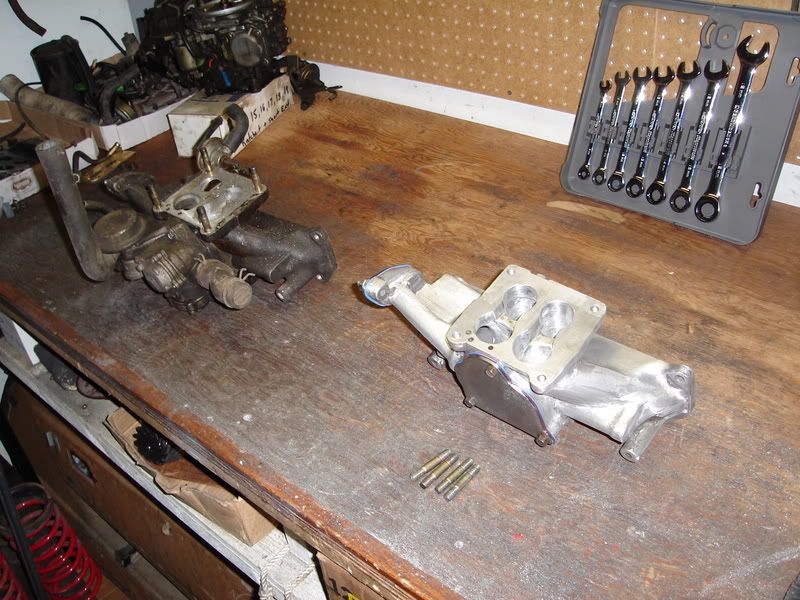
Heres a final comparaison:
What do you guys think???
My custom intake!! Here are some before and after pictures
The beast that came off the car:
Custom work done:
Holes tapped and bolts inserted as block offs, no JB weld here!
The top end was ported out a small bit, I moreso just wanted to smooth out all the bumps and even everything out. I know the notch between the primary and the secondary on the rear rotor side isnt really needed since theres the hole there lower, but since I was in there I just did it for the heck of it.
Heres a final comparaison:
What do you guys think???

 12-28-06, 09:02 PM
#4
It definately doesnt need the hole between the primary and secondary anymore, but what can ya do. If I was going to fill anything in I would have done things a bit differently. I just dont feel very comfortable putting any epoxy or JB weld in there.
As for holes, there were sevral which I decided to not worry about. Instead I simply rounded off the edges closest to the engine, which will hopefully assist the flow a little bit.
At this point, I think Im prety happy with it, just cant decide if the outside needs some color or not.
As for holes, there were sevral which I decided to not worry about. Instead I simply rounded off the edges closest to the engine, which will hopefully assist the flow a little bit.
At this point, I think Im prety happy with it, just cant decide if the outside needs some color or not.
12-28-06, 09:47 PM
#6
If you want to plug the hole left from the shutter valve shaft, drill and tap it from the outside all the way to the runner divider. Find a long enough bolt to go all the way through, set it with J B Weld, then cut out the part that interfers with flow. When done, be sure to stake the edges of the bolt so it can't back out.
A simpler option might be to tap as above, then plug the runner divider with an allen plug and a bolt on the outside. Use J B as a thread sealer to hold both of them in place.
A simpler option might be to tap as above, then plug the runner divider with an allen plug and a bolt on the outside. Use J B as a thread sealer to hold both of them in place.
Trending Topics
12-29-06, 05:35 PM
#8
It wasnt too hard, Just took some time with the dremel and die grinder...no real skill required... Just takes patience, and a good enough eye/imagination to match the runners.
It is a bit difficult because one primary curves off to the side a bit more than the other, so they wont look identical no matter how hard you try. On a scale of 1 to 10, it was probably a 3.
As for driving it...The car is put away for the winter so thats gonna have to wait...
This however, isnt a bad thing as there are many more projects to finish off before I tear up the streets.
Next project is the carb...Ill be back with more pictures in another thread once Im done.
The goal for my new 7 is simply to make the baddest ride with the least money spent.
THE BUDGET BUILD!!!
Cant wait...I have a magnificent feeling about Grimace!!!!!!! ( for those who dont know, Grimace is the name for a $500 PURPLE '85 GS I picked up not too long ago.)
12-29-06, 08:31 PM
#13
Originally Posted by wackyracer
Find a 12-A intake from a RX-2 and RX-3. I know someone 
If you or anyone wants to get rid of a pre 79 12a intake and ship it up here to canada for a decent price PM me, I could be interested.
01-02-07, 11:56 PM
#20
very nice work on the intake. i mean that. i think it looks better than the one i did for my recent 12A project. as for the finish, i'd leave the aluminum clean - no paint.
i take it there will be a thread that announces this spring sale, eh?
Originally Posted by wackyracer
I will keep you in mind. I have plans for an extensive garage spring cleaning.
01-03-07, 06:08 AM
#21
Eats, Sleeps, Dreams Rotary
Join Date: Jul 2004
Location: Allentown, PA - Paterson, NJ
Posts: 3,247
Likes: 0
Received 2 Likes
on
2 Posts
Originally Posted by 84stock
I would assume in the past 20 years someone eslo would've tried it. How well did the one you saw work?
01-03-07, 03:11 PM
#22
Originally Posted by diabolical1
very nice work on the intake. i mean that. i think it looks better than the one i did for my recent 12A project. as for the finish, i'd leave the aluminum clean - no paint.
I have decided to do a little more polishing up of the intake, and spraying it with some high temp clearcoat to preserve the goodness, I think it will look slick that way!
Im also really hoping to get a pre -79 intake to do up (hopefully from wacky at some point), but in the meantime this will do.
Now, I just gotta figure out the carb stuff from my other thread and Ill be good to go.
Ill have an update for everyone as soon as the intake and carb are finished and running on the car!
01-03-07, 03:27 PM
#23
Something you guys need to remember, a SA intake will not work on a FB block without modification. You will have this.
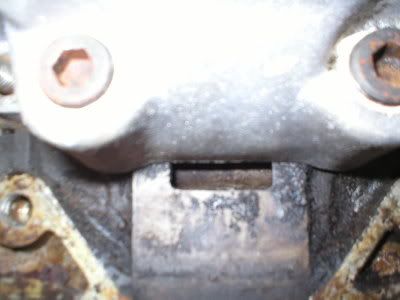
That open port is part of the EGR setup on the '81 through '85 center iron. This port extends to the exhaust ports. This leaves you with two options. One, you can plug the port with JB Weld, or something, or, option two. Build up the bottom of the SA intake to cover the port. If left open, you will have a massive exhaust leak. You can take that intake a step further, and remove the extra material for the EGR. This is the SA intake I modified to use on my turbo FB.


As you can see, there are a couple of ports that have to be plugged, but doesn't this really clean up a stock intake?
That open port is part of the EGR setup on the '81 through '85 center iron. This port extends to the exhaust ports. This leaves you with two options. One, you can plug the port with JB Weld, or something, or, option two. Build up the bottom of the SA intake to cover the port. If left open, you will have a massive exhaust leak. You can take that intake a step further, and remove the extra material for the EGR. This is the SA intake I modified to use on my turbo FB.
As you can see, there are a couple of ports that have to be plugged, but doesn't this really clean up a stock intake?
01-04-07, 02:28 AM
#24
Originally Posted by diabolical1
i take it there will be a thread that announces this spring sale, eh?
). 2 FB's dont need to be in the garage.
04-01-07, 10:47 AM
#25
Well, I just had to give everyone an update...
The Intake is working amazingly.
Combined with the tweaked up Nikki rockin the AP mod / mech. secondaries it runs like a top.
Im seriously impressed!
Ill get some shots up of the intake/carb installed in the near future!
The Intake is working amazingly.
Combined with the tweaked up Nikki rockin the AP mod / mech. secondaries it runs like a top.
Im seriously impressed!
Ill get some shots up of the intake/carb installed in the near future!