GSL and SE LSD teardown pics,drivetrain tutorials coming soon
 11-29-07, 11:53 PM
#26
FB+FC=F-ME
Thread Starter

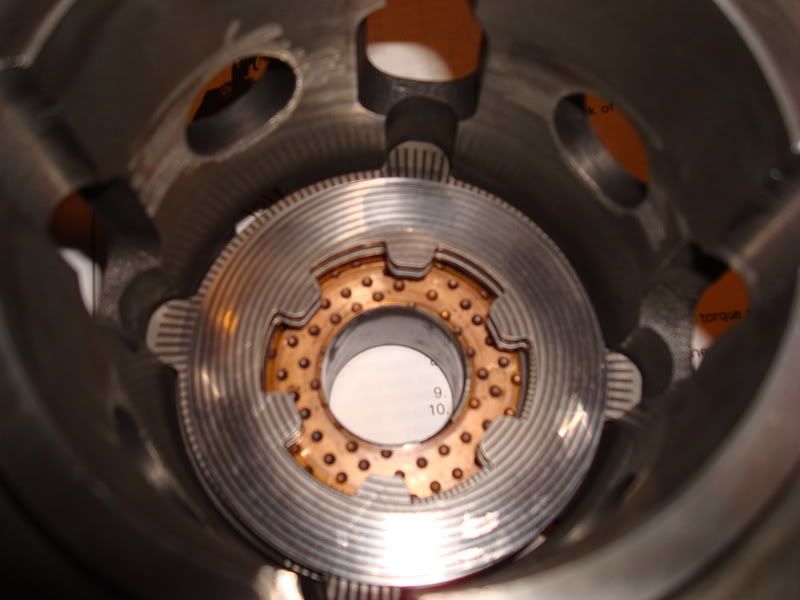
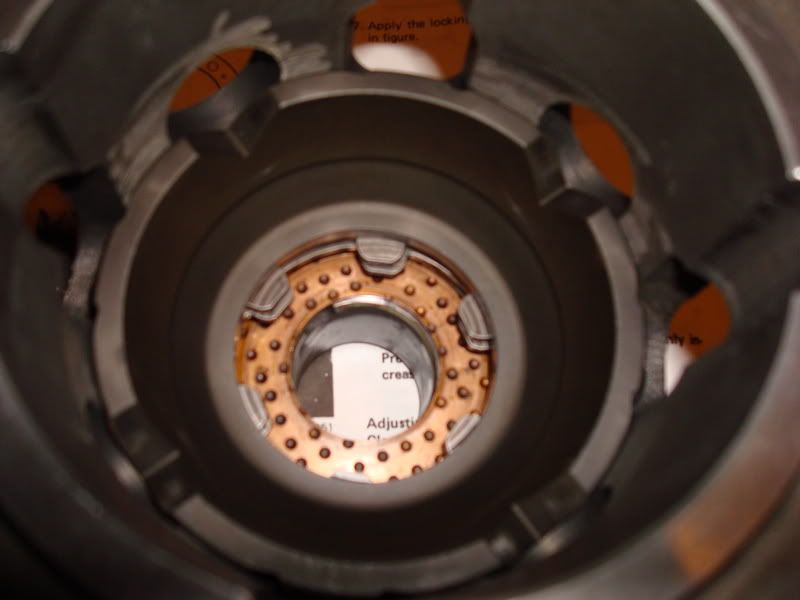
Step 2 involves measuring the LSD core with the copper thrust washers installed.Too much clearance will induce slop in the spider gears since they are beveled and gain lash as they spread apart from each other.The thrust washers bear against the side gears and put them into contact with the spider gears.
They do no affect the LSD preload tension as I incorrectly stated when REVHEAD mentioned machining the cases.Thicker LSD drive discs are availible for taking up excess play in the previous proceedure.For this part of the assembely,if the tolerances are outside of spec,you can get thicker thrust washers to close up the slop in the spiders/side gears.
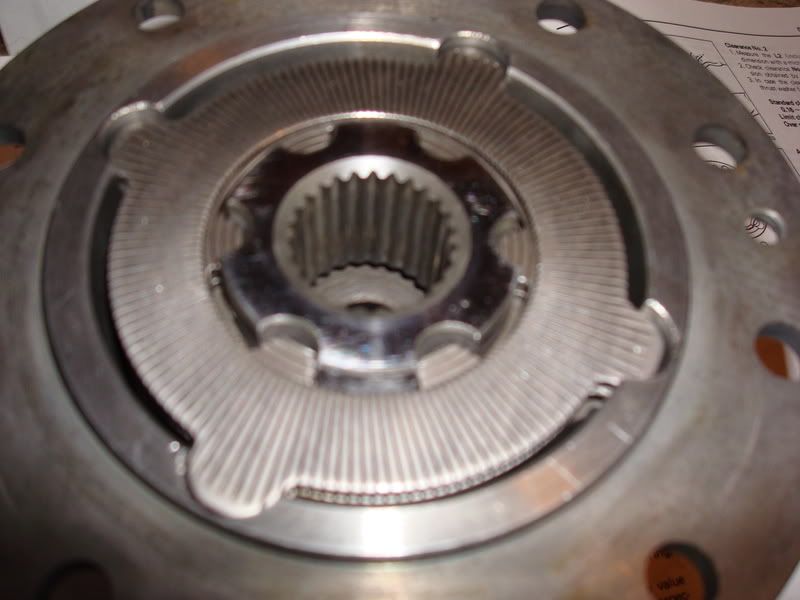
First measure the width of the LSD unit including the thrust washers.I took several measurements and backed them up by measuring the LSD assembely and the washers seperately and then adding the 3 values.I averaged them all for a width of 87.81MM.
The factory spec is 88.2MM. You then subtract your measurment from that number and get your clearance.....mine was .39MM of clearance.The factory spec range is .16 to .42MM so Im within spec,although a tad loose.No biggie, since the max allowable clearance is .80MM which I am far from.Oversize thrust washers can be used to take up the wear or you can install better or buy new spider gears to get rid of the slop without the thicker washers.
Now for assembely.........
First lay the right side thrust washer and cone spring inside the carrier case.Then stack the 4 LSD discs starting with an outside spline disc and ending with an inside spline disc.This will give you the maximum friction surfaces allowable with 4 LSD discs on each side.
Then install the thrust block over the discs.I found it easier to first alighn the driven discs with a side gear before installing the thrust block.
Then,install the side gear into the block,engaging the gear's splines with the driven discs.Then you can drop the spider and spider gears into the block and engage all the gears together.

Your now halfway there.Just install the other side gear,thrust block and 4 LSD plates,starting with an inside spline disc and ending with an outside spline disc.
Now install the other cone spring and thrust washer on the pack.

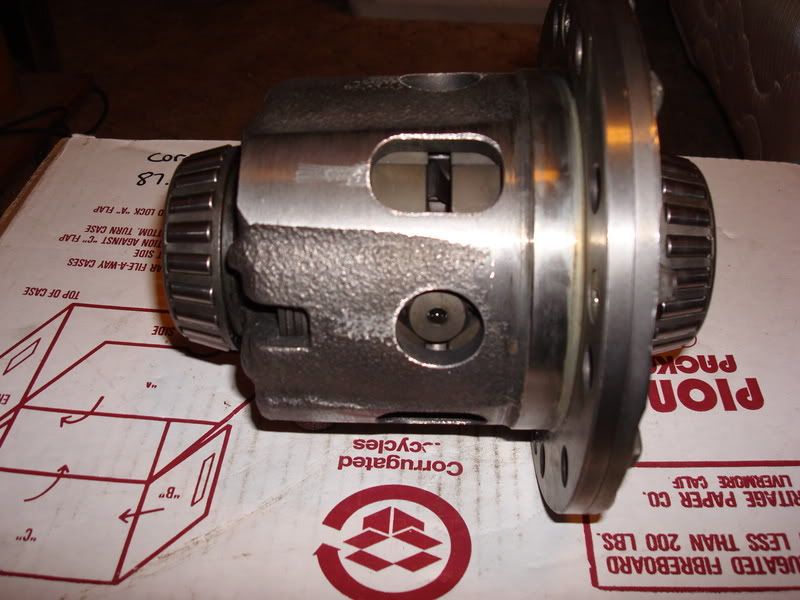
Once the end cap is in place,line up the ID marks on the circumference of each and loosely screw in the 4 little phillips screw that hold the case together.Before tightening,check that the thrust washers and cone springs are centered and alighned with everything.They can move around a little,but its unlikely they will gwet out of place.But still,better to be sure.
Then snug up the screws and you are done!
The next session will involve installing the gears and new bearings,and setting up all the specs for pinion preload and gear backlash as well as checking the pattern.
They do no affect the LSD preload tension as I incorrectly stated when REVHEAD mentioned machining the cases.Thicker LSD drive discs are availible for taking up excess play in the previous proceedure.For this part of the assembely,if the tolerances are outside of spec,you can get thicker thrust washers to close up the slop in the spiders/side gears.
First measure the width of the LSD unit including the thrust washers.I took several measurements and backed them up by measuring the LSD assembely and the washers seperately and then adding the 3 values.I averaged them all for a width of 87.81MM.
The factory spec is 88.2MM. You then subtract your measurment from that number and get your clearance.....mine was .39MM of clearance.The factory spec range is .16 to .42MM so Im within spec,although a tad loose.No biggie, since the max allowable clearance is .80MM which I am far from.Oversize thrust washers can be used to take up the wear or you can install better or buy new spider gears to get rid of the slop without the thicker washers.
Now for assembely.........
First lay the right side thrust washer and cone spring inside the carrier case.Then stack the 4 LSD discs starting with an outside spline disc and ending with an inside spline disc.This will give you the maximum friction surfaces allowable with 4 LSD discs on each side.
Then install the thrust block over the discs.I found it easier to first alighn the driven discs with a side gear before installing the thrust block.
Then,install the side gear into the block,engaging the gear's splines with the driven discs.Then you can drop the spider and spider gears into the block and engage all the gears together.
Your now halfway there.Just install the other side gear,thrust block and 4 LSD plates,starting with an inside spline disc and ending with an outside spline disc.
Now install the other cone spring and thrust washer on the pack.
Once the end cap is in place,line up the ID marks on the circumference of each and loosely screw in the 4 little phillips screw that hold the case together.Before tightening,check that the thrust washers and cone springs are centered and alighned with everything.They can move around a little,but its unlikely they will gwet out of place.But still,better to be sure.
Then snug up the screws and you are done!
The next session will involve installing the gears and new bearings,and setting up all the specs for pinion preload and gear backlash as well as checking the pattern.
 12-29-07, 11:21 AM
#29
Brap, Brap, Ole!
Join Date: Apr 2005
Location: kalamazoo, mi
Posts: 1,461
Likes: 0
Received 0 Likes
on
0 Posts
OMG, lol. Looking at the pics of the diff going back together, it reminds me of when i used to race RC nitro trucks! The differential internals are not much different!
12-29-07, 07:27 PM
#31
FB+FC=F-ME
Thread Starter
Ehh..........
If your going to be installing it right away,then it cant hurt.If its going to sit like mine did,then keeping it dry is cleaner and wont attract dust.Once the diff is installed and spun a few times,everything will be soaked down and lubed.
I hinted at putting this thread in the archives,since my gear setting thread is in there now.The two go hand- in- hand for anyone looking to do a full rearend job.
 12-30-07, 04:36 PM
#33
FB+FC=F-ME
Thread Starter
Custom made.
Using a stock 1st gen shaft behind a TII is a bad idea, and the TII shaft is too short.So instead of trying to make a hybrid shaft to connect the two components,its better to just have a shop make a full custom unit from other factory parts.
By bringing in a TII front yoke and the SE rear companion flange,they can match up what new yokes will accept the same size tubing and cut it to length.Im pretty sure they used Ford parts on both ends.Cost me about 200 bucks,nothing fancy and its plenty big,greasable and rebuildable.
 01-02-08, 09:38 PM
#38
FB+FC=F-ME
Thread Starter
Thanks Vipernicus.
The seal can be worked out with a screwdriver if you try hard enough.But the more you fight with it,the more likely you are to ding the housing,shaft or bearing.
Many pinion and tranny seals have a metal flange that wraps all the way up to the front of the housing.That way,you can pry the seal out without actually jamming anything INTO the seal itself.If yours doesnt have this flange,then Id invest in a seal puller.Its not an expensive item and it has lots of uses.Its about 18" long with beak-like hooks on one end.......think Mid-eveil torture device!

Thread
Thread Starter
Forum
Replies
Last Post