gastank leak
 11-11-09, 09:16 AM
#1
recycled teenager
Thread Starter

Join Date: Feb 2004
Location: Jackson MI USA
Posts: 837
Likes: 0
Received 0 Likes
on
0 Posts
Anyone with a real foolproof way to fix a 3/8 hole in the bottom. I hate to drop tanks Turns out most sealants are not gas proof. Bob
 11-11-09, 09:29 AM
#2
Lives on the Forum
Find a screw slightly larger than the hole. Put a washer on it, screw it through a piece of rubber (patch, piece of bike tube, rubber washer, etc.). Then goop sealant all over everything and screw the assembly into the hole.
Say your prayers every day, where clean underwear, what could possibly go wrong, eh?
Say your prayers every day, where clean underwear, what could possibly go wrong, eh?
11-11-09, 09:51 AM
#3
I've never had a leak that size, but I did get holed right on the rear left lower corner once, by road debris; about a 1/8" hole. I used some of the epoxy sealer specifically made for fuel tanks. It's been fuel-tight for over 10 years now.
Only real prep I did was gently removing the outer tank coating before mashing the epoxy in place, making sure it was rust and dirt free.
Only real prep I did was gently removing the outer tank coating before mashing the epoxy in place, making sure it was rust and dirt free.

 11-11-09, 09:58 AM
#5
here's some info and my writeup on dropping the tank should you need to do that. others may do it differently, but this is what i've found works. dropping the tank is no big feat. just make sure you drain all of the gas first. it makes a big difference when removing and reinstalling the tank. pop open the filler door and remove the three 8mm bolts holding the filler neck on. push the filler neck through the opening. it may be a little tough at first but the seal will unstick and it will push through.
next, get under the car and remove the three lines ahead of the fuel tank. eaiser to do this now rather than when the tank is coming down. then you'll want to remove the small plastic splash guard in the left wheel well. this will give you access to the sending unit. unplug it. chances are the connector will fight you a bit coming off and will be stiff. be patient with it.
you will then want to remove the two 14mm bolts holding the tank up, move the straps down, and work the tank down. get the tank on the ground and remove the pickup lines and the fuel level sender. you may find the screws for the fuel level sender very rusty and difficult to remove..of course you are in NC so i doubt that thats the case... you can now look in the tank and make a determination of where you want to go from there. when the tank is clean you will want to replace the gasket for the fuel level sender and the gasket for the pickup lines. you may also want to replace the pickup screen that attatches to the pickup lines. this can be clogged or ripped or otherwise in poor condition. the part numbers for replacement parts from mazda are as follows:
pickup/return line gasket: FA54-42-182
fuel level sender gasket: 8871-60-962A
pickp screen: GA97-42-113
fuel tank pad: 8871-42-761
fuel level sender(if yours is bad. new sender comes with gasket): FA54-60-960
i have recently purchased most of these parts for my project and the prices are pretty reasonable from the dealer.
pics to follow with explanations.
11-11-09, 09:59 AM
#6
here are the instructions with pics for the tank removal:
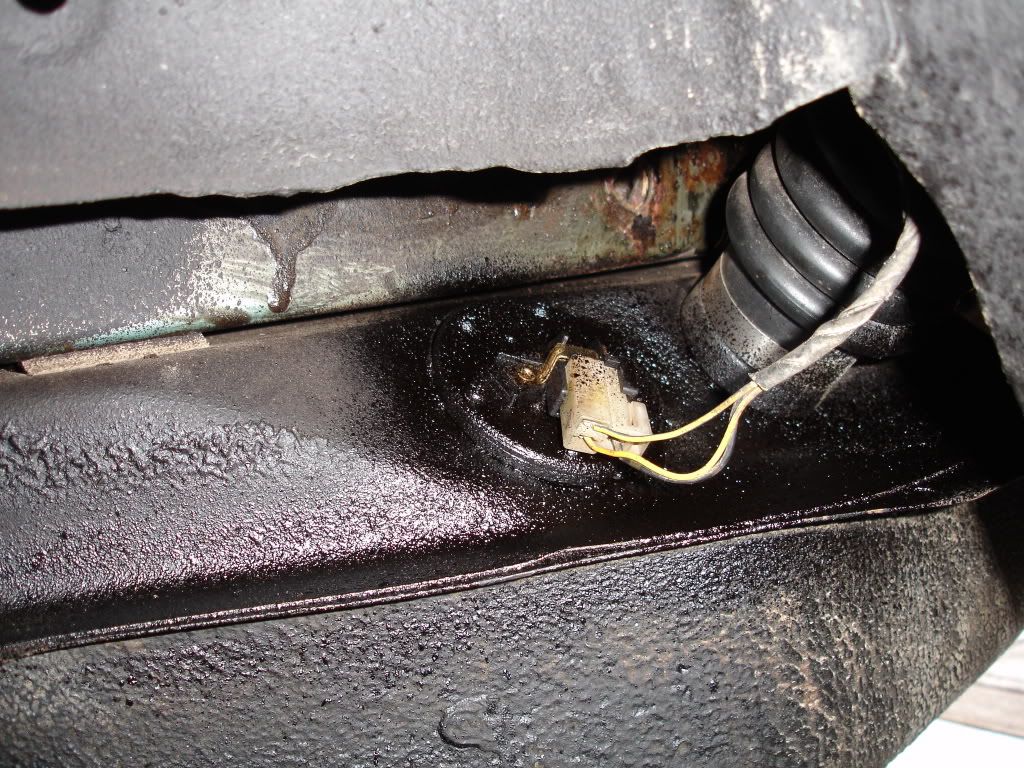
first, jack the car up, put it on stands, remove the left rear wheel, remove the plastic splash shield in the left wheel well. it is held on by two 10mm bolts and a 10mm nut. this will expose the fuel level sender which needs to be unplugged at this step:
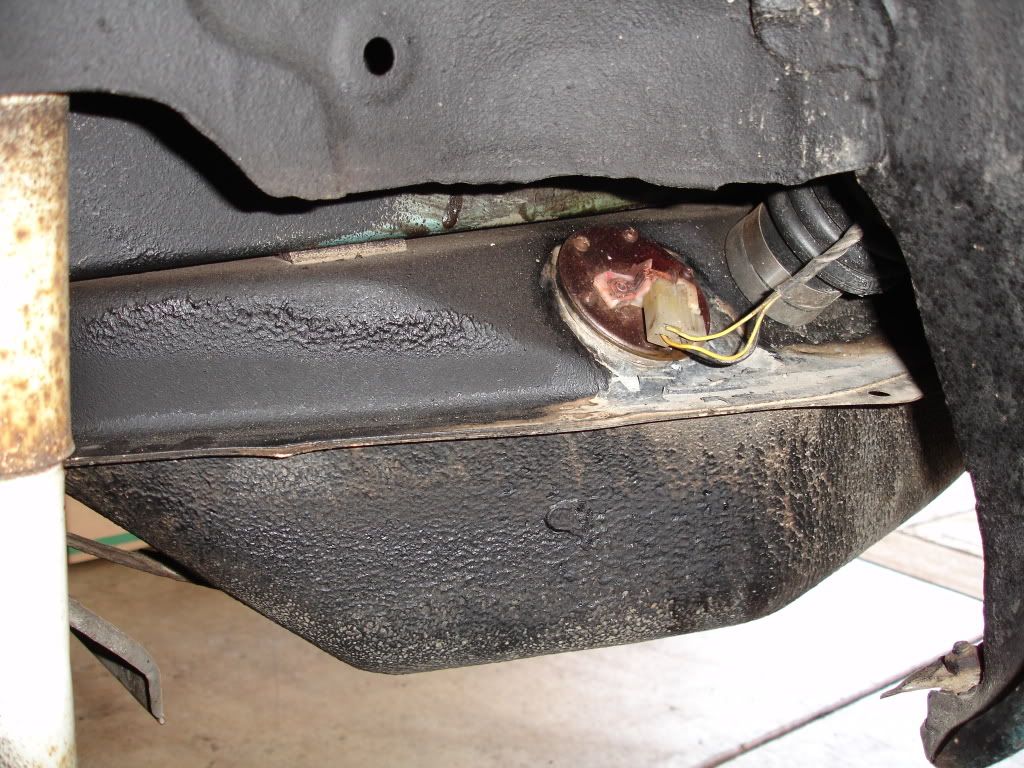
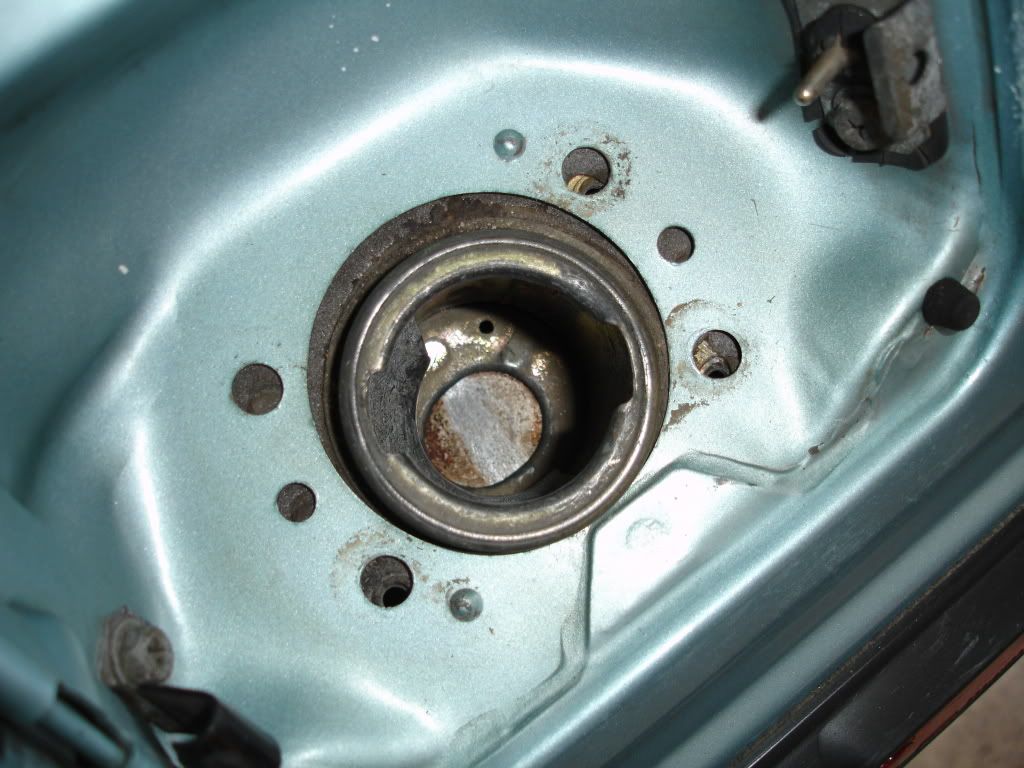
next, open the filler door, remove the gas cap and the three 8mm bolts, lift off the plate and push the neck down until it breaks away from the body:
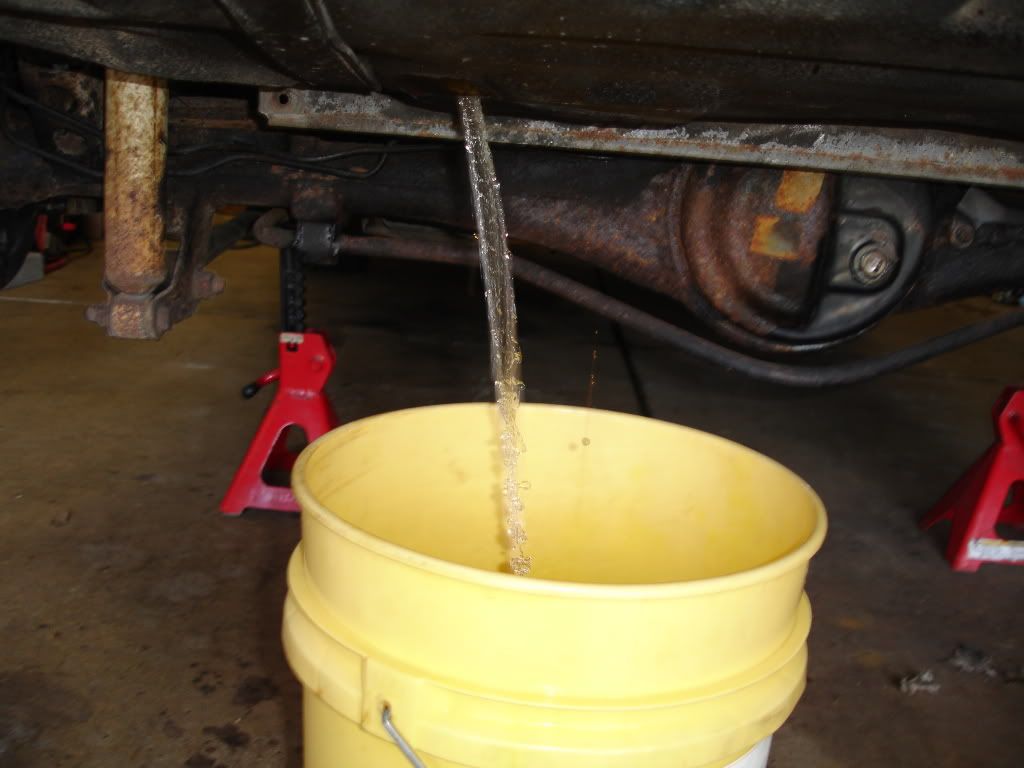
now is a good time to drain the gas. place a suitable bucket under the drain plug and remove the drain plug. a clean 5 gallon bucket works great and you can empty the bucket into a 5 gallon gas can or cans:
after the tank is drained, reinstall the drain plug and remove the clamps from the feed, return, and vent lines and slide the hoses off:

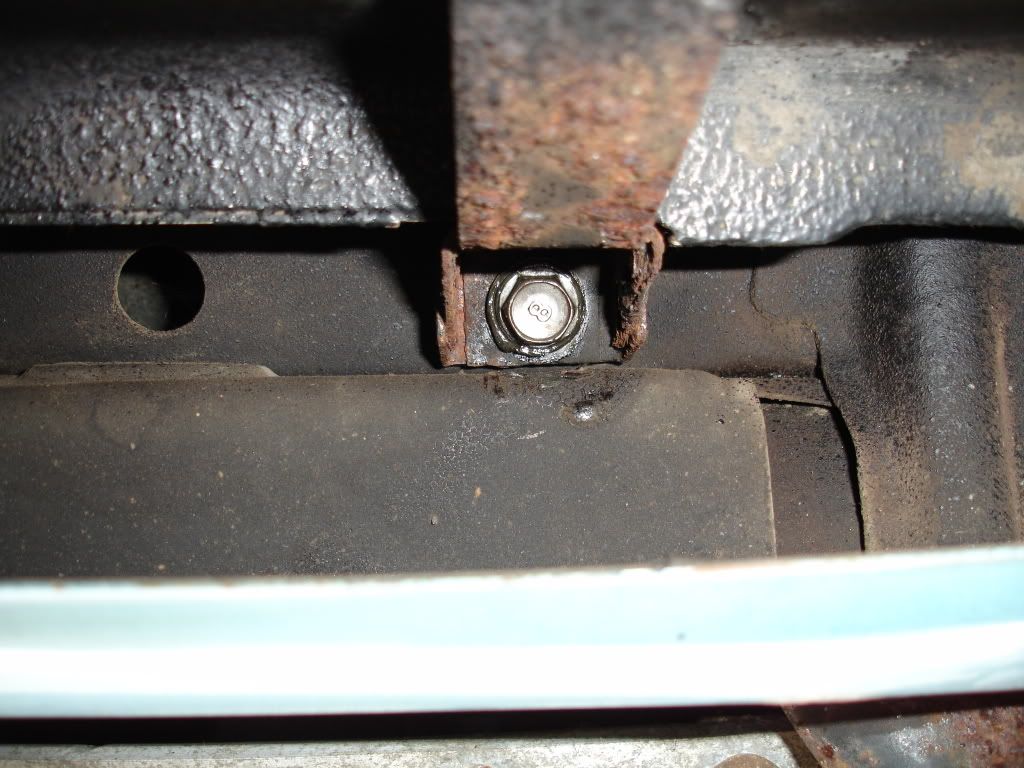
once thats done, remove the 14mm bolt from from each tank strap, they'll be in the front of the straps towards the rear bumper and you'll want to swing the straps down:
when the tank starts coming down, wiggle the filler neck out of its opening. once you do this, the tank will finish coming down(all the while you are supporting the tank with your leg or suitable support i hope)

and the tank will be down and ready for service:
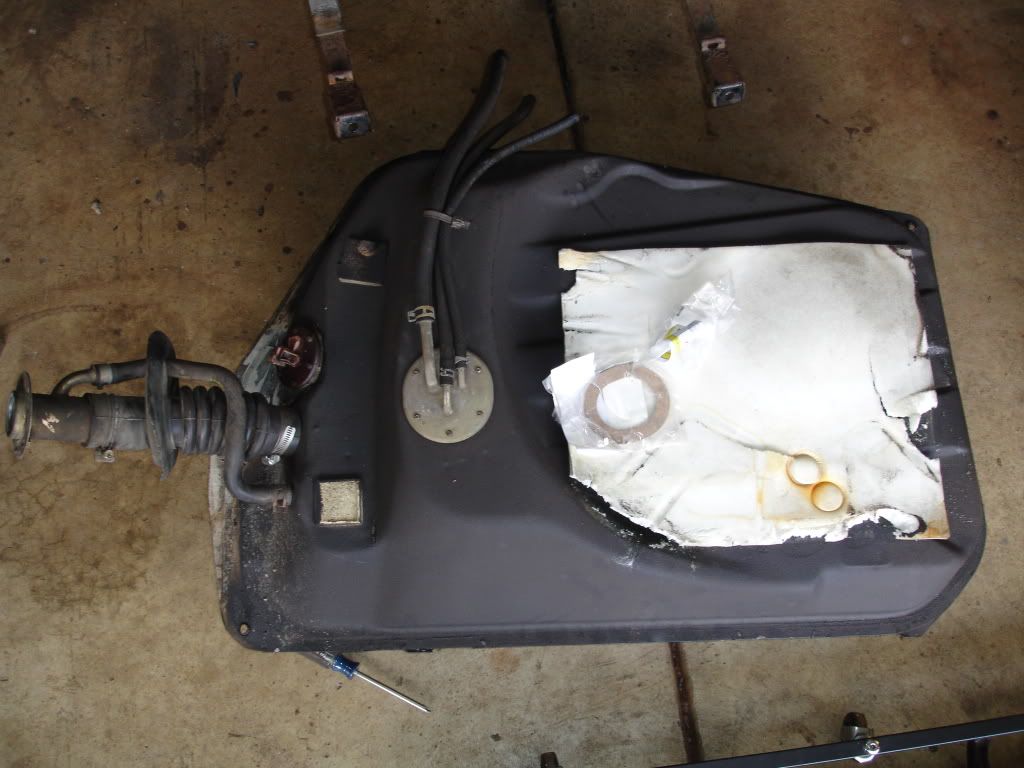
once you are satisfied with the tank, install is the reverse of removal. wiggling the filler neck into its opening while installing the tank at an angle is the toughest part. once everything is set in place, you'll bolt the straps up, install the lines, install the filler hose and cap, connect the sender connector, install the splash shield, install the tire, lower the car down, fill the tank with gas, start, and check for leaks.
here is the new pickup gasket and fuel level sender with screws installed
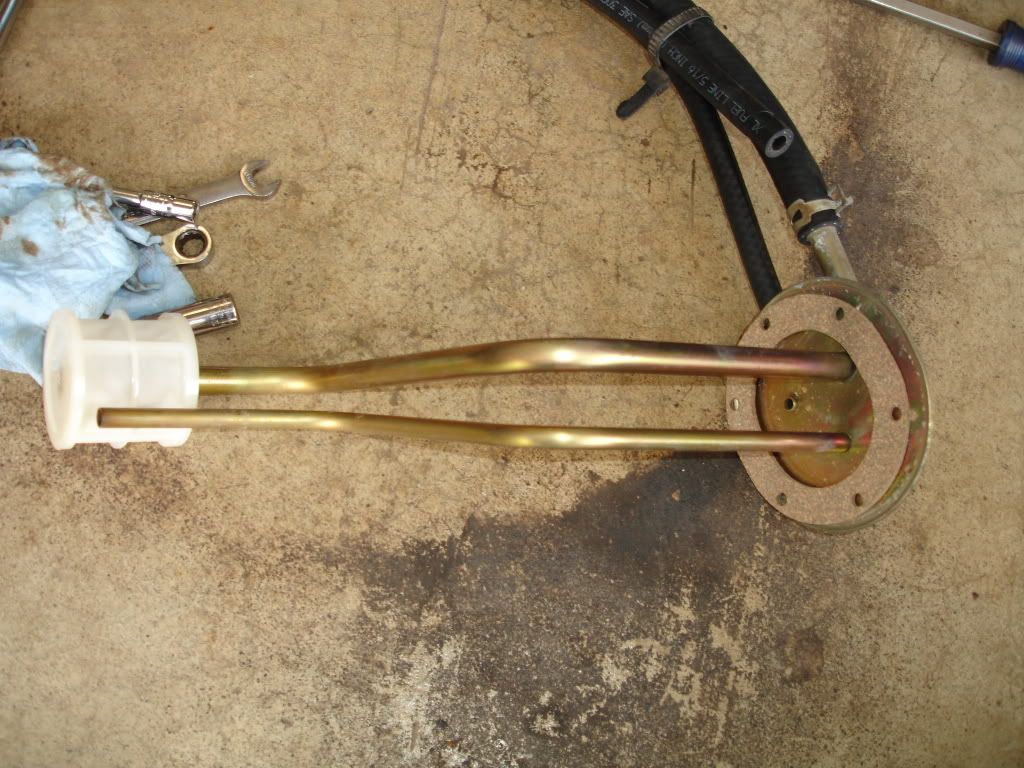
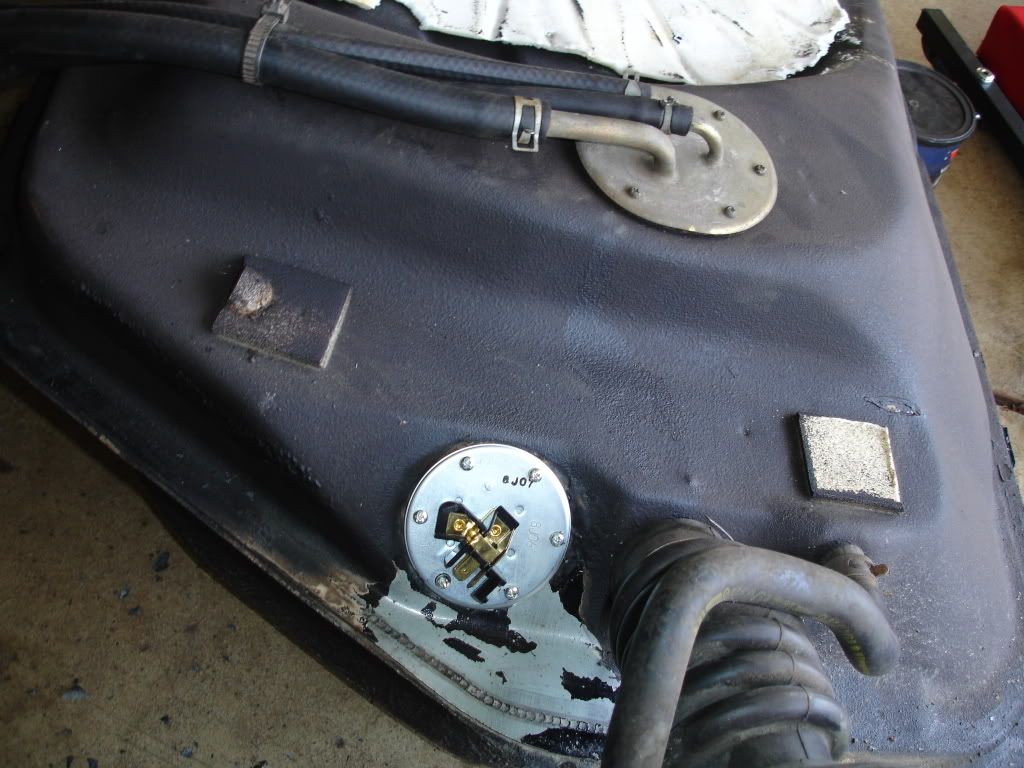
reinstall the tank and add a coat of undercoating to preserve the sender and protect it and the screws from rust. you may also want to clean and undercoat the entire top of the tank while it out to preserve it:
first, jack the car up, put it on stands, remove the left rear wheel, remove the plastic splash shield in the left wheel well. it is held on by two 10mm bolts and a 10mm nut. this will expose the fuel level sender which needs to be unplugged at this step:
next, open the filler door, remove the gas cap and the three 8mm bolts, lift off the plate and push the neck down until it breaks away from the body:
now is a good time to drain the gas. place a suitable bucket under the drain plug and remove the drain plug. a clean 5 gallon bucket works great and you can empty the bucket into a 5 gallon gas can or cans:
after the tank is drained, reinstall the drain plug and remove the clamps from the feed, return, and vent lines and slide the hoses off:
once thats done, remove the 14mm bolt from from each tank strap, they'll be in the front of the straps towards the rear bumper and you'll want to swing the straps down:
when the tank starts coming down, wiggle the filler neck out of its opening. once you do this, the tank will finish coming down(all the while you are supporting the tank with your leg or suitable support i hope)
and the tank will be down and ready for service:
once you are satisfied with the tank, install is the reverse of removal. wiggling the filler neck into its opening while installing the tank at an angle is the toughest part. once everything is set in place, you'll bolt the straps up, install the lines, install the filler hose and cap, connect the sender connector, install the splash shield, install the tire, lower the car down, fill the tank with gas, start, and check for leaks.
here is the new pickup gasket and fuel level sender with screws installed
reinstall the tank and add a coat of undercoating to preserve the sender and protect it and the screws from rust. you may also want to clean and undercoat the entire top of the tank while it out to preserve it:
Trending Topics
11-11-09, 09:20 PM
#8
+1 for the epoxy sealer DivinDriver recommended. They have repair kits that include some fiberglass matt to repair larger holes. I used it many years ago to repair a leak in the tank of my '62 Chevy, and I drove the car without issue for 8 years after the repair.
After that the tank sprang a leak, a stream of fuel ran downhill, it was ignited by a discarded cigarette, and the car burned up. Just joking -- I sold the car.
After that the tank sprang a leak, a stream of fuel ran downhill, it was ignited by a discarded cigarette, and the car burned up. Just joking -- I sold the car.
11-11-09, 10:31 PM
#9
Lives on the Forum
11-11-09, 11:23 PM
#10
^^thanks. i find that its helpful when someone is considering dropping the tank but may be learning on taking it to a shop or putting the project off because they feel that dropping the tank is a daunting task. it has not been archived here. i wrote it and archived it on www.ohiorotaries.com where i'm on the admin team and can copy and paste this on rx-7club as much as need be.
11-12-09, 06:28 AM
#11
If you have the time and desire to do a complete job, dropping the tank is the way to go. But if the hole was caused by some sort of impact, the top is likely to be fine. Likewise for a localized hole cause by corrosion, since water settles to the bottom of the tank.
11-12-09, 07:42 AM
#12
recycled teenager
Thread Starter
Join Date: Feb 2004
Location: Jackson MI USA
Posts: 837
Likes: 0
Received 0 Likes
on
0 Posts
Thanks for the download, I have dropped two tanks in the past. It is an upside down pain. Permatex makes a great epoxy putty repair,but it pays to use their surface cleaner. My leak is stopped, at least for now. Bob
11-12-09, 06:21 PM
#13
I've used POR15 gas tank sealer to seal several tanks with holes that size. Gas tank sealer inside and standard POR15 on the outside.
http://www.por15.com
http://www.por15.com

Thread
Thread Starter
Forum
Replies
Last Post
ls1swap
3rd Generation Specific (1993-2002)
17
06-03-24 03:25 PM
Turblown
Vendor Classifieds
12
10-17-20 03:25 PM
LongDuck
1st Generation Specific (1979-1985)
12
10-07-15 08:12 PM