Cleaning Up Your Smog Pump
 04-17-10, 09:10 PM
#1
Wrkn Toyota, Rootn Wankel
Thread Starter
Join Date: Sep 2007
Location: "Haystack" Hayward, CA
Posts: 1,642
Likes: 0
Received 1 Like
on
1 Post
Cleaning Up Your Smog Pump
I made a thread about this before, exploring the idea of disassembling a smog pump to clean it and possibly service it. I got a lot of good feedback and gave a short description of what I did but it really wasn't much of a guide. So here's a guide to help anyone who is crazy enough to try and clean up one of these. 
First off, you're gonna need some tools;
-Ratchet Set 10&12mm Sockets
-Screwdriver Set with Philips head and possibly Torx
-A hydraulic press or otherwise
-A partswash machine or some way to clean the parts
-Grease
So lets start off with what your smog pump will look like, this is the front and the rear of the pump:
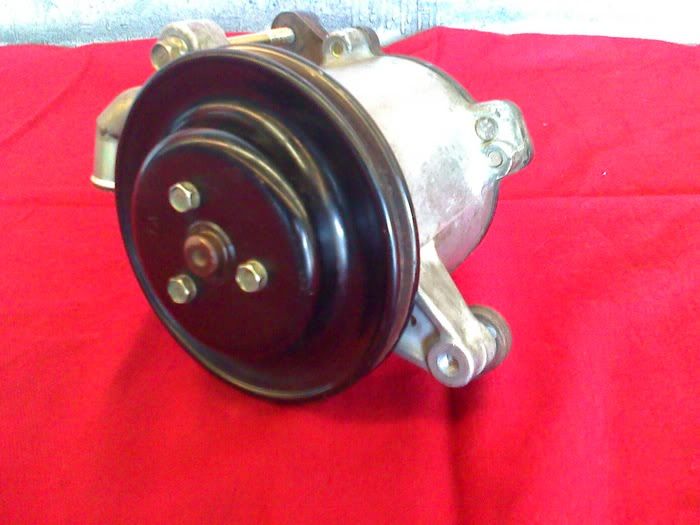
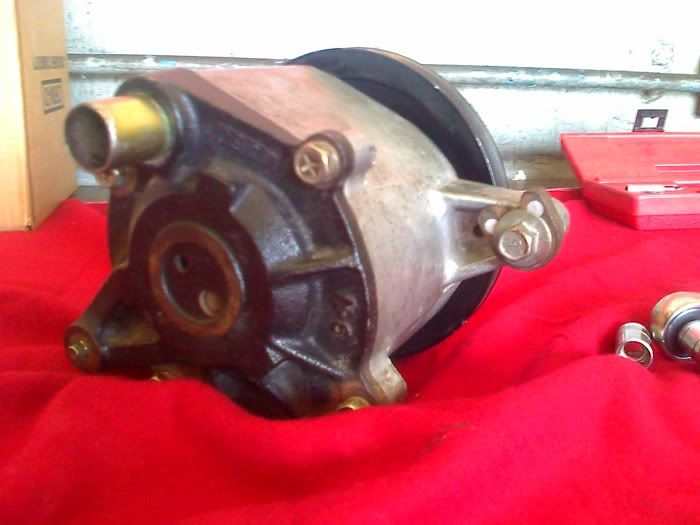
As you can see the pulley comes off with a 10mm socket and the back of the case are held together with 12mm bolts. After removing the pulley you'll need to press off the actually pulley plate, this can be accomplished one of two ways.
One, you can go ahead and use the press to pop it off; two, you could use three bolts that are longer than the three used to old the pulley plate on. Don't be afraid of damaging the case as you will dent the case a bit, but the bolts will pus against the snap ring and bearing more than the case and it will pop off easily. Just remember to go in an even pattern when tightening.
When you get pulley plate off, you have the choice to remove the snap ring and press the bearing off and the shaft or just press the shaft out. Either way once you have the two halves open it should look like this:
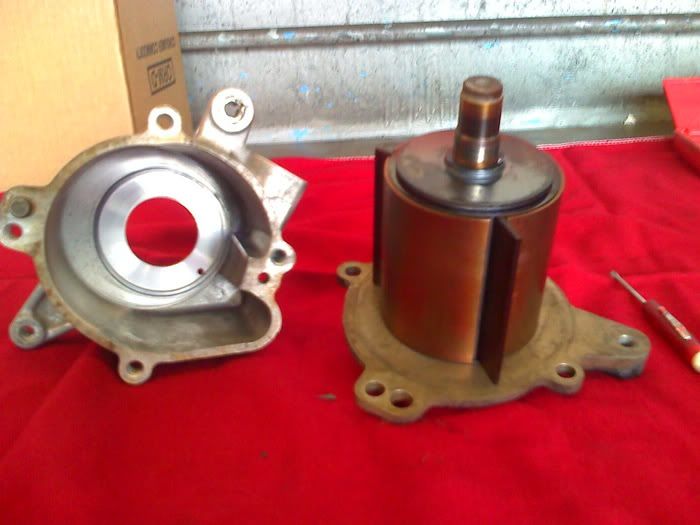
Grab the big barrel and pull it off slowly, wiggling it a little until it comes off, you should have 3 large pieces now:

Next, there are 6 Allen bolts holding the bearing plate on the drum, you can use an Allen wrench set, or if you don't have one Torx bits also work as well. This should leave you with the drum looking like this:
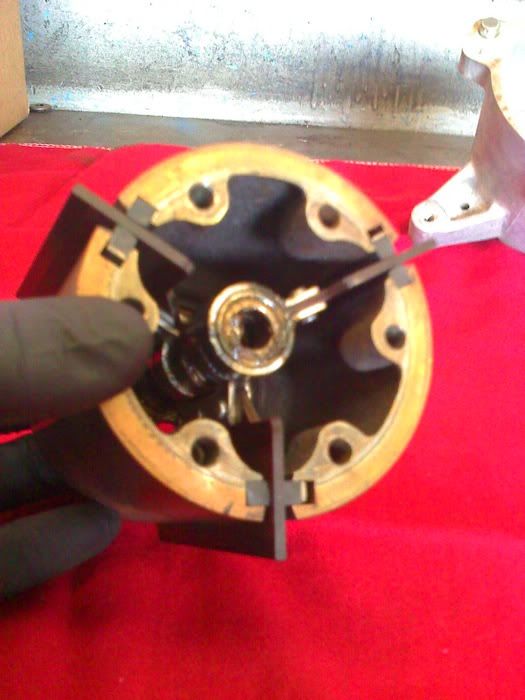
Go ahead and remove the fins and seals, they should just slide out easily. Be careful not to damage them as you will most likely not find replacements. They should look like this:
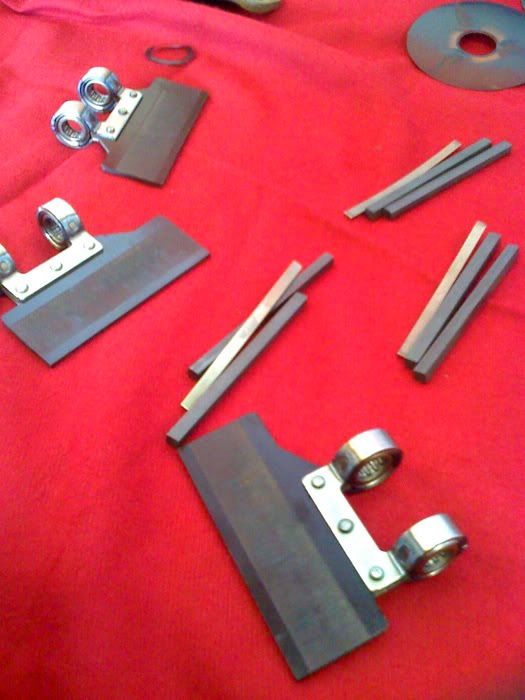
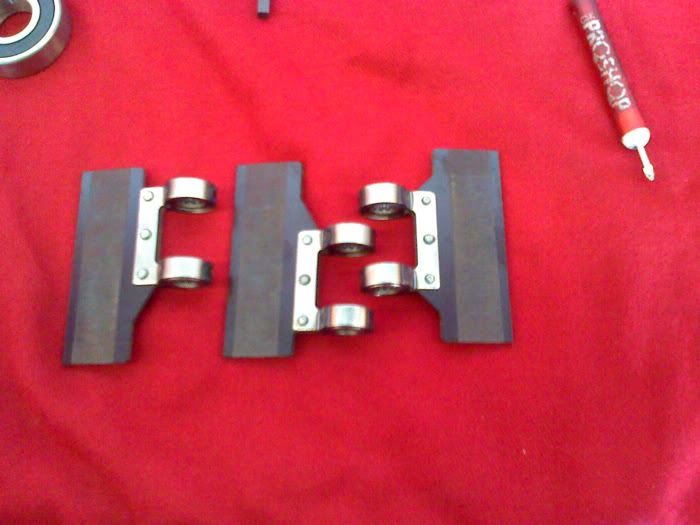
Something else to note, there is only one or two ways the fins can be organized to fit on the shaft evenly. If you lay them out you'll see that they are offset some and the bearings are located at different spots:
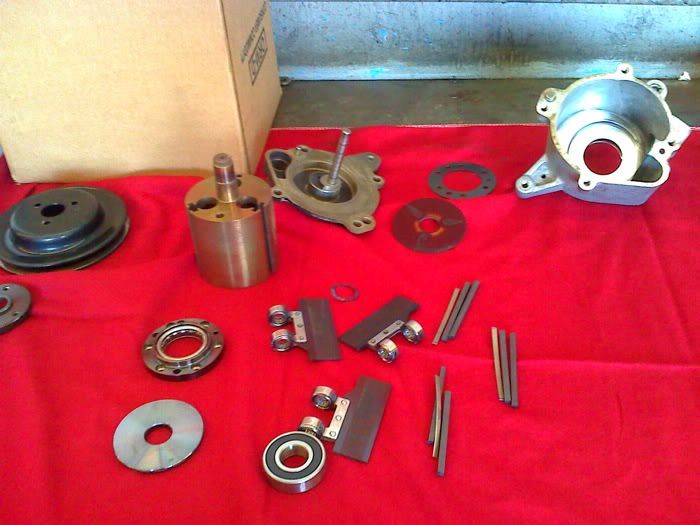
After you have disassembled everything, it should look like this:
Now go ahead and clean up all your parts, detail them how you want. Be very careful with the gaskets because they are very fragile and they are not replaceable, you can try what I did and just turn the gaskets over and hope that it works better than the worn side. Basically all you're doing is taking all the crap and old grease off so you can relube the assembly. I used a general purpose lithium grease to lube the bearings and shafts, I found it worked fine and it should not affect the pump's functionality. Reassmbly is just the reverse of taking it apart, just be careful when pressing the case and pulley plate on as it is easy to crack the backing plate if you're not paying attention to how you have it set on your press.
Hope this helps!
First off, you're gonna need some tools;
-Ratchet Set 10&12mm Sockets
-Screwdriver Set with Philips head and possibly Torx
-A hydraulic press or otherwise
-A partswash machine or some way to clean the parts
-Grease
So lets start off with what your smog pump will look like, this is the front and the rear of the pump:
As you can see the pulley comes off with a 10mm socket and the back of the case are held together with 12mm bolts. After removing the pulley you'll need to press off the actually pulley plate, this can be accomplished one of two ways.
One, you can go ahead and use the press to pop it off; two, you could use three bolts that are longer than the three used to old the pulley plate on. Don't be afraid of damaging the case as you will dent the case a bit, but the bolts will pus against the snap ring and bearing more than the case and it will pop off easily. Just remember to go in an even pattern when tightening.
When you get pulley plate off, you have the choice to remove the snap ring and press the bearing off and the shaft or just press the shaft out. Either way once you have the two halves open it should look like this:
Grab the big barrel and pull it off slowly, wiggling it a little until it comes off, you should have 3 large pieces now:
Next, there are 6 Allen bolts holding the bearing plate on the drum, you can use an Allen wrench set, or if you don't have one Torx bits also work as well. This should leave you with the drum looking like this:
Go ahead and remove the fins and seals, they should just slide out easily. Be careful not to damage them as you will most likely not find replacements. They should look like this:
Something else to note, there is only one or two ways the fins can be organized to fit on the shaft evenly. If you lay them out you'll see that they are offset some and the bearings are located at different spots:
After you have disassembled everything, it should look like this:
Now go ahead and clean up all your parts, detail them how you want. Be very careful with the gaskets because they are very fragile and they are not replaceable, you can try what I did and just turn the gaskets over and hope that it works better than the worn side. Basically all you're doing is taking all the crap and old grease off so you can relube the assembly. I used a general purpose lithium grease to lube the bearings and shafts, I found it worked fine and it should not affect the pump's functionality. Reassmbly is just the reverse of taking it apart, just be careful when pressing the case and pulley plate on as it is easy to crack the backing plate if you're not paying attention to how you have it set on your press.
Hope this helps!
 04-18-10, 01:24 AM
#2
Wrkn Toyota, Rootn Wankel
Thread Starter
Join Date: Sep 2007
Location: "Haystack" Hayward, CA
Posts: 1,642
Likes: 0
Received 1 Like
on
1 Post
Small note, your pump will most definitely look dirtier than the one in the pictures. I didn't get the idea to take pictures until I was cleaning the pump so I decided to take pictures as I assembled the cleaned and greased unit and just use those pictures.