Carb questions
#1
Thread Starter
Joined: Oct 2005
Posts: 961
Likes: 0
From: Troy, Missouri
Carb questions
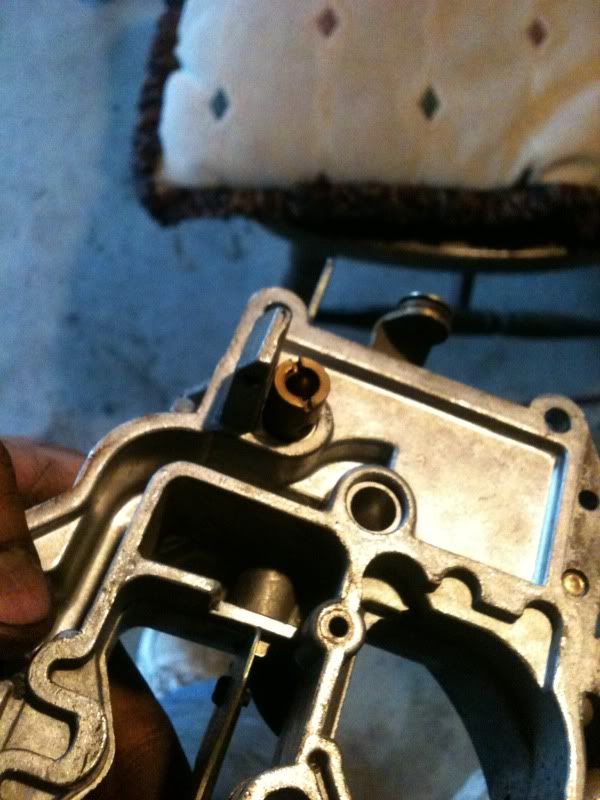
so yesterday I cleaned most of the crap off the carb and tore it down. I also removed the "heat shield" from the spacer and got the gasket off one side of it but I used a rotary tool and a sanding attachment and now theres a few spot that are uneven. can I just get it close to even and then use rtv high temp gasket sealer or is it ruined? also could i soak my carb in something like the product in this pic to get rid of the rest of the dirt?

hear are some pics of the spacer and carb disassembly.


hear are some pics of the spacer and carb disassembly.


#2
You fucked up. You never mess with the spacer plate. Toss the gaskets that look like they fit the spacer, and the spacer, in the trash. Always reuse the spacer just like it came off the carb. Time to find a good used spacer plate. Buy a gallon can of Berryman's carb cleaner. Once you have the carb broke down, it will fit in the can. Inside the gallon can is a strainer basket to catch all the small loose parts.
#4
Joined: Aug 2010
Posts: 1,416
Likes: 4
From: East Palestine, Oh
i dont know, but if your read sterings carb rebuild article he even says:
"If you do need to remove the plate for cleaning, etc, do NOT try to remove the gasket. They are adhered to the plate."
http://www.sterlingmetalworks.com/re..._the_nikki.htm
"If you do need to remove the plate for cleaning, etc, do NOT try to remove the gasket. They are adhered to the plate."
http://www.sterlingmetalworks.com/re..._the_nikki.htm
#6
1st-Class Engine Janitor
iTrader: (15)
Joined: Jun 2008
Posts: 8,376
Likes: 28
From: Chino Hills, CA
They are not replaceable, you don't remove them.
You re-use the spacer as it is.
There aren't any replacements for the gaskets, because they're not 'gaskets.' They're a permanent part of the assembly.
Capice?
Trending Topics
#10
Those are seats for the needle/seats. Why do they need to come out? Do you have new ones to install? Are they super gummed up with varnish that you haven't been able to clean out? What I'm saying is they don't need to be removed. At least I've never bothered.
#11
ya know, whenever i run across a need for a tool i don't have it's just another reason to buy tools. but i think u'll find u can get it loose with what u have just using one of the slots. it's one of those "been there, done that" kinda situations.
#13
I'd use the new ones if they were supplied in the kit. Get a helper, have them hold the airhorn assembly on top of a table very firmly. Get a butter knife, use the flat side of the blade . While you loosen them make sure to firmly have your hand placed on the knife so the blade doesnt tear that brass up.
#14
Thread Starter
Joined: Oct 2005
Posts: 961
Likes: 0
From: Troy, Missouri
K I'll give that a try after work. Btw I just looked in our comp and noticed that the 79 carb kit has a different part number than the 83 kit. Anybody know what the difference is?
#18
Just get the right kit bro. Aint nothing worse than half-assing a job and having to go back in to rectify your mistakes. If your near a Autozone get the GP Sorenson kit 96-462 it has all the gaskets for all the 79-85 models.
#21
be sure to get the kit that comes with new check *****. Be careful not to loose the two weights that are also in the carb when you take it appart, they can't be replaced. Also, if you read Sterlings site he tells you to burnish the edges/corners of the new needle valves. Be sure that you do this so you don't have on stick open, or closed, and pump gas everywhere all over the top of the motor, or cause flooding.
#22
be sure to get the kit that comes with new check *****. Be careful not to loose the two weights that are also in the carb when you take it appart, they can't be replaced. Also, if you read Sterlings site he tells you to burnish the edges/corners of the new needle valves. Be sure that you do this so you don't have on stick open, or closed, and pump gas everywhere all over the top of the motor, or cause flooding.
as for the needle seats, I bought a large screwdriver and ground down the blade so that it would fit. alternatively some jaw grip pliers can remove them and then like suggested use a butter knife on its side to tighten them. just be sure they are very tight, as I've had a few come loose.
#24
The part you burnish is the needle bro, it has a rubberized gray tip. Forget asking for pics you work at Autozone you should know this! LOL! hint: they will fall out as soon as you remove these guys.
Last edited by Jibaro 12A; 09-04-10 at 02:38 PM.
#25
Thread Starter
Joined: Oct 2005
Posts: 961
Likes: 0
From: Troy, Missouri
Yes I work at az however it's my third week and this is my first carb rebuild. So I need to burnish the tips of the needles that go down inside there? Correct?


