Bout ready to get rid of this RX7...
#51
I had 2 fuel tanks - 1 that looked great on outside and 1 that was a complete rust covered box. I put the good looking one on and finally 82 fuel filters later the tank has stopped eating them so fast. I get about 500 miles on one before it needs changed where when I started it was around 45 miles. Its dropped now and getting cleaned the right way.
FB fuel tanks are like a box of chocolates...
Edit: I paid ~80 for the POR-15 Fuel Tank Repair Kit and it has all you need and EXPLICIT instructions. From what I have read if you follow the instructions to a "T" you should be good. That is today's project. I'll update with how much of a pain in the *** it was so if you go a similar route you will know what to expect.
Last edited by IanS; 04-28-09 at 08:12 AM.
#52
Thread Starter
Senior Member
iTrader: (4)
Joined: Nov 2008
Posts: 419
Likes: 0
From: Waynesville, NC
Thanks man, can you also include instructions on tank removal and how in the heck you get the por15 to completely cover the inside of the tank. I guess you can only access it thru the small hole where the fuel pump goes??? Im probably wrong on that.
#53
Found this looking for something else. It explains the tank dropping method.
https://www.rx7club.com/showthread.p...fuel+tank+vent
https://www.rx7club.com/showthread.p...fuel+tank+vent
#54
dropping the tank is no big feat. just make sure you drain all of the gas first. it makes a big difference when removing and reinstalling the tank. pop open te filler door and remove teh three 8mm bolts holding the filler neck on. push the filler neck through the opening. it may be a little tough at first but the seal will unstick and it will push through.
next, get under teh car and remove the three lines ahead of the fuel tank. eaiser to do this now rather than when the tank is coming down. then you'll want to remove the small plastic splash guard in the left wheel well. this will give you access to the sending unit. unplug it. chances are the connector will fight you a bit coming off and will be stiff. be patient with it.
you will then want to remove the two 14mm bolts holding the tank up, move the straps down, and work the tank down. get the tank on the ground and remove the pickup lines and the fuel level sender. you may find the screws for the fuel level sender very rusty and difficult to remove..of course you are in NC so i doubt that thats the case... you can now look in the tank and make a determination of where you want to go from there. when the tank is clean you will want to replace the gasket for the fuel level sender and the gasket for the pickup lines. you may also want to replace the pickup screen that attatches to the pickup lines. this can be clogged or ripped or otherwise in poor condition. the part numbers for replacement parts from mazda are as follows:
pickup/return line gasket: FA54-42-182
fuel level sender gasket: 8871-60-962A
pickp screen: GA97-42-113
fuel tank pad: 8871-42-761
fuel level sender(if yours is bad. new sender comes with gasket): FA54-60-960
i have recently purchased most of these parts for my project and the prices are pretty reasonable from the dealer.
#57
Just wanted to give you an update since i told you I would. I havent gotten to do the POR 15 kit yet. However, I did fill my tank with water and found a leak so i ended up fixing that after sandblasting the outside. I then sprayed it with etch primer and after it flashed over I shot it with the sprayable truck bed liner stuff from walmart. It looks pretty good so far and I found I had some other things wrong with my tank but I wont go into it, I dont want to jack your thread.
I havent forgotten about this thread, I most likely wont have the full update til this weekend.
I havent forgotten about this thread, I most likely wont have the full update til this weekend.
#59
OK so, I started out with 2 possible tanks to use. 1 that was good on outside, and one that I knew was good on inside but rusty on the outside.
I took them both apart to make sure how good or bad the tanks were. I found them in the same condition as I believed them to be in. A few things I didnt know about also were found. For one I figured out that at one time or another the tank I was using was taken apart. I found the pickup tube assembly had different screws than the other tank. I also found that the pickup tube sock thing was missing. I decided to reuse my tank instead of the spare as it was in overall better condition, especially considering that the inside and outside will be cleaned and sealed. I plan on using the spare tank pickup tube as well as the fill neck and the level sender unit as all 3 were in considerably better shape than from my tank.
One thing that was a problem for both tanks was that the original screws simply DIDNT come out. I drilled the heads off and still the screws wouldnt come out so I am now forced to drill and tap the holes and replace the screws. Ive tried to take other fuel tanks apart and that is the one thing they almost all have in common - the phillips screws just get old and rusty and when trying to remove them the phillips "cross" area simply turns to dust when force is applied.
#61
no, the tank is sealed, save for the drain plug, pickup lines and the sender. i am going to drop my tank today to change the sender and gasket as well as the pickup line gasket. i will post detailed instrusctions as well as pics of each step.
#62
Thread Starter
Senior Member
iTrader: (4)
Joined: Nov 2008
Posts: 419
Likes: 0
From: Waynesville, NC
Thanks man, you want to move to Western NC, you know the mountains are a nice place to live.
http://www.haywood-nc.com/visitor/index.asp
http://www.haywood-nc.com/visitor/index.asp
#63
i originally wanted to move to NC..but my wife won't leave her family here in OH. now if i won the lottery and could afford to move everyone down there i would.... i'm so sick of winter and snow..it sucks
#64
Thread Starter
Senior Member
iTrader: (4)
Joined: Nov 2008
Posts: 419
Likes: 0
From: Waynesville, NC
lol, I would actually like more snow, we get about 5-6 inches a year. Its here one day, gone the next. The beach is not to far a drive either, lol, anyway, Im looking forward to your tank pics. Thanks again.
#65
i'm eating some cereal now and then i'm going to go to the garage and slam the tank job out. should be about an hour and a half before i'm ready to post some pics. snow is cool in moderation. here we can get 10+ inches on the roadway..and i'm a cop for a living, so that makes for a long day of doing traffic crashes and pushing people oput of snow drifts and trudging through the snow on calls...sucks when you go out to your car and its iced over and it takes 15 ins of idleing before the windows that are iced over melt..and when you eake up early in the morning and its -10 outside...
#66
I am just going to chime in here and echo everyone. The seller was probably not being 100% honest but hey...I think the FUN part is these little fix it items. Like someone else said, you cannot expect these things to be running like new. You have to be prepared for all kinds of stuff to go wrong!
#68
the tank is back in and i'm changing the trans fluid yet again..for good measure since i just put a newly used trans in. i guess you could call it a flush, lol. i'll post the tank pics pics after in refill the trans and shifter housing and re-adjust the parking brake. its nice to have a wokring gas gauge. now i hope it doesnt leak. it shouldnt with the new sender and gaskets. pics up in a bit
#69
ok, i'm back and in for the night. i had family obligations and got tied up. so, here are the instructions with pics for the tank removal:
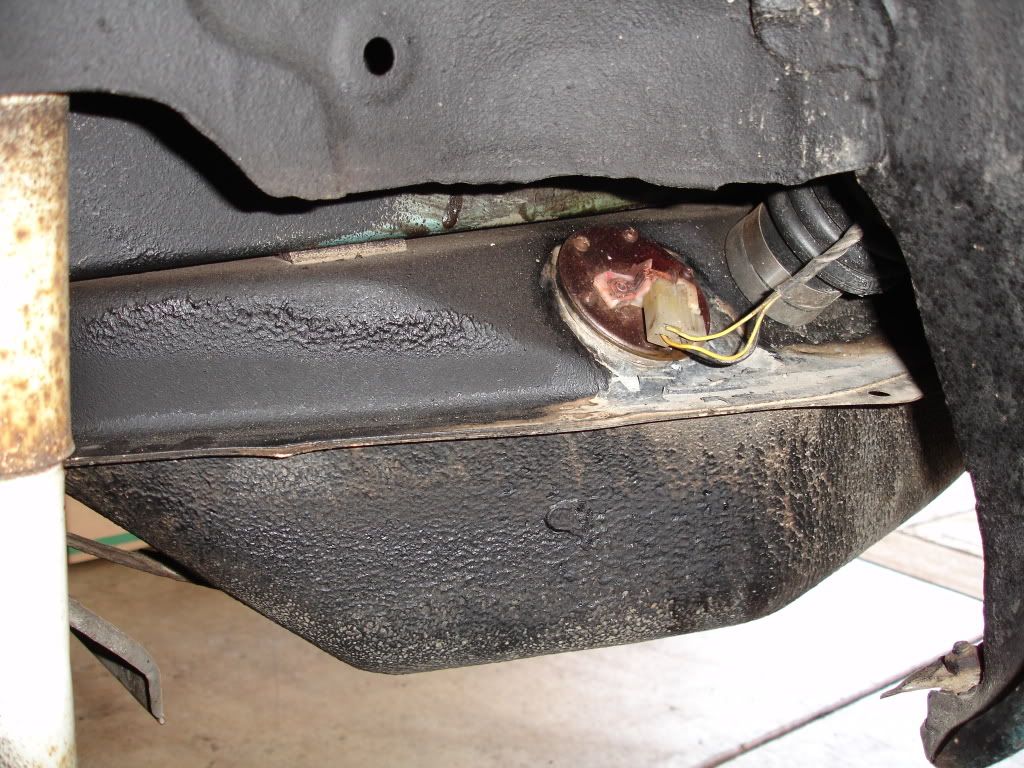
first, jack the car up, put it on stands, remove the left rear wheel, remove the plastic splash shield in the left wheel well. it is held on by two 10mm bolts and a 10mm nut. this will expose the fuel level sender which needs to be unplugged at this step:
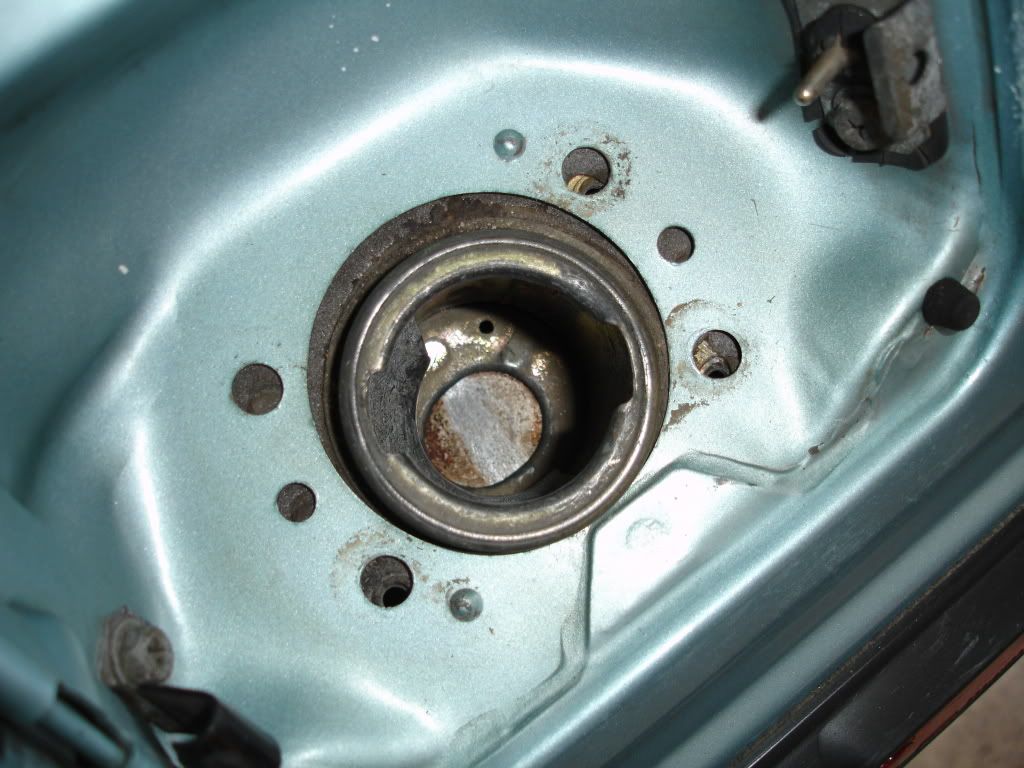
next, open the filler door, remove the gas cap and the three 8mm bolts, lift off the plate and push the neck down until it breaks away from the body:
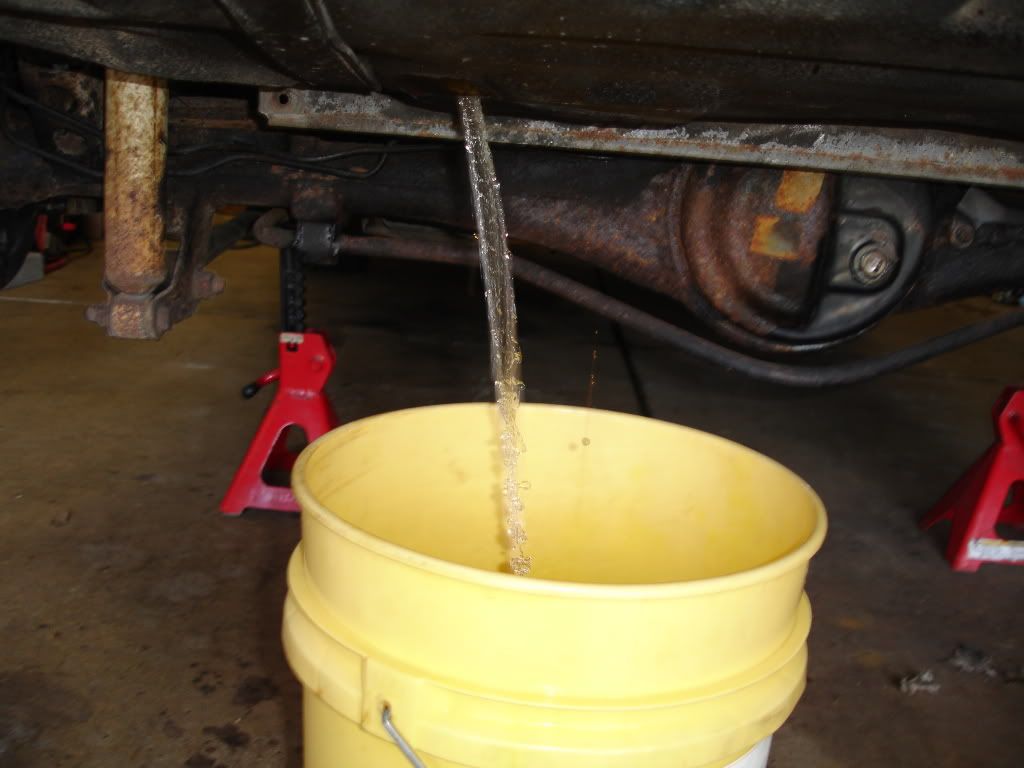
now is a good time to drain the gas. place a suitable bucket under the drain plug and remove the drain plug. a clean 5 gallon bucket works great and you can empty the bucket into a 5 gallon gas can or cans:
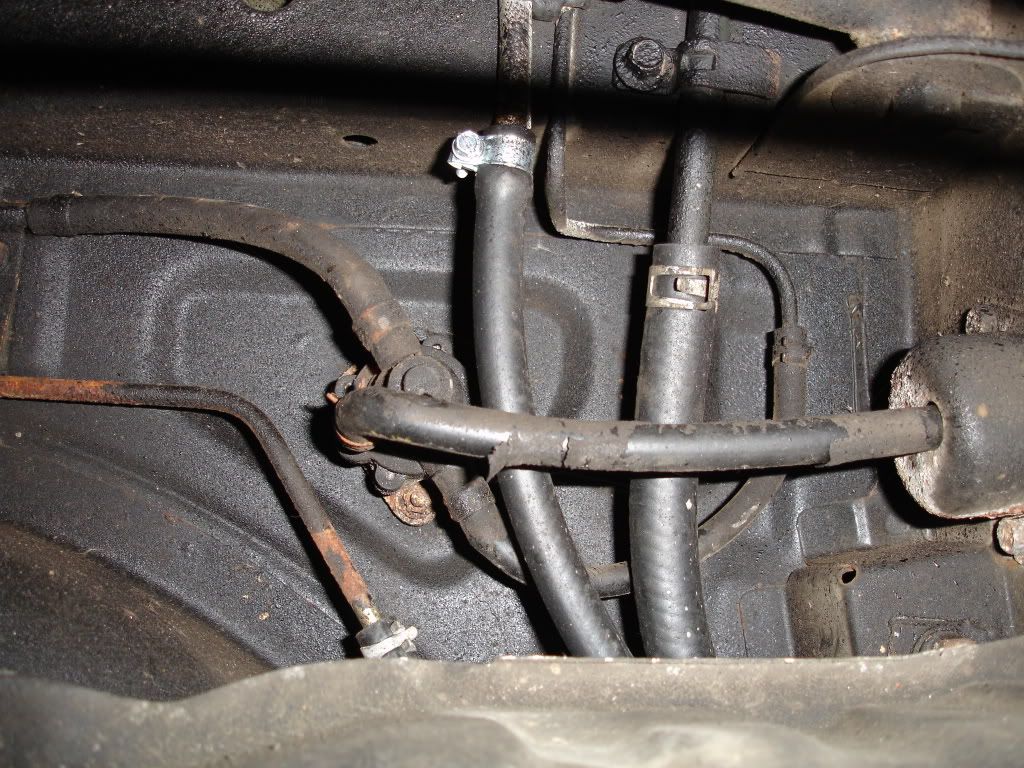
after the tank is drained, reinstall the drain plug and remove the clamps from the feed, return, and vent lines and slide the hoses off:
once thats done, remove the 14mm bolt from from each tank strap, they'll be in the front of the straps towards the rear bumper and you'll want to swing the straps down:
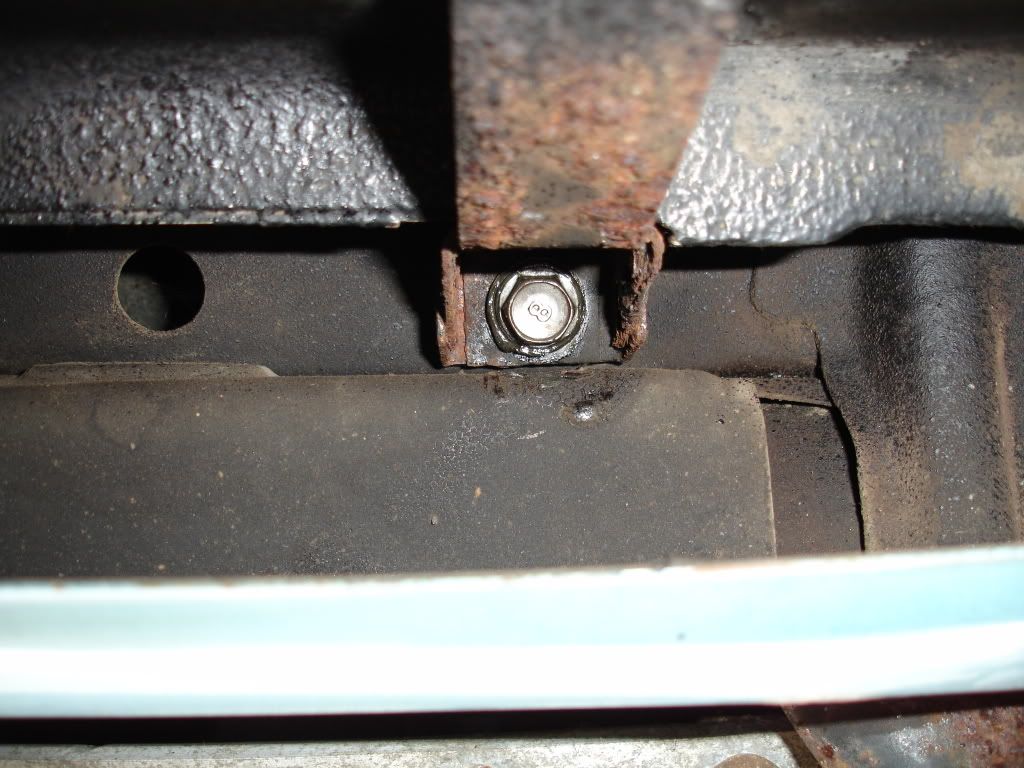
when the tank starts coming down, wiggle the filler neck out of its opening. once you do this, the tank will finish coming down(all the while you are supporting the tank with your leg or suitable support i hope)
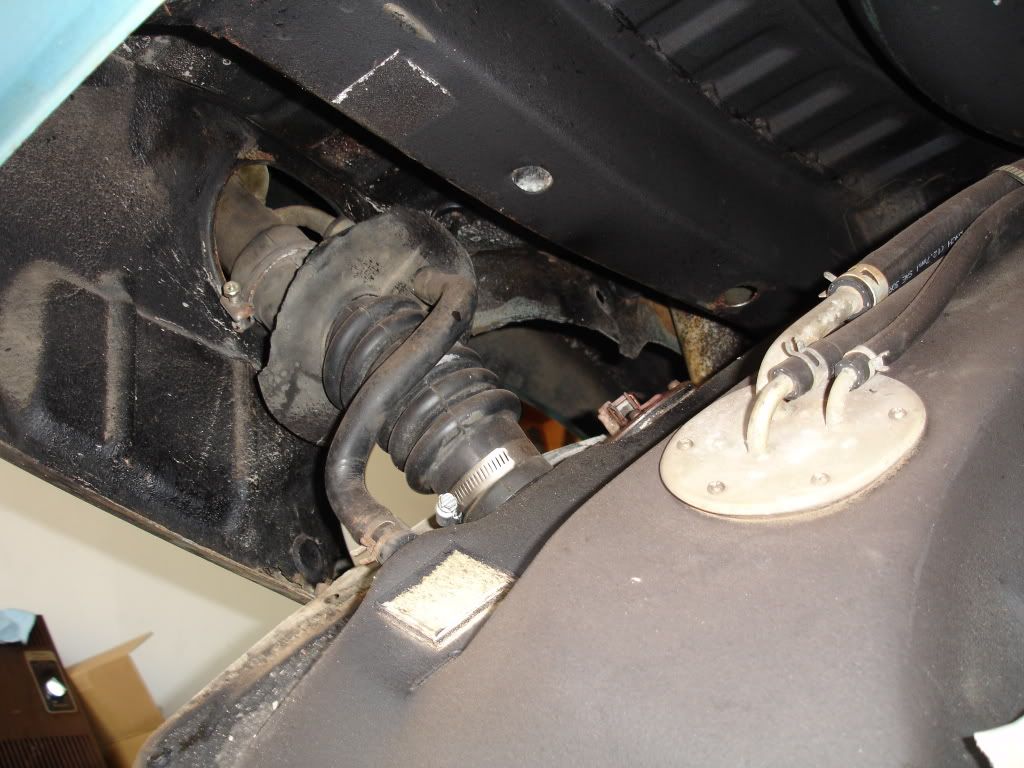
and the tank will be down and ready for service:
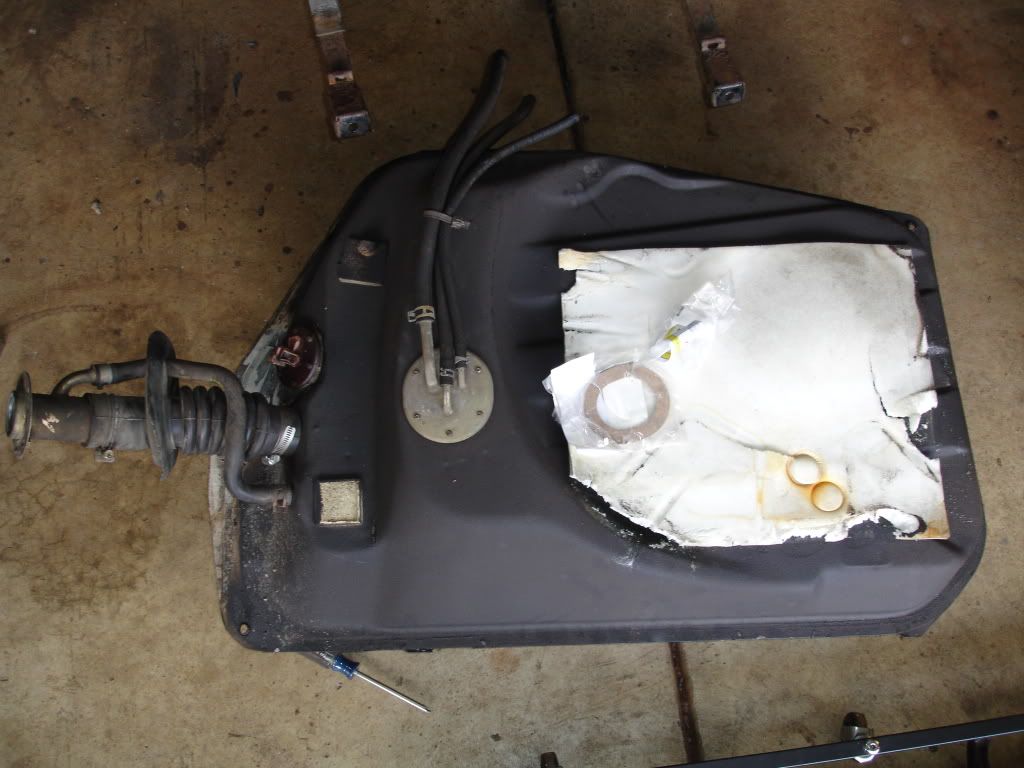
once you are satisfied with the tank, install is the reverse of removal. wiggling the filler neck into its opening while installing the tank at an angle is the toughest part. once everything is set in place, you'll bolt the straps up, install the lines, install the filler hose and cap, connect the sender connector, install the splash shield, install the tire, lower the car down, fill the tank with gas, start, and check for leaks.
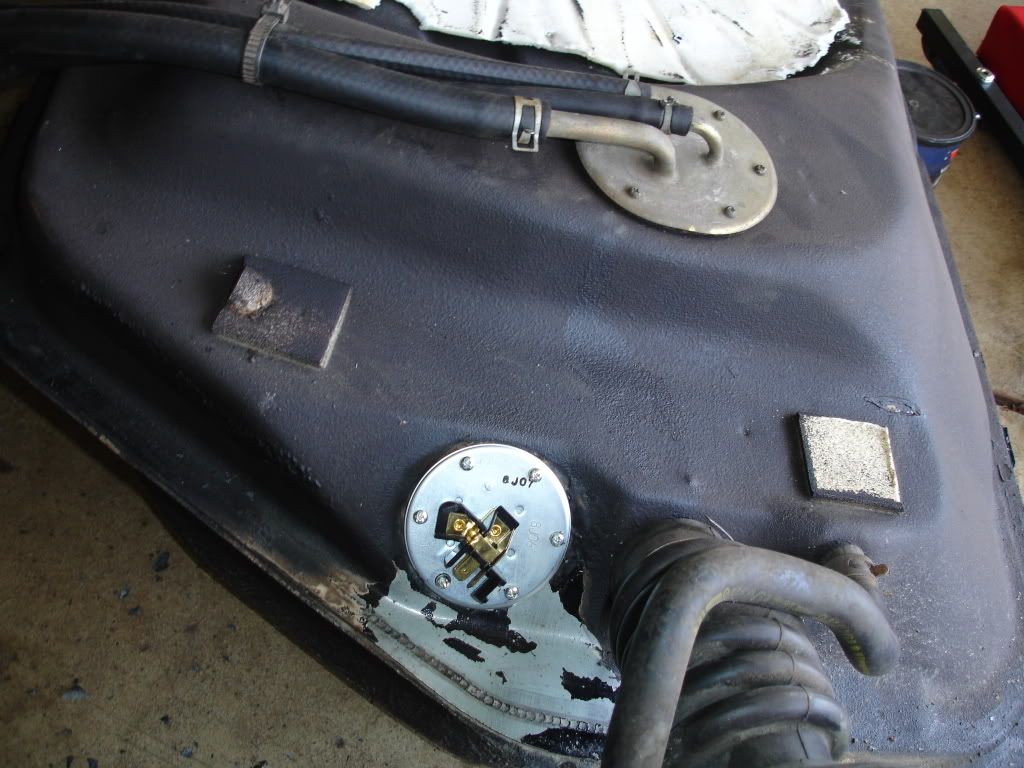
here is the new pickup gasket and fuel level sender with screws instralled:
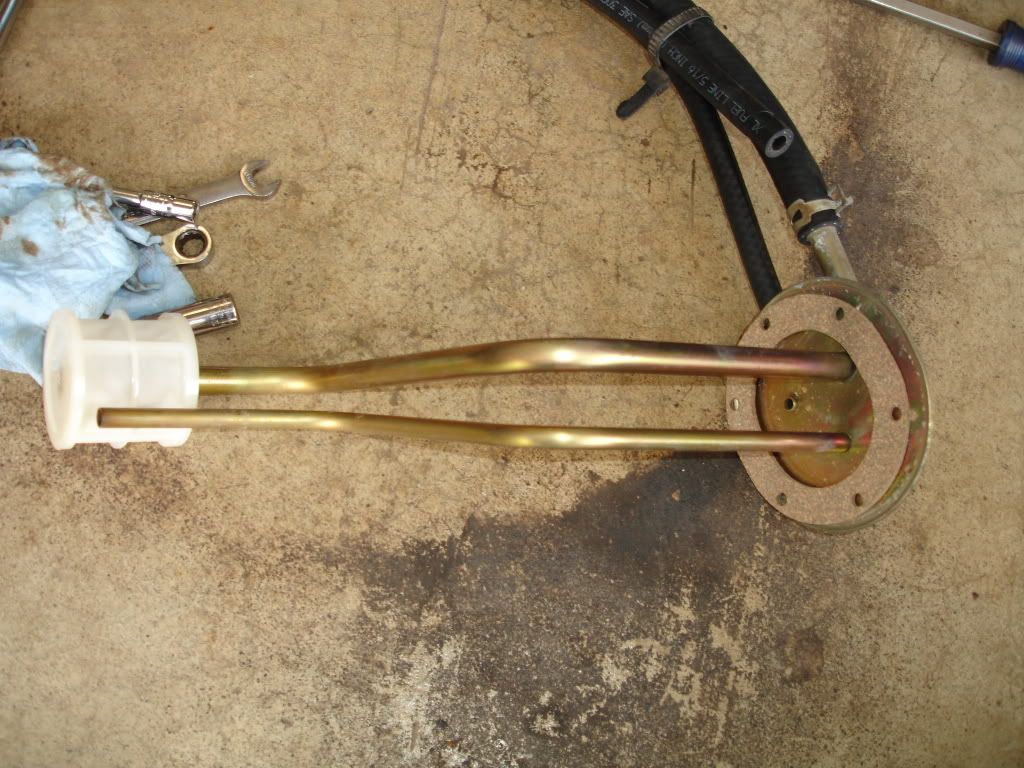
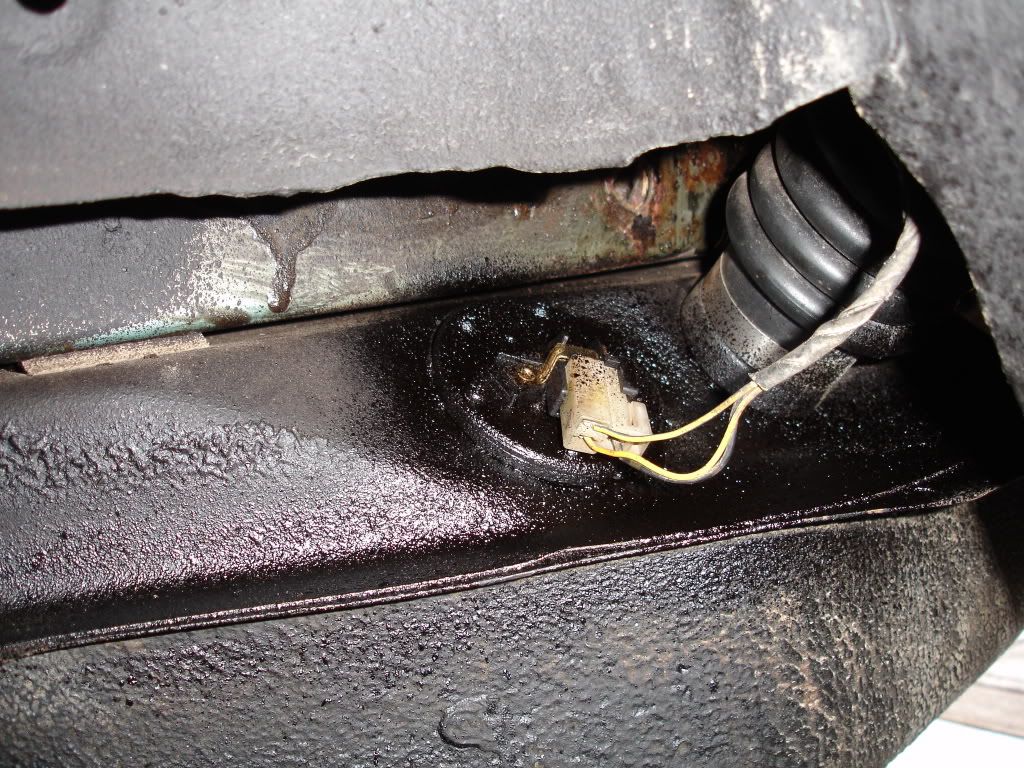
and a coat of undercoating to preserve the sender and protect it and the screws from rust:
first, jack the car up, put it on stands, remove the left rear wheel, remove the plastic splash shield in the left wheel well. it is held on by two 10mm bolts and a 10mm nut. this will expose the fuel level sender which needs to be unplugged at this step:

next, open the filler door, remove the gas cap and the three 8mm bolts, lift off the plate and push the neck down until it breaks away from the body:

now is a good time to drain the gas. place a suitable bucket under the drain plug and remove the drain plug. a clean 5 gallon bucket works great and you can empty the bucket into a 5 gallon gas can or cans:

after the tank is drained, reinstall the drain plug and remove the clamps from the feed, return, and vent lines and slide the hoses off:

once thats done, remove the 14mm bolt from from each tank strap, they'll be in the front of the straps towards the rear bumper and you'll want to swing the straps down:

when the tank starts coming down, wiggle the filler neck out of its opening. once you do this, the tank will finish coming down(all the while you are supporting the tank with your leg or suitable support i hope)

and the tank will be down and ready for service:

once you are satisfied with the tank, install is the reverse of removal. wiggling the filler neck into its opening while installing the tank at an angle is the toughest part. once everything is set in place, you'll bolt the straps up, install the lines, install the filler hose and cap, connect the sender connector, install the splash shield, install the tire, lower the car down, fill the tank with gas, start, and check for leaks.
here is the new pickup gasket and fuel level sender with screws instralled:


and a coat of undercoating to preserve the sender and protect it and the screws from rust:

#72
Joined: Jul 2008
Posts: 1,669
Likes: 9
From: Chino and Lake Arrowhead Calif
My wife and I are going to come to Cleveland prolly at the end of summer. We want to drive out to Sandusky to Cedar Point. Been a long time since I have ridden those bad *** roller coasters there!!!
#73
Vermilion is right on lake erie. its a riverfront town and many people dock there and sail out of there. if you're in the area feel free to get ahold of me and stop by and see the 7's. perhaps my family and yours can at least grab lunch. vermilion is about 35-40 mins west of bay village. cedar point is about 20 mins from my house.
#74
Joined: Jul 2008
Posts: 1,669
Likes: 9
From: Chino and Lake Arrowhead Calif
Vermilion is right on lake erie. its a riverfront town and many people dock there and sail out of there. if you're in the area feel free to get ahold of me and stop by and see the 7's. perhaps my family and yours can at least grab lunch. vermilion is about 35-40 mins west of bay village. cedar point is about 20 mins from my house.
#75
very true. its always a mad house there at cedar point. i dont go more so because i dont like roller coasters, but i have little patience when it comes to traffic jams with cars and people alike.


