
85' RX7 - Stripping Stock Stereo

 01-19-11 | 11:04 PM
#27
all i did to install it was remove the cloth part of the bin, set it upside down, and i used like half inch self tapping screws. the go thru just enough to not really get in the way of putting the bin back in, and hold it in there perfect. i was originally going to put it underneath the bin, but i didn't want to remove any sound deadening stuff or have to modify it, and 4 little holes on the topside of that bin aren't going to really cause any issues. if i removed it you'd never know :p
and i didn't have to drill holes for the cables, either - you can just move the cloth part back a bit and slide them through.
( like minimal looking builds )
and i didn't have to drill holes for the cables, either - you can just move the cloth part back a bit and slide them through.
( like minimal looking builds )
01-20-11 | 03:39 PM
#28
okay, here's a pretty good section of pictures about the stereo install for you.
sorry about them being blurry :/ camera phone still. unless i can hold absolutely still, they look like crap.
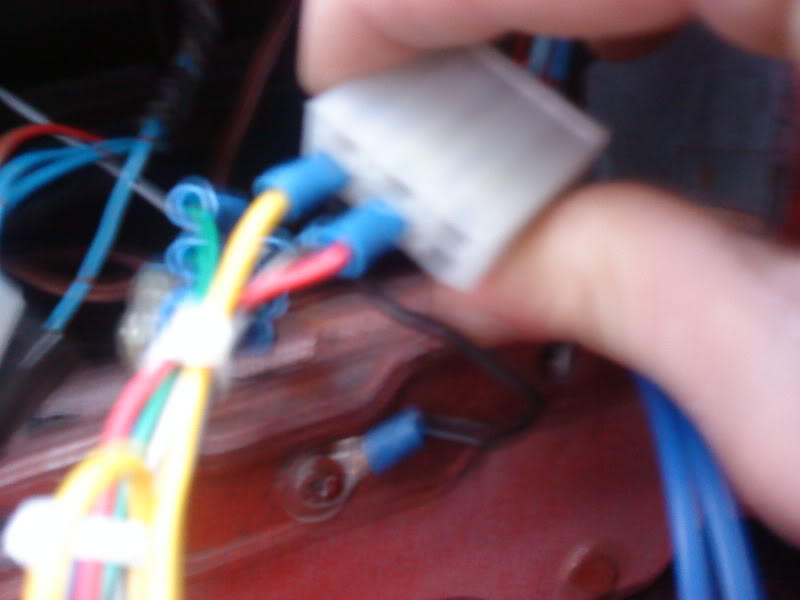
Heres the plug I was talking about, and there's the power wire and ACC wire hooked up.i used my test light to figure out which plug was constant power and which was keyed power.
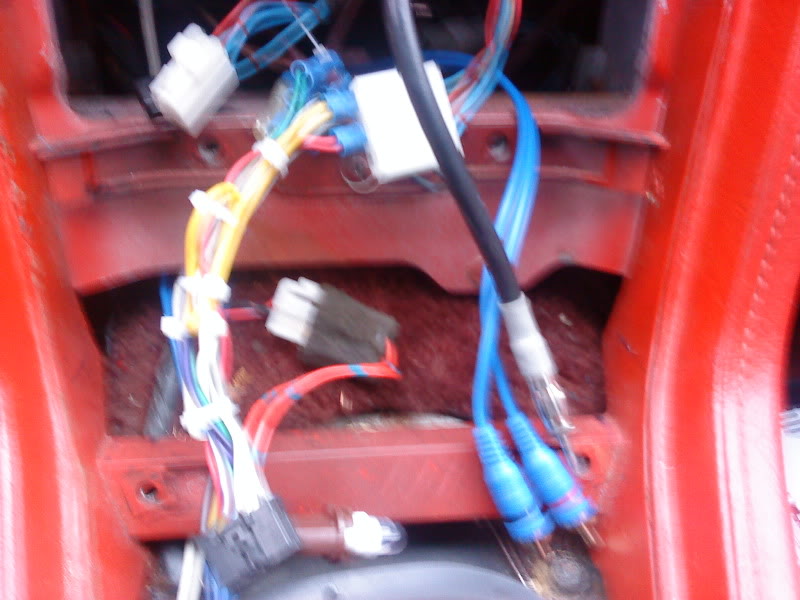
Here's the entire harness. I like zip ties. No tangles. the USB cord is off to the left, i didn't think to move it into the picture.
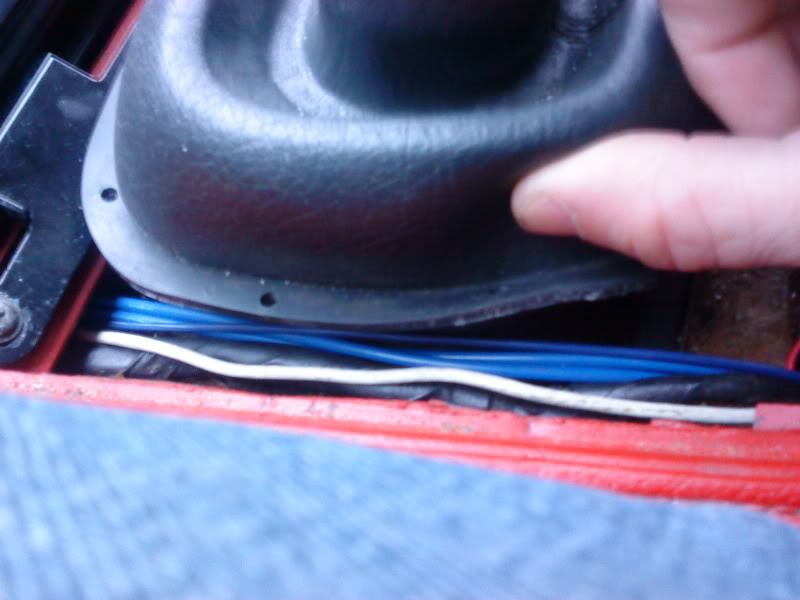
right here we have the Ipod cable, the RCA cables, and the remote wire. they go under the center console and under the little bit of carpet directly behind it, and straight into the opening for the storage bin. the cables are currently sitting under the bin waiting to be plugged in.
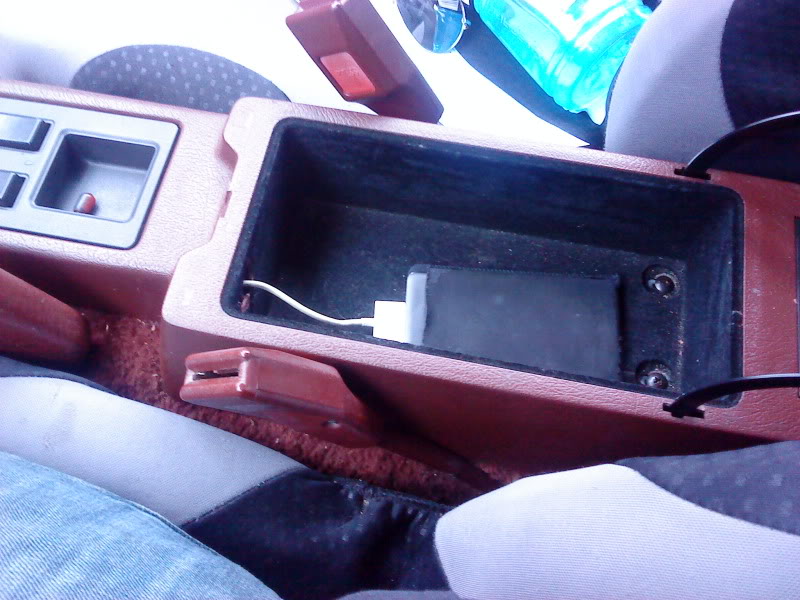
My Ipod in the center console. I debated putting it in the glove box, but i like it better right there. It's completely managed by the stereo so i never have to touch it. be carefull making the hole or you'll break the plastic like i did! the drill got caught and just broke the weak plastic. but it fit, so it's ok I guess.
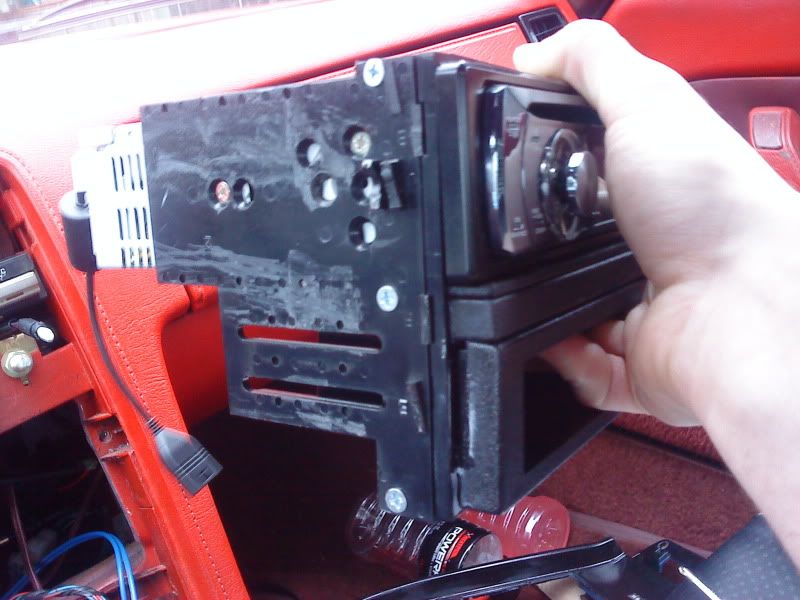
heres the stereo in the mounting bracket. I'm sure with enough work i could make it work exactly how i want to, but I'll just get a different one when i get around it it.
on a side note - heres a picture of the back of my center console. I used cut sections of zip ties and plastic epoxy to fix it. the zip ties are added strength to stop future breaks.
On this section i did not use zip ties, i just lightly coated the crack's surface with epoxy, pressed them together, used a blow dryer to speed up curing, and sanded the front side down. the backside can be ugly, no one will see it.
sorry about them being blurry :/ camera phone still. unless i can hold absolutely still, they look like crap.
Heres the plug I was talking about, and there's the power wire and ACC wire hooked up.i used my test light to figure out which plug was constant power and which was keyed power.
Here's the entire harness. I like zip ties. No tangles. the USB cord is off to the left, i didn't think to move it into the picture.
right here we have the Ipod cable, the RCA cables, and the remote wire. they go under the center console and under the little bit of carpet directly behind it, and straight into the opening for the storage bin. the cables are currently sitting under the bin waiting to be plugged in.
My Ipod in the center console. I debated putting it in the glove box, but i like it better right there. It's completely managed by the stereo so i never have to touch it. be carefull making the hole or you'll break the plastic like i did! the drill got caught and just broke the weak plastic. but it fit, so it's ok I guess.
heres the stereo in the mounting bracket. I'm sure with enough work i could make it work exactly how i want to, but I'll just get a different one when i get around it it.
on a side note - heres a picture of the back of my center console. I used cut sections of zip ties and plastic epoxy to fix it. the zip ties are added strength to stop future breaks.
On this section i did not use zip ties, i just lightly coated the crack's surface with epoxy, pressed them together, used a blow dryer to speed up curing, and sanded the front side down. the backside can be ugly, no one will see it.
01-21-11 | 07:49 PM
#29

Thread Starter
In the Progress
Joined: Sep 2009
Posts: 56
Likes: 0
From: Maryland
Dude, these pictures really help. Thanks a lot Mr. Miles! To me this doesn't look too hard but I know it will be tedious. Oh well, anything I'm willing to do to make my stereo system sound amazing. Thanks again man.
01-21-11 | 08:06 PM
#30
No prob'. I'm going to be in there again tomorrow if it doesn't rain, i installed the relay for the antenna and i thought i did it wrong when i did it right, and I'll post pics of that when it's installed. if i get it wired how i want it, it'll go up when i start the car and down when i shut it off. We shall see.
I may also do the rest of the sub install, so you'll get pics of me routing the power wire and you can see my other wiring for that under the bins
I may also do the rest of the sub install, so you'll get pics of me routing the power wire and you can see my other wiring for that under the bins

 01-29-11 | 09:02 AM
#34
Thread Starter
In the Progress
Joined: Sep 2009
Posts: 56
Likes: 0
From: Maryland
Mr. Miles don't worry about not getting the relay pictures up in time... I have all the time in the world, and sry for responding late, I've just been busy with school and work. Just take your time and remember that I'm in no rush so it's perfectly fine whenever you get those pics up