Dry Carbon fiber wrap FD interior
#1
Dry Carbon fiber wrap FD interior
Hey everyone. I have been thinking of what to do to to the scratched, messed up (15 year old) interior of my FD. and I thought about everything, Plasti-dip, having it wrapped in carbon like everybody else here, but I want to do something different. I love the look of CF, but I just don't like how the very glossy resin looks against the flat black leather on the interior, so what I thought was why not dry wrap the interior pieces in Carbon? It will give the same look, without the high gloss shine that (to me), throws off the whole look of the interior. much like this of a 3-series BMW
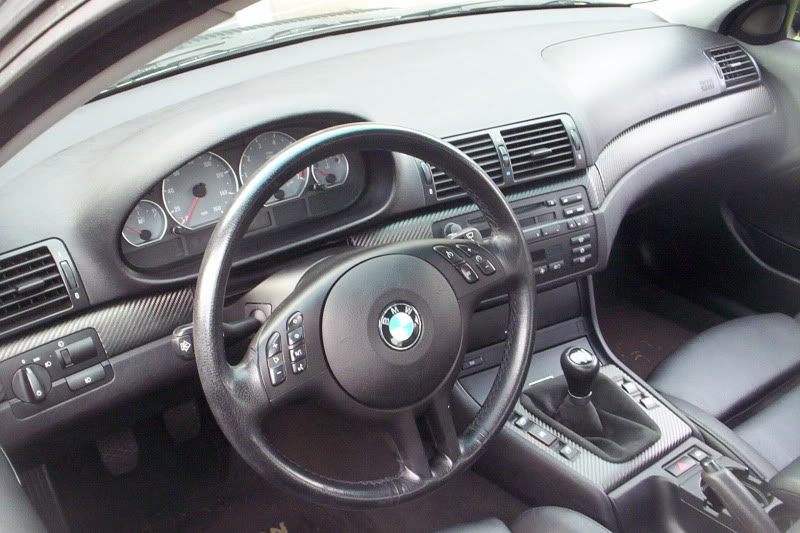
What do you guys think? Ill be posting up pics when I finish. Should be about a week or so.

What do you guys think? Ill be posting up pics when I finish. Should be about a week or so.
#3
I like this idea a lot. I'm a big fan of the stock, clean interior. I've been following the refinishing thread in this forum, and I think I'm going to go for the sanding/Duplicolor bumper paint method that some have had good luck with.
Please do post up your results though, I'd be interested to see what this ends up looking like. And a detailed writeup would be awesome too
Please do post up your results though, I'd be interested to see what this ends up looking like. And a detailed writeup would be awesome too
#6
Hey Everyone. After researching all the possible options I decided not to go with real carbon fiber at first. What I decided to go with is the Carbon Fiber "Leather" (that's how the BMW dealer describes it) that they use in the new M3's etc, its basically carbon fiber backed with a very thin piece of fabric. This is what I used:
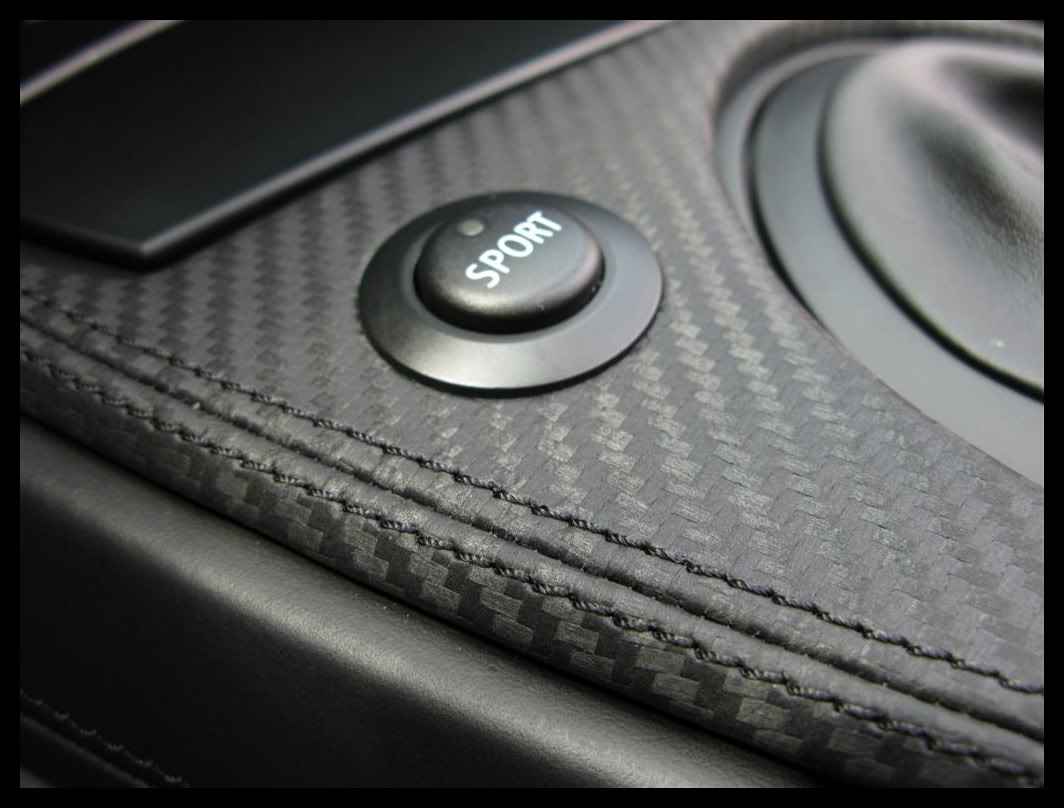
There were a few reasons I did this.
1. its a lot easier to work with
2. its its a lot easier to clean
3. it looks and feels almost identical
So it took me quite awhile to get the curves down, and the hardest part was getting the lines of the weave to match up where the pieces met, but I finished with the first few pieces, and I think they came out awesome! Here's a few pics. The front part of the gauge hood is giving me quite a bit of trouble due to the ridiculous curves at the top! Ill post more pics later.
A/C Panel
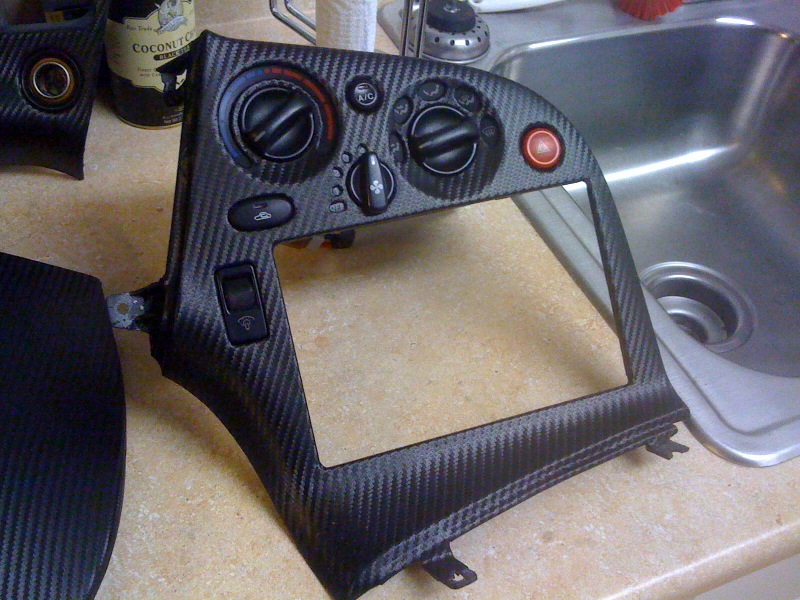
Gauge Hood Top piece
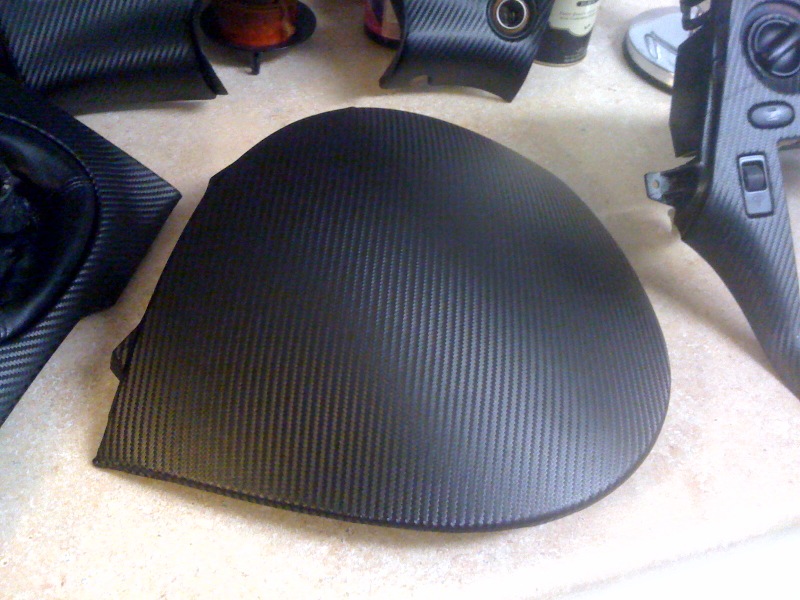
Center Panel
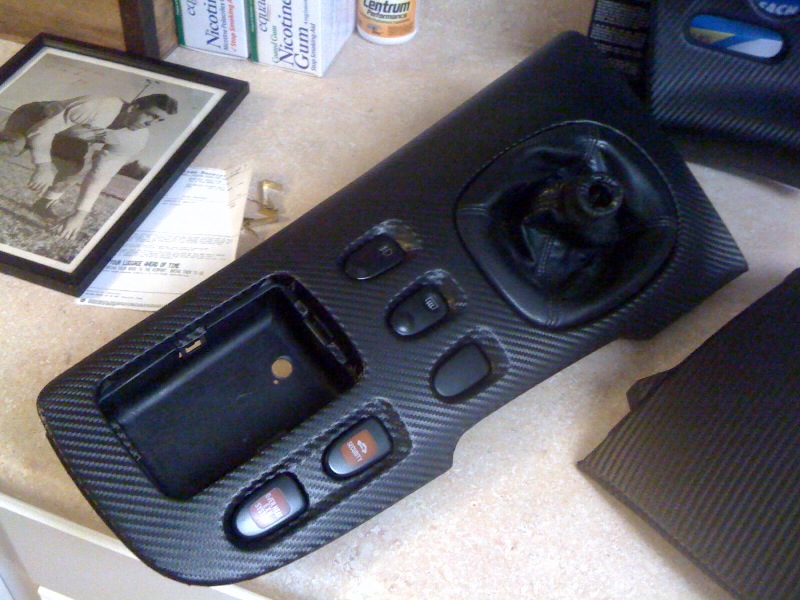
Let me know what you guys think.
Sorry for the Low res cell phone pics but my Rebel was charging, Ill take some higher res pics when I'm finished.

There were a few reasons I did this.
1. its a lot easier to work with
2. its its a lot easier to clean
3. it looks and feels almost identical
So it took me quite awhile to get the curves down, and the hardest part was getting the lines of the weave to match up where the pieces met, but I finished with the first few pieces, and I think they came out awesome! Here's a few pics. The front part of the gauge hood is giving me quite a bit of trouble due to the ridiculous curves at the top! Ill post more pics later.
A/C Panel

Gauge Hood Top piece

Center Panel

Let me know what you guys think.
Sorry for the Low res cell phone pics but my Rebel was charging, Ill take some higher res pics when I'm finished.
Trending Topics
#11
Ya, that's the best looking carbon look I've seen. It's nice and subtle which I like and no shine. Where did you get the material and whats the technique you used to apply/shape?
#12
Please let us know where you got the material and how you applied it. This is like a before and after video with nothing about the details in between. Looks fantastic. You did a great job. Now it's time for show and tell.....so please share.
#13
Read all about it here:
https://www.rx7club.com/interior-exterior-audio-26/diy-carbon-fiber-wrapping-839288/
https://www.rx7club.com/interior-exterior-audio-26/diy-carbon-fiber-wrapping-839288/
#15
Bump... just jumping on the thread. I have the Torasport CF overlays, but I really like this look as well. Considering, but want to see more. I can see the corner of your main dash in some of the pics, but no full pics. Please post up pics when you have more pieces done and installed.
Thx
Thx
#16
i got the material from http://www.euro-spec.net it took me a little more than a yard to wrap the door trim and the entire dash, so 2 yards was enough to wrap everything with some back up for the door trim and main dash that I need to re-do. I will post a write up when I re-wrap the maid dash and gauge bezel. Should be done some time today or tomorrow.
#17
#19
Actually I am still trying to get that one to come out like I want it. everything else is done, as seen in the pics above, but im on my 3rd attempt at the gauge surround. I only have about 5-6 hours a week I can actually work on this with work and school and stuff, but I'll try to get everything worked out within the next week or so.
#21
Actually I am still trying to get that one to come out like I want it. everything else is done, as seen in the pics above, but im on my 3rd attempt at the gauge surround. I only have about 5-6 hours a week I can actually work on this with work and school and stuff, but I'll try to get everything worked out within the next week or so.
 Can't wait to see images of everything installed. Anyone else making progress on installing the same material? If so, please post up some pics!
Thx!
#22
Sorry everybody, but with registering for the fall semester and this damn idle problem I've had to put redoing the other pieces on the back burner. I can snap some pics of them installed but I need to redo the gauge bezel and passenger door panel. Ill post those up today.


