How to Clean Engine Rotors, Housings, and Irons
#1
Thread Starter
Joined: Oct 2006
Posts: 4,216
Likes: 2
From: Tampa, FL
How to Clean Engine Rotors, Housings, and Irons
I couldn't seem to find a thread that specifically dealt with this issue...probably my search-fu is weak. However, as I have just torn apart my first engine, I would like to hear what experienced builders have to offer in regards to cleaning various parts.
For instance...I know many people suggest the wire wheel route on rotors. I also know of someone who takes their parts to a machine shop and has them briefly left in a chemical dip of some sort to remove everything (my personal question about this would be is it dangerous for the nitride surface of the irons?). I also have had suggested to rent a steam cleaner as used on the underside of cars or even go to the local car wash and spray everything down as well as media blasting (exterior only!).
Any advice or tips would be appreciated.
#2
#3
Thread Starter
Joined: Oct 2006
Posts: 4,216
Likes: 2
From: Tampa, FL
Hi Arghx...I appreciate your input but nowhere in those videos does it talk about cleaning the plates or externally cleaning some of the pieces outside of the rotors. Certainly a great resource for anyone who didn't know about those videos!
I'm hoping some experienced builders will reference techniques they use to clean the oil, buildup, etc, etc. on parts to hear what else is common. Thank you again for sharing.
I'm hoping some experienced builders will reference techniques they use to clean the oil, buildup, etc, etc. on parts to hear what else is common. Thank you again for sharing.
#4
For the rotors, Pineapple racing has a great video. I used a brass wire brush on the faces with some kerosene to remove the carbon. Use an old side seal to thoroughly clean the side seal grooves of carbon. Use a wire wheel on a moto-tool to clean the corner seal grooves. Use an old apex seal to clean the apex seal grooves.
For the irons, clean the outsides with a wire brush and simple green or kerosene. I don't recommend simple green for the rotor housings because it can do a number on the aluminum. But the wire brush works great.
To prep the irons, follow Lynn Hanover's instructions. Use 180 grit aluminum oxide paper on a random orbital sander to remove the water staining and shine. Then slap on a 400-500 grit silicon carbide (wet / dry) disc or piece of paper, flood the housing with kerosene and sand it with the orbital until it has a matte grey finish. Use medium pressure and avoid the legs because you can chew through them.
Powerwash the housings at the carwash or at home if you have a powerwasher. Remove all the rust from the rotor housings with this method.
WD-40 on the iron faces until you're ready to build.
The following users liked this post:
Fickert (04-12-19)
#5
I use broken side seals to remove deposits. I use a wire wheel to clean the rotor face but stay away from the apex grooves. I use a 5 gallon bucket with some degreaser, a tooth brush, and a brass brush to clean everywhere else on the rotor. Then I hose the rotor off with the garden hose and blast it all over with compressed air.
Don't touch the bearing unless you plan to replace it. Have fun.
Broken side seals also work well in the o-ring grooves on the plates.
Don't touch the bearing unless you plan to replace it. Have fun.
Broken side seals also work well in the o-ring grooves on the plates.
Trending Topics
#10
#11
Engine, Not Motor
iTrader: (1)
Joined: Feb 2001
Posts: 29,793
Likes: 119
From: London, Ontario, Canada
It is hard to beat a parts washer. I use mine to clean everything but the eccentric, which I just hose with brake cleaner.
Make an initial wash in the parts cleaner to get rid of junk. Then go back and clean again, scraping all the grooves in the irons. Wash with soap and warm water, dry with compressed air. Clean the rotors by soaking in cleaner (watch out for the bearings!) and then rinsing. Scrape the grooves with old seals and carb cleaner.
After the first cleaning, scrape the irons again in the parts washer and use a Scotch Brite pad to clean up the surface. Wash with degreaser, soap and water, then dry thoroughly with the air compressor.
The following users liked this post:
justino1125 (01-11-22)
#15
rotors: go to autozone and buy some cold parts cleaner. let the rotors soak in this for a day or so and rinse it off with warm water. If there is any carbon buildup still there stick them back in for another day. Rinse with warm water then blast them down with some penetrating oil to prevent rust. Take a piece of old apex seal and make sure the apex seal grooves are clean and free of carbon buildup. Do the same with the side seals. Take a pick and make sure that the corner seal holes are also clean of carbon. Take a pick and make sure the oil control ring grooves are clean.
Housings: a bucket of mineral spirits and a scotch brite pad work pretty well. The inner surfaces of mine were in pretty good shape when i did my rebuild so i gave them a quick scrubbing/rinse and moved onto the sides of the housings. I first began with the scotch brite pad to get off the residual water seal. Constantly pouring the mineral spirits over it helped quite a bit to loosen things up. I then took some pretty fine sand paper and briefly sanded that area. I took a scrub brush to the outside of the parts. Make sure the dowel pin holes/oring grooves are clean. If not go to town with a tooth brush and a pick
Irons: A light scrubbing in the mineral spirits with a scotch brite pad to free up any buildup on the surface. I ground a crappy flat head screw driver down into a groove scraping tool. MAKE SURE THE GROOVES ARE CLEAN. This does take a long time but i think it is important to a quality rebuild. The outside got the brush+mineral spirits treatment. I have seen people take some 600 wet sand paper in a DA sander and lightly wet sand the surface of the irons with kerosene. I am not sure if this is advised or necessary. I did not do this on my engine.
Im sure a parts cleaner would have made the job easier but i dont have the space in my garage for one so i made do with a bucket.
Make sure that any raw iron surface gets a coating of penetrating oil to prevent rust.
This entire process does take quite a bit of time. If you can afford it i would take them to get ultra sonically cleaned or hot tanked.
#16
If your wanting a clean hassle free finish on the housing, I always use a small brass wire wheel on a drill the clean them up. This leaves a simi-shine that you don't have to go back and polish. This is a bridgeport I built for my old SA.
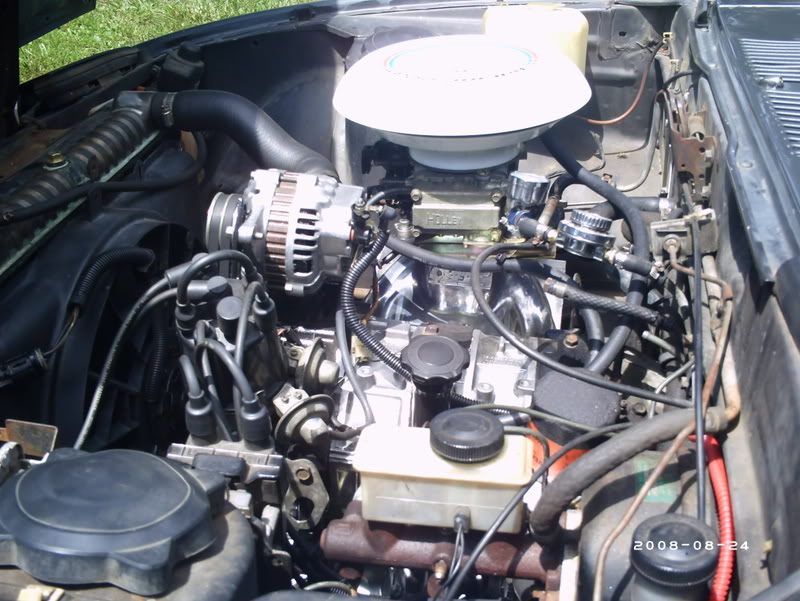
Before and after pics of my 13B bridgeport I am building for my Turbo FB.
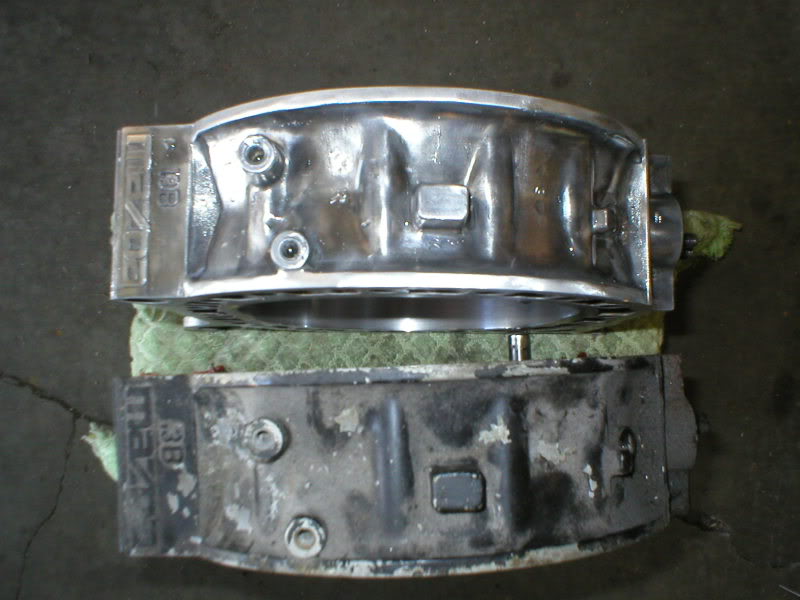
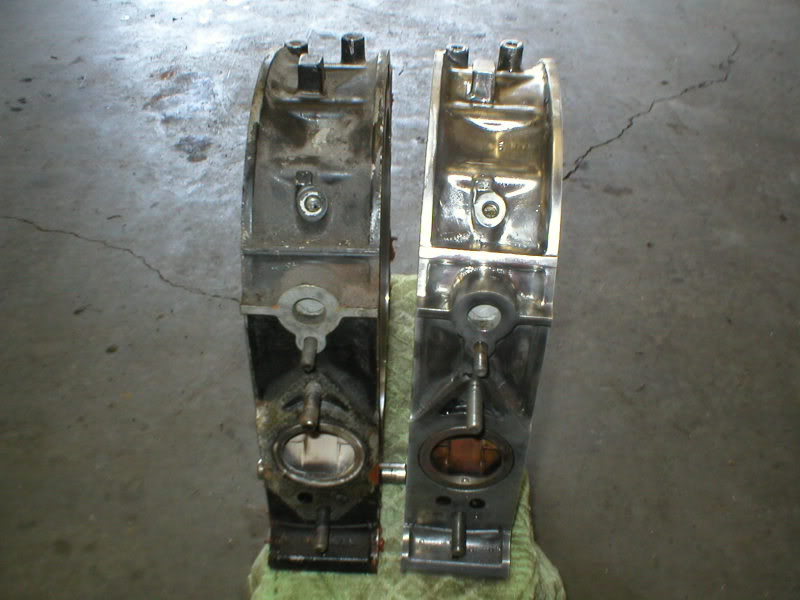
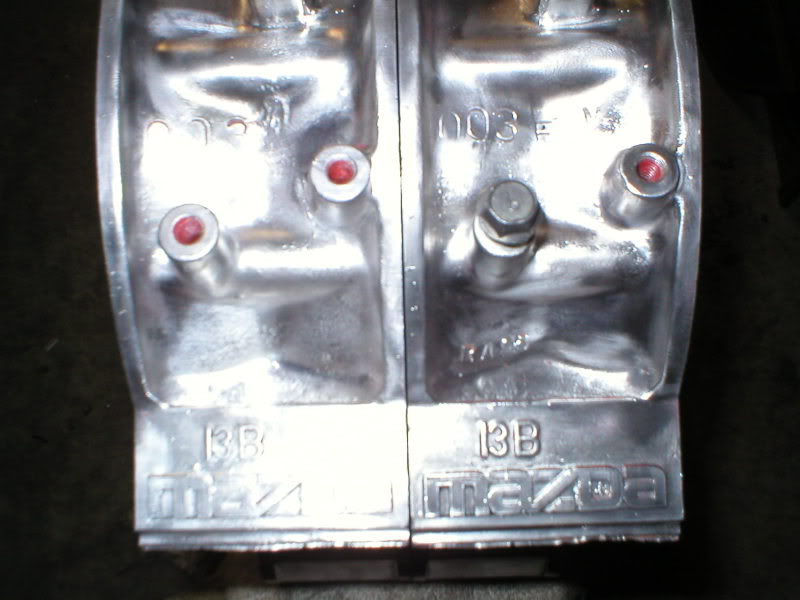
I do this with all my aluminum parts.
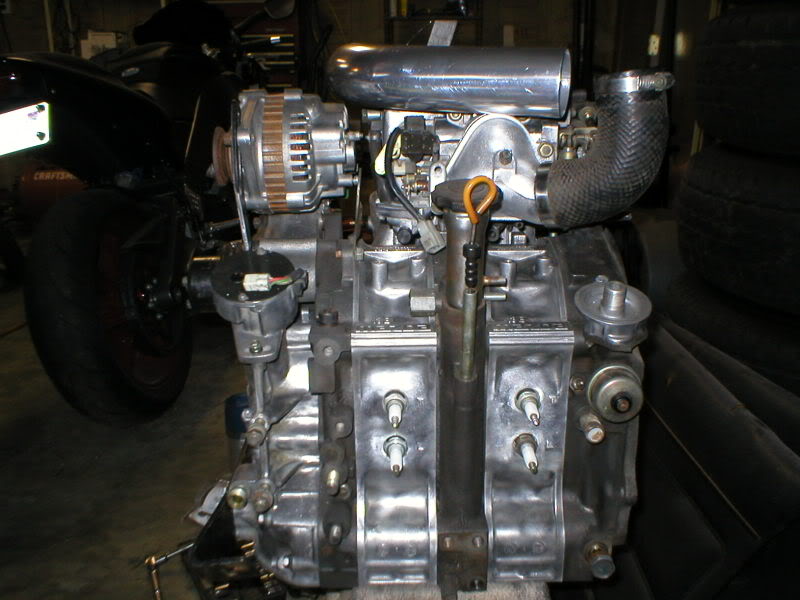
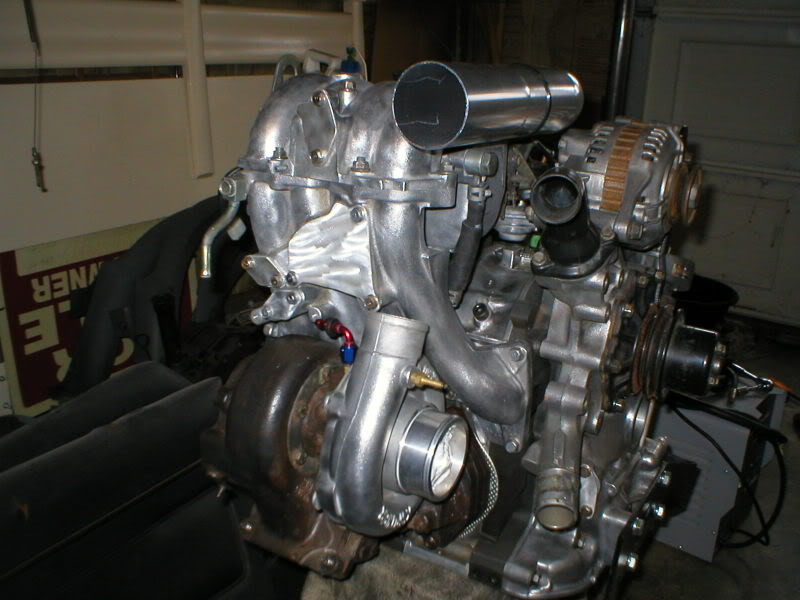

Before and after pics of my 13B bridgeport I am building for my Turbo FB.


I do this with all my aluminum parts.


#18
#20
I didn't have access at the time of rebuilding, but afterward a friend had done this for me on a scrap housing (just in case) using silica beads. It came out PERFECT.
Iron parts were easy. After a wire brush for the tough build up, I used the regular green scotchbrite pads to polish up. They came out super clean and it went pretty quick.
When I did the housings on my own, I used a dremel with the paint stripping wheels on the side surfaces. They are beige and purple (course, soft) IIRC. They practically make the aluminum into a mirror.
Thread
Thread Starter
Forum
Replies
Last Post
cdn
2nd Generation Specific (1986-1992)
14
09-10-15 07:23 AM
cdn
2nd Generation Non-Technical and pictures
0
08-11-15 09:59 PM


