
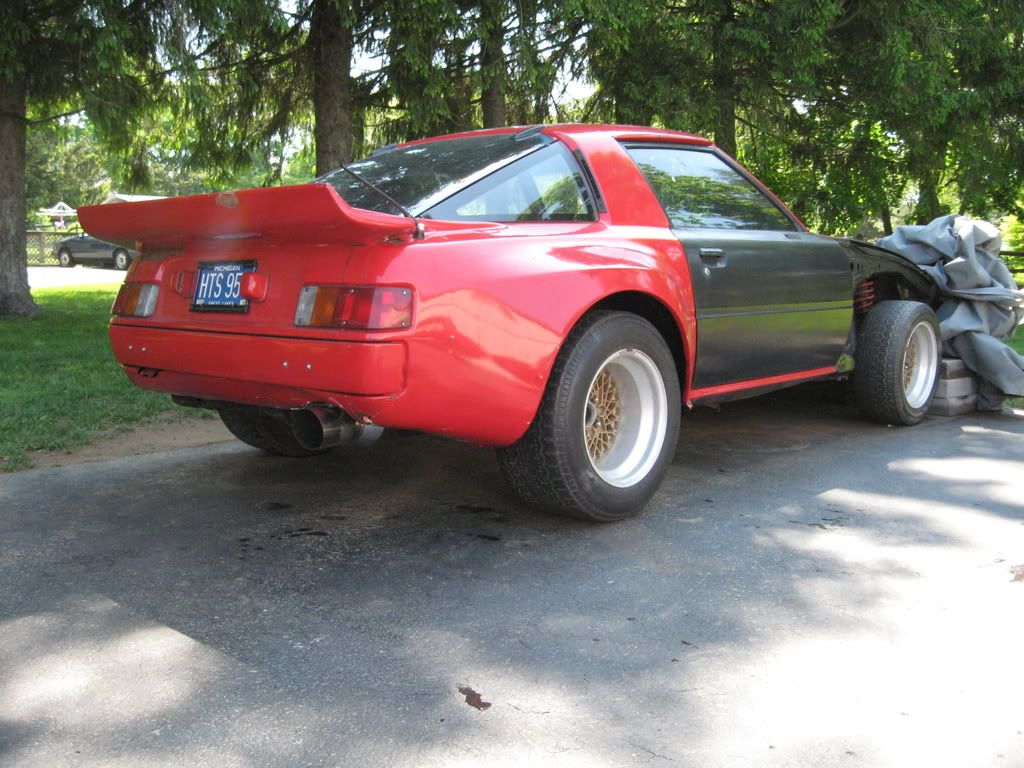
79' turbo widebody restoration
 05-25-08, 10:33 PM
#1
Back at it again!!
Thread Starter
iTrader: (3)
Join Date: Jun 2003
Location: Western Colorado
Posts: 1,324
Likes: 0
Received 0 Likes
on
0 Posts
79' turbo widebody restoration
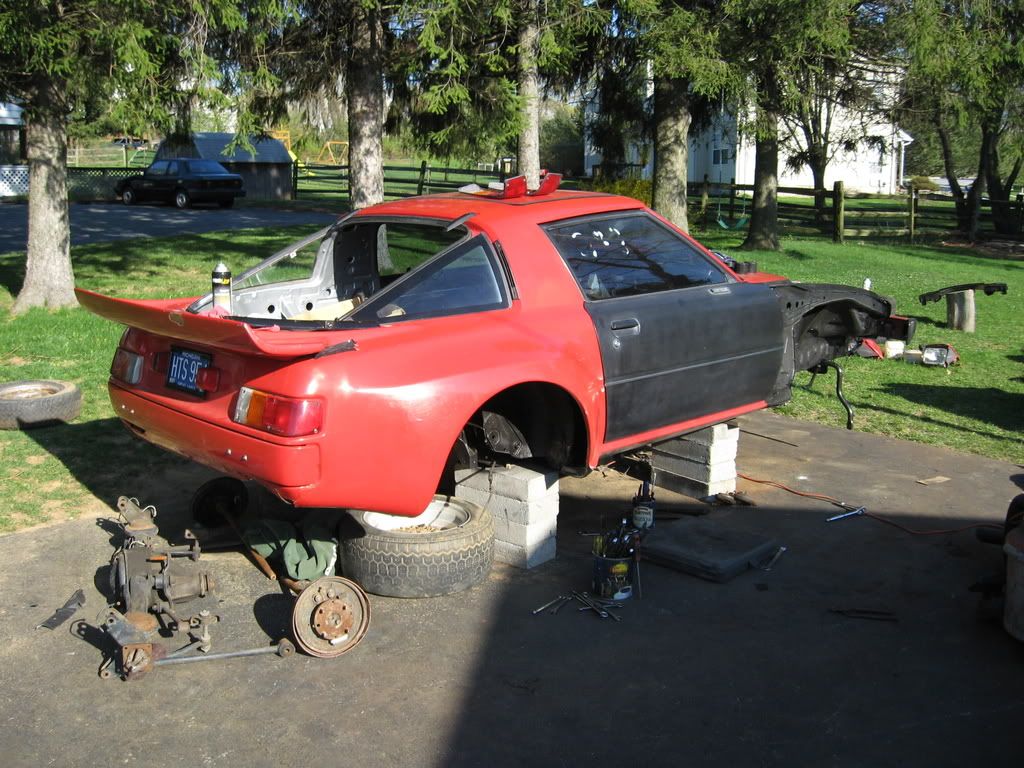
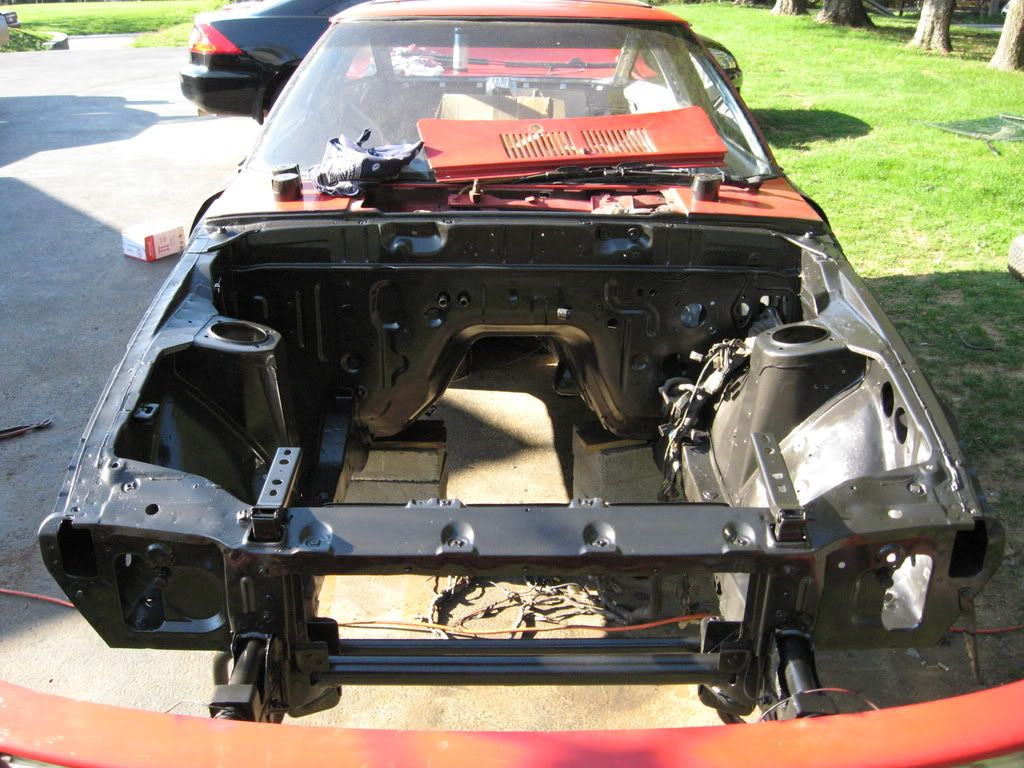
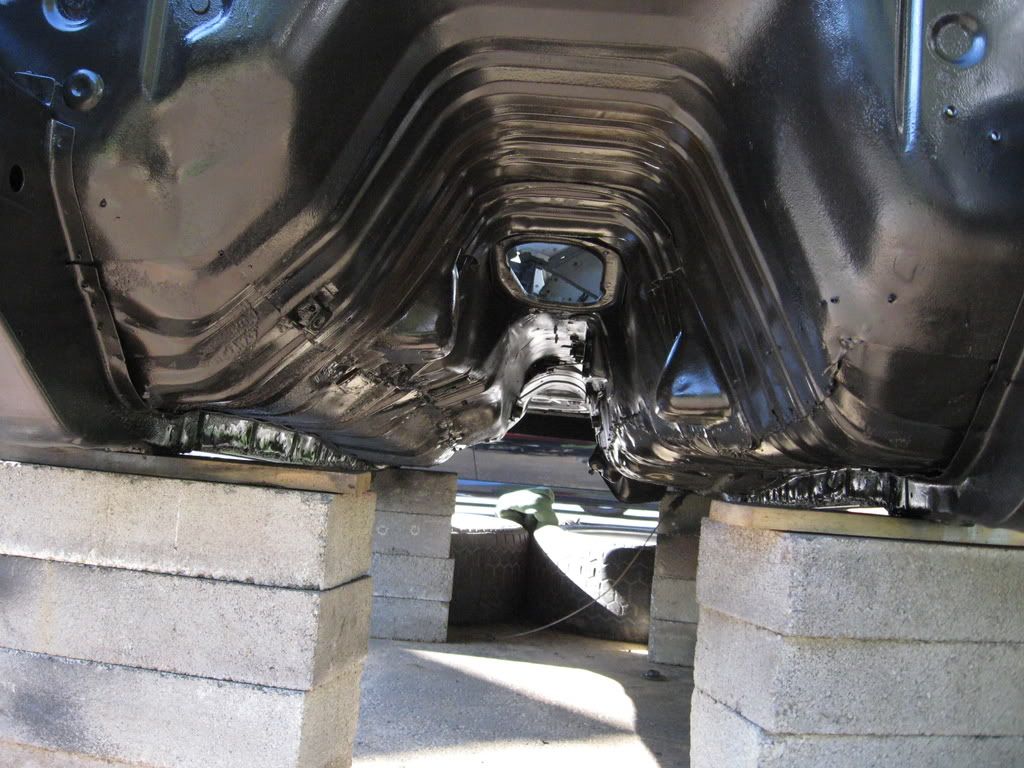
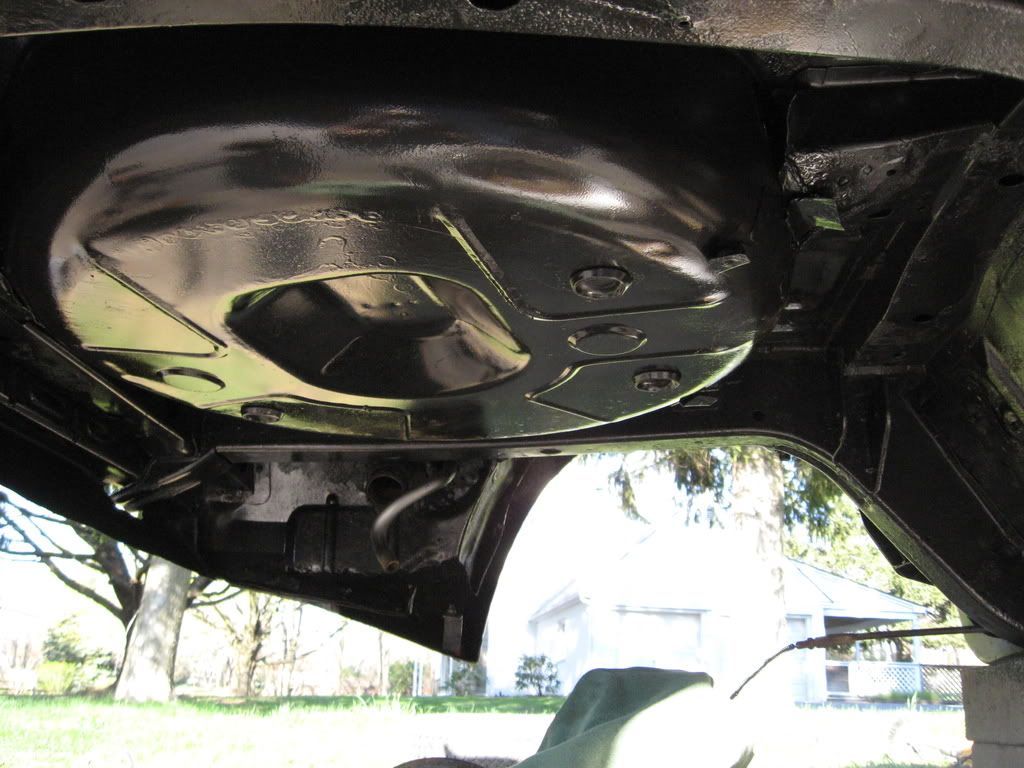
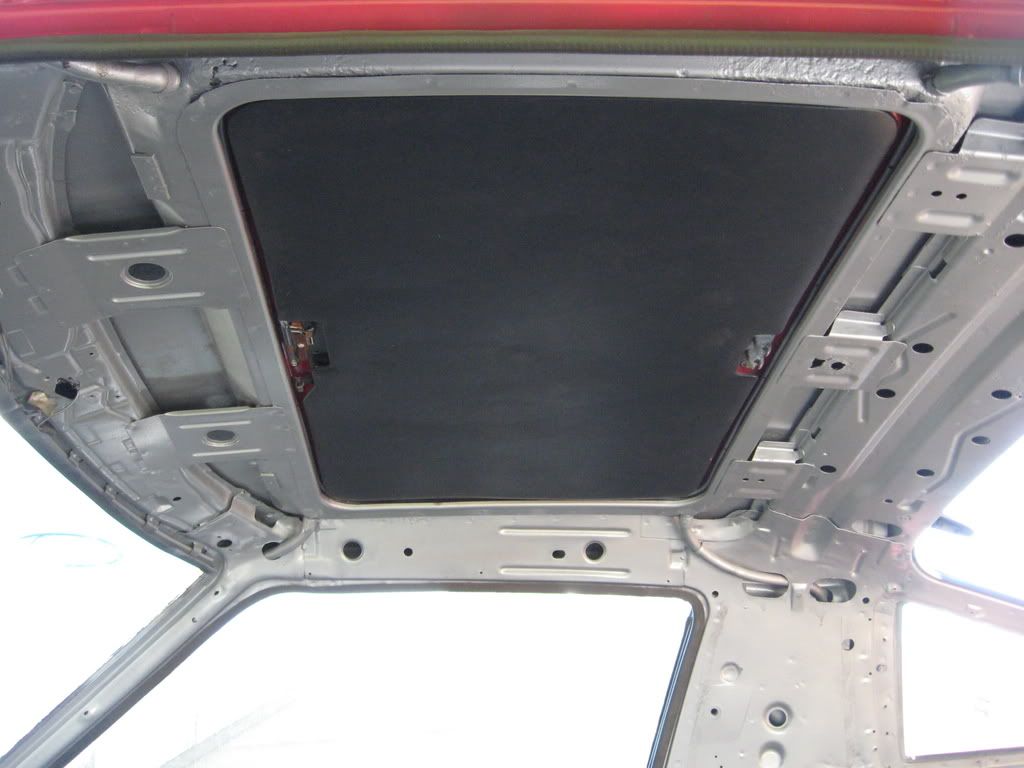
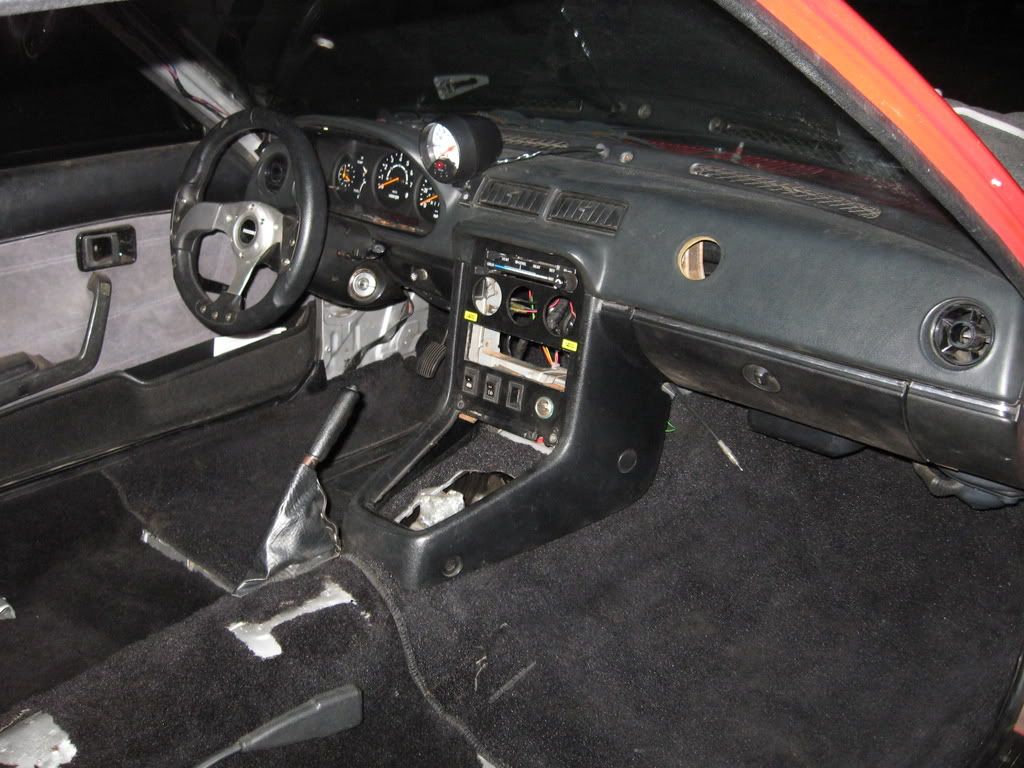
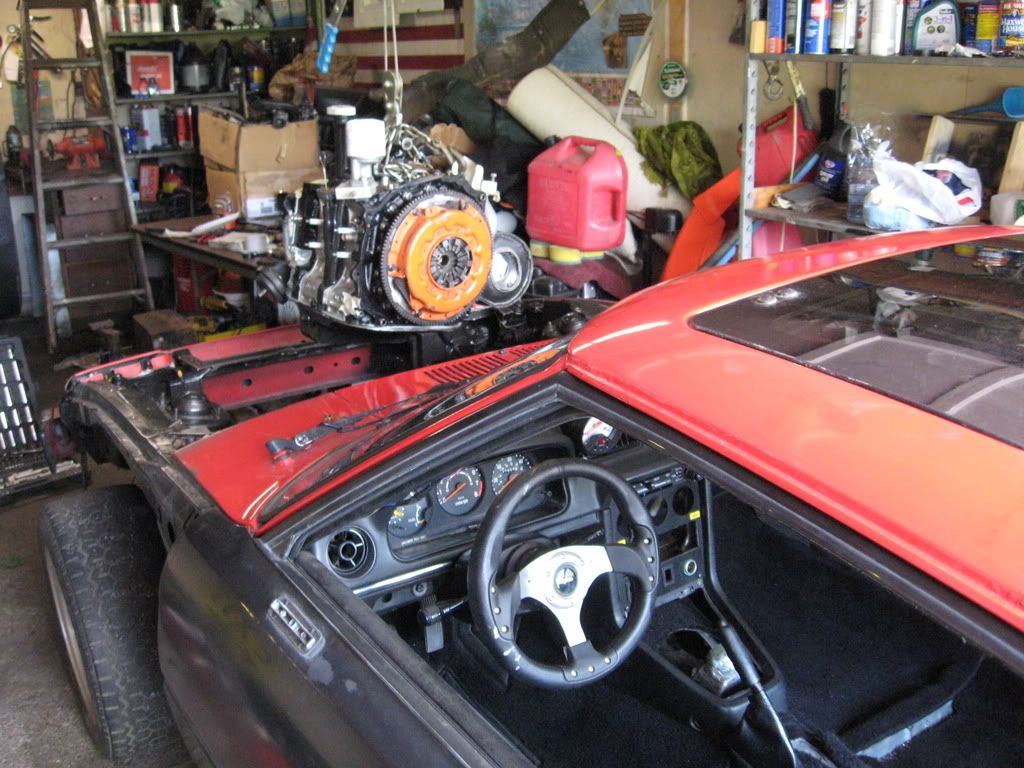
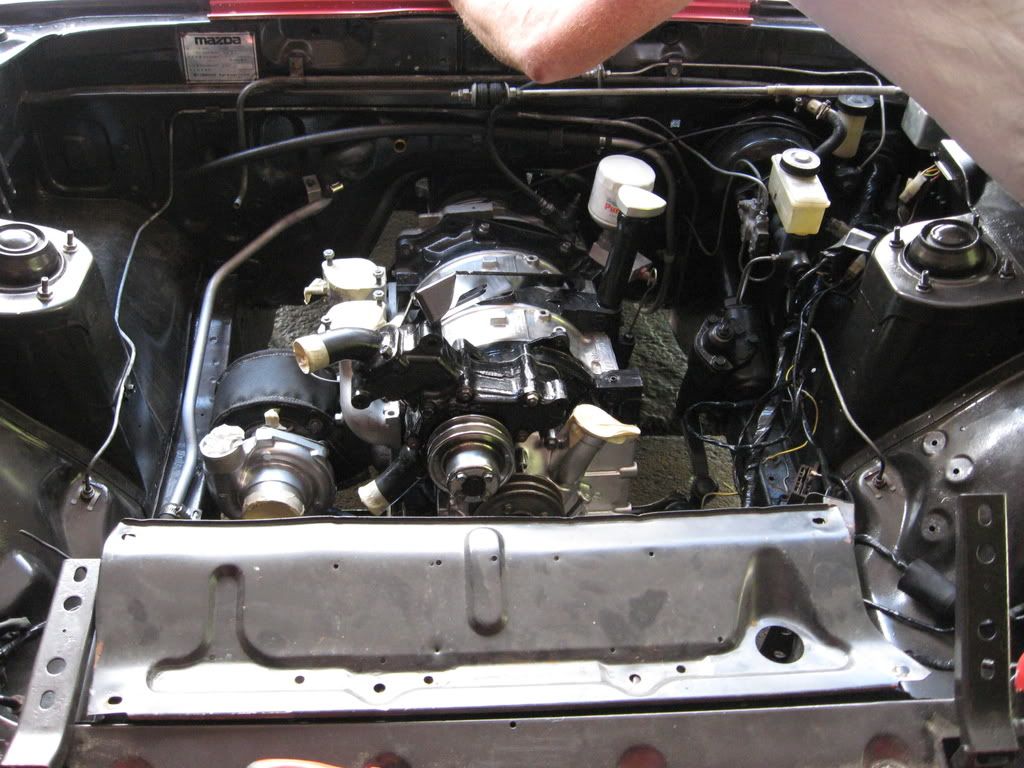
I figured that I should finally share the progress on my brother's 1979 widebody rx7 that we picked up last spring. We actually didn't start working on it until the beginning of this year, and has recently turned into my full time job (seriously) since march. Unfortunately, I did not start taking pictures of the progress until after we stripped the car of everything but the rear fenders and windows, wire-wheeling the entire underbody, engine bay and interior and painting it all. Oh yeah, I can't forget the floorboards and spare tire holder area that were cut out, replaced and welded before we did anything else, along with industrial uni-strut that was incorporated and welded "into" the orginal unibody frame rail. The link is in my sig, or you can access them here:
http://s267.photobucket.com/albums/i...20Mazda%20Rx7/
http://s267.photobucket.com/albums/i...%201979%20Rx7/
I will update when I can
http://s267.photobucket.com/albums/i...20Mazda%20Rx7/
http://s267.photobucket.com/albums/i...%201979%20Rx7/
I will update when I can


 05-25-08, 11:00 PM
#6
Back at it again!!
Thread Starter
iTrader: (3)
Join Date: Jun 2003
Location: Western Colorado
Posts: 1,324
Likes: 0
Received 0 Likes
on
0 Posts
That was the car that we got the floorboards and spare tire area from. The frame got hit pretty hard about 10 years back, and after replacing the suspension, having the frame pulled, and buying adjustable a-arms and barely getting it to achieve 0.5 degrees negative camber and wandering, we decided to swap everything from it over to the red one. It was stripped completely bare, but the body kit still resides up in the attic along with another widebody kit that is about as wide as the current one, but is a different style. They will both need work however to make them look pretty. If anyone is curious about either kit, let me know.....but I hope you have good bodywork and fiberglassing skills. Also, got an extra set of (2x) 15x8 and (2x) 15x9 wheels too.
Trending Topics
 05-25-08, 11:23 PM
#9
Back at it again!!
Thread Starter
iTrader: (3)
Join Date: Jun 2003
Location: Western Colorado
Posts: 1,324
Likes: 0
Received 0 Likes
on
0 Posts
A basic rundown:
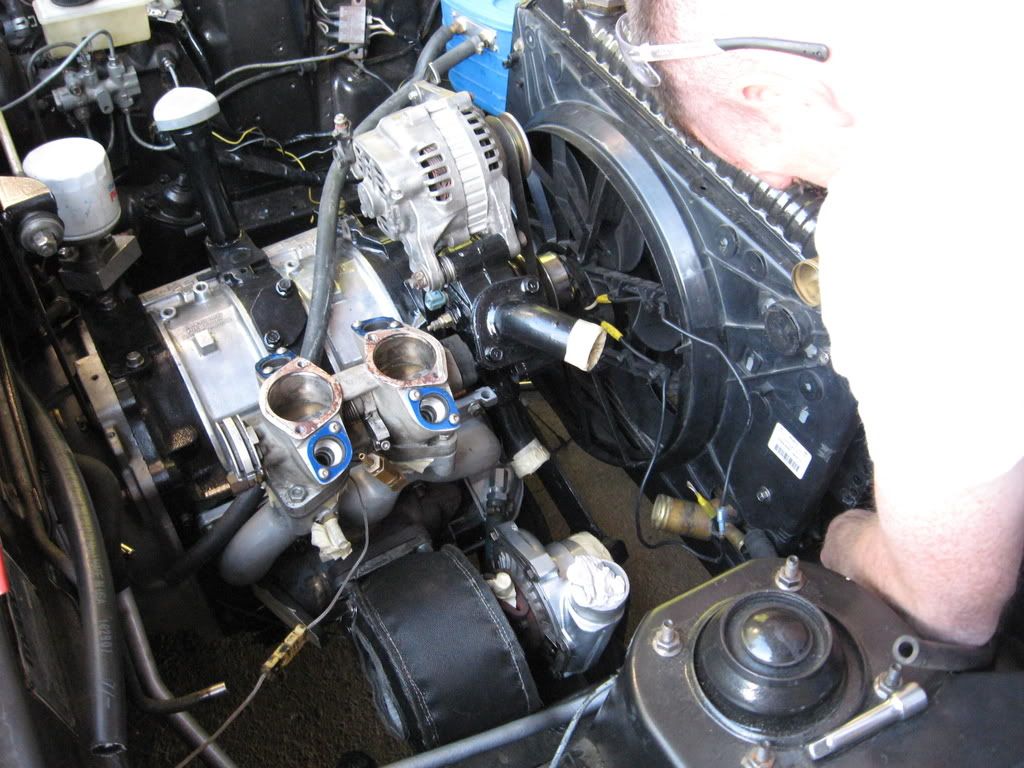
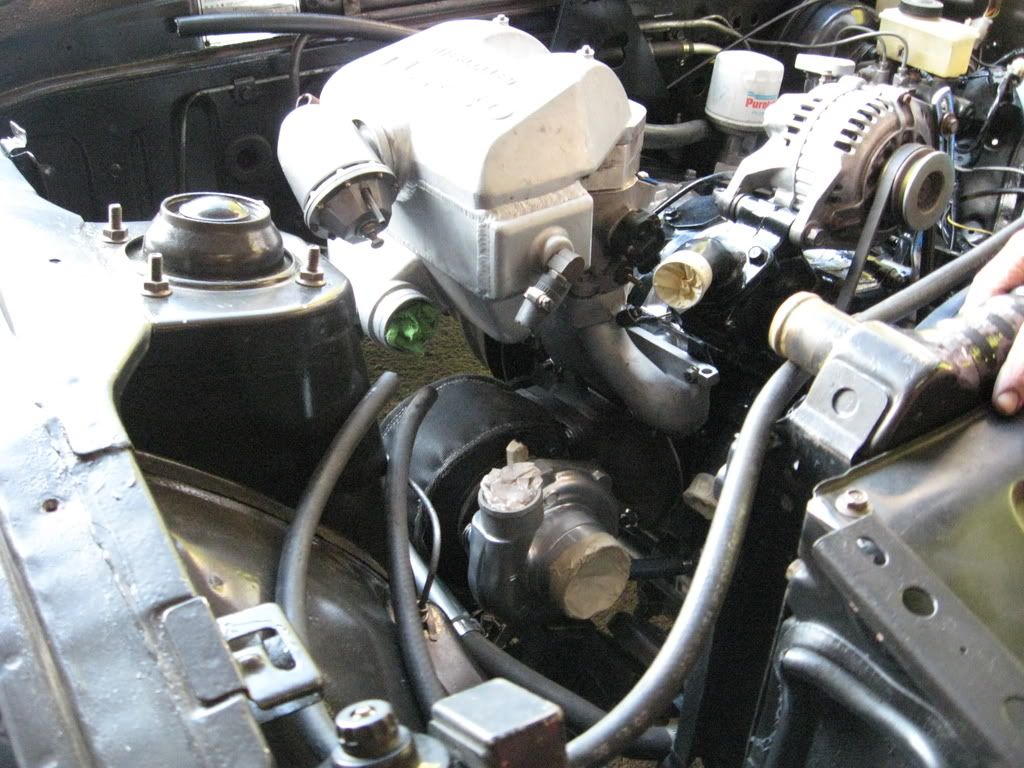
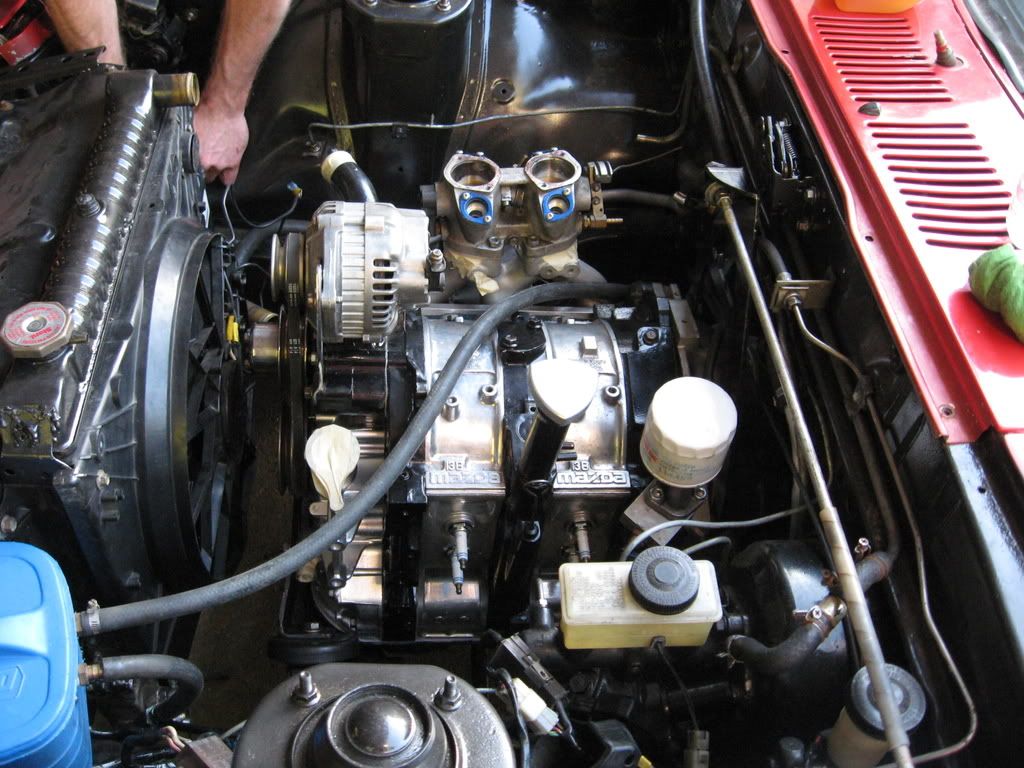
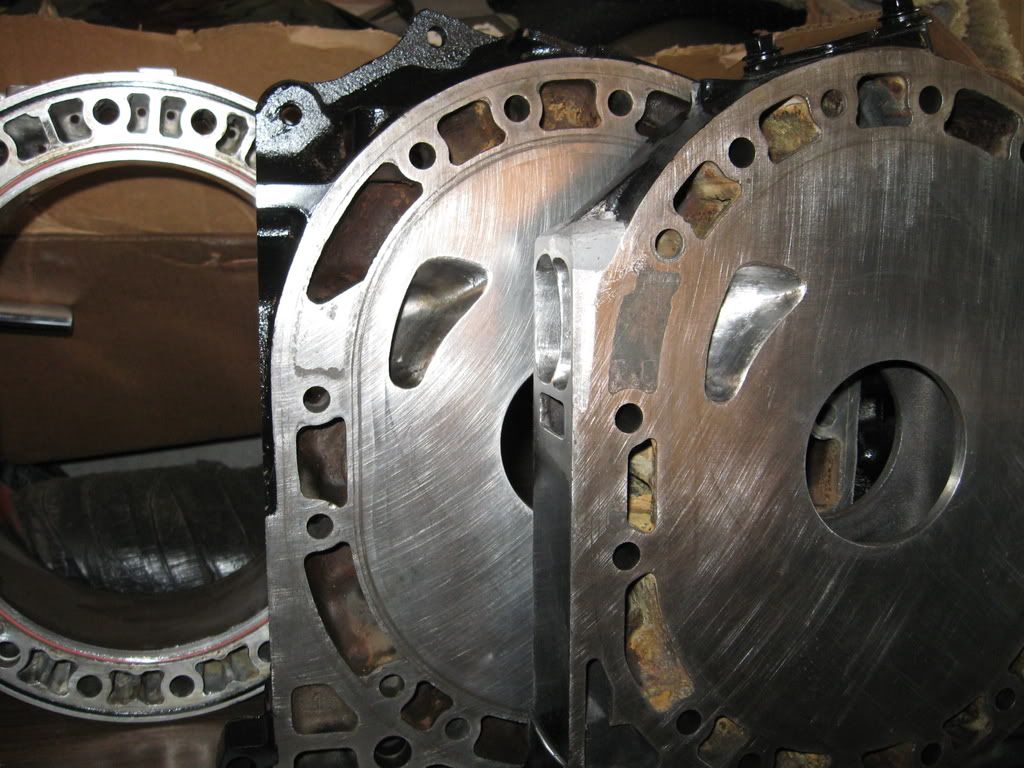
Borg/Warner To4b with a .81 exhaust housing, Cartech water/air intercooler and exhaust manifold, weber intake manifold, Injection Perfection 48IDF throttle body, earlier style block with the grooves in the rotor housings as opposed to the side housings, earlier style rotors w/ the 3mm apex seals and larger side seals, large streetport (the primaries and secondaries are the same size), exhaust housings ported, exhaust mani. ported and polished (the stock casting didn't flow the best), and other stuff that I can't recall at the moment.
The size of the primary ports:
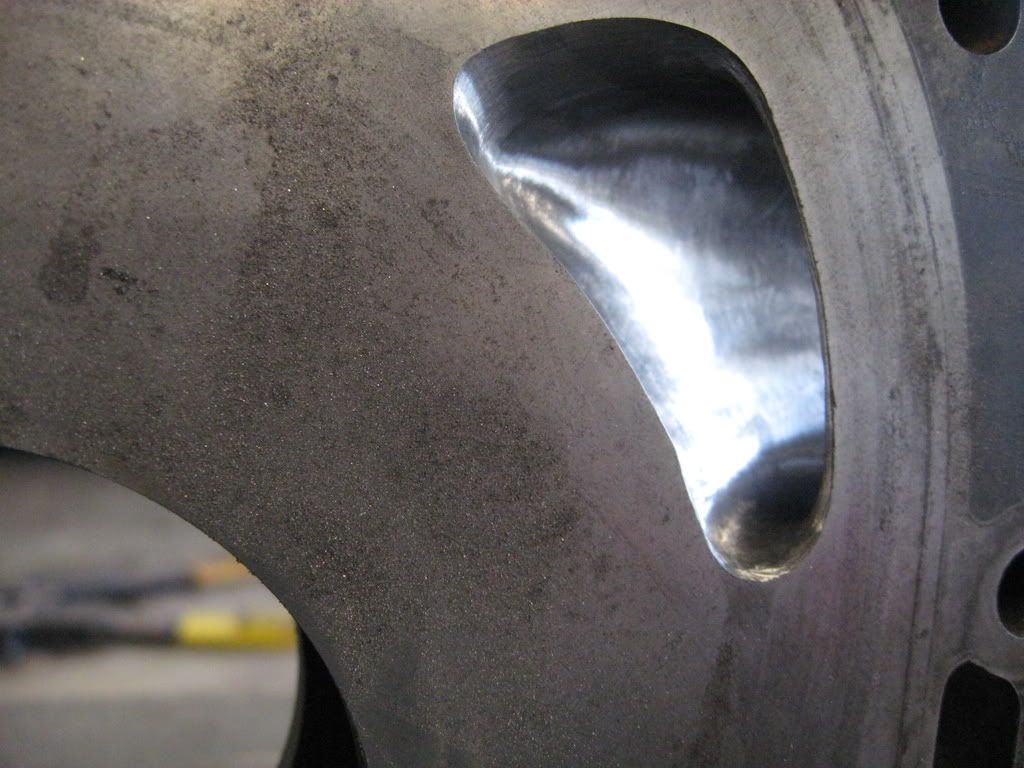
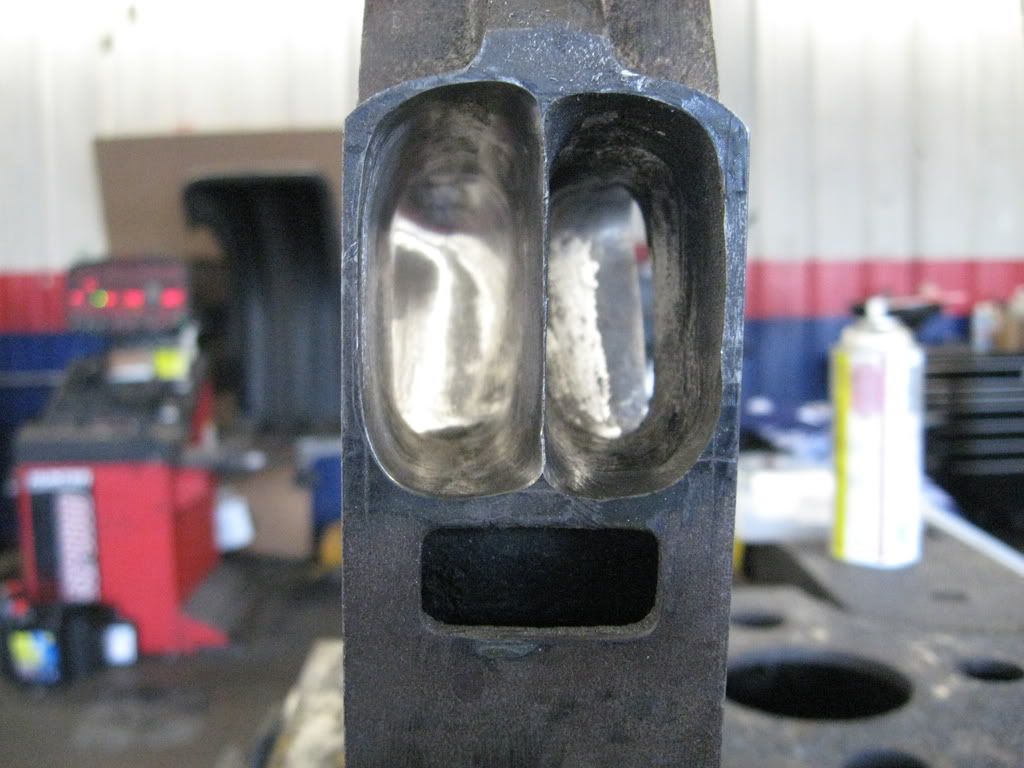
comparison:
epoxy that I needed to use because the ports were soo large:
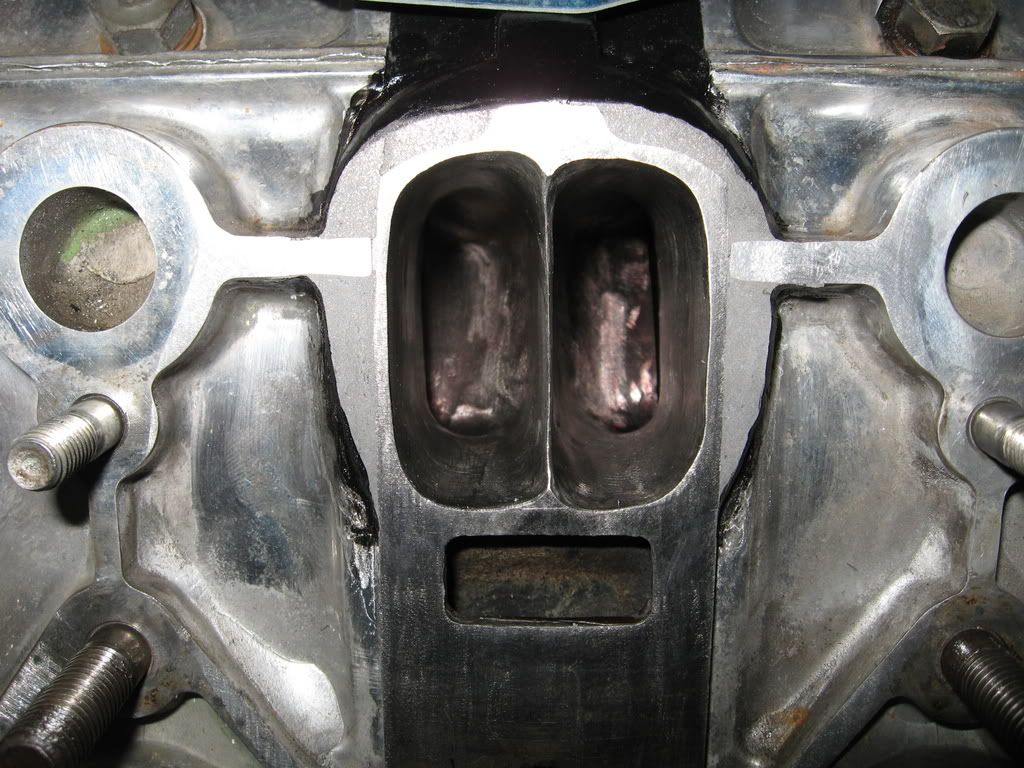
The reason for the primary port size and "squarish" shape:
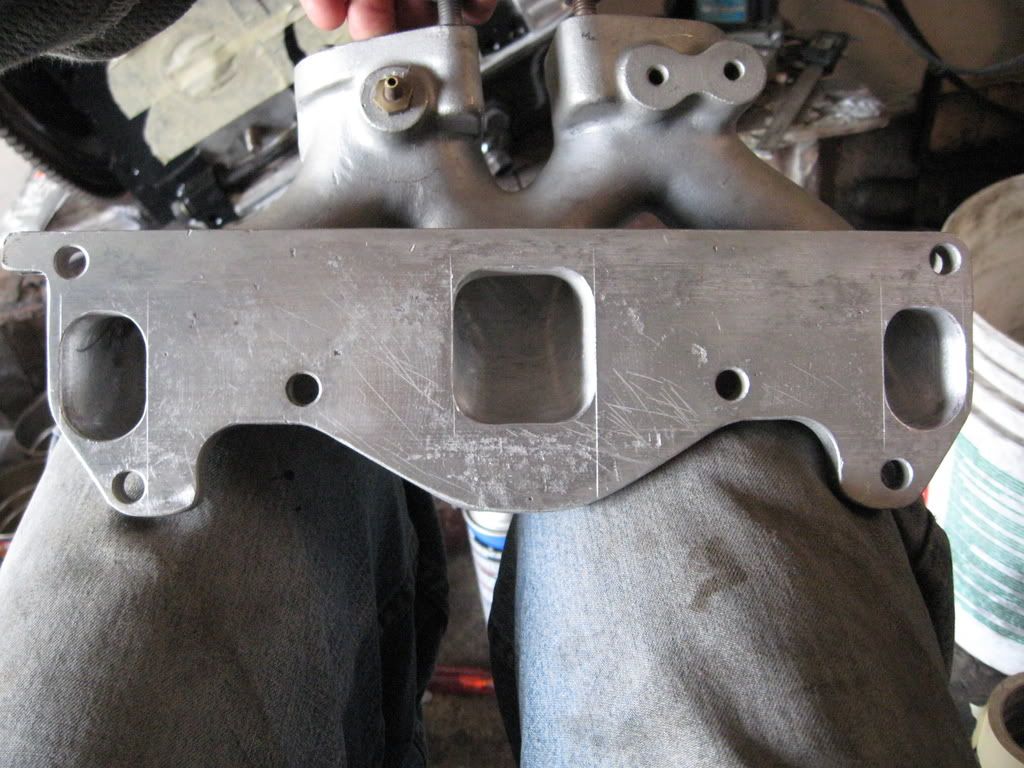
Borg/Warner To4b with a .81 exhaust housing, Cartech water/air intercooler and exhaust manifold, weber intake manifold, Injection Perfection 48IDF throttle body, earlier style block with the grooves in the rotor housings as opposed to the side housings, earlier style rotors w/ the 3mm apex seals and larger side seals, large streetport (the primaries and secondaries are the same size), exhaust housings ported, exhaust mani. ported and polished (the stock casting didn't flow the best), and other stuff that I can't recall at the moment.
The size of the primary ports:
comparison:
epoxy that I needed to use because the ports were soo large:
The reason for the primary port size and "squarish" shape:
 05-25-08, 11:29 PM
#11
Back at it again!!
Thread Starter
iTrader: (3)
Join Date: Jun 2003
Location: Western Colorado
Posts: 1,324
Likes: 0
Received 0 Likes
on
0 Posts
Actually, it's a volvo fan My friend's dad gave him 5+ volvo fans and it turned out that they are being used on my 91, his 91, my friend's 88 and my brother's 79. They require very little trimming and they fit great!! They are also very powerful.
My friend's dad gave him 5+ volvo fans and it turned out that they are being used on my 91, his 91, my friend's 88 and my brother's 79. They require very little trimming and they fit great!! They are also very powerful.
05-25-08, 11:41 PM
#14
Back at it again!!
Thread Starter
iTrader: (3)
Join Date: Jun 2003
Location: Western Colorado
Posts: 1,324
Likes: 0
Received 0 Likes
on
0 Posts
That is a very good question, because we got the car like that. I'll look at it tomorrow, but it looked relatively simple, yet professional at the same time. I have no idea what company or who made it.
05-25-08, 11:49 PM
#16
djessence
05-25-08, 11:57 PM
#17
Back at it again!!
Thread Starter
iTrader: (3)
Join Date: Jun 2003
Location: Western Colorado
Posts: 1,324
Likes: 0
Received 0 Likes
on
0 Posts
I actually use a 400 grit sandpaper to resurface all my surfaces for a much better break in. I've had excellent results and relatively quick break in time ever since I've been doing this a couple years ago. I've had my blocks apart after doing this (about 20k miles later and I found nothing abnormal with the housings, the corner seals, side seals and apex seals. I do this for initial break-in , in much the same way that you would hone the cylinders in a piston engine before building it.
05-26-08, 12:05 AM
#19
Back at it again!!
Thread Starter
iTrader: (3)
Join Date: Jun 2003
Location: Western Colorado
Posts: 1,324
Likes: 0
Received 0 Likes
on
0 Posts
I just checked the sand paper I use and I stated the wrong number.
I actually use a very straight and smooth 1"x4" sanding block along with 120 grit aluminum oxide sandpaper made by gator grip for belt sanders. It wraps around the wood block and I sand it evenly in 4 different directions, and then I swirl it for the final step. Afterwards, you cannot even feel it whatsoever........extremely smooth, and you wil notie that the assembly lube being used during assembly doesn't "bead up" and puddle like it would with shiny irons.
I actually use a very straight and smooth 1"x4" sanding block along with 120 grit aluminum oxide sandpaper made by gator grip for belt sanders. It wraps around the wood block and I sand it evenly in 4 different directions, and then I swirl it for the final step. Afterwards, you cannot even feel it whatsoever........extremely smooth, and you wil notie that the assembly lube being used during assembly doesn't "bead up" and puddle like it would with shiny irons.
05-26-08, 12:14 AM
#21
Back at it again!!
Thread Starter
iTrader: (3)
Join Date: Jun 2003
Location: Western Colorado
Posts: 1,324
Likes: 0
Received 0 Likes
on
0 Posts
BTW, I do the same to the rotor housings, but the technique is somewhat different:

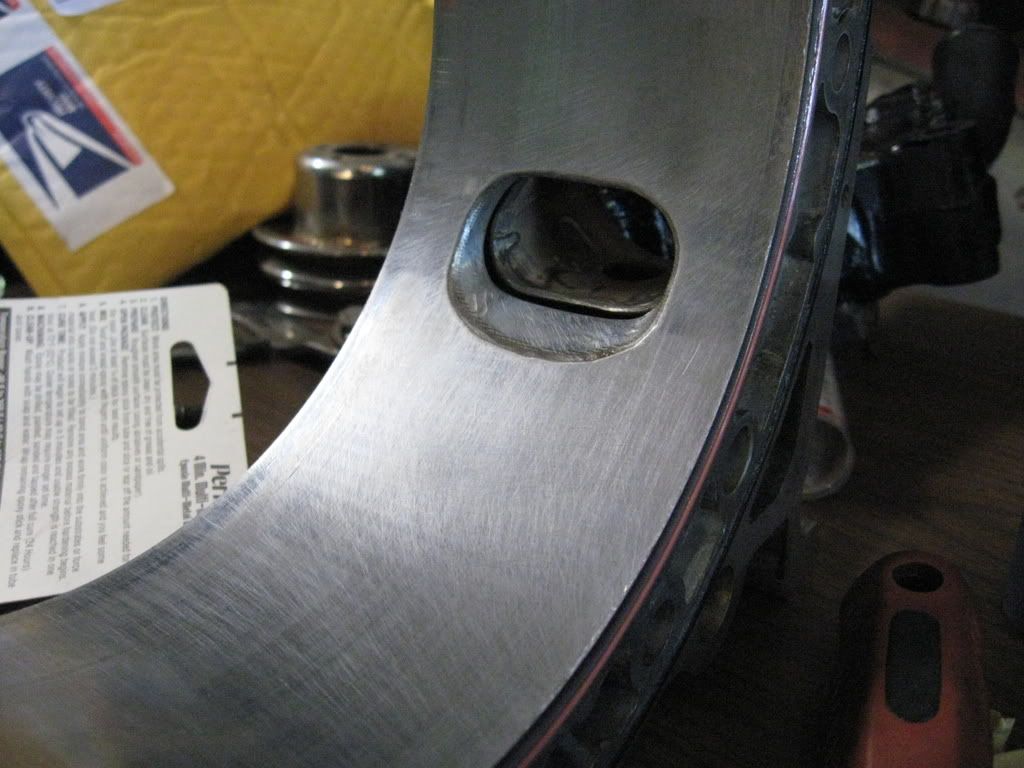
The "cross-hatching" pretty much wears away within the first 500 - 1000 miles or so. (My friend who warped his block --- ran out of coolant......long story) with about 1500 - 2000 miles on it had the typical shiny surface that you always see when you pull the block apart.
The "cross-hatching" pretty much wears away within the first 500 - 1000 miles or so. (My friend who warped his block --- ran out of coolant......long story) with about 1500 - 2000 miles on it had the typical shiny surface that you always see when you pull the block apart.
05-26-08, 01:02 AM
#22
Senior Member

Join Date: Sep 2005
Location: omaha
Posts: 256
Likes: 0
Received 0 Likes
on
0 Posts
im all sorts of interested in the spare rims and tires, as well as the other wide body depending on the style, and i can do fiberglass work.
email me pics at flaresniper@***.net
do you still have the shell off the black car? and what about the wing? im up for a roadtrip
email me pics at flaresniper@***.net
do you still have the shell off the black car? and what about the wing? im up for a roadtrip
05-26-08, 09:52 AM
#25
Back at it again!!
Thread Starter
iTrader: (3)
Join Date: Jun 2003
Location: Western Colorado
Posts: 1,324
Likes: 0
Received 0 Likes
on
0 Posts
The shell got tossed after we cut out the floorboards. We basically turned it into a flintstone mobile I actually went and picked up 4 different spare tires with "close enough" bolt patterns and put those on the car just so that it could be towed away. It probably weighed a few hundred pounds when it left. We have all the fenders, the wing, the front bumper and the front valance all from the black car. The other kit consists of all 4 fenders, 2 sideskirts, and the front bumper. It's definitely a very unique kit. I will get pics today for you 
I actually went and picked up 4 different spare tires with "close enough" bolt patterns and put those on the car just so that it could be towed away. It probably weighed a few hundred pounds when it left. We have all the fenders, the wing, the front bumper and the front valance all from the black car. The other kit consists of all 4 fenders, 2 sideskirts, and the front bumper. It's definitely a very unique kit. I will get pics today for you